

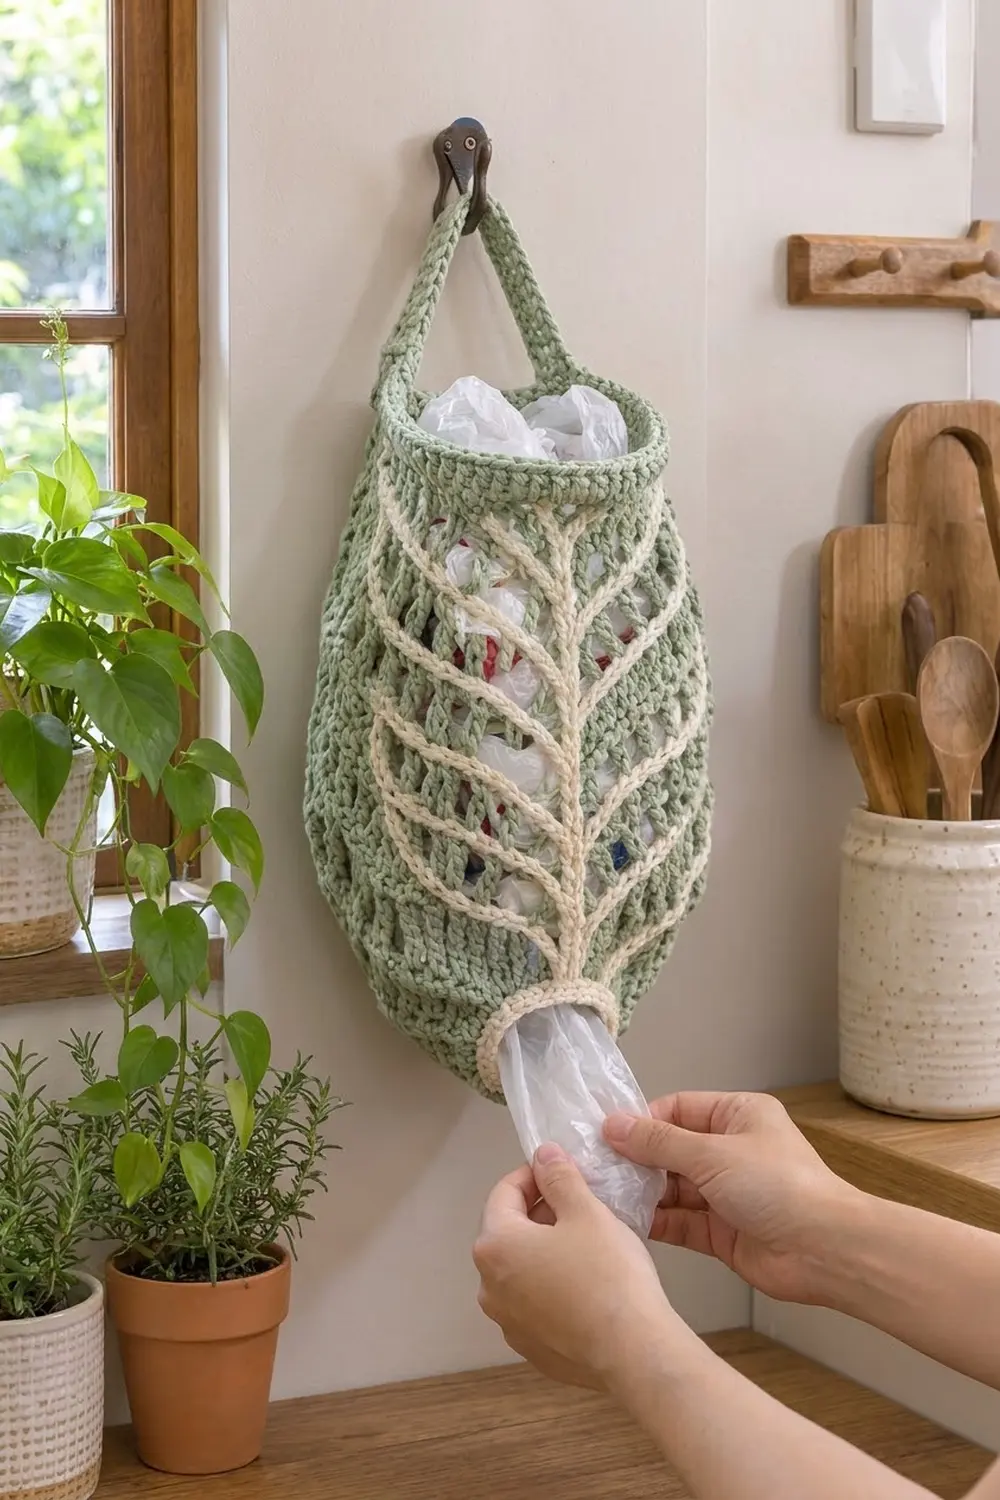
This bag holder is a practical kitchen piece that also looks good on the wall. The body is a light, open mesh in sage green, so you can see the bags inside. A cream leaf runs up the front, with a straight central vein and diagonal side veins.
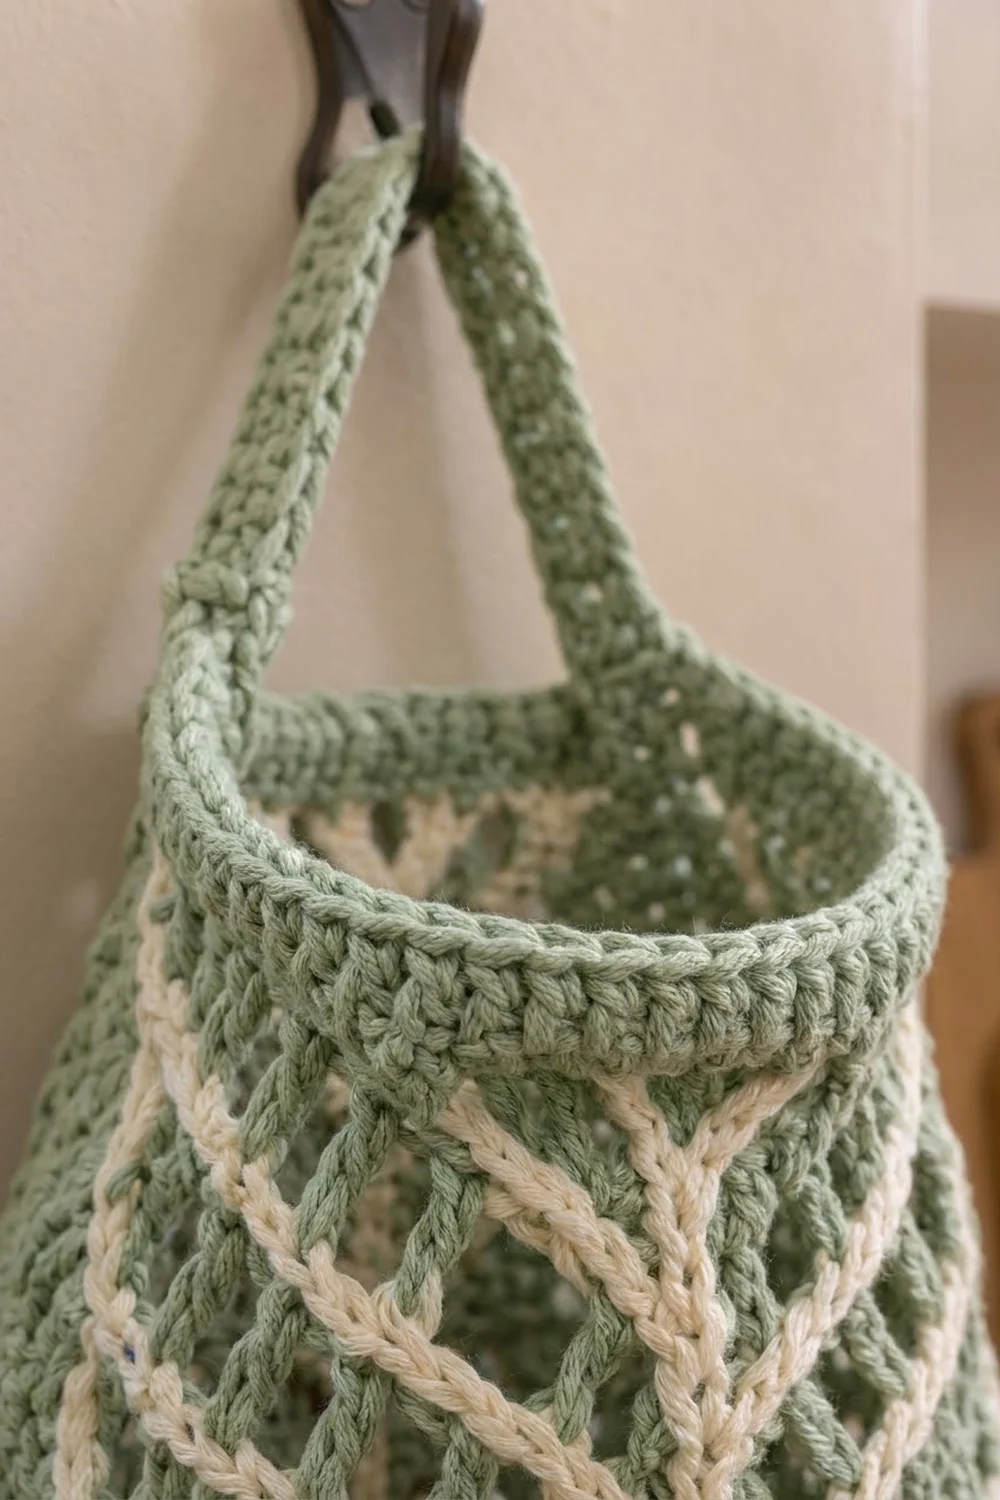
You push bags in through the wide top opening. You pull them out one at a time through the small cream-edged hole at the bottom. A thick rolled rim keeps the top firm, and a sturdy strap hangs the holder from a hook or cabinet knob.
The pattern uses US crochet terms. The finished holder is about 9 in (22.9 cm) wide and 14 in (35.6 cm) long when flattened. With the strap peaked on a hook, it hangs about 20 in (50.8 cm) from top to bottom.
Construction is simple and seamless:
1. Start at the bottom dispensing hole and work a flat ring of double crochet for the base.
2. Work a straight mesh tube for the body.
3. Decrease into a solid single crochet rim.
4. Add the strap, the cream bottom edge and the surface slip stitch leaf.
Finished Size and Construction
- Finished size: 9 in (22.9 cm) wide × 14 in (35.6 cm) long, flattened
- Hanging length with strap: about 20 in (50.8 cm)
- Skill level: Easy-intermediate
- Terminology: US crochet terms
- Yarn weight: Worsted (#4) cotton
- Hook: 5.0 mm (H-8)
- Number of pieces: 1 (worked in the round), with the strap worked directly onto the rim
- Layout: Bottom-up tube: base ring, mesh body, top rim, strap
- Body circumference: 72 sts = 18 in (45.7 cm), or 9 in (22.9 cm) flat
- Size before border: 9 in (22.9 cm) wide × 12 in (30.5 cm) long (base plus mesh)
- Border depth: top rim about 1.75 in (4.4 cm); cream bottom edge about 0.25 in (0.6 cm)
Materials
Use a smooth cotton or cotton blend in worsted weight. Cotton holds its shape when filled with bags and makes crisp surface stitches. Avoid very splitty yarn, because the surface slip stitches pass through the mesh many times.
- Sage green (main color): 130 g / 200 m
- Cream (accent): 20 g / 31 m
Tools:
– 5.0 mm (H-8) crochet hook
– 4.0 mm (G-6) hook (optional, for neater surface slip stitches)
– 4 locking stitch markers
– Tapestry needle
– Scissors
– Measuring tape
– Blocking pins and a spray bottle
Both quantities include about a 15% margin for your gauge swatch and weaving in ends.
Abbreviations (US Terms)
- ch – chain
- sl st – slip stitch
- sc – single crochet
- dc – double crochet
- sc2tog – single crochet 2 together
- sk – skip
- sp – space
- st(s) – stitch(es)
- rnd – round
- rev sc – reverse single crochet (crab stitch): sc worked from left to right (right to left if you crochet left-handed)
Special stitch: surface slip stitch (surf sl st). Hold the yarn behind the work. Insert the hook from the front through the space or stitch, yarn over, and pull the loop through the fabric and through the loop on the hook. This makes a raised chain line on the front.
Gauge and Checkpoints
- Single crochet: 16 sts and 16 rnds = 4 in (10.2 cm)
- Mesh: 8 dc columns (16 sts) = 4 in (10.2 cm), and 8 rnds = 5 in (12.7 cm). Each mesh or dc round is about 5/8 in (1.6 cm) tall.
Test the base first. Rounds 1–5 act as your gauge swatch.
Checkpoint 1: After Round 5, the base should lie as a flat ring about 5.75 in (14.6 cm) across, with a center hole about 1.9 in (4.8 cm) wide.
– If the ring is larger than 6 in (15.2 cm), go down a hook size.
– If it is smaller than 5.5 in (14 cm), go up a hook size.
– If it ruffles, your dc are too tall. Try a smaller hook or shorten your yarn-overs.
– If it cups, go up a hook size.
Checkpoint 2: After Round 13, the mesh section should be 5 in (12.7 cm) tall, and the tube should measure 9 in (22.9 cm) across when flattened.
Checkpoint 3: After Round 21, the mesh section should be 10 in (25.4 cm) tall.
Checkpoint 4: After Round 24, the top opening should measure 6 in (15.2 cm) across when flattened.
Pattern: Base
Use sage green and the 5.0 mm hook.
Ch 24, then sl st to the first ch to form a ring. Don’t twist the chain. This ring is the dispensing hole.
Rnd 1: Ch 1, sc in each ch around, sl st to the first sc to join. (24 sts)
Rnd 2: Ch 3 (counts as dc throughout). Work 2 dc in the next st, then dc in the next st, 2 dc in the next st 11 times. Join to the top of the ch-3. (36 sts)
Rnd 3: Ch 3, dc in the next st, 2 dc in the next st, then dc in each of the next 2 sts, 2 dc in the next st 11 times. Join. (48 sts)
Rnd 4: Ch 3, dc in each of the next 2 sts, 2 dc in the next st, then dc in each of the next 3 sts, 2 dc in the next st 11 times. Join. (60 sts)
Rnd 5: Ch 3, dc in each of the next 3 sts, 2 dc in the next st, then dc in each of the next 4 sts, 2 dc in the next st 11 times. Join. (72 sts)
Check Checkpoint 1 now.
Pattern: Mesh Body
Rnd 6 (mesh set-up): Ch 4 (counts as dc + ch 1). Sk the next st, then dc in the next st, ch 1, sk the next st 35 times. Join to the 3rd ch of the beginning ch-4. (36 dc + 36 ch-1 sps = 72 sts)
Stop increasing now, and the work will start to rise into a tube.
Rnds 7–21: Ch 4, sk the ch-1 sp, then dc in the next dc, ch 1, sk the ch-1 sp 35 times. Join to the 3rd ch of the ch-4. (72 sts each round: 36 dc + 36 ch-1 sps)
The mesh body has 16 rounds in total. Every dc sits on a dc, so the ch-1 spaces line up in straight vertical columns. The leaf grid depends on this. Check Checkpoints 2 and 3.
Pattern: Top Rim
Rnd 22 (conversion): Ch 1. Sc in each dc and each ch-1 sp around, then join. (36 sc in dc + 36 sc in ch-1 sps = 72 sts)
Rnd 23: Ch 1, sc in each of the next 4 sts, sc2tog 12 times. Join. (60 sts)
Rnd 24: Ch 1, sc in each of the next 3 sts, sc2tog 12 times. Join. (48 sts)
Rnds 25–27: Ch 1, sc in each st around, then join. (48 sts each round)
Rnd 28: Ch 1, rev sc in each st around. Join and fasten off. (48 sts)
The rev sc round makes the corded, rolled look. The rim is 7 rounds and about 1.75 in (4.4 cm) deep.
Pattern: Strap
- Flatten the holder. Choose the front face by picking the column of ch-1 spaces that will be the center of the leaf.
- On Round 27, mark the 5 sts centered on the left side fold and the 5 sts centered on the right side fold. Each set should start 24 sts after the other.
- Join sage green on the inside of the rim at the first marked st on the left fold.
Row 1: Ch 1, sc in each of the 5 marked sts on Round 27, working into the inside loops so the rev sc cord stays visible. Turn. (5 sts)
Rows 2–56: Ch 1, sc in each st across, then turn. (5 sts each row)
The strap should measure 14 in (35.6 cm) long and 1.25 in (3.2 cm) wide.
Check that the strap isn’t twisted. Then hold the last row against the 5 marked sts on the right fold, inside the rim, and sl st through both layers. (5 sl sts) Fasten off.
When hung, the strap peaks about 6 in (15.2 cm) above the rim.
Pattern: Cream Bottom Edge
Hold the holder upside down. Join cream in any free loop on the underside of the foundation chain.
Rnd 1: Ch 1, sc in each free loop around, then join. (24 sts)
Rnd 2: Ch 1, rev sc in each st around. Join and fasten off. (24 sts)
The cream edge adds about 0.25 in (0.6 cm) and makes a firm corded ring around the hole.
Pattern: Surface Leaf
Use cream. If you have the 4.0 mm hook, use it here.
Placement: The front face has 18 mesh columns (half of 36). Name them columns 1–18 from left to right. Column 9 is the center.
Step: One step is 2 surf sl sts:
1. Work the first one through the next mesh space.
2. Work the second one around the ch-1 bar at the top of that space.
Central vein:
1. Join cream at the cream edge, directly below column 9.
2. Work 1 surf sl st into Round 1.
3. Work 2 surf sl sts into each of Rounds 2–5, keeping a straight vertical line between stitches. (9 sts so far)
4. Work straight up column 9 for Rounds 6–21, one step per round. (32 sts)
5. Finish with 1 surf sl st into Round 22 and fasten off.
Total for the central vein: 42 surf sl sts.
Side veins: Work them in pairs. For each vein, join cream in the column-9 space of the starting round. Then move diagonally: each step goes one column outward (left or right) and one round up. Fasten off at the end.
| Start round | Steps per vein | Sl sts per vein | Ends at |
|---|---|---|---|
| Rnd 7 | 6 | 12 | Rnd 13, columns 3 and 15 |
| Rnd 9 | 6 | 12 | Rnd 15, columns 3 and 15 |
| Rnd 11 | 6 | 12 | Rnd 17, columns 3 and 15 |
| Rnd 13 | 5 | 10 | Rnd 18, columns 4 and 14 |
| Rnd 15 | 4 | 8 | Rnd 19, columns 5 and 13 |
| Rnd 17 | 3 | 6 | Rnd 20, columns 6 and 12 |
That makes 6 pairs (12 side veins) with 120 surf sl sts in total. The side veins angle upward and get shorter toward the top, so the leaf has a tapered tip.
Border
Border gauge: 16 sc = 4 in (10.2 cm).
Counts per side are given with the holder flattened (front / back).
Top rim:
| Round | Total | Front / back |
|---|---|---|
| Rnd 22 | 72 sts | 36 / 36 |
| Rnd 23 | 60 sts | 30 / 30 |
| Rnd 24 | 48 sts | 24 / 24 |
| Rnds 25–27 | 48 sts | 24 / 24 |
| Rnd 28 | 48 sts | 24 / 24 |
Bottom edge:
| Round | Total | Front / back |
|---|---|---|
| Rnd 1 | 24 sts | 12 / 12 |
| Rnd 2 | 24 sts | 12 / 12 |
Why the math works:
– Round 22 places exactly one sc per mesh stitch, so the width stays at 72 sts, or 9 in (22.9 cm) flat.
– Rounds 23 and 24 each remove 12 sts (6 per face), spaced evenly, so the top narrows smoothly into the teardrop shape without puckering.
– The final 24 sts per face ÷ 4 sts per in = 6 in (15.2 cm) flat opening.
– The bottom edge uses one sc per foundation chain, so the hole keeps its 6 in (15.2 cm) circumference, about 1.9 in (4.8 cm) across.
Final Blocking
- Weave in all ends inside the holder. Run each cream tail along the back of its own vein.
- Lightly mist the holder with water until it is damp but not wet.
- Stuff it loosely with a towel or plastic bags to round out the teardrop shape.
- Lay it flat with the leaf centered. Pat it to 9 in (22.9 cm) wide and 14 in (35.6 cm) long.
- Straighten the central vein with your fingers and nudge the side veins into even diagonals.
- Pin the strap flat at 14 in (35.6 cm).
- Let it dry completely before hanging.
Final Quality-Control Checklist
- Base ring lies flat at 5.75 in (14.6 cm) before the mesh begins
- The mesh has 36 straight columns with no slanting
- The body measures 9 in (22.9 cm) flat and the mesh is 10 in (25.4 cm) tall
- The rim measures 48 sts and 6 in (15.2 cm) flat
- The strap has 56 rows, isn’t twisted and is anchored on both side folds
- The cream bottom ring has 24 sts and an even corded edge
- The central vein runs straight up column 9; the side veins come in mirrored pairs
- All ends are secure, with no cream tails showing on the front
Troubleshooting
- Mesh spirals or slants: You are working into ch-1 spaces instead of dc. Each dc must go into a dc.
- Base ruffles: Your dc are too tall. Go down a hook size or snug up your yarn-overs.
- Rim flares: Check that you made 12 decreases in each of Rounds 23 and 24.
- Surface veins pucker: Your surface slip stitches are too tight. Switch to the larger hook or loosen your tension.
- Strap stretches when the holder is full: Add a row of sc along each long edge of the strap.
- Bags fall out too easily: Add a third cream round of sc at the bottom to narrow the hole.
Care
Hand wash in cool water, or machine wash on a gentle cycle in a mesh bag. Reshape and lay flat to dry.
Final Notes
Each part of this holder builds on a measurement you’ve already checked:
– The 24-st ring sets the 1.9 in (4.8 cm) hole.
– The base grows to 72 sts and 5.75 in (14.6 cm).
– The mesh holds 72 sts for 10 in (25.4 cm) at 9 in (22.9 cm) wide.
– The rim decreases to 48 sts, or 6 in (15.2 cm) flat.
– The finished holder is 14 in (35.6 cm) long and hangs about 20 in (50.8 cm) with the strap.
If each checkpoint matches, the leaf grid lines up and the finished holder hangs neatly in your kitchen.
Happy crocheting!