

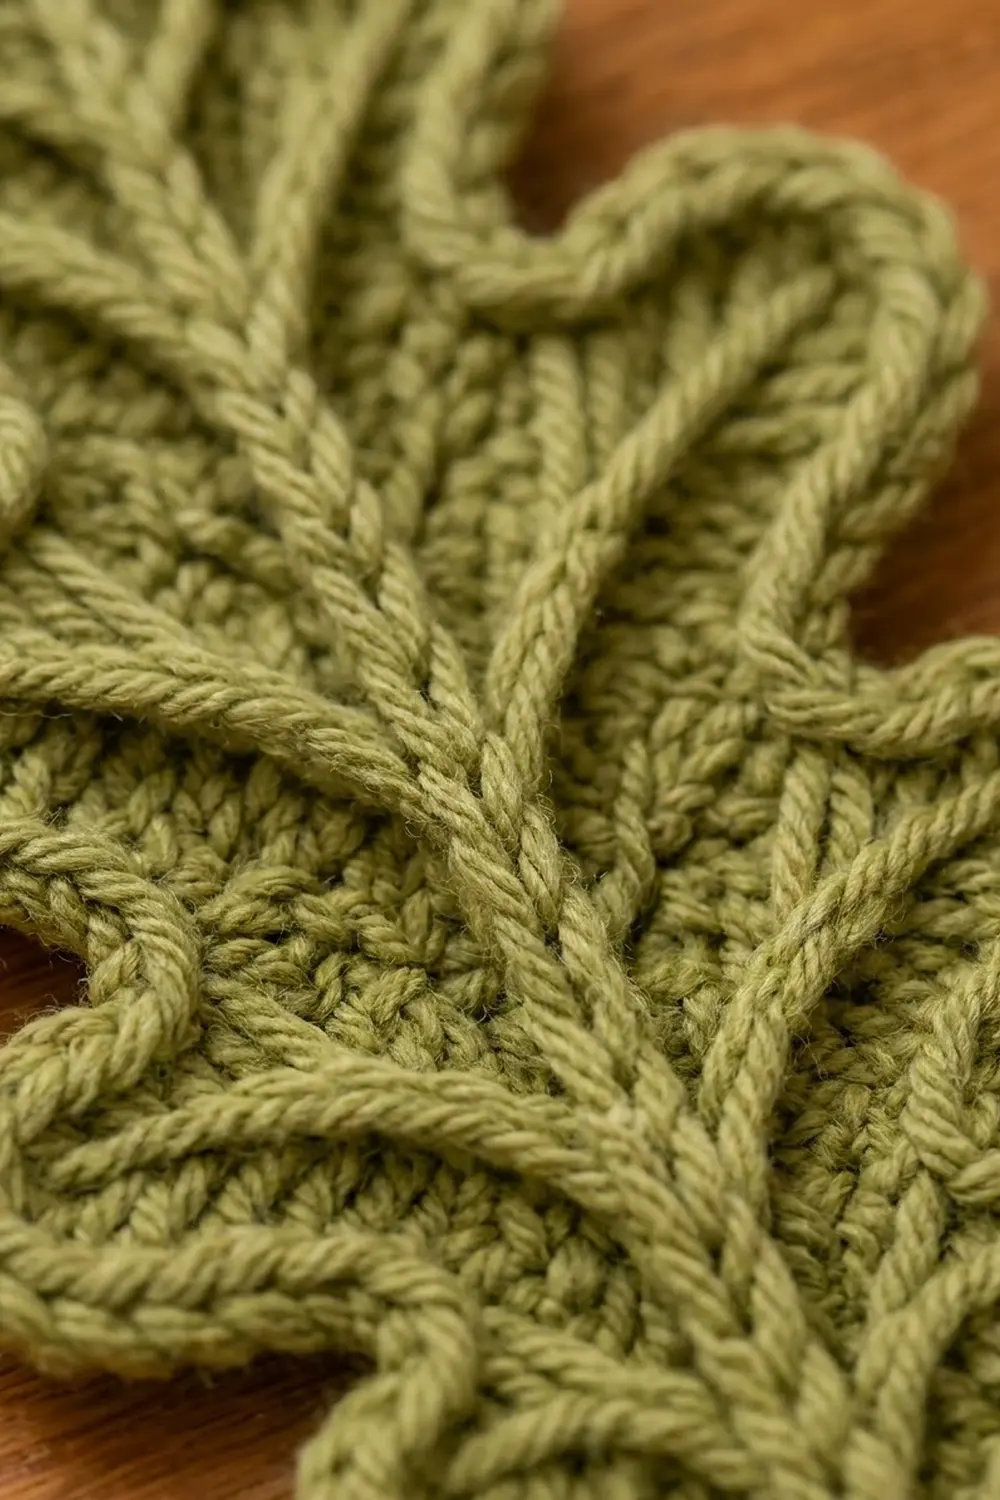
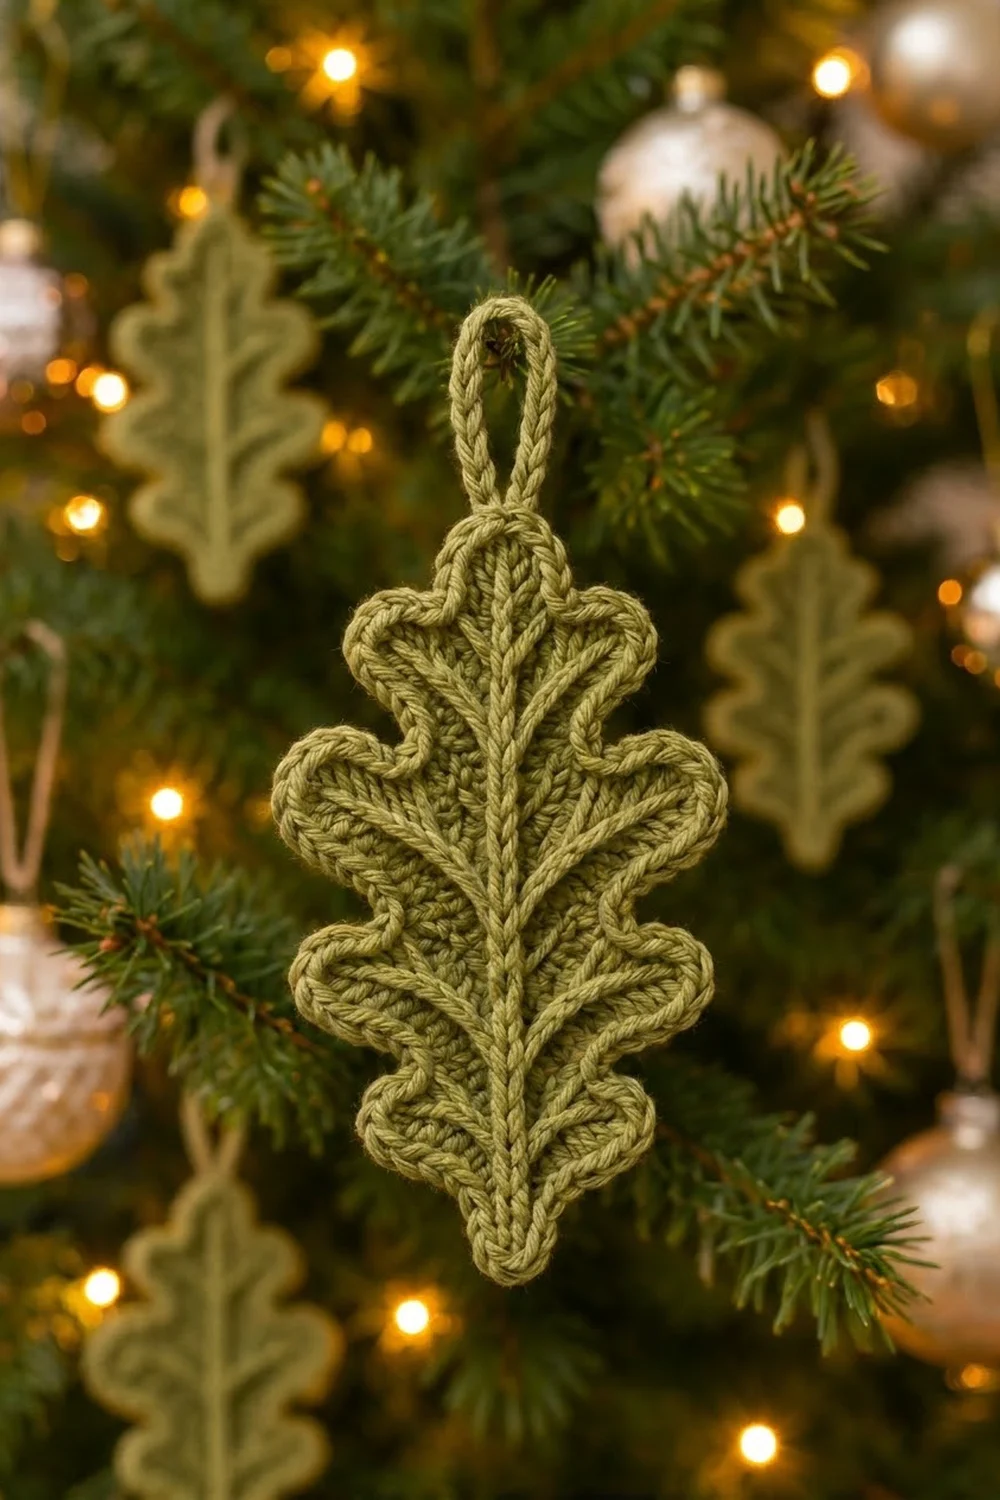
This oak leaf ornament is a small, sculptural piece. It looks lovely on a Christmas tree, a wreath, or tied to a gift. It has deep rounded lobes, a raised midrib with branching veins, and a rope-like edge that catches the light.
The sample is one color, a muted olive-sage green. That keeps the focus on the texture: the vein lines, the fine ridge just inside the edge, and the twisted cord border. Any leafy green, rust, gold, or warm brown works just as well if you want a full autumn set.
This pattern uses US crochet terms. The finished leaf is 3.5 in (8.9 cm) wide and 6 in (15.2 cm) tall, not counting the loop. The hanging loop adds about 2 in (5.1 cm), so the full ornament is 8 in (20.3 cm) tall.
Here’s how it’s built. You work in rounds around a foundation chain, which becomes the center line of the leaf. Round 3 shapes the lobes with different stitch heights. Two border rounds add the inner ridge and the rope edge. Last, you add the veins with surface slip stitch and attach a slip-stitch cord loop.
Finished Size and Construction
- Finished size: 3.5 in (8.9 cm) wide x 6 in (15.2 cm) tall, plus a 2 in (5.1 cm) loop
- Skill level: Easy-intermediate
- Terminology: US crochet terms
- Yarn weight: Worsted (#4)
- Hook: 4.0 mm (G-6)
- Number of pieces: 1 (single leaf, no joining)
- Layout: One standalone leaf with the loop at the top tip
- Piece size before border: 5.5 in (14.0 cm) tall x 3 in (7.6 cm) wide
- Border depth: 0.25 in (0.6 cm) on every edge
Materials
Yarn: Use a smooth worsted-weight yarn with good stitch definition. Wool, a wool blend, or a soft acrylic all work. Avoid fuzzy or very splitty yarn, because the surface veins and the reverse single crochet edge need to stay crisp.
- Sage green: 15 g, about 30 m (33 yd)
That amount includes a margin for the gauge swatch, the surface veins, and weaving in ends. The leaf itself uses less.
Tools:
- 4.0 mm (G-6) crochet hook
- 3.5 mm (E-4) hook for the surface slip stitch (optional, but it makes neater veins)
- Tapestry needle
- Scissors
- Stitch markers (2)
- Rustproof pins and a blocking mat or folded towel
- Spray bottle with water
Abbreviations (US Terms)
- ch – chain
- sl st – slip stitch
- sc – single crochet
- hdc – half double crochet
- dc – double crochet
- tr – treble crochet
- BLO – back loop only
- rev sc – reverse single crochet (crab stitch)
- st(s) – stitch(es)
Reverse single crochet (rev sc): Work from left to right (right to left if you crochet left-handed). Insert the hook in the next stitch to the right, yarn over, pull up a loop, yarn over, and pull through both loops. Each rev sc twists slightly, which makes the rope look.
Surface slip stitch: Hold the yarn behind the work. Push the hook through the fabric from front to back, pull up a loop, and draw it through the loop on the hook. Each stitch looks like one chain on the front.
Gauge and Checkpoints
Gauge: 16 sc and 18 rows = 4 in (10.2 cm) with a 4.0 mm hook.
This is a small project, so the finished leaf is your best swatch. Make one leaf, measure it, and change hooks before making a set. Always measure the leaf flat on a table, without stretching. Measure height from the base to the tip in a straight line and width across the two large lobes.
Checkpoints:
- After Round 1: 4.75 in (12.1 cm) long x 0.5 in (1.3 cm) wide
- After Round 2: 5.25 in (13.3 cm) long x 1.5 in (3.8 cm) wide
- After Round 3: 5.5 in (14.0 cm) long x 3 in (7.6 cm) at the widest lobes
- After Round 5: 6 in (15.2 cm) long x 3.5 in (8.9 cm) wide
If your leaf is too big: Go down half a hook size, or try a 3.75 mm (F-5) hook.
If your leaf is too small: Go up to a 4.5 mm (7) hook.
If only the lobes are off: Check the height of your tr stitches. Loose trebles make wide, floppy lobes. Tight ones flatten the oak outline.
Leaf Body
The foundation chain becomes the midrib. One end becomes the narrow base and the other becomes the rounded top tip.
Foundation: Ch 19.
Number the usable chains c1 to c18, starting with the 2nd chain from the hook (c1) and ending at the chain next to the slip knot (c18). The c18 end becomes the top tip, and the c1 end becomes the base.
Round 1
Sc in the 2nd ch from the hook (c1) and in the next 16 ch (c2–c17). Work 3 sc in the last ch (c18). Rotate the work and continue along the other side of the chain. Sc in the next 16 ch (c17–c2), then 2 sc in c1, the same chain as the first sc. Sl st to the first sc to join.
Stitch count: 1 + 16 + 3 + 16 + 2 = 38 sts
Round order: 1 base st, 16 side A sts, 3 tip sts, 16 side B sts, 2 base sts. The 3 base stitches are split across the start and end of the round.
Tip: Keep the chain untwisted as you rotate. Work into the same loop of every chain on the second side, usually the single remaining loop, so the midrib line stays straight and even for the surface stitching later.
Round 2
Ch 2 (does not count as a stitch). Work 2 hdc in the first st. Hdc in the next 16 sts. Work 2 hdc in each of the next 3 sts. Hdc in the next 16 sts. Work 2 hdc in each of the last 2 sts. Sl st to the first hdc to join.
Stitch count: 2 + 16 + 6 + 16 + 4 = 44 sts
Round order: 2 base, 16 side A, 6 tip, 16 side B, 4 base. Place a marker in the 1st and 6th tip stitches so you can find the tip easily in Round 3.
Round 3 – Lobe Round
This round turns the oval into an oak leaf. Each side has four lobes, and each lobe is worked over 4 stitches.
Small lobe (over 4 sts): Sl st in the next st, (hdc, 2 dc) in the next st, (2 dc, hdc) in the next st, sl st in the next st. That makes 8 sts.
Large lobe (over 4 sts): Sl st in the next st, (dc, 2 tr) in the next st, (2 tr, dc) in the next st, sl st in the next st. That makes 8 sts.
Two slip stitches end up side by side between lobes. They pull the edge in to make the deep notches.
Ch 1 (does not count). Sc in the first 2 sts (base).
Side A (base to tip): Small lobe, large lobe, large lobe, small lobe. That’s 32 sts over 16 sts.
Top tip (over the 6 marked tip sts): Hdc in the next st, dc in the next st, 2 dc in each of the next 2 sts, dc in the next st, hdc in the next st. That’s 8 sts.
Side B (tip to base): Small lobe, large lobe, large lobe, small lobe. That’s 32 sts.
Sc in the last 4 sts (base). Sl st to the first sc to join.
Stitch count: 2 + 32 + 8 + 32 + 4 = 78 sts
Section counts for the border: side A 32, tip 8, side B 32, base 6.
Tip: Pull each tr up to full height before you finish it. Lazy trebles shrink the large lobes, and the leaf loses its oak shape.
Check the size now. The leaf should measure 5.5 in (14.0 cm) tall x 3 in (7.6 cm) wide at the large lobes. Smaller lobes near the base and tip are normal.
Border
Border gauge: One sc and one rev sc per stitch. Together, the two rounds add 0.25 in (0.6 cm) to every edge.
Round 4 – Inner Ridge Round
Ch 1 (does not count). Working in BLO, sc in each st around. Work an sc into each slip stitch at the notches too, and don’t skip them. Sl st to the first sc to join.
Count per section:
- Base: 6 sc
- Side A: 32 sc
- Tip: 8 sc
- Side B: 32 sc
- Total: 78 sts (78 worked 1-per-existing-stitch + 0 added)
The unused front loops of Round 3 stay on the surface as a thin raised line. That makes the inner ridge that follows the leaf outline.
Round 5 – Rope Edge
Ch 1 (does not count). Rev sc in each st around, working to the right. Sl st to the first rev sc to join. Fasten off and leave a 6 in (15.2 cm) tail.
Count per section:
- Base: 6 rev sc
- Side A: 32 rev sc
- Tip: 8 rev sc
- Side B: 32 rev sc
- Total: 78 sts (78 worked 1-per-existing-stitch + 0 added)
Why the math works: All the shaping happens in Round 3. Each lobe turns 4 stitches into 8, which builds in enough extra length to curve around the rounded edge. The pairs of slip stitches pull the notches in tight. Because both border rounds work exactly one stitch into each stitch, they follow that outline without ruffling or cupping. Each section keeps the same count from Round 3 through Round 5: 6 + 32 + 8 + 32 = 78.
Veins and Hanging Loop
Midrib
Using the smaller hook if you have one, attach the yarn at the center of the base, just inside Round 3. Surface sl st straight up the foundation chain line. Work 1 sl st per chain, which is 18 sl sts. Then work 1 sl st into Round 2 and 1 into Round 3 at the tip, for 20 sl sts in total. Pull the yarn to the back and fasten off.
Side Veins
There are 8 side veins, one for each lobe. For each one, start on the midrib about 2 stitches below the level of the lobe’s center. Surface sl st on an upward diagonal toward the gap between the lobe’s two center stitches. Stop at the Round 4 ridge. Each vein is 5 sl sts. Keep the vein angles the same on both sides so the leaf looks balanced.
Weave all vein tails in on the back, catching them under the surface stitches so they stay hidden.
Hanging Loop
Find the center of the tip: between the 4th and 5th of the 8 tip stitches. Join the yarn with a sl st in the 4th tip stitch of Round 4, just behind the rope edge. Ch 21. Sl st in the back bump of the 2nd ch from the hook and in each ch across (20 sl sts). Sl st into the 5th tip stitch. Fasten off and weave in.
The loop is a firm, doubled cord about 2 in (5.1 cm) tall when folded. If you’d rather use ribbon, skip the cord and thread a 6 in (15.2 cm) length of ribbon through the same two tip stitches.
Final Blocking
- Weave in all the ends before blocking, but don’t trim them yet.
- Mist the leaf evenly with water until it’s damp but not dripping.
- Lay it face up on the mat. Pin the top tip and the base so the leaf is 6 in (15.2 cm) tall.
- Pin the outer point of each large lobe so the widest part is 3.5 in (8.9 cm).
- Put a pin into each notch to set the deep oak curves.
- Gently pat the midrib straight with your fingers.
- Lay the loop flat above the tip, pointing straight up.
- Let it dry completely, then unpin and trim the ends.
For a stiffer ornament that hangs perfectly flat, mist it lightly with fabric stiffener or spray starch before step 8.
Final Quality-Control Checklist
- Round 3 count is 78 sts: base 6, side A 32, tip 8, side B 32
- Rounds 4 and 5 each have 78 sts
- The leaf is 6 in (15.2 cm) x 3.5 in (8.9 cm) after blocking
- The two sides mirror each other: small, large, large, small lobes
- All 6 notches between lobes (3 per side) are deep and even
- The tip and base curve smoothly
- The midrib runs straight from base to tip
- There are 8 side veins at matching angles
- The inner ridge shows all the way around
- The rope edge twists evenly with no gaps
- The loop is centered and holds the leaf straight when hung
Troubleshooting
The leaf curls into a bowl: Your Round 4 or 5 is too tight. Rework it with a larger hook.
The edges ruffle: Your trebles are too loose. Rework Round 3 with tighter tr, or swap the large lobes for small lobes.
The notches are shallow: Make sure there are two sl sts side by side between lobes, and pull them snug.
The leaf twists when hung: The loop is off center. Re-attach it between tip stitches 4 and 5.
The veins pucker the leaf: Your surface sl st is too tight. Use a hook one size larger and keep the yarn loose behind the work.
The rope edge looks flat: Rev sc needs a loose loop. Pull each loop up a little taller before you finish the stitch.
The midrib wanders: You’ve drifted off the foundation line. Pull it out and work each sl st into the gap right between the two sides of Round 1.
The stitch count is off in Round 3: Count each side separately. Every lobe must take exactly 4 stitches, and the tip must take the 6 marked stitches.
Care
Hand wash in cool water and lay flat to dry, reshaping the lobes and notches. Store the ornament flat so the loop and edge don’t crush.
Final Notes
The measurement chain is simple. The foundation of 19 ch gives a Round 1 oval of 38 sts, 4.75 in (12.1 cm) long. Round 2 grows it to 44 sts at 5.25 in (13.3 cm). Round 3 shapes 78 sts into a 5.5 in x 3 in (14.0 cm x 7.6 cm) leaf. Two 78-stitch border rounds bring it to 6 in x 3.5 in (15.2 cm x 8.9 cm). If each checkpoint matches, your leaf will match too.
Make one in sage for the tree, then try a few in autumn tones.
Happy crocheting!