
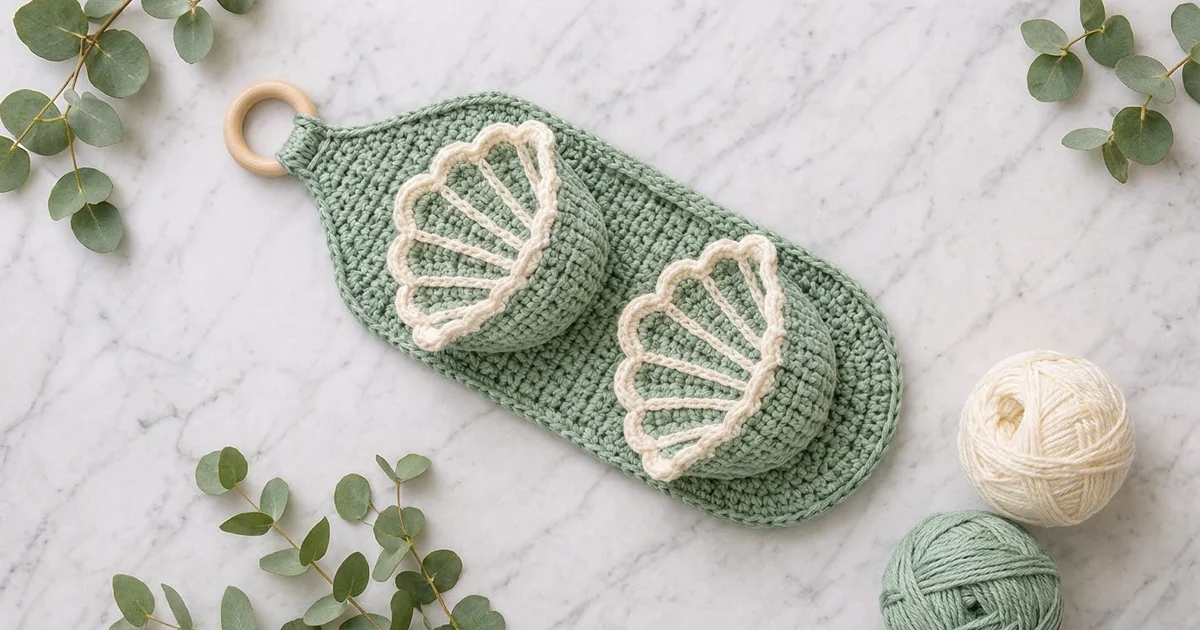
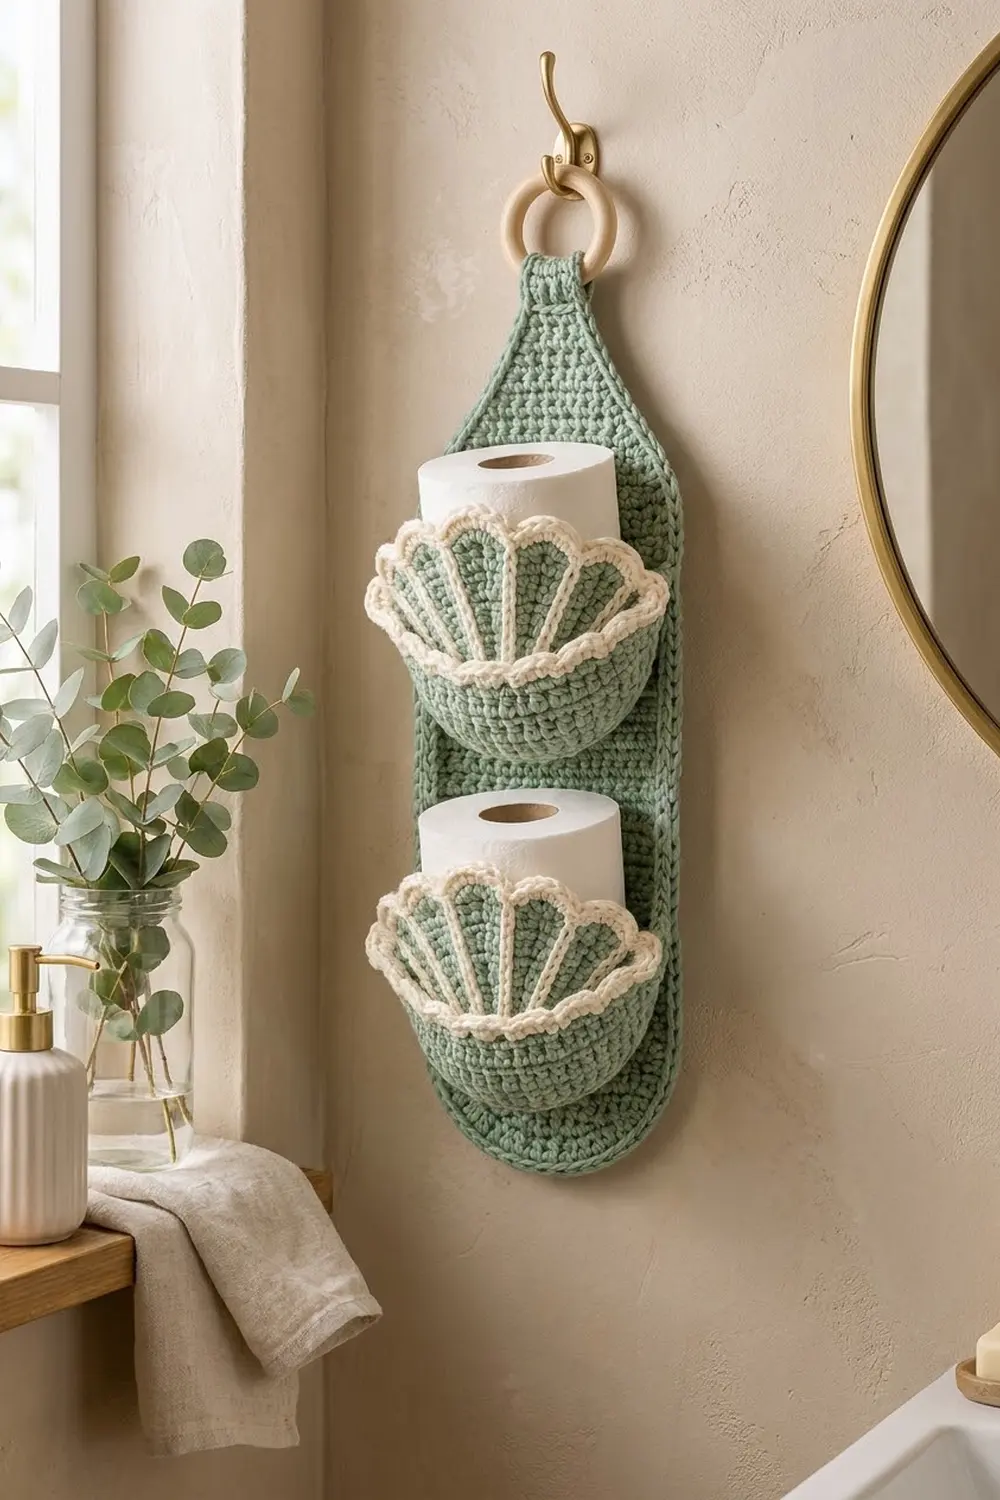
This hanging holder keeps two spare toilet rolls in sight and within reach. A sage-green back panel shaped like a bottle hangs from a wooden ring. Two shell-shaped pockets sit on the front, one above the other, and each one cups a standard roll.
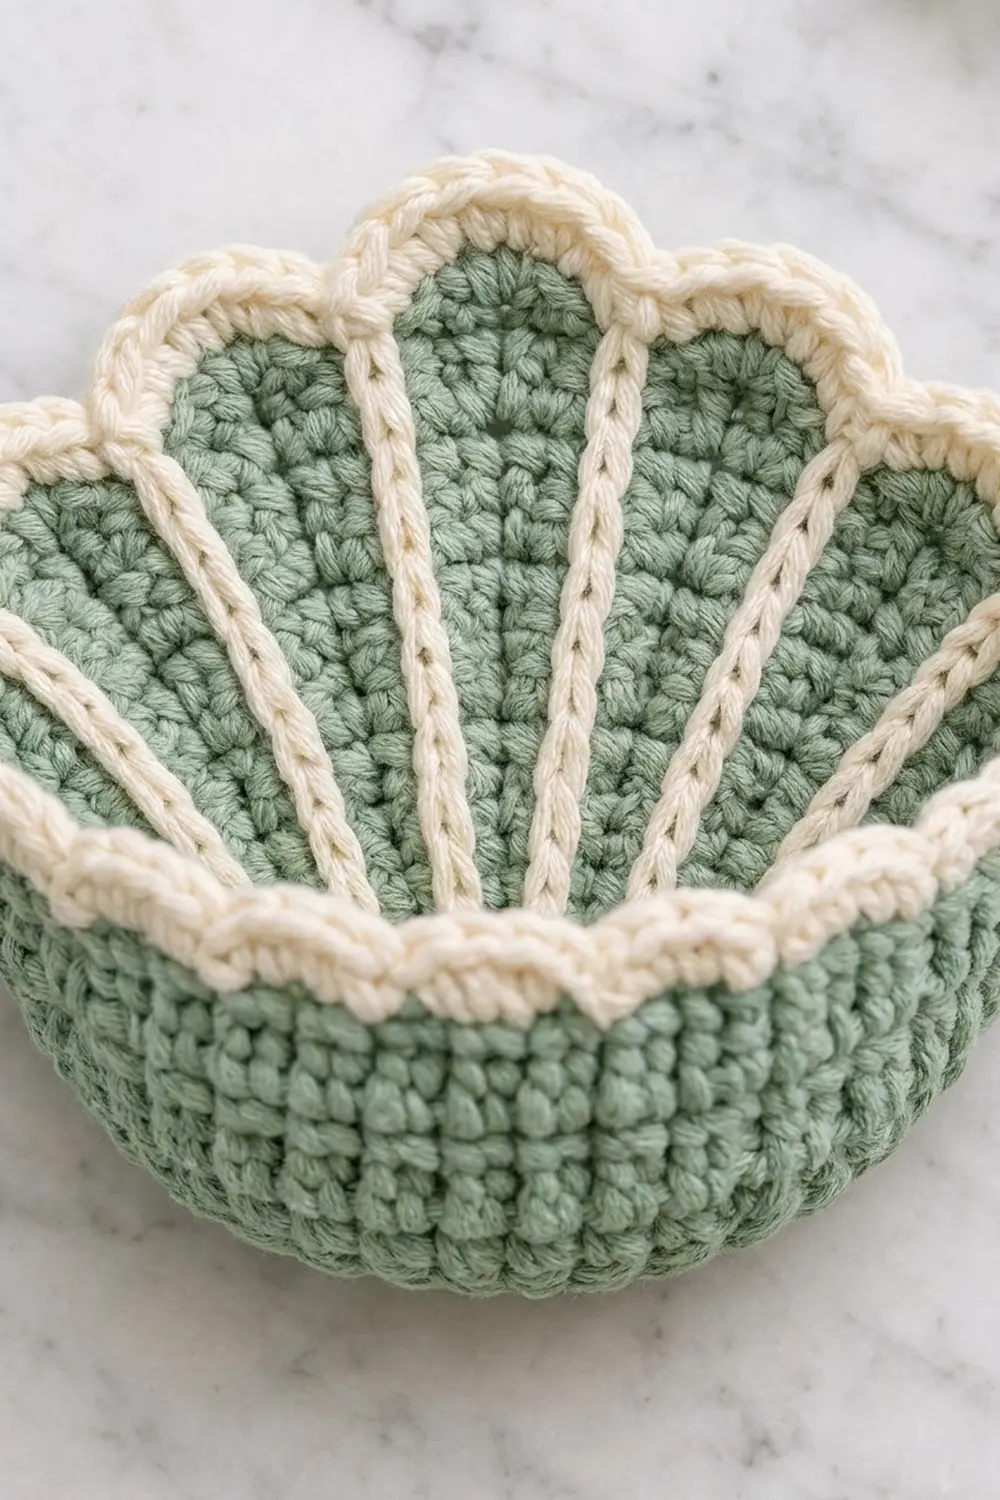
The palette is soft and coastal: sage green for the body and cream for the shell details. Each shell pocket has 8 rounded scallops with a cream corded edge and 7 raised cream ribs that fan out like the ridges on a real scallop shell.
The pattern uses US crochet terms. The finished holder measures 8.5 in (21.6 cm) wide and 22.5 in (57.2 cm) long, not counting the ring and tab.
You’ll make one shaped panel, two half-circle pocket bases, two shell fronts, a ring tab and two support straps. Then you sew each base to a shell front to form a cup and stitch both cups onto the panel.
Finished Size and Construction
- Finished size: 8.5 x 22.5 in (21.6 x 57.2 cm), not counting the ring
- Skill level: Intermediate
- Terminology: US terms
- Yarn weight: Worsted (#4) cotton
- Hook: 5.0 mm (H-8)
- Number of pieces: 8 (1 panel, 2 bases, 2 shell fronts, 1 tab, 2 straps), plus a wooden ring
- Layout: 1 vertical panel with 2 pockets stacked on it
- Panel size before border: 8 x 22 in (20.3 x 55.9 cm)
- Border depth: about 0.25 in (0.6 cm) on every edge
- Pocket wall height: about 3.5 in (8.9 cm) at the tips of the scallops
Materials
Use a smooth worsted-weight cotton or cotton blend. Cotton holds its shape, can handle bathroom humidity and makes crisp scallops. Acrylic works too, but the pockets will be softer.
- Sage green: 350 g / 595 m (bodies of all pieces)
- Cream: 60 g / 102 m (ribs and scallop edging)
- 5.0 mm (H-8) crochet hook
- Wooden ring, 3 in (7.6 cm) across
- Tapestry needle
- Locking stitch markers (at least 10)
- Sewing pins and a measuring tape
- Scissors
The quantities include about a 10% margin for swatching and seaming.
Abbreviations (US Terms)
- ch: chain
- sc: single crochet
- hdc: half double crochet
- dc: double crochet
- sl st: slip stitch
- sc2tog: single crochet 2 together
- rsc: reverse single crochet (crab stitch)
- st(s): stitch(es)
- RS / WS: right side / wrong side
- BLO: back loop only
Surface slip stitch: Hold the working yarn behind the fabric. Insert the hook from the front between two stitches, pull up a loop, then insert the hook one row higher and pull up a new loop through the loop on your hook. This makes a raised chain line on the RS.
Reverse single crochet (rsc): Work single crochet from left to right (if you’re right-handed) without turning. This makes a corded edge.
Gauge and Checkpoints
Gauge: 16 sc x 18 rows = 4 in (10.2 cm) in sc worked flat.
That works out to 4 sts and 4.5 rows per inch. Every measurement in this pattern comes from this gauge.
Test piece: Make one pocket base first and use it as your swatch. Check it at these points:
- After Row 8 (24 sts): the radius should be about 1.8 in (4.6 cm).
- After Row 16 (48 sts): the radius should be about 3.6 in (9.1 cm), and the straight edge should be about 7.1 in (18.0 cm).
If your piece is too big: go down to a 4.5 mm hook.
If your piece is too small: go up to a 5.5 mm hook.
Fix the gauge before you start the panel, because the seams match stitch for stitch.
Back Panel
Use sage green. You’ll work in rows from the bottom up. Turn at the end of each row, and note that ch 1 does not count as a stitch.
Row 1 (RS): Ch 23. Sc in the 2nd ch from the hook and in each ch across. (22 sts)
Row 2: Ch 1, 2 sc in the first st, sc in the next 20 sts, 2 sc in the last st. (24 sts)
Rows 3–6: Repeat Row 2. You’ll have 26, 28, 30 and then 32 sts.
Checkpoint: Row 6 measures 8 in (20.3 cm) wide.
Rows 7–81: Ch 1, sc in each st across. (32 sts) That’s 75 rows.
Checkpoint: After Row 81 the panel is 18 in (45.7 cm) long.
Shoulders, Rows 82–91: Ch 1, sc2tog, sc across to the last 2 sts, sc2tog. Each row has 2 fewer sts than the row before: 30, 28, 26, 24, 22, 20, 18, 16, 14, and then 12 sts on Row 91.
Neck, Rows 92–99: Ch 1, sc in each st across. (12 sts)
Don’t fasten off. Go straight on to the border.
Checkpoint: The panel is 99 rows long, which is 22 in (55.9 cm). It’s 8 in (20.3 cm) wide across the body and 3 in (7.6 cm) wide at the neck.
Panel Border
Border gauge: You’ll work 1 sc into each stitch along the top and bottom edges and 1 sc into each row-end along the sides. Sc row-ends come 4.5 to the inch against 4 stitches to the inch. That small surplus is absorbed because border stitches lie sideways, and Round 2 pulls the edge snug.
Round 1 (RS): Ch 1.
- Top edge: 3 sc in the first st, sc in the next 10 sts, 3 sc in the last st. (16 sc)
- Left side: Work 1 sc in each row-end from Row 98 down to Row 1. Work 2 sc in the row-ends of Rows 91, 89, 87, 85, 83, 6, 4 and 2. That’s 98 row-ends plus 8 extra stitches, for 106 sc.
- Bottom edge: Sc in each of the 22 remaining foundation loops. (22 sc)
- Right side: Work up the right side the same way as the left side. (106 sc)
Join with a sl st to the first sc. (250 sts: 16 + 106 + 22 + 106)
Round 2: Ch 1, then sl st in the BLO of each st around. Join and fasten off. (250 sl sts)
Why the math works: Row 99 provides the 12 top stitches. Its first and last stitches each get 3 sc, which adds 4 stitches and rounds the top corners. Its row-ends aren’t counted separately. The 8 extra stitches on each side fall on the diagonal rows of the rounded bottom and the shoulders. Each of those rows runs about 1.3 stitches long on the slant, so they need one extra stitch every other row to lie flat. The bottom edge uses the 22 foundation loops one for one.
Checkpoint: The bordered panel measures 8.5 x 22.5 in (21.6 x 57.2 cm).
Pocket Base (Make 2)
Use sage green. Each base is a half circle worked flat in turned rows. Each row adds 3 stitches, so Row n has 3n stitches.
Row 1: Make a magic ring, ch 1, work 3 sc in the ring, and pull the ring closed. (3 sts)
Row 2: Ch 1, turn, 2 sc in each st. (6 sts)
Row 3: Ch 1, turn, [sc 1, 2 sc in next] 3 times. (9 sts)
Row 4: Ch 1, turn, [sc 2, 2 sc in next] 3 times. (12 sts)
Rows 5–16: Keep going the same way. On each row, work 1 more plain sc before each increase than you did on the row before. The stitch counts are 15, 18, 21, 24, 27, 30, 33, 36, 39, 42, 45 and 48 sts on Row 16.
Fasten off.
The curved edge has 48 sts. The straight edge has 32 row-ends, 16 on each side of the ring.
Shell Front (Make 2)
Use sage green for Rows 1–13. Odd rows are RS rows.
Row 1 (RS): Ch 49. Sc in the 2nd ch from the hook and in each ch across. (48 sts)
Row 2: Ch 1, sc across. (48 sts)
Row 3: Ch 1, [sc 5, 2 sc in next] 8 times. (56 sts)
Rows 4–5: Ch 1, sc across. (56 sts)
Row 6: Ch 1, [sc 6, 2 sc in next] 8 times. (64 sts)
Rows 7–8: Ch 1, sc across. (64 sts)
Row 9: Ch 1, [sc 7, 2 sc in next] 8 times. (72 sts)
Rows 10–12: Ch 1, sc across. (72 sts)
Checkpoint: The fan is about 2.7 in (6.9 cm) tall. The foundation edge measures 12 in (30.5 cm) and the Row 12 edge measures 18 in (45.7 cm).
Row 13 (scallops): Ch 1. Work the following 8 times: sc, hdc, dc, 2 dc in next, 3 dc in next, 2 dc in next, dc, hdc, sc. Each repeat uses 9 sts and makes 13. This is a conversion row: 72 sts + 32 added = 104 sts in 8 lobes. Fasten off.
Row 14 (RS, cream): Join cream in the first st of Row 13. Ch 1 and sc across. At each of the 7 valleys, sc2tog over the 2 sc where two lobes meet. (104 – 7 = 97 sts)
Row 15 (cream): Don’t turn. Ch 1 and work rsc in each st across. (97 sts) Fasten off.
Ribs: With cream and the RS facing, surface slip stitch 7 vertical lines. Start each line at Row 1, between stitches 6 and 7, 12 and 13, and so on up to 42 and 43. Work 1 sl st per row up to the matching valley, which is 13 sl sts per rib. Each line follows the boundary between two 6-stitch sections up into the valley between two lobes. Fasten off and weave in the ends on the WS.
Ring Tab and Straps
Tab (make 1, green): Ch 7. Row 1: sc in the 2nd ch from the hook and across. (6 sts) Rows 2–18: ch 1, sc across. The tab measures 1.5 x 4 in (3.8 x 10.2 cm).
Strap (make 2, green): Ch 33. Row 1: sc in the 2nd ch from the hook and across. (32 sts) Row 2: ch 1, sc across. (32 sts) Each strap is 8 in (20.3 cm) long and about 0.5 in (1.3 cm) wide.
Make All Pieces
| Piece | Qty | Color |
|---|---|---|
| Back panel | 1 | Green, bordered in green |
| Pocket base | 2 | Green |
| Shell front | 2 | Green, with cream ribs and edge |
| Ring tab | 1 | Green |
| Strap | 2 | Green |
Layout (front view):
         ( ring )
          [tab]
        /  neck  \
       |  panel   |
       | POCKET 2 |  <- base on Row 44
       |          |
       | POCKET 1 |  <- base on Row 14
        \________/
Joining
Use sage green and a tapestry needle. Sew with whipstitch through both loops.
1. Form each cup. Place a base and a shell front with the RS facing out. Match the 48 foundation loops of the shell front to the 48 stitches of Row 16 on the base, one to one. Sew them together. The fan now stands up around the curved edge of the base.
2. Mark placement. On the panel, place a marker at each end of Row 14 for the lower pocket and Row 44 for the upper pocket. The two lines are 30 rows apart, about 6.7 in (17.0 cm).
3. Attach the base. Line up the 32 row-ends on the straight edge of the base with the 32 stitches of the marked panel row. Sew them one to one. The base edge is about 7.1 in (18.0 cm) long and the panel is 8 in (20.3 cm) wide, so the panel draws in by about 0.9 in (2.3 cm) along this line. That’s what makes the pocket hug the roll.
4. Attach the sides. Each side of the shell front has 15 row-ends. Sew them up the outermost stitch column of the panel, just inside the border, over 16 panel rows: Rows 14–29 for the lower pocket and Rows 44–59 for the upper one. Sew one row-end to each panel row, then spread the extra panel row across fan Rows 13–15, where the stitches are taller. The scalloped rim flares out past the panel edges.
5. Add the straps. On the WS, center a strap directly behind each base seam and sew it down stitch for stitch, 32 to 32. The straps carry the weight of the rolls and pull the panel back to its full 8 in (20.3 cm) width.
6. Add the ring. Fold the tab around the wooden ring. Sew one end to the RS of the neck and the other end to the WS, over Rows 92–99.
Tension: Make the seams firm but not tight. If the stitches pucker, you’re pulling too hard.
Checkpoint: The finished panel is still 8.5 x 22.5 in (21.6 x 57.2 cm) and both pockets sit level.
Final Blocking
- Mist the whole holder until it’s damp, or steam it lightly without touching the yarn with the iron.
- Lay it flat and pin the panel to 8.5 x 22.5 in (21.6 x 57.2 cm).
- Stuff each pocket with a rolled towel so the cups take on their shape.
- Pin each scallop tip outward and open each valley.
- Leave it to dry completely before you remove the pins.
Final Quality-Control Checklist
- [ ] The panel has 32 sts across the body and 12 at the neck.
- [ ] Border Round 1 has 250 sts.
- [ ] Each base ends with 48 sts, and each shell front has 48 foundation loops.
- [ ] Each shell has 8 even lobes and 7 straight ribs ending in the valleys.
- [ ] The cream rsc edge lies smooth with no gaps.
- [ ] The pockets are level and centered on Rows 14 and 44.
- [ ] The straps are sewn behind both base seams.
- [ ] The tab holds the ring securely.
Troubleshooting
- The base cups instead of lying flat: Your gauge is too tight. Go up a hook size, or check that each row adds exactly 3 stitches.
- The base ruffles: You’ve added too many stitches. Recount each row against 3n.
- The scallops are floppy: Block them over a towel, or use a smaller hook for Row 13.
- The ribs look wavy: Insert the hook between the same two stitch columns on every row.
- The pocket sags forward: Resew the strap more firmly behind the base seam.
- The panel edge waves: Work Border Round 2 more firmly, or skip 1 extra stitch on each of the long straight stretches.
Care
Hand wash in cool water, press out the water gently and dry flat with the pockets reshaped. Don’t wring or tumble dry.
Final Notes
Everything in this pattern follows from one gauge: 16 sc and 18 rows to 4 in (10.2 cm). That gauge gives a panel 8 x 22 in (20.3 x 55.9 cm). The border takes it to 8.5 x 22.5 in (21.6 x 57.2 cm). The 48-stitch curved edge of each base meets the 48-stitch fan, and each 32-row-end straight edge meets the 32 panel stitches. Check each stage as you go and the shells will sit exactly where they should.
Happy crocheting!