
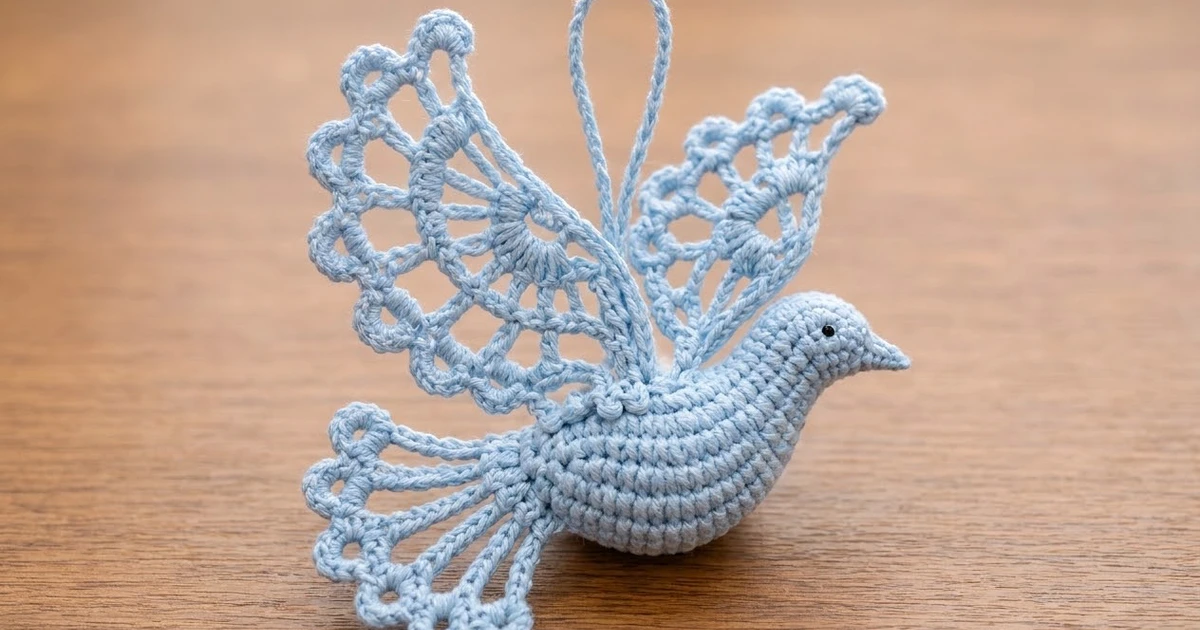
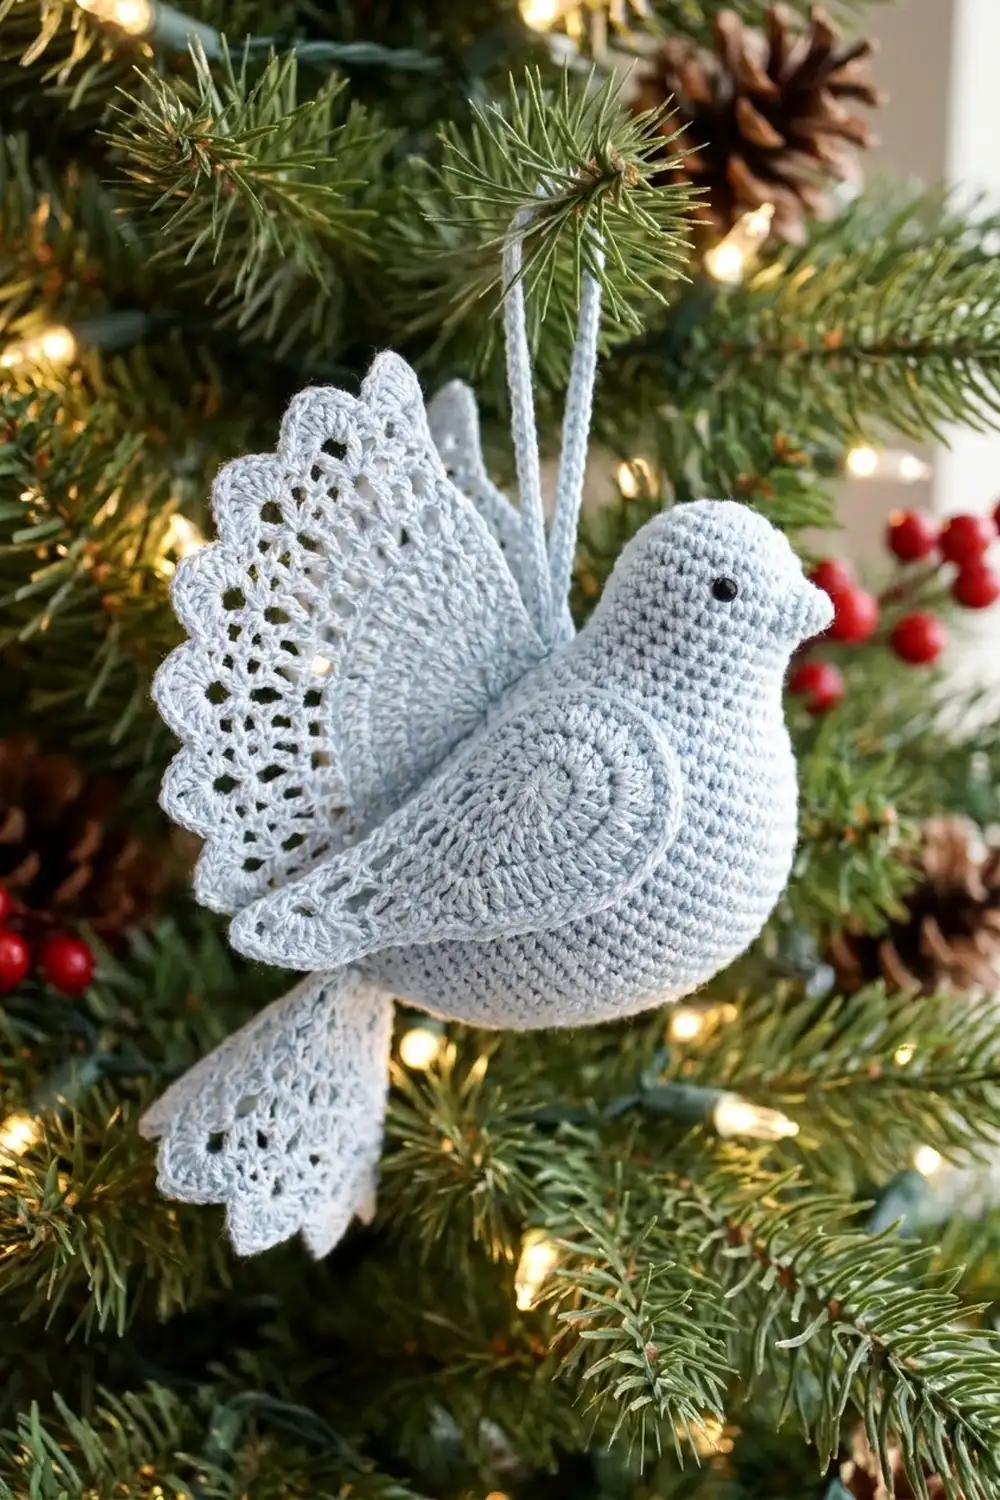
The Snowlace Dove is a small, airy Christmas ornament that pairs a soft, rounded body with lacy wings and a lacy tail. Pale powder-blue thread keeps it quiet and wintry, and it looks lovely against dark evergreen branches and warm string lights.
The body is worked in tight single-crochet rounds and lightly stuffed, so it feels solid and smooth. The two wings and the tail are flat lace fans. Each fan starts as a solid semicircle, opens into long spokes, and finishes with a scalloped picot edge. A small ring decorates each wing tip.
This pattern uses US crochet terms. The finished dove measures about 5.5 in (14.0 cm) wide by 5 in (12.7 cm) tall, plus a 2.5 in (6.4 cm) hanging loop.
You’ll make five components: the body, a large wing, a small wing, the tail and the loop. Then you stiffen the lace parts, sew everything together and add the eye.
Finished Size and Construction
- Finished size: about 5.5 in (14.0 cm) wide x 5 in (12.7 cm) tall, not counting the loop
- Skill level: Intermediate
- Terminology: US crochet terms
- Yarn weight: Super fine (#1) mercerized cotton, fingering weight
- Hook: 2.25 mm (US B-1)
- Number of pieces: 1 ornament, made from 5 sewn components
- Layout: large wing behind the body, small wing in front at the shoulder, tail below the rear, loop on the back
- Component sizes:
- Body: 3.5 in (8.9 cm) long x 1.75 in (4.4 cm) tall
- Large wing: 3.5 in (8.9 cm) x 1.75 in (4.4 cm)
- Small wing: 2.75 in (7.0 cm) x 1.75 in (4.4 cm)
- Tail: 2.25 in (5.7 cm) x 1.5 in (3.8 cm)
- Large wing before the border: 3 in (7.6 cm) across
- Border depth: 0.25 in (0.6 cm)
Materials
Yarn: Use a smooth, tightly plied mercerized cotton in fingering weight (about 200 m per 50 g). Cotton holds the lace shape well after stiffening and shows the picots clearly. Avoid fuzzy or very stretchy yarns, because they blur the scallops.
- Main color, powder blue: 15 g, about 60 m (65 yd)
- Eye, dark gray or black: a scrap of about 20 in (50.8 cm)
These quantities include a margin. One dove uses about 10 g.
Tools:
– 2.25 mm (US B-1) crochet hook
– Tapestry needle, plus a sharp embroidery needle for the eye
– Small amount of polyester fiberfill (about 2 g)
– Stitch marker
– Rust-proof pins and a foam blocking board
– Fabric stiffener or spray starch
– Scissors
Abbreviations (US Terms)
- ch – chain
- sl st – slip stitch
- sc – single crochet
- hdc – half double crochet
- dc – double crochet
- tr – treble crochet (yarn over twice)
- dtr – double treble crochet (yarn over 3 times)
- inc – 2 sc in the same stitch
- dec – single crochet 2 together (invisible decrease recommended)
- MR – magic ring
- st(s) – stitch(es)
- sp – space
Special stitches:
- Picot: Ch 3, then sl st in the 3rd ch from the hook.
- Scallop: Work (sc, hdc, 2 dc, picot, 2 dc, hdc, sc) all in the same chain loop. That’s 8 stitches plus 1 picot.
Gauge and Checkpoints
Gauge: 14 sc and 16 rounds = 2 in (5.1 cm) in tight amigurumi single crochet.
Start with the large wing. It’s quick, and it tells you whether your tension matches the pattern.
Checkpoints:
– Large wing after Row 3: solid semicircle 1.5 in (3.8 cm) across the straight edge
– Large wing after Row 4: 2.4 in (6.1 cm) across
– Large wing after Row 5: 3 in (7.6 cm) across
– Large wing after the border: 3.5 in (8.9 cm) across, 1.75 in (4.4 cm) deep
– Body after Round 4: head circle laid flat, 0.8 in (2.0 cm) across
– Body after Round 11: open end laid flat, 2 in (5.1 cm) across
If your pieces are too big: Go down to a 2 mm hook, or tighten your yarn-over on the tall stitches.
If your pieces are too small: Go up to a 2.5 mm hook.
Small differences of up to 0.25 in (0.6 cm) are fine on an ornament. Do keep all components on the same hook so they stay in proportion.
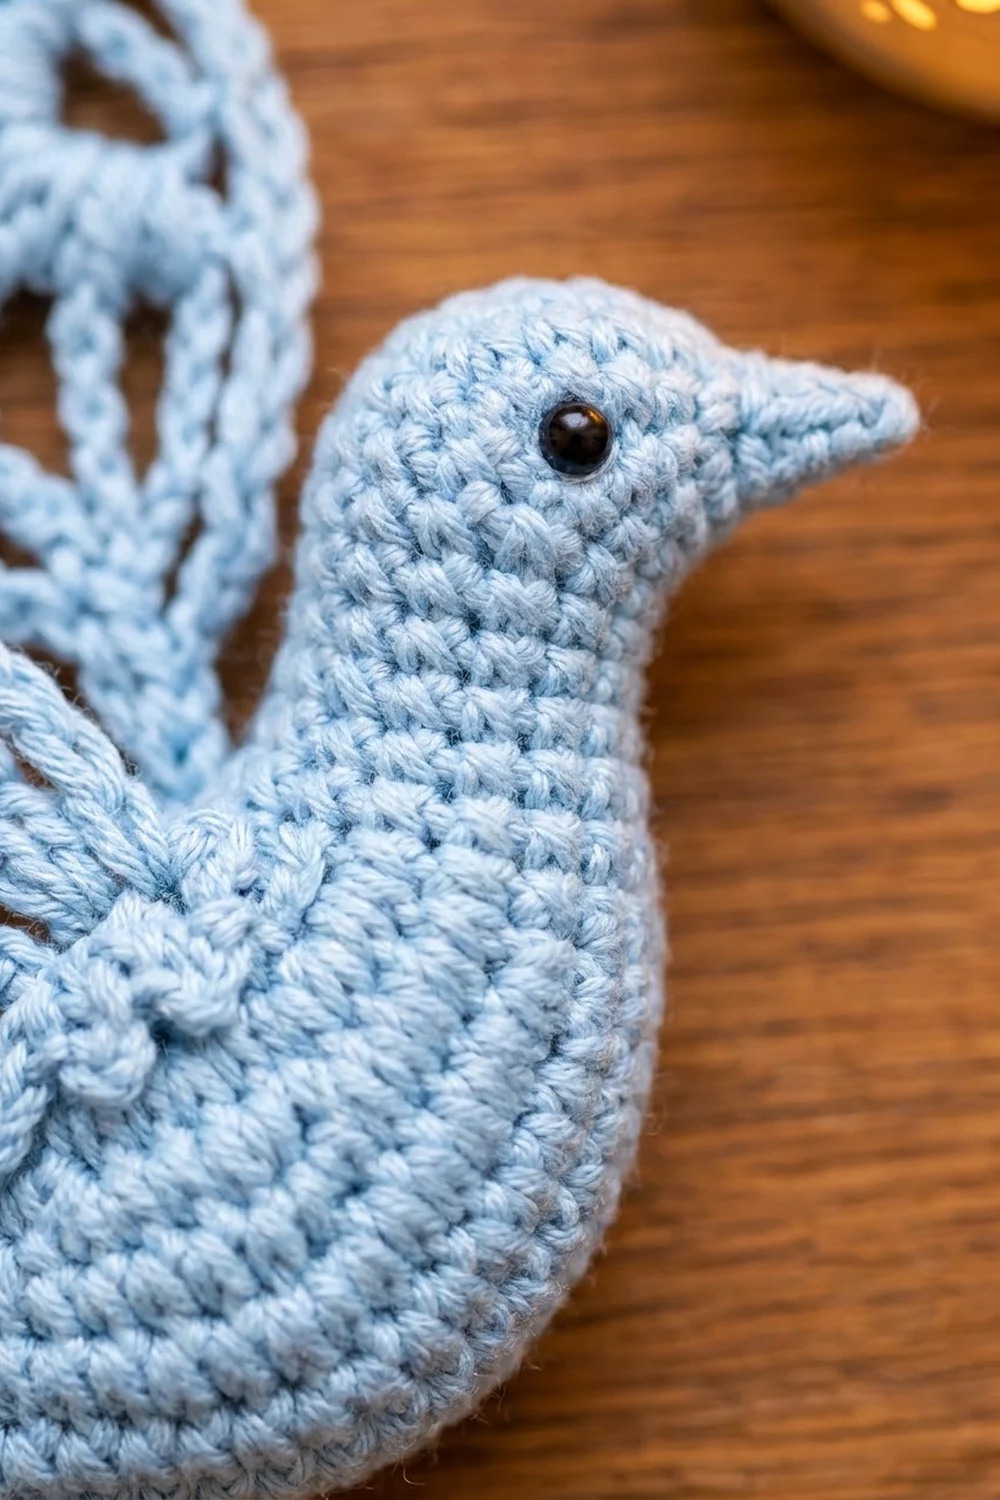
Body
Work in continuous spiral rounds. Do not join and do not turn. Place a marker in the first stitch of each round. You begin at the beak tip and work toward the tail.
Rnd 1: 4 sc in MR. (4)
Rnd 2: [sc, inc] 2 times. (6) This forms the pointed beak.
Rnd 3: Inc in each st around. (12)
Rnd 4: [sc, inc] 6 times. (18)
Rnds 5–6: Sc in each st around. (18) This is the rounded head.
Rnd 7: [sc, dec] 6 times. (12)
Rnd 8: Sc in each st around. (12) This is the neck.
Rnd 9: [sc, inc] 6 times. (18)
Rnd 10: [2 sc, inc] 6 times. (24)
Rnd 11: [3 sc, inc] 6 times. (30)
Checkpoint: the open end lies flat at 2 in (5.1 cm) across.
Rnds 12–17: Sc in each st around. (30) This forms the full chest.
Rnd 18: [3 sc, dec] 6 times. (24)
Rnds 19–20: Sc in each st around. (24)
Rnd 21: [2 sc, dec] 6 times. (18)
Rnd 22: Sc in each st around. (18)
Stuff lightly. Put a small amount of fiberfill in the head and chest. Then press the body between your palms so it becomes an oval with a slightly flatter back. Don’t overstuff, or the stitches will gap.
Rnd 23: [sc, dec] 6 times. (12)
Rnd 24: Dec 6 times. (6)
Fasten off and leave a 6 in (15.2 cm) tail. Weave it through the front loops of the last 6 sts, pull it closed and secure it.
The finished body measures about 3.5 in (8.9 cm) from beak to rear and 1.75 in (4.4 cm) tall.
Large Wing (Back Wing)
Work in turned rows. The magic ring becomes the base of the fan.
Row 1: MR, ch 3 (counts as dc), 8 dc in the ring. Pull the ring closed until the dc form a semicircle. Turn. (9 dc)
Row 2: Ch 3 (counts as dc), dc in the same st, 2 dc in each of the next 7 sts, dc in the last st. Turn. (17 dc)
Row 3: Ch 1, sc in each st across. Turn. (17 sc)
Checkpoint: a solid semicircle 1.5 in (3.8 cm) across.
Row 4 (spokes): Ch 5 (counts as tr + ch 1), [tr in next sc, ch 1] 15 times, tr in the last sc. Turn. (17 tr, 16 ch-1 sps)
Row 5 (loops): Ch 1, sc in the first tr, [ch 5, skip the next tr, sc in the next tr] 8 times. Turn. (9 sc, 8 ch-5 loops)
The last sc lands in the top of the turning chain from Row 4. Don’t fasten off. The border comes next (see Border below).
Small Wing (Front Wing)
This wing uses the same row heights as the large wing but fewer stitches. That makes it a narrower wedge, about 115 degrees instead of a half circle, so it stands upright and looks pointed.
Row 1: MR, ch 3 (counts as dc), 5 dc in the ring. Pull closed. Turn. (6 dc)
Row 2: Ch 3 (counts as dc), dc in the same st, 2 dc in each of the next 4 sts, dc in the last st. Turn. (11 dc)
Row 3: Ch 1, sc in each st across. Turn. (11 sc)
Row 4: Ch 5 (counts as tr + ch 1), [tr in next sc, ch 1] 9 times, tr in the last sc. Turn. (11 tr, 10 ch-1 sps)
Row 5: Ch 1, sc in the first tr, [ch 5, skip the next tr, sc in the next tr] 5 times. Turn. (6 sc, 5 ch-5 loops)
Don’t fasten off. Continue to the border.
Tail
Row 1: MR, ch 3 (counts as dc), 6 dc in the ring. Pull closed. Turn. (7 dc)
Row 2 (long spokes): Ch 7 (counts as dtr + ch 2), [dtr in next st, ch 2] 5 times, dtr in the last st. Turn. (7 dtr, 6 ch-2 sps)
Row 3: Ch 1, sc in the first dtr, [ch 5, sc in the next dtr] 6 times. Turn. (7 sc, 6 ch-5 loops)
Here no spokes are skipped. Each long spoke ends in its own sc, which gives the tail its open, ribbed look. Continue to the border.
Hanging Loop
Ch 41. Sl st in the 2nd ch from the hook and in each ch across. (40 sl st)
Fasten off and leave a 6 in (15.2 cm) tail. The strip is about 5 in (12.7 cm) long, and folding it in half gives a 2.5 in (6.4 cm) loop.
Border
The border is the scalloped picot edge on the wings and the tail. The tip rings are added to the wings at the end.
Border gauge: each scallop is about 0.5 in (1.3 cm) wide and 0.25 in (0.6 cm) deep.
Border row, all three fans: Ch 1, sl st in the first sc. Then work 1 scallop in the next ch-5 loop, sl st in the next sc. Repeat from * across.
Counts per piece:
| Piece | Scallops | Picots | Sl sts | Stitches in scallops (8 each) |
|---|---|---|---|---|
| Large wing | 8 | 8 | 9 | 64 |
| Small wing | 5 | 5 | 6 | 40 |
| Tail | 6 | 6 | 7 | 48 |
Fasten off the tail and leave a 10 in (25.4 cm) yarn end for sewing.
Tip ring, both wings only: After the last sl st, ch 6 and sl st in the 6th ch from the hook to make a ring. Work 8 sc into the ring and sl st to the first sc. (8 sc)
Fasten off and leave a 10 in (25.4 cm) yarn end. The ring sits at the outer corner of the wing tip.
Why the math works: Row 4 always has an odd number of spokes (17 on the large wing, 11 on the small wing). Because you skip every other spoke in Row 5, the first and last sc land exactly on the end spokes. That gives (17 − 1) ÷ 2 = 8 loops and (11 − 1) ÷ 2 = 5 loops. The tail has 7 spokes and skips none, so it has 7 − 1 = 6 loops. The border places one scallop in each loop and one sl st on each sc, so there is always one more sl st than scallops. No stitches are added or lost at the edges, so the fans stay symmetrical.
Assembly
- Stiffen first. Do the wing and tail stiffening steps under Final Blocking before you sew. Lace pieces are much easier to handle once they’re firm.
- Large wing: Place it behind the body. The magic-ring center goes at the shoulder, about Rnd 11, on the upper back. The straight edge (the row ends) runs along the top of the body toward the tail. Whipstitch the straight edge and the Row 1 base to the body with the long yarn end.
- Small wing: Place it on the front side of the body, with its center on the shoulder over the large wing’s center. Tilt it so the tip ring points up and slightly forward. Sew only the Row 1 to Row 3 base, so the lace stays free.
- Tail: Tuck the magic-ring end under the rear of the body, around Rnds 20 to 23. Angle it down and back. Whipstitch it in place.
- Loop: Fold the strip in half. Sew both ends to the top of the back, behind the wing bases, so the dove hangs level.
- Eye: With dark thread, make a small French knot on each side of the head between Rnds 3 and 4.
Final Blocking
- Mix the fabric stiffener as the label directs, or use undiluted spray starch.
- Wet the large wing, small wing and tail. Squeeze out the extra liquid.
- Pin each fan flat on the board. Put one pin in each picot and one in each tip ring.
- Check the sizes: large wing 3.5 in (8.9 cm), small wing 2.75 in (7.0 cm), tail 2.25 in (5.7 cm).
- Open the spokes evenly so the chain spaces look equal.
- Let the pieces dry completely. This usually takes 6 to 12 hours.
- Unpin the pieces and assemble the dove as described above.
- Lightly mist the body and shape it by hand. Don’t use stiffener on the body.
Final Quality-Control Checklist
- [ ] The body counts 24 rounds and has a clear neck dip at Rnds 7–8.
- [ ] The beak comes to a point and isn’t flattened.
- [ ] The large wing has 8 scallops, the small wing has 5 and the tail has 6.
- [ ] Every picot is visible and every chain loop is even.
- [ ] Both wings have a tip ring with 8 sc.
- [ ] The wings fan out from the same shoulder point.
- [ ] The overall size is about 5.5 in x 5 in (14.0 cm x 12.7 cm).
- [ ] The dove hangs level from its 2.5 in (6.4 cm) loop.
- [ ] All yarn ends are woven in and hidden inside the body.
Troubleshooting
The fan cups instead of lying flat. Your Row 2 increases are too tight. Go up half a hook size for Rows 1–2 only.
The fan ruffles. Your tall stitches are too loose. Pull each loop snug against the hook as you work.
The last sc doesn’t land on the turning chain. Recount the Row 4 spokes. The large wing needs 17 and the small wing needs 11.
The scallops look crowded. Your ch-5 loops are too short. Work the chains more loosely.
Stuffing shows through the body. Use a smaller hook and less fiberfill.
The dove tips forward when it hangs. Move the loop 0.25 in (0.6 cm) toward the tail.
The picots disappear after blocking. Pin through the center of each picot, not beside it.
Care
Spot clean only with a damp cloth and let the dove air dry. Store it flat in tissue paper so the stiffened lace keeps its shape.
Final Notes
The measurement chain is simple. Your gauge sets the 1.5 in (3.8 cm) solid center. The center grows to 2.4 in (6.1 cm) after the spokes and 3 in (7.6 cm) after the loops. The border then brings the large wing to its final 3.5 in (8.9 cm). The body’s 24 rounds give a 3.5 in (8.9 cm) length to match, and the assembled dove comes to about 5.5 in (14.0 cm) by 5 in (12.7 cm).
If your first wing hits its checkpoints, the rest of the dove will follow.
Happy crocheting!