

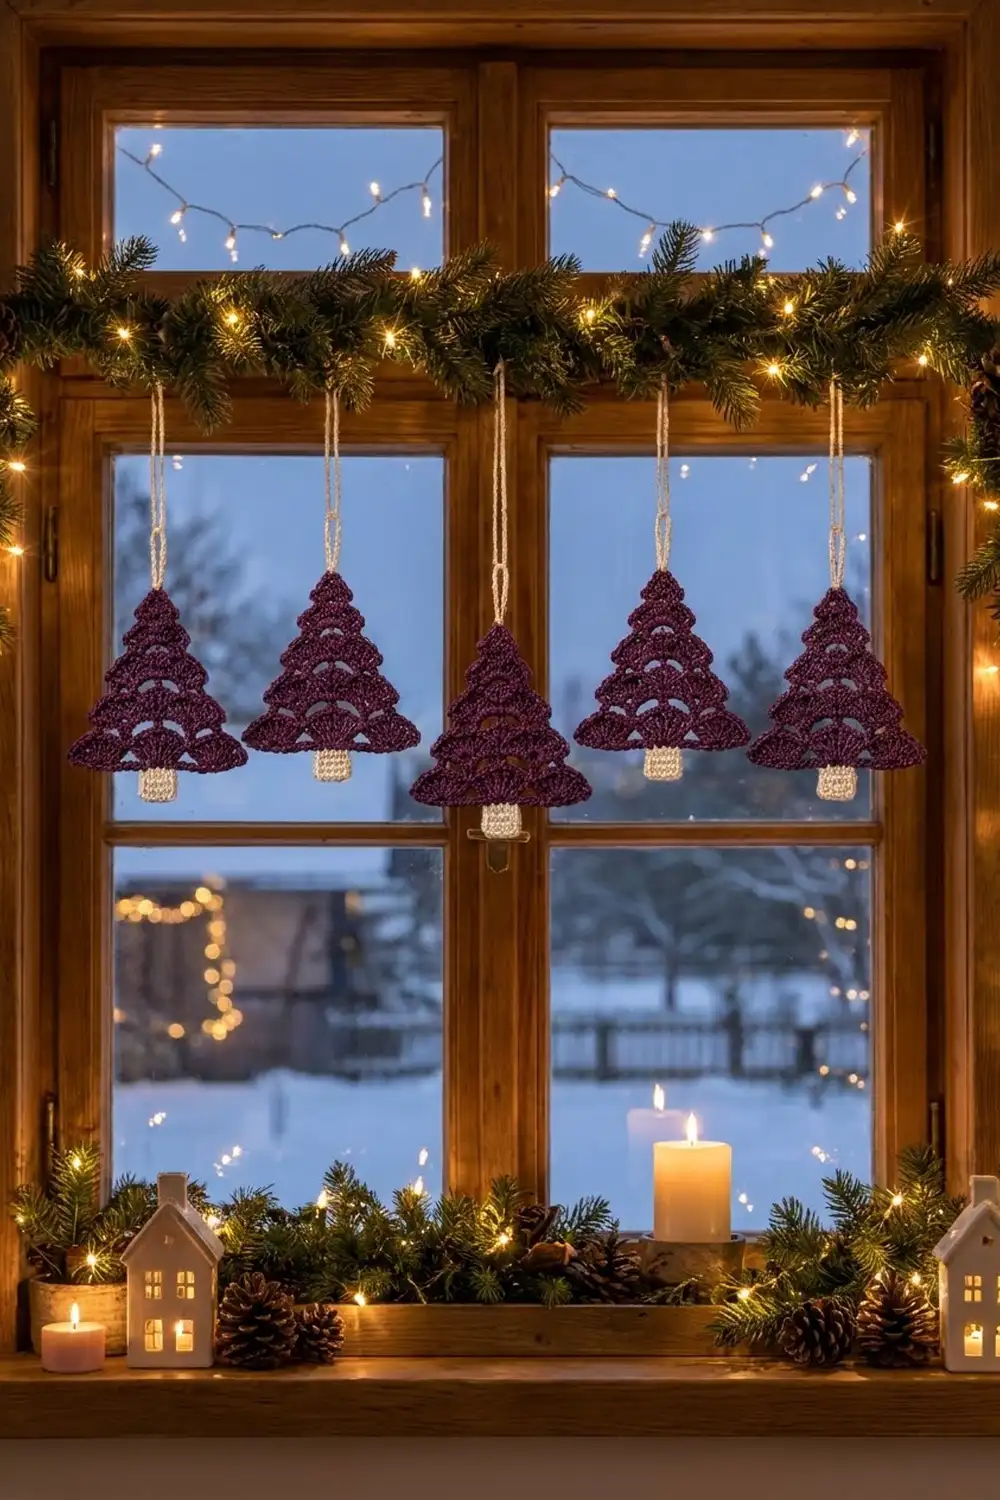
The Sugarplum Fan Tree is a small, lacy Christmas tree ornament made from stacked shell fans. Each row adds one fan, so the triangle grows naturally from a single shell at the tip to a wide, scalloped base. A cream trunk and a matching hanging loop finish the tree.
The main color is a rich plum, almost burgundy, and the trunk and loop are a soft cream. Small chain arcs between the shells leave open spaces, so the tree looks delicate and catches the light nicely on a tree branch or in a window.
This pattern uses US crochet terms. The finished ornament measures 4.75 in (12.1 cm) wide and 3.75 in (9.5 cm) tall for the tree alone. With the trunk it is 4.5 in (11.4 cm) tall… measured from tip to trunk bottom, that is 3.75 in (9.5 cm) of tree plus 0.75 in (1.9 cm) of visible trunk.
You work the tree top-down in turned rows, starting from a magic ring. Then you add one round of single crochet edging around the whole triangle, make a small cream trunk in rows, sew it on and finish with a chain loop.
Finished Size and Construction
- Finished size (tree): 4.75 in (12.1 cm) wide × 3.75 in (9.5 cm) tall
- Finished size (with trunk): 4.75 in (12.1 cm) wide × 4.5 in (11.4 cm) tall, not counting the loop
- Skill level: Easy–Intermediate
- Terminology: US crochet terms
- Yarn weight: Sport (#2)
- Hook: 3.25 mm (US D-3)
- Number of pieces: 1 tree, 1 trunk, 1 hanging loop (worked directly onto the tree)
- Layout: Single ornament, nothing to join
- Tree size before border: 4.5 in (11.4 cm) wide × 3.5 in (8.9 cm) tall
- Border depth: 0.125 in (0.3 cm) on each edge
- Trunk size: 1 in (2.5 cm) × 1 in (2.5 cm)
- Loop height: about 1.25 in (3.2 cm)
Materials
Yarn: A smooth sport-weight cotton or cotton blend shows the shell texture best. Mercerized cotton gives crisp fans and holds its shape well after blocking. Acrylic also works, but the fans will be a little softer.
- Plum (main color): 10 g, about 30 m
- Cream (trunk and loop): 3 g, about 9 m
These quantities include a margin for your gauge swatch and weaving in ends. One ornament uses a little less than this.
Tools:
– 3.25 mm (US D-3) crochet hook
– Tapestry needle
– Scissors
– Stitch marker
– Blocking mat and rustproof pins
– Spray bottle with water
– Ruler or tape measure
Abbreviations (US Terms)
- ch – chain
- sl st – slip stitch
- sc – single crochet
- dc – double crochet
- st(s) – stitch(es)
- sp – space
- tch – turning chain
- RS / WS – right side / wrong side
- rep – repeat
Special stitch – Fan: Work the stated number of dc all into the same stitch. A 5-dc fan is 5 dc in one stitch, and a 7-dc fan is 7 dc in one stitch. The center dc of a 5-dc fan is its 3rd dc.
Edge fan: Ch 3 (counts as the first dc), then work the rest of the dc in the stitch at the base of the ch-3.
Gauge and Checkpoints
Swatch gauge: 24 sc and 26 rows = 4 in (10.2 cm) square with a 3.25 mm hook.
Test one tree first. Work Rows 1–3, then check them against the checkpoints below. This takes only a few minutes and tells you more than a flat swatch, because fans spread differently from plain stitches.
Measurement checkpoints (lay the piece flat without stretching):
– After Row 1: 1 in (2.5 cm) wide, 0.5 in (1.3 cm) tall
– After Row 2: 1.75 in (4.4 cm) wide, 1.25 in (3.2 cm) tall
– After Row 3: 2.75 in (7.0 cm) wide, 2 in (5.1 cm) tall
– After Row 4: 3.5 in (8.9 cm) wide, 2.75 in (7.0 cm) tall
– After Row 5: 4.5 in (11.4 cm) wide, 3.5 in (8.9 cm) tall
– After the border: 4.75 in (12.1 cm) wide, 3.75 in (9.5 cm) tall
If your tree is too big: go down to a 3.0 mm hook, or pull the ch-2 arcs a little tighter.
If your tree is too small: go up to a 3.5 mm hook. Check that your fans aren’t bunching. Each dc should sit side by side, not stacked.
A difference of up to 0.25 in (0.6 cm) can be fixed when you block. Anything bigger than that means you should change your hook size.
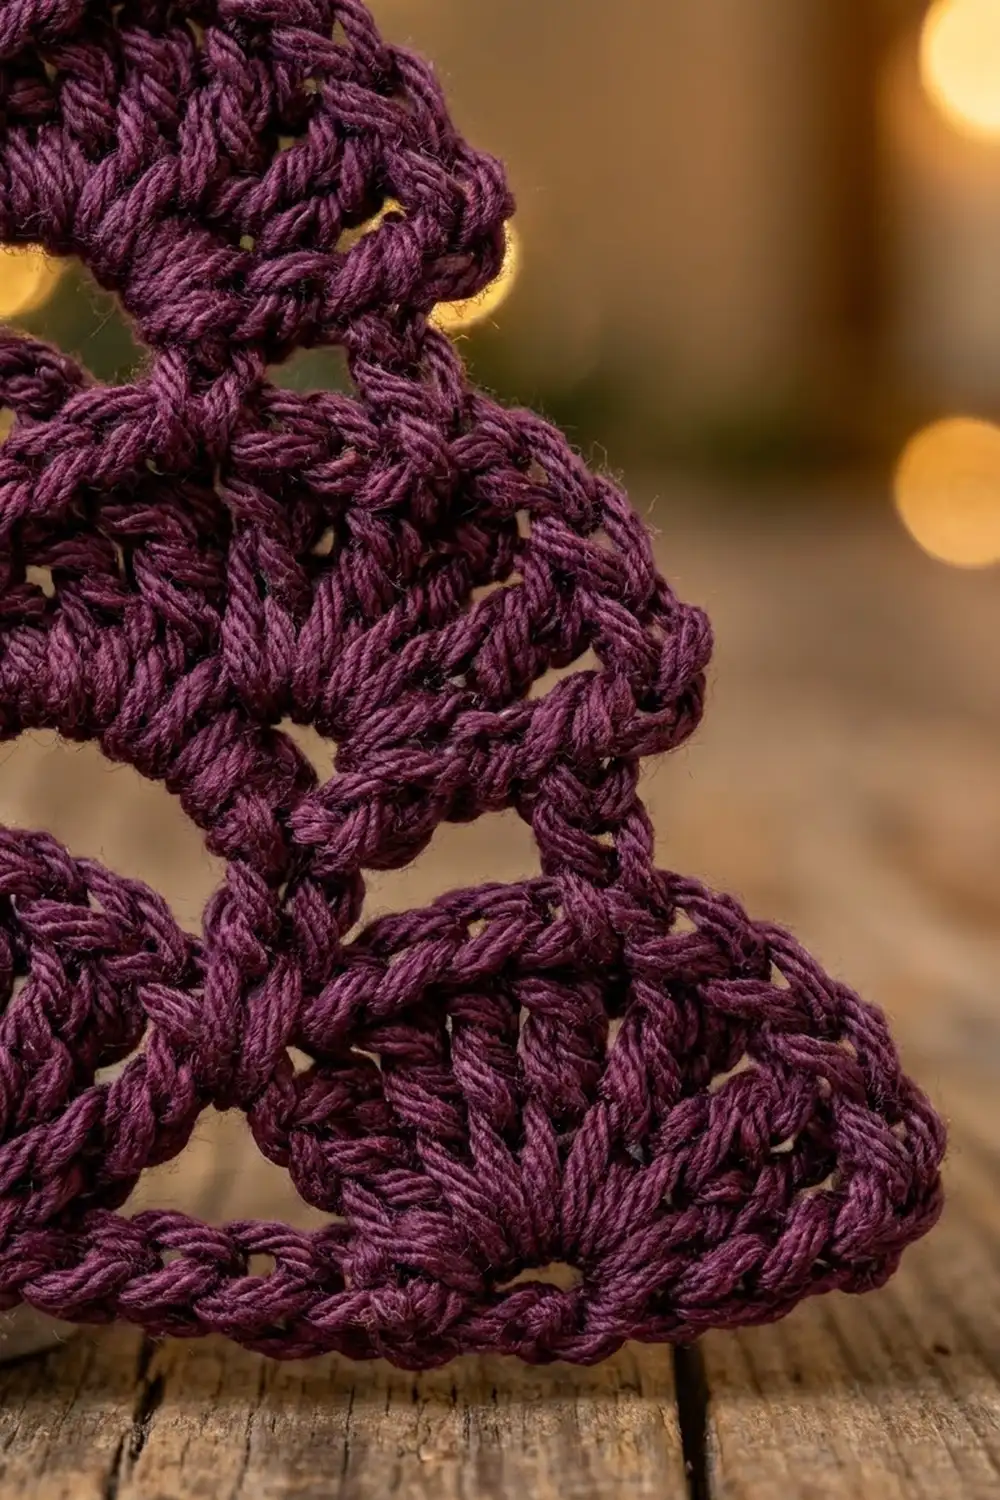
Tree
The tree is worked top-down in turned rows with plum yarn. Odd rows are RS rows.
How the rows work: Every row starts and ends with an edge fan. An sc goes into the center dc of each fan from the row before, and a new fan goes into each sc from the row before. Any stitches between those targets are skipped, and the ch-2 arcs cover them. Because of this, each row has one more fan than the row before.
Row 1 (RS): Make a magic ring. Ch 3 (counts as dc), work 4 dc into the ring. Pull the ring tight. Turn. (5 dc – 1 fan)
Row 2 (WS): Ch 3, work 4 dc in the first dc (edge fan made). Ch 2, skip 1 dc, sc in the next dc (the center dc of the Row 1 fan). Ch 2, skip 1 dc, work 5 dc in the top of the tch. Turn.
(10 dc, 1 sc, 2 ch-2 sps – 2 fans)
Row 3 (RS): Ch 3, work 4 dc in the first dc. Ch 2, sc in the center dc of the first fan. Ch 2, work 5 dc in the next sc, ch 2, sc in the center dc of the next fan. Rep from * to * 1 time. Ch 2, work 5 dc in the top of the tch. Turn.
(15 dc, 2 sc, 4 ch-2 sps – 3 fans)
Row 4 (WS): Ch 3, work 4 dc in the first dc. Ch 2, sc in the center dc of the first fan. Ch 2, work 5 dc in the next sc, ch 2, sc in the center dc of the next fan. Rep from * to * 2 more times. Ch 2, work 5 dc in the top of the tch. Turn.
(20 dc, 3 sc, 6 ch-2 sps – 4 fans)
Row 5 (RS) – large base fans: Ch 3, work 6 dc in the first dc (7-dc edge fan). Ch 2, sc in the center dc of the first fan. Ch 2, work 7 dc in the next sc, ch 2, sc in the center dc of the next fan. Rep from * to * 2 more times. Ch 2, work 7 dc in the top of the tch.
(35 dc, 4 sc, 8 ch-2 sps – 5 fans)
Fasten off.
Count check: Row k has k fans, k − 1 sc and 2(k − 1) ch-2 sps. Row 5 has 5 fans of 7 dc each, which gives 35 dc. The bigger fans in Row 5 make the scalloped base you can see in the finished tree.
Checkpoint: 4.5 in (11.4 cm) wide, 3.5 in (8.9 cm) tall.
Border
Border gauge: On the base, the sc follow the curve of each fan, so you count them along the scallops rather than across a straight line. On the slanted sides, work 4 sc per row-end, which is about 5.5 sc per inch (2.5 cm) along the edge.
Corner groups: Each corner gets 3 sc in one stitch. The middle sc of that group is the corner stitch. Per-side counts below include both corner stitches.
Round 1 (RS): With the RS facing, join plum with a sl st in the top of the beginning ch-3 of Row 5. That stitch is the first base corner.
- First base corner: Ch 1, work 3 sc in the same st.
- Base: Sc in each of the next 6 dc. Skip the ch-2 sp, sc in the sc, skip the ch-2 sp, sc in each of the next 7 dc. Rep from * to * 2 more times. Skip the ch-2 sp, sc in the sc, skip the ch-2 sp, then sc in each of the next 6 dc. That makes 37 sc.
- Second base corner: Work 3 sc in the last dc.
- First side: Rotate the tree and work 4 sc evenly into each row-end of Rows 5, 4, 3, 2 and 1. That makes 20 sc.
- Tip: Work 3 sc into the magic ring at the top point, slipping your hook under the ring strands.
- Second side: Work 4 sc evenly into each row-end of Rows 1, 2, 3, 4 and 5. That makes 20 sc.
- Sl st into the first sc to join.
Round total: 86 sc.
– Base: 41 sc (1 corner + 1 + 37 + 1 + 1 corner)
– Each side: 24 sc (1 corner + 1 + 20 + 1 + 1 corner)
– Check: 41 + 24 + 24 = 89, minus the 3 shared corner stitches = 86
Fasten off and weave in the ends.
Why the math works:
– On the base, there is exactly 1 sc on top of each dc and each valley sc, and you skip the ch-2 arcs. This keeps each 7-dc scallop intact without ruffling it. The base has 35 dc in total: 2 of them hold the corner groups and 33 get 1 sc each. Add the 4 valley sc and you get 37.
– On the sides, all five rows are dc-height. Four sc per row-end covers that height plus the outward step of each edge fan, so the sides lie straight.
– The border adds 0.125 in (0.3 cm) on every edge. This brings the tree from 4.5 in (11.4 cm) to 4.75 in (12.1 cm) wide and from 3.5 in (8.9 cm) to 3.75 in (9.5 cm) tall.
Trunk
Work in cream.
Row 1: Ch 7, sc in the 2nd ch from the hook and in each ch across. Turn. (6 sc)
Rows 2–7: Ch 1, sc in each st across. Turn. (6 sc)
Fasten off, leaving a 12 in (30.5 cm) tail for sewing.
Checkpoint: 1 in (2.5 cm) × 1 in (2.5 cm).
Attaching: Place the trunk behind the tree, centered under the middle fan of Row 5. Overlap 0.25 in (0.6 cm) so that 0.75 in (1.9 cm) shows below the base. Whipstitch the top edge of the trunk to the back of the border sc, making sure the stitches don’t show on the RS. Weave in the ends.
Hanging Loop
With cream, join with a sl st in the center sc of the tip corner group. Ch 18, then sl st into the same sc to make the loop. Fasten off, leaving an 8 in (20.3 cm) tail. Weave both ends into the back of the tip and knot them securely before you trim.
Checkpoint: The loop stands about 1.25 in (3.2 cm) above the tip.
Final Blocking
- Wet the ornament fully with your spray bottle, or soak it briefly and press out the water in a towel.
- Lay it RS up on the blocking mat.
- Pin the three corners first so the tree measures 4.75 in (12.1 cm) across the base and 3.75 in (9.5 cm) from the base to the tip.
- Pin each straight side every 0.75 in (1.9 cm) so it stays in a straight line.
- Pin the top of each of the 5 base scallops so the curves are even.
- Open each fan gently with your fingertips so all the dc spread evenly and the ch-2 spaces are open.
- Pin the trunk square at 1 in (2.5 cm) × 1 in (2.5 cm).
- Let it dry completely before you unpin. For a crisper finish, mist it lightly with fabric stiffener before drying.
Final Quality-Control Checklist
- [ ] The tree has 5 rows of fans: 1, 2, 3, 4 and 5 fans
- [ ] Rows 1–4 use 5-dc fans and Row 5 uses 7-dc fans
- [ ] Every sc sits in the center dc of a fan from the row above
- [ ] The border has 86 sc, with 41 on the base and 24 on each side
- [ ] The tree measures 4.75 in (12.1 cm) × 3.75 in (9.5 cm)
- [ ] The trunk is 1 in (2.5 cm) square and centered, with 0.75 in (1.9 cm) showing
- [ ] The loop is secure and the tree hangs straight
- [ ] All ends are woven in on the WS
Troubleshooting
The tree leans to one side. You probably missed an edge fan at the start or end of a row. Count the fans in each row against 1, 2, 3, 4, 5.
The fans cup or ruffle. Your tension on the dc is too loose, or the ch-2 arcs are too long. Tighten the arcs or go down a hook size.
The gaps between fans are puckered. The ch-2 arcs are too tight. Relax your tension on the chains, or work ch 3 if the problem is extreme. If you do that, measure again.
The sides curve inward after the border. Work 5 sc into the Row 5 row-ends only. That changes each side to 25 sc and the round total to 88.
The base scallops look flat. Make sure you skipped the ch-2 spaces on the base and didn’t work sc into them.
The tip looks open. Pull the magic ring tighter before you work the border. Then make sure the 3 tip sc go under all the ring strands.
Care
Hand wash in cool water with mild soap, press out the water in a towel and dry flat, reshaping as needed. Store flat or hanging so the fans keep their shape.
Final Notes
Here’s how the measurements build on each other. Your swatch gauge of 24 sc and 26 rows = 4 in (10.2 cm) sets the size of every fan. Five rows of fans give you a 4.5 in (11.4 cm) × 3.5 in (8.9 cm) triangle. The 86-stitch border brings it to 4.75 in (12.1 cm) × 3.75 in (9.5 cm). The 1 in (2.5 cm) trunk adds 0.75 in (1.9 cm) of visible height, for a finished ornament 4.5 in (11.4 cm) tall. If you check at each checkpoint, your tree will come out the right size every time.
Happy crocheting!