

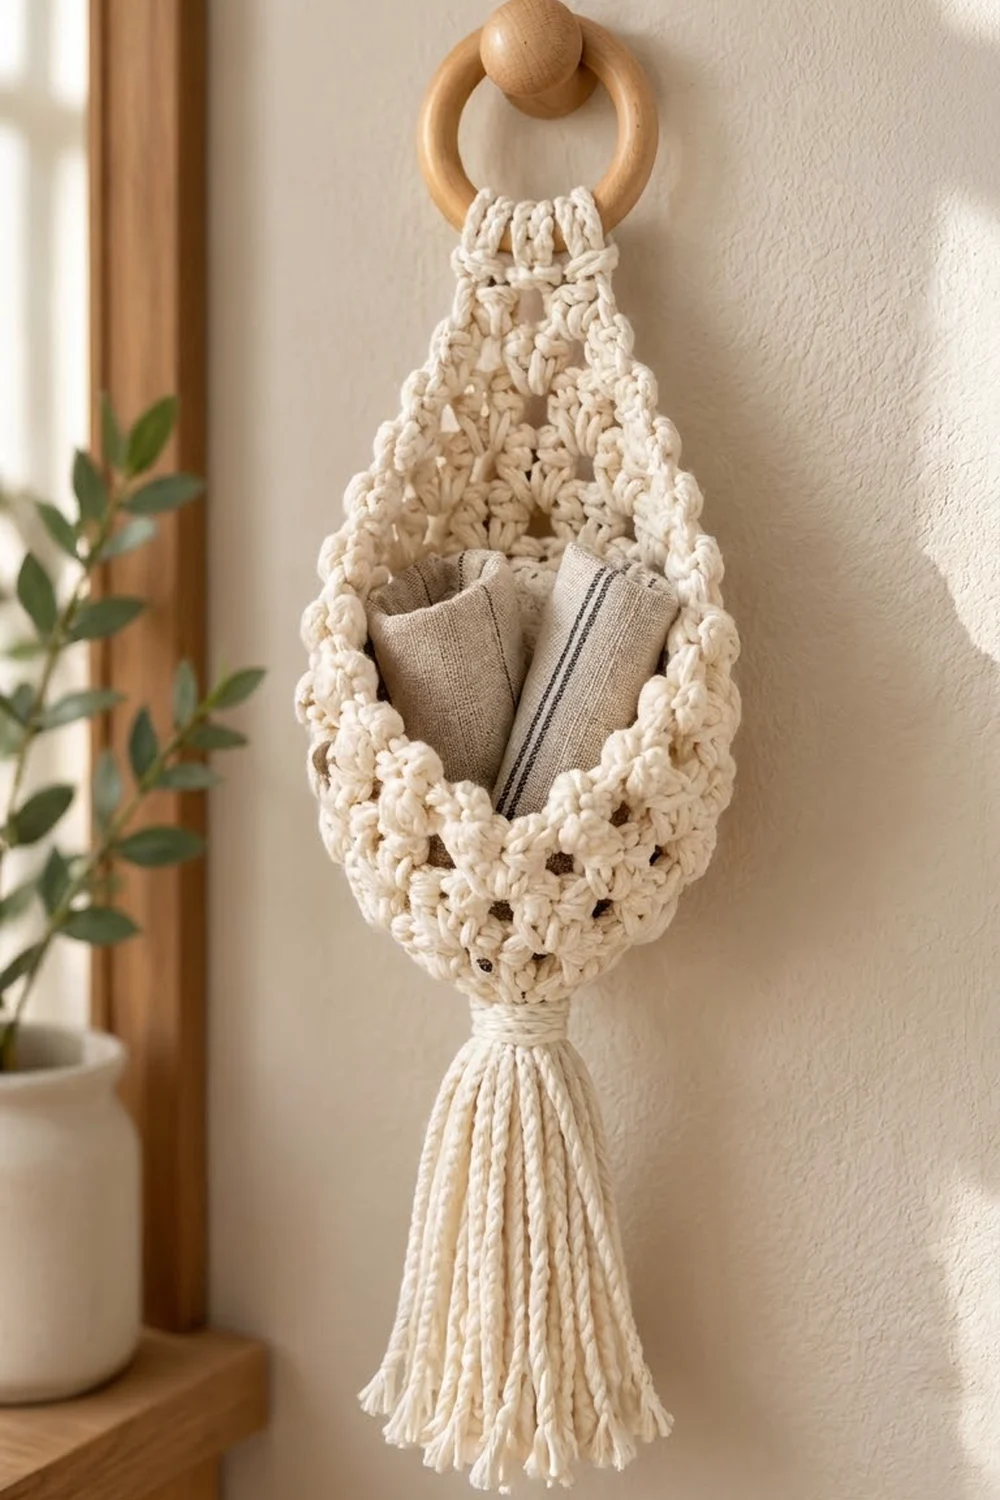
The Willow Drop is a teardrop-shaped wall pocket for small things you want close at hand, like rolled napkins, gloves, letters or a small trailing plant. It hangs from a smooth wooden ring and ends in a full, swinging tassel.
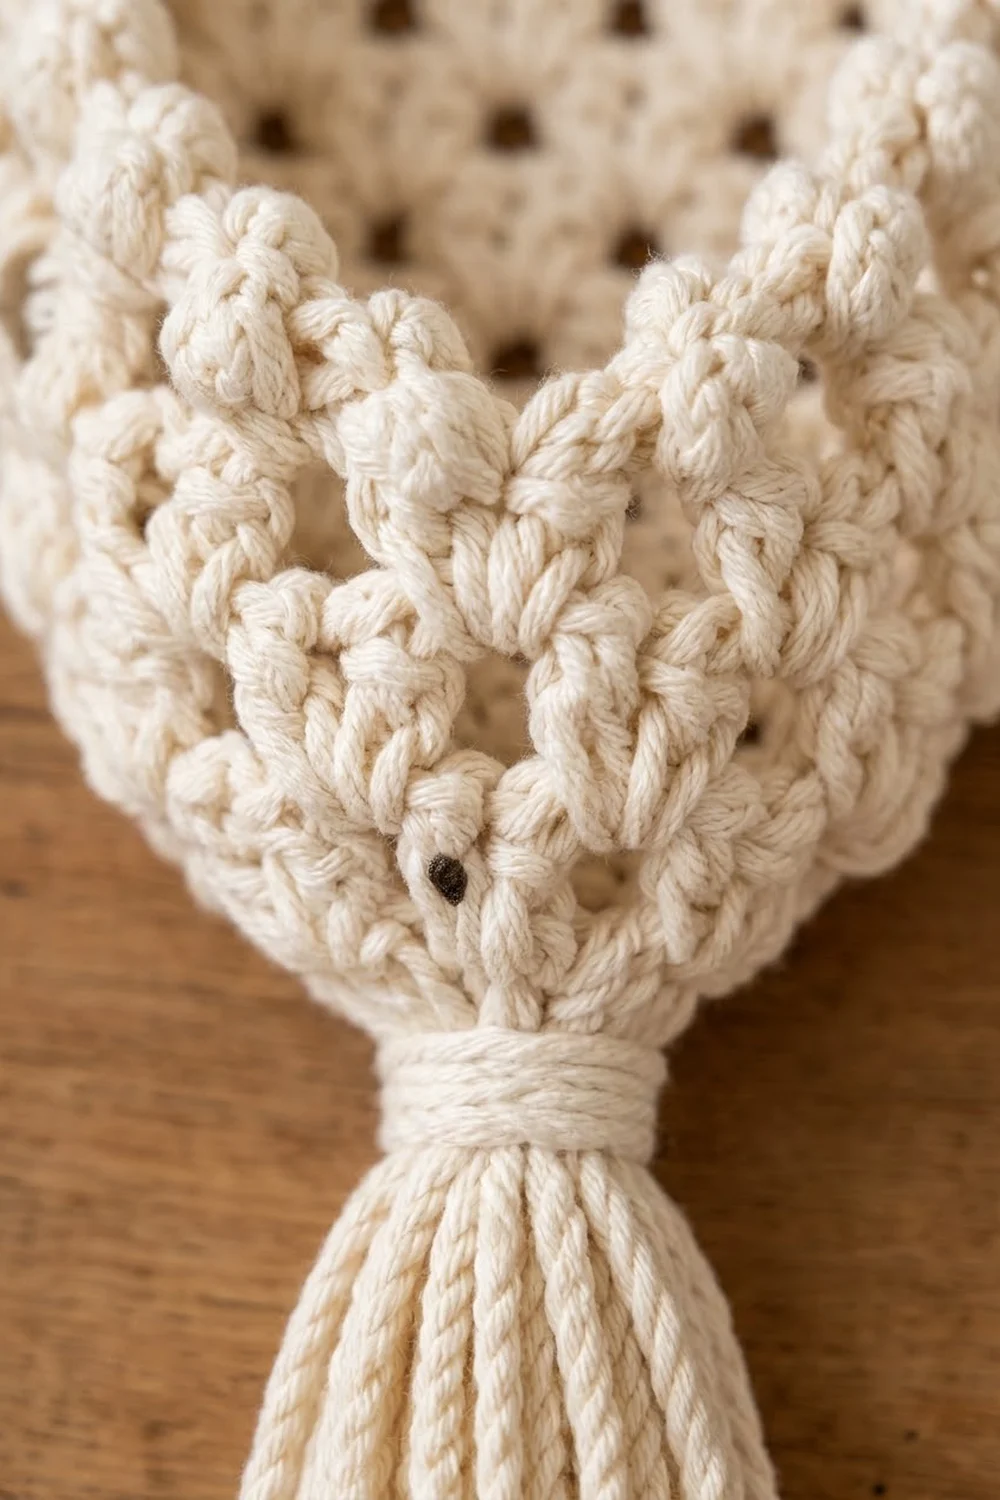
It is worked in one natural cream cotton. The body is an openwork lattice of granny clusters, and its small triangular gaps show the wall behind it. A rim of chunky bobbles frames the opening, which gives the pocket the look of macramé without any knotting.
This pattern uses US crochet terms. The finished body measures about 6 in (15.2 cm) wide at the opening and about 10 in (25.4 cm) from the bottom point to the ring. The tassel adds 6 in (15.2 cm) below that.
Construction is simple. You crochet a cone in the round from the bottom point. Then you work the back half on its own in decreasing rows and finish it with a narrow strap that wraps around the ring. Two border rows edge the opening, and the tassel is tied to the tip last.
Finished Size and Construction
- Finished size: 6 in (15.2 cm) wide x 10 in (25.4 cm) tall, plus a 6 in (15.2 cm) tassel
- Skill level: Easy to intermediate
- Terminology: US crochet terms
- Yarn weight: Bulky (#5) cotton
- Hook: 6.0 mm (US J-10)
- Number of pieces: 1 body (worked in one piece) plus 1 tassel
- Layout: Single pocket hung from 1 wooden ring
- Piece size: Cone 12 in (30.5 cm) around at the widest point, which lies flat at 6 in (15.2 cm) wide
- Size before border: 6 in (15.2 cm) wide x 8.8 in (22.4 cm) tall from tip to the top of the back panel
- Border depth: 0.75 in (1.9 cm), 2 rows
Materials
Yarn: Use a smooth bulky cotton or a soft cotton cord that is about 130 m per 100 g. Cotton holds the pocket’s shape and makes a tassel that hangs straight.
- Cream: 160 g, about 210 m (230 yd)
Approximate breakdown: body 95 g, border 15 g, tassel and ties 25 g. The 160 g total includes a margin of about 15% for your gauge test and any tension differences.
Tools:
- 6.0 mm (US J-10) crochet hook
- 1 wooden ring, 3 in (7.6 cm) outer diameter
- 4 locking stitch markers
- Tapestry needle and scissors
- Stiff card 7 in (17.8 cm) tall, for the tassel
- Measuring tape
- Rustproof pins and a hand towel, for blocking
Abbreviations (US Terms)
- ch: chain
- sl st: slip stitch
- sc: single crochet
- sc2tog: single crochet 2 together
- dc: double crochet
- sp: space
- st(s): stitch(es)
- beg: beginning
- RS / WS: right side / wrong side
Special stitches:
- Cluster: 3 dc worked into the same space.
- Inc (increase): (3 dc, ch 1, 3 dc) in the same ch-1 sp. This turns one space into 2 clusters.
- Bobble: (Yarn over, insert hook in st, yarn over and pull up a loop, yarn over and draw through 2 loops) 3 times in the same st, then yarn over and draw through all 4 loops on hook. Bobbles worked on a WS row pop out toward the RS.
Gauge and Checkpoints
Gauge: 4 clusters (each counted with its ch-1) = 4 in (10.2 cm) wide, and 5 granny rounds = 4 in (10.2 cm) tall. So each round adds about 0.8 in (2.0 cm). In sc: 4 sc and 4 rows = 1 in (2.5 cm).
Make the first 3 rounds as your test. After Round 3 the cone should measure 8 in (20.3 cm) around and about 2.4 in (6.1 cm) tall. If it does, keep going in the same piece.
Checkpoints:
- After Round 3: 8 in (20.3 cm) around, 4 in (10.2 cm) flat width
- After Round 5: 12 in (30.5 cm) around, 4 in (10.2 cm) tall
- After Round 7: 6 in (15.2 cm) flat width, 5.6 in (14.2 cm) tall
- After back Row 4: 8.8 in (22.4 cm) tall from the tip
If your piece is too big, go down to a 5.5 mm hook. If it is too small, go up to a 6.5 mm hook. Check the stitch height as well as the width. Loose, tall dc stretch downward when the pocket is filled.
Body (Worked in the Round)
Do not turn between rounds. Join every round with a sl st to the top of the beg ch-3. The ch-3 counts as the first dc.
Round 1: Make a magic ring. Ch 3, 2 dc in ring, ch 1, (3 dc in ring, ch 1) 3 times. Join. Pull the ring tightly closed. (4 clusters, 12 dc, 4 ch-1 sp)
Round 2: Sl st in next 2 dc and in next ch-1 sp. (Ch 3, 2 dc, ch 1, 3 dc, ch 1) in same sp. (3 dc, ch 1) in next sp. Inc in next sp, ch 1. (3 dc, ch 1) in last sp. Join. (6 clusters, 18 dc, 6 ch-1 sp)
Place a marker in the center ch-1 of each increase. These 2 markers show the side folds of the pocket. Move them up on every increase round.
Round 3: Sl st to first ch-1 sp. Work a beg inc in that sp (ch 3, 2 dc, ch 1, 3 dc), ch 1. (3 dc, ch 1) in each of next 2 sp. Inc in next sp, ch 1. (3 dc, ch 1) in each of last 2 sp. Join. (8 clusters, 24 dc, 8 ch-1 sp)
Round 4: Sl st to first sp. Beg inc in first sp, ch 1. (3 dc, ch 1) in each of next 3 sp. Inc in next sp, ch 1. (3 dc, ch 1) in each of last 3 sp. Join. (10 clusters, 30 dc, 10 ch-1 sp)
Round 5: Sl st to first sp. Beg inc in first sp, ch 1. (3 dc, ch 1) in each of next 4 sp. Inc in next sp, ch 1. (3 dc, ch 1) in each of last 4 sp. Join. (12 clusters, 36 dc, 12 ch-1 sp)
The 2 increases in each round sit opposite each other, so the cone grows evenly and lies flat when pressed.
Rounds 6–7: Sl st to first sp. Ch 3, 2 dc in same sp, ch 1, (3 dc, ch 1) in each remaining sp. Join. (12 clusters, 36 dc, 12 ch-1 sp each round)
Fasten off. Flatten the cone so the 2 side markers lie on the folds. The ch-1 sp at each fold is a side sp. Each half now has 6 clusters with 5 spaces between them. Choose the smoother half as the back.
Checkpoint: 6 in (15.2 cm) wide flat and 5.6 in (14.2 cm) tall.
Back Panel (Worked in Rows)
The back panel loses one cluster per row, like an upside-down granny triangle. With the RS facing, number the 6 back clusters 1 to 6 from right to left.
Row 1 (RS): Join yarn in the sp between back clusters 1 and 2. Ch 3, 2 dc in same sp, (ch 1, 3 dc in next sp) 4 times. The last cluster sits between clusters 5 and 6. Turn. (5 clusters, 15 dc, 4 ch-1 sp; 5 in / 12.7 cm wide)
Row 2 (WS): Sl st in first 3 dc and in next ch-1 sp. Ch 3, 2 dc in same sp, (ch 1, 3 dc in next sp) 3 times. Turn. (4 clusters, 12 dc, 3 ch-1 sp)
Row 3: Sl st in first 3 dc and in next ch-1 sp. Ch 3, 2 dc in same sp, (ch 1, 3 dc in next sp) 2 times. Turn. (3 clusters, 9 dc, 2 ch-1 sp)
Row 4: Sl st in first 3 dc and in next ch-1 sp. Ch 3, 2 dc in same sp, ch 1, 3 dc in next sp. Turn. (2 clusters, 6 dc, 1 ch-1 sp; 2 in / 5.1 cm wide)
Back clusters 1 and 6 from Round 7 stay uncovered at the outer edges and become part of the opening’s edge.
Checkpoint: 8.8 in (22.4 cm) from the tip to the top of Row 4.
Strap and Ring
Row 5 (conversion row): Ch 1, sc in each of 3 dc, sc in ch-1 sp, sc in each of 3 dc. Turn. (6 sc in sts + 1 sc in sp = 7 sc)
Row 6: Ch 1, sc2tog, sc in next 3 sts, sc2tog. Turn. (5 sc)
Rows 7–16: Ch 1, sc in each st across. Turn. (5 sc each row)
The strap (Rows 5–16) is 12 rows, 3 in (7.6 cm) long and about 1.25 in (3.2 cm) wide. Fasten off and leave a 12 in (30.5 cm) tail.
Pass the strap through the ring from front to back. Fold the last 1.25 in (3.2 cm) down behind it, so the top of Row 16 lines up with Row 7 on the WS. Whipstitch the edge in place through back loops only, so the stitches do not show on the front. About 1.25 in (3.2 cm) of strap stays visible above the panel. This brings the body to 10 in (25.4 cm) from the tip to the ring.
Border
Border gauge: 4 sc = 1 in (2.5 cm). Work 2 sc per granny row-end. Each 0.8 in (2.0 cm) row-end could hold about 3 sc, so 2 sc keeps the edge slightly firm and stops the opening from ruffling. The border is worked in rows around the opening only, from the base of the strap on one side to the base of the strap on the other.
Border Row 1 (RS): With the RS facing, join yarn with a sc in the row-end of Row 4 at the left edge of the back panel. Then work:
- Left back edge: 1 more sc in the same row-end. Then 2 sc in each row-end of Rows 3, 2 and 1, and 1 sc in each of the 3 dc of the uncovered back cluster. (8 + 3 = 11 sc)
- Front rim: 1 sc in the side sp. Then 1 sc in each of the 18 front dc and each of the 5 front ch-1 sp, and 1 sc in the other side sp. (1 + 18 + 5 + 1 = 25 sc)
- Right back edge: 1 sc in each of the 3 dc of the uncovered back cluster, then 2 sc in each row-end of Rows 1, 2, 3 and 4. (3 + 8 = 11 sc)
Turn. (11 + 25 + 11 = 47 sc)
Border Row 2 (WS, bobble row): Ch 1, sc in first st, bobble in next st, sc in next st. Repeat from * to end. (23 bobbles + 24 sc = 47 sts)
Why the math works: 47 is an odd number, so the row starts and ends with a sc, and no bobble sits at either end. That gives 5 bobbles on each back edge and 13 across the front (5 + 13 + 5 = 23). The front rim’s 25 sc fit its 6 in (15.2 cm) width at about 4 sc per inch, so the rim lies flat.
Fasten off and weave in all ends on the WS.
Tassel
Wrap the yarn 40 times around the 7 in (17.8 cm) card. Slide a 12 in (30.5 cm) strand under the wraps at the top and tie it tightly. Cut the loops at the bottom.
Wrap a 24 in (61.0 cm) strand tightly around the bundle 8 to 10 times, 0.75 in (1.9 cm) below the top. Knot it and hide the ends inside the tassel. Trim the tassel evenly to 6 in (15.2 cm).
Thread the two top-tie ends through the center of the magic ring at the tip. Knot them securely on the inside and weave them in. The tassel’s wrapped neck should sit right against the point of the cone.
Final Blocking
- Soak the pocket (not the tassel) in cool water for 10 minutes.
- Squeeze it gently without wringing, then roll it in a towel to remove more water.
- Stuff the pocket loosely with a dry hand towel to round out the front.
- Lay it flat with the back panel down. Pin it to 6 in (15.2 cm) wide and 10 in (25.4 cm) from the tip to the ring.
- Pinch each bobble round and smooth the clusters so the gaps open evenly.
- Let it dry completely. Steam the tassel lightly and comb the strands straight.
Final Quality-Control Checklist
- Round 7 has 12 clusters and 12 ch-1 spaces
- The increase lines sit on the 2 side folds
- Back panel Rows 1–4 have 5, 4, 3 and 2 clusters
- The strap is 5 sc wide and securely stitched behind the ring
- Border Row 1 has 47 sc (11 + 25 + 11)
- Border Row 2 has 23 bobbles, and all of them face the RS
- Size is 6 in (15.2 cm) x 10 in (25.4 cm), plus a 6 in (15.2 cm) tassel
- The tassel is firmly knotted inside the tip
Troubleshooting
- The cone flares into a flat circle: Keep each ch-1 snug and check your round height against the gauge.
- The pocket twists: The increases have drifted. Always increase in the marked spaces.
- The back panel leans: Make sure Row 1 began between clusters 1 and 2 and ended between clusters 5 and 6.
- The rim ruffles: Work Border Row 1 with a 5.5 mm hook.
- The rim pulls in: Check that you worked 2 sc in every row-end.
- The bobbles face the back: Work Border Row 2 with the WS facing.
Care
Hand wash in cool water with mild soap, then dry flat with the pocket stuffed into shape. Comb the tassel gently while it is still damp.
Final Notes
Here is the measurement chain:
- Round 3: 8 in (20.3 cm) around
- Round 7: 6 in (15.2 cm) wide and 5.6 in (14.2 cm) tall
- Back panel: 8.8 in (22.4 cm) tall
- Strap: brings the body to 10 in (25.4 cm) at the ring
- Border: 47 stitches with 23 bobbles framing the opening
- Tassel: adds 6 in (15.2 cm) below the tip
If each checkpoint matches, the finished pocket will match too.
Happy crocheting!