

The Bluebell Swallow is a lacy, one-piece bird motif with a strong, clean outline. It has a solid single crochet body, a small head with a pointed beak, two upswept wings filled with staggered eyelets, and a long forked tail with slim streamers.
The sample is worked in one color, a soft cornflower blue cotton. The look is classic and airy, a little like vintage Irish-style lace, but the construction is simple. The pattern uses US crochet terms throughout.
The finished swallow measures about 7.5 in (19.1 cm) from wingtip to wingtip and about 6.25 in (15.9 cm) from beak to tail tip after blocking.
You’ll work the body first in rows, from the tail base up to the beak. Each wing is then worked outward from the side edge of the body, and the tail is worked downward from the foundation chain. Two rounds of edging tie all the parts into one smooth outline.
Finished Size and Construction
- Finished size: 7.5 in (19.1 cm) wingspan × 6.25 in (15.9 cm) beak to tail tip
- Skill level: Intermediate (shaping in rows, mesh rows, edging around an irregular shape)
- Terminology: US crochet terms
- Yarn weight: Fingering weight (Super Fine #1) mercerized cotton
- Hook: 2.5 mm (US B-1/C-2)
- Number of pieces: 1 (worked in one piece; there’s no joining)
- Layout: One bird with a body, 2 wings and a 2-streamer tail
- Body size: 2.125 in (5.4 cm) wide at the widest point × 3.75 in (9.5 cm) long
- Size before edging: 7.25 in (18.4 cm) wingspan × 6 in (15.2 cm) long
- Edging depth: about 0.125 in (0.3 cm) on every edge
Materials
Yarn: Use a smooth, tightly plied mercerized cotton in fingering weight. Cotton holds the pointed wingtips and tail streamers crisply after blocking, and it shows the eyelets clearly. Avoid fuzzy or very stretchy fibers, because they blur the mesh.
- Cornflower blue: 10 g, about 34 m (37 yd)
The quantity includes a margin for your gauge swatch and weaving in ends. The motif itself uses a little less.
Tools:
– 2.5 mm (US B-1/C-2) crochet hook
– Tapestry needle
– 4 locking stitch markers
– Ruler or tape measure
– Blocking mat, rustproof pins and a spray bottle
– Small sharp scissors
Abbreviations (US Terms)
- ch – chain
- sl st – slip stitch
- sc – single crochet
- dc – double crochet
- sk – skip
- st(s) – stitch(es)
- sp – space
- sc2tog – single crochet 2 together (decrease)
- sc3tog – single crochet 3 together (decrease)
- inc – 2 sc in the same st
- RS / WS – right side / wrong side
Special stitches:
- Mesh A (worked over an odd number of sts): Ch 3 (counts as dc), ch 1, sk next st, dc in next st; repeat from * to end. For a row of 2k + 1 sts, this makes k eyelets.
- Mesh B (worked over an odd number of sts): Ch 3 (counts as dc), dc in next st, ch 1, sk next st, dc in next st; repeat from * until 1 st remains, dc in last st. For a row of 2k + 1 sts, this makes k − 1 eyelets, offset by one stitch from Mesh A.
Both mesh rows keep the same stitch count: each dc and each ch-1 sp counts as 1 st.
Gauge and Checkpoints
Gauge: 26 sc and 28 rows = 4 in (10.2 cm) in sc rows. That’s 6.5 sc and 7 rows per 1 in (2.5 cm). In mesh rows, about 3.5 dc rows = 1 in (2.5 cm).
Because this is a single motif, the body works as your test piece. Make the body first and measure it before starting the wings.
Checkpoints:
1. After Body Row 14: The body measures 2.125 in (5.4 cm) across the 14 sts and 2 in (5.1 cm) tall.
2. After Body Row 26: The body measures 3.75 in (9.5 cm) from foundation chain to beak tip.
3. After each wing: The wing measures about 3.5 in (8.9 cm) from the body edge to the tip and about 2 in (5.1 cm) across its base.
4. After the tail: The tail measures about 2.25 in (5.7 cm) from the foundation chain to the streamer tips, and 1.5 in (3.8 cm) across after Tail Row T4.
5. After edging and blocking: 7.5 in (19.1 cm) × 6.25 in (15.9 cm).
If your body is too big, go down to a 2.25 mm hook. If it’s too small, go up to a 2.75 mm hook. Remake the body and check again. Getting the row gauge right matters as much as stitch gauge here, because the wings are worked into row-ends.
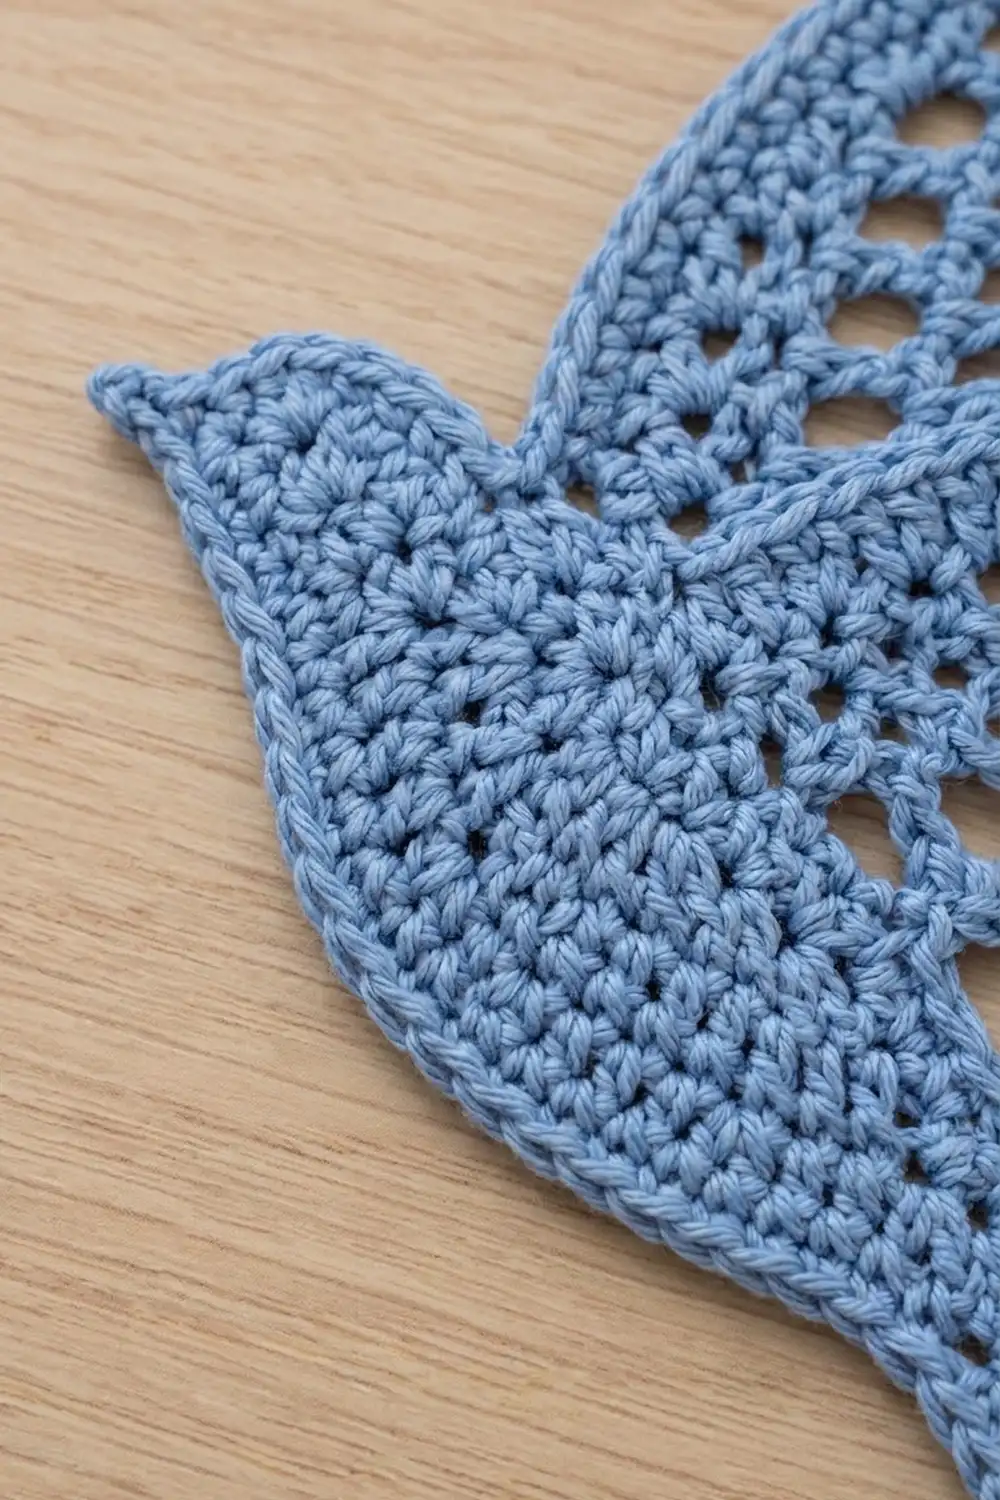
Body
The body is worked in turned rows from the tail base to the beak. Ch 1 at the start of each row does not count as a stitch.
Foundation: Ch 7.
Row 1 (RS): Sc in 2nd ch from hook and in each ch across, turn. (6 sts)
Row 2: Ch 1, inc, sc in next 4 sts, inc, turn. (8 sts)
Row 3: Ch 1, sc in each st across, turn. (8 sts)
Row 4: Ch 1, inc, sc in next 6 sts, inc, turn. (10 sts)
Row 5: Ch 1, sc across, turn. (10 sts)
Row 6: Ch 1, inc, sc in next 8 sts, inc, turn. (12 sts)
Row 7: Ch 1, sc across, turn. (12 sts)
Row 8: Ch 1, inc, sc in next 10 sts, inc, turn. (14 sts)
Rows 9–14: Ch 1, sc across, turn. (14 sts per row)
Checkpoint 1: 2.125 in (5.4 cm) wide.
Row 15: Ch 1, sc2tog, sc in next 10 sts, sc2tog, turn. (12 sts)
Row 16: Ch 1, sc across, turn. (12 sts)
Row 17: Ch 1, sc2tog, sc in next 8 sts, sc2tog, turn. (10 sts)
Row 18: Ch 1, sc2tog, sc in next 6 sts, sc2tog, turn. (8 sts; this is the neck)
Row 19: Ch 1, sc across, turn. (8 sts)
Head:
Row 20: Ch 1, inc, sc in next 6 sts, inc, turn. (10 sts)
Row 21: Ch 1, sc across, turn. (10 sts)
Row 22: Ch 1, sc2tog, sc in next 6 sts, sc2tog, turn. (8 sts)
Row 23: Ch 1, sc2tog, sc in next 4 sts, sc2tog, turn. (6 sts)
Row 24: Ch 1, sc2tog, sc in next 2 sts, sc2tog, turn. (4 sts)
Row 25: Ch 1, sc2tog twice, turn. (2 sts)
Row 26: Ch 1, sc2tog. (1 st; this is the beak tip)
Fasten off. Place a marker in the beak-tip stitch.
Checkpoint 2: 3.75 in (9.5 cm) long.
Wings (Make 2, Worked Off the Body)
Each wing is worked into the row-ends of Body Rows 6–18 on one side. That’s 13 row-ends, so Wing Row 1 has 13 sts. Work the first wing on the right edge of the body, then repeat on the left edge.
Row 1 (RS): Join yarn at the row-end of Body Row 6 (or Row 18 on the second side, so the RS still faces you). Ch 1, work 1 sc in each row-end of Rows 6–18, turn. (13 sts)
Row 2 (WS): Ch 1, sc across, turn. (13 sts)
Row 3: Mesh A, turn. (7 dc + 6 ch-1 sps = 13 sts; 6 eyelets)
Row 4: Ch 1, sc in each dc and ch-1 sp across, ending with sc in the top of the turning ch-3, turn. (13 sts)
Row 5: Mesh B, turn. (13 sts; 5 eyelets)
Row 6: Ch 1, sc2tog, sc in next 9 sts, sc2tog, turn. (11 sts)
Row 7: Mesh B, turn. (11 sts; 4 eyelets)
Row 8: Ch 1, sc across as in Row 4, turn. (11 sts)
Row 9: Mesh A, turn. (11 sts; 5 eyelets)
Row 10: Ch 1, sc2tog, sc in next 7 sts, sc2tog, turn. (9 sts)
Row 11: Mesh A, turn. (9 sts; 4 eyelets)
Row 12: Ch 1, sc2tog, sc in next 5 sts, sc2tog, turn. (7 sts)
Row 13: Mesh A, turn. (7 sts; 3 eyelets)
Row 14: Ch 1, sc2tog, sc in next 3 sts, sc2tog, turn. (5 sts)
Row 15: Mesh A, turn. (5 sts; 2 eyelets)
Row 16: Ch 1, sc2tog, sc in next st, sc2tog, turn. (3 sts)
Row 17: Ch 1, sc3tog. (1 st; this is the wingtip)
Fasten off. Place a marker in the wingtip.
Why the eyelets stagger: Each decrease row merges the first two stitches, which shifts every column by one stitch. The mesh sequence A, B, B, A, A, A, A takes that shift into account, so each eyelet row sits between the eyelets of the row before. Each wing has 29 eyelets: 6 + 5 + 4 + 5 + 4 + 3 + 2.
Checkpoint 3: about 3.5 in (8.9 cm) long. That’s 10 sc rows at about 1.43 in (3.6 cm) plus 7 mesh rows at about 2 in (5.1 cm).
Tail
The tail is worked into the unused loops on the underside of the foundation chain. With the beak pointing away from you, join yarn in the first foundation loop.
Row T1: Ch 1, sc in each of the 6 foundation loops, turn. (6 sts)
Row T2: Ch 1, inc, sc in next 4 sts, inc, turn. (8 sts)
Row T3: Ch 1, sc across, turn. (8 sts)
Row T4: Ch 1, inc, sc in next 6 sts, inc, turn. (10 sts)
First streamer: Work over the first 5 sts of Row T4 only. On every decrease row, work the sc2tog at the fork-side edge, which is the edge next to the center of the tail.
Row S1: Ch 1, sc in next 5 sts, turn. (5 sts)
Row S2: Ch 1, sc across, turn. (5 sts)
Row S3: Ch 1, sc2tog, sc in next 3 sts, turn. (4 sts)
Rows S4–S5: Ch 1, sc across, turn. (4 sts per row)
Row S6: Ch 1, sc2tog, sc in next 2 sts, turn. (3 sts)
Rows S7–S8: Ch 1, sc across, turn. (3 sts per row)
Row S9: Ch 1, sc2tog, sc in next st, turn. (2 sts)
Rows S10–S11: Ch 1, sc across, turn. (2 sts per row)
Row S12: Ch 1, sc2tog. (1 st; this is the tip)
Fasten off.
Second streamer: Join yarn in the 6th st of Row T4 and work Rows S1–S12 over the remaining 5 sts. Again, place every sc2tog at the fork-side edge. Fasten off, and place markers in both tail tips.
Checkpoint 4: 2.25 in (5.7 cm) from the foundation chain to the tips. That’s 16 rows at 7 rows per inch.
Border (Edging)
The edging runs all the way around the bird in 2 rounds.
Border gauge: Work 1 sc per sc stitch or sc row-end, and 2 sc per dc row-end. This matches the 7-per-inch row gauge: one dc row is about 2/7 in, so 2 sc fill it.
Round 1: With RS facing, join yarn at the marked beak tip. Work the segments below in order, starting on the right side of the bird. When you reach a marked tip, work 3 sc into the tip stitch.
| Segment | Stitches |
|---|---|
| Beak tip | 3 sc |
| Right head/neck (row-ends of Body Rows 25–20) | 6 sc |
| Upper armpit (row-end of Body Row 19 + Wing Row 1 together) | 1 sc2tog |
| Upper wing edge (Rows 2–16: 8 sc rows + 7 mesh rows × 2) | 22 sc |
| Wingtip | 3 sc |
| Lower wing edge (Rows 16–2) | 22 sc |
| Lower armpit (Wing Row 1 + Body Row 5 together) | 1 sc2tog |
| Body side (Body Rows 4–1) | 4 sc |
| Tail base (Rows T1–T4) | 4 sc |
| Streamer outer edge (Rows S1–S11) | 11 sc |
| Streamer tip | 3 sc |
| Streamer inner edge (Rows S11–S2) | 10 sc |
| Tail fork (Row S1 of both streamers together) | 1 sc2tog |
That’s 87 sts on the right half. After the fork, work the left half as a mirror image: 10 inner, 3 tip, 11 outer, 4 tail base, 4 body, 1 sc2tog, 22, 3 wingtip, 22, 1 sc2tog, 6 neck. That’s another 87 sts.
Join with sl st to the first sc. Total: 3 + 87 + 1 + 87 = 178 sts.
Round 2: Ch 1, sl st through the back loop of each sc around, keeping the stitches firm. Join to the first sl st and fasten off. (178 sl sts)
This round gives the crisp, slightly raised outline that frames the bird.
Why the math works: Every edge stitch is counted exactly once. The three marked points (beak, 2 wingtips, 2 tail tips) each get 3 sc to make a sharp point. The three inside corners (2 armpits per side and the tail fork) each use one sc2tog, so they pull in cleanly instead of ruffling. Both halves of the bird mirror each other at 87 sts, and the round only adds about 0.125 in (0.3 cm) on each edge. That takes the motif from 7.25 in (18.4 cm) × 6 in (15.2 cm) to 7.5 in (19.1 cm) × 6.25 in (15.9 cm).
Final Blocking
- Weave in all ends through the solid sc areas, not through the mesh, so they stay hidden.
- Mist the motif until it’s damp but not dripping.
- Lay the motif RS up on the blocking mat with the body pointing straight up.
- Pin the beak tip, then pin the body straight and 3.75 in (9.5 cm) long, not counting the edging.
- Angle each wing upward about 40–45° from horizontal. Pin each wingtip so the tips end up 7.5 in (19.1 cm) apart.
- Pin along each wing edge every 0.5 in (1.3 cm) so the edges stay straight.
- Open each eyelet gently with a pin tip or a toothpick.
- Spread the two streamers into a narrow V and pin each tip so the bird measures 6.25 in (15.9 cm) from beak to tail tip.
- Let it dry completely before you remove the pins.
Final Quality-Control Checklist
- [ ] Body is 14 sts at its widest and has 26 rows
- [ ] Each wing has 17 rows, 29 eyelets and a single-stitch tip
- [ ] The eyelet rows are visibly staggered
- [ ] Each streamer has 12 rows and ends in 1 st
- [ ] Edging Round 1 has 178 sts, with 87 on each half
- [ ] All 5 points are sharp and all 3 inside corners are smooth
- [ ] Wingspan is 7.5 in (19.1 cm) and length is 6.25 in (15.9 cm)
- [ ] No ends show through the mesh
Troubleshooting
The wing ruffles where it meets the body. Your Wing Row 1 stitches are too loose. Work them firmly, or use a hook 0.25 mm smaller for that row only.
The eyelets line up instead of staggering. You’ve swapped Mesh A and Mesh B. Check the sequence after Row 5: Rows 7 and 9 should be B, then A.
The wing count is off after a mesh row. You probably forgot to count the turning ch-3 as a stitch, or skipped the sc into it on the next row.
The tips are rounded. Make sure you work all 3 sc into the single tip stitch, then pin the tip hard while blocking.
The edging puckers. Check that you’re working 2 sc (not 1) into each dc row-end.
The edging flares. You’re working too many stitches into the sc row-ends. Work exactly 1 per row-end.
The tail streamers curl. Pin them flat and damp until fully dry, and keep the sc2tog on the fork-side edge.
Care
Hand wash in cool water with mild soap and press out the water in a towel; don’t wring it. Lay flat and reshape, pinning the tips if needed, until dry.
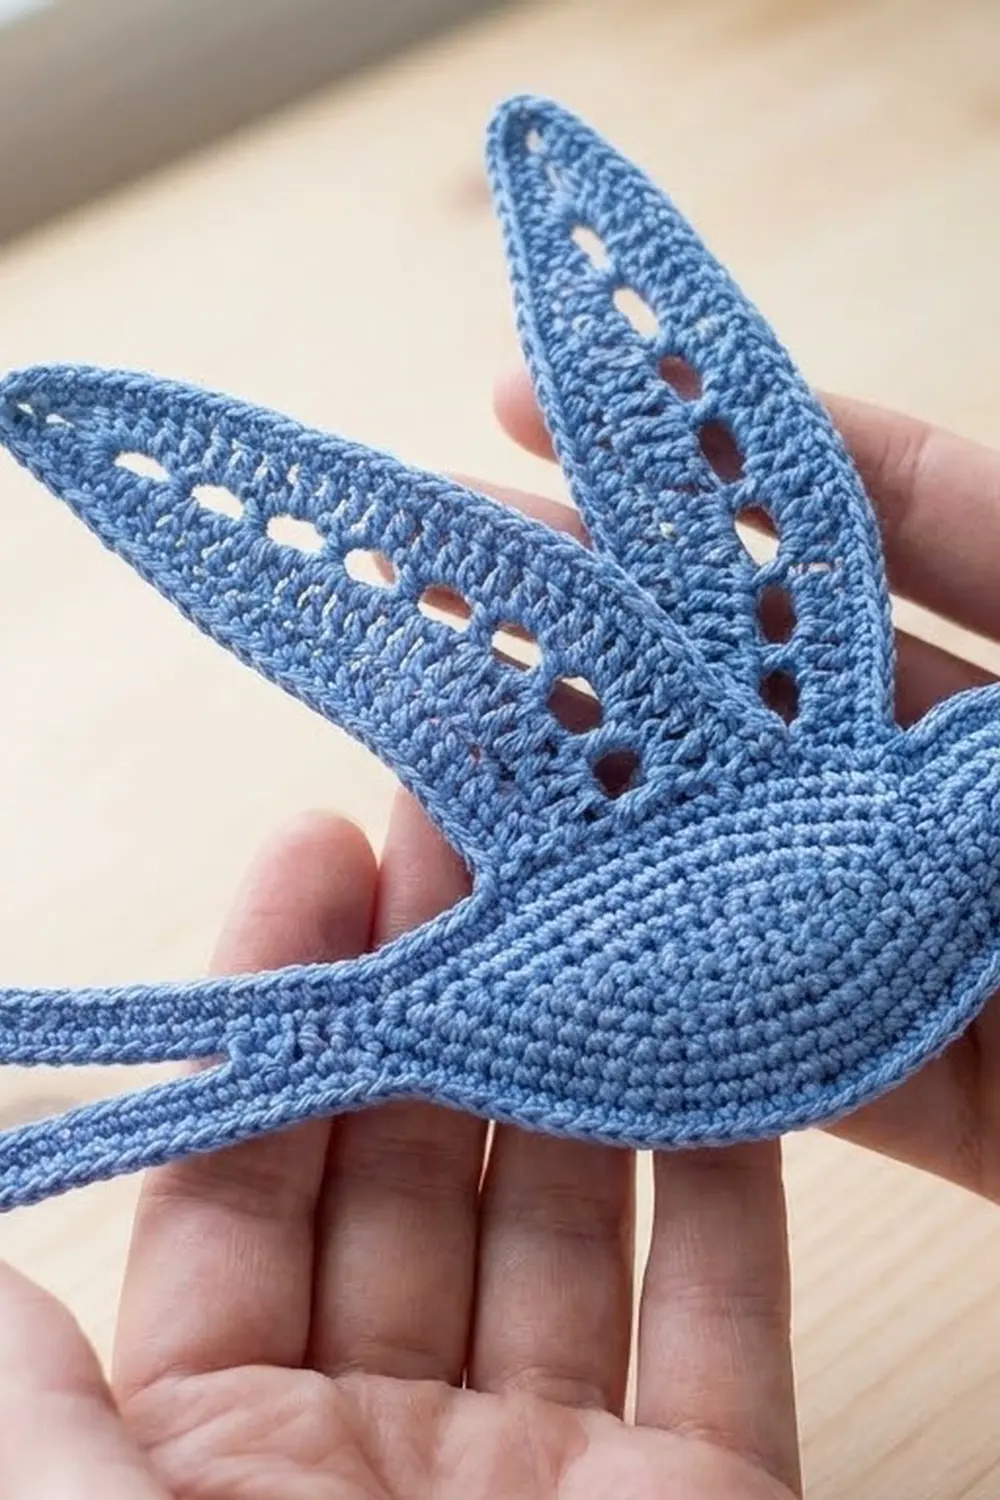
Final Notes
The measurements build in a simple chain:
- Gauge: 6.5 sc and 7 rows per 1 in (2.5 cm)
- Body: 2.125 in (5.4 cm) × 3.75 in (9.5 cm)
- Each wing: 3.5 in (8.9 cm)
- Tail: 2.25 in (5.7 cm)
- Before edging: 7.25 in (18.4 cm) × 6 in (15.2 cm)
- Edging: a 178-stitch round, adding 0.125 in (0.3 cm) per edge
- Finished: 7.5 in (19.1 cm) × 6.25 in (15.9 cm)
If you check the body against Checkpoints 1 and 2 before starting the wings, the rest of the bird will fall into place. Use your swallow as an appliqué, a sachet topper or a single decoration.
Happy crocheting!