

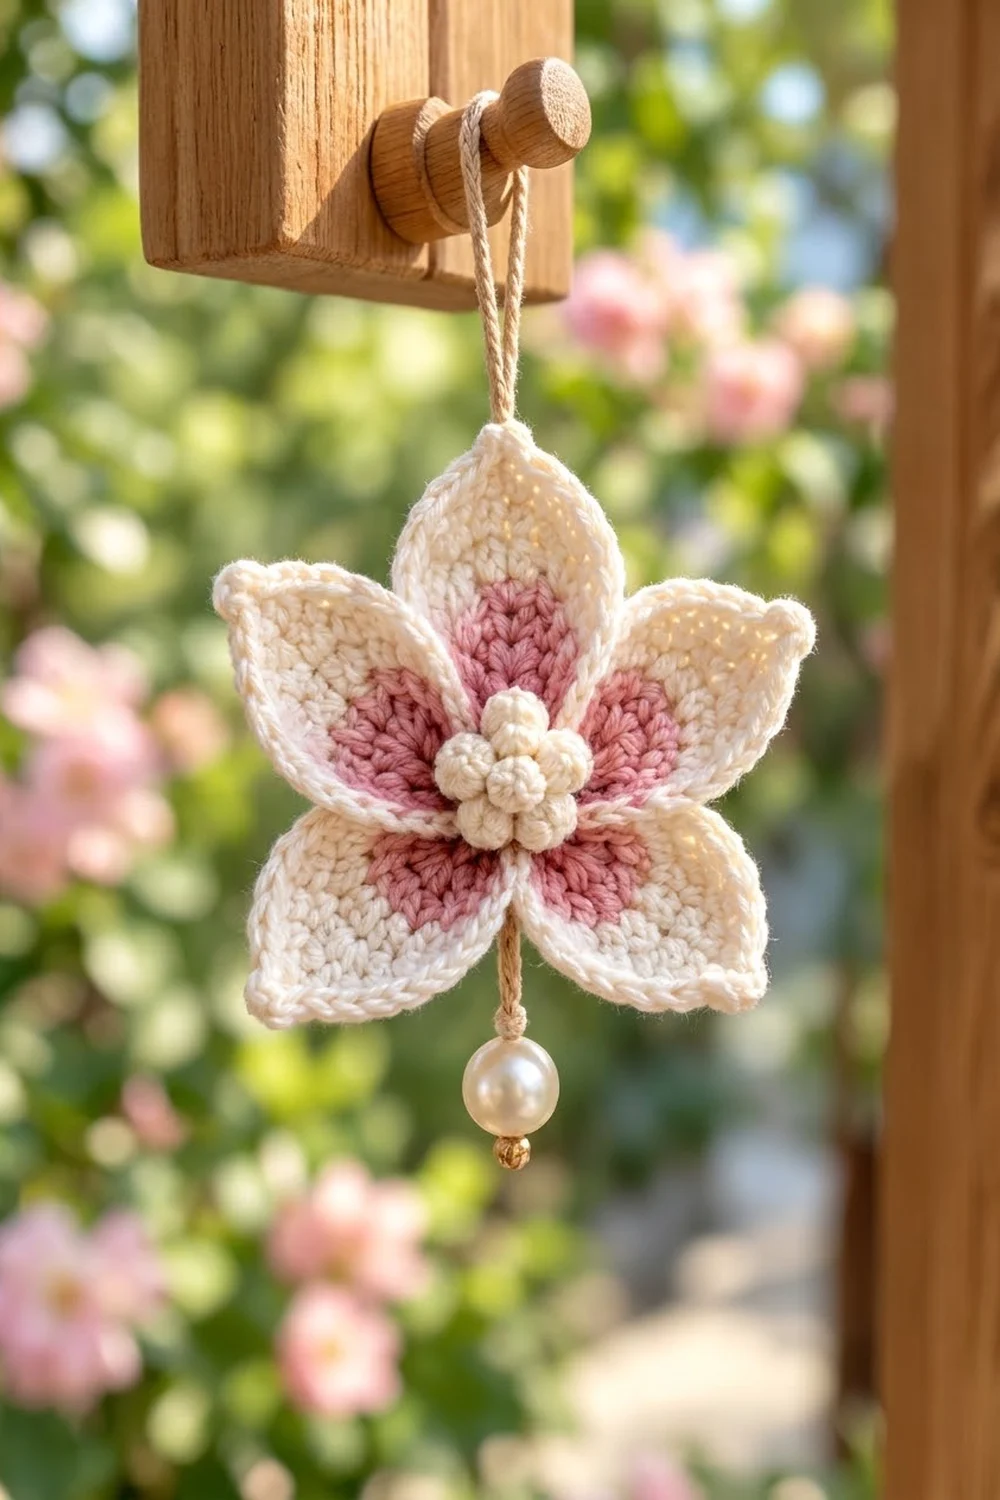
This little flower ornament has five pointed petals around a raised cluster of cream bobbles. A tan cord runs up from the top petal to hang it, and a single pearl bead dangles below the flower. It looks lovely on a window latch, a cabinet knob, a bag handle, or a gift.
Each petal is dusty rose near the center and creamy ivory toward the tip. One cream outline traces every petal, so the colors look soft but still neat. The style is cottage-romantic: plain stitches, gentle color, and one shiny accent.
This pattern uses US crochet terms. The finished flower measures about 4.2 in (10.7 cm) wide from tip to tip and 4.0 in (10.2 cm) tall. That height does not include the cord or bead.
You crochet the flower as seven small pieces. First, work five petals in single crochet rows from the base to the tip, changing from pink to cream partway up. Then sew the petals into a star and work one continuous cream border around the outside edge. To finish, add a ring of six bobbles with one bobble in the middle, thread the cord through, and tie on the pearl.
Finished Size and Construction
- Finished size: 4.2 in (10.7 cm) wide x 4.0 in (10.2 cm) tall, not including the hanger
- Skill level: Easy / advanced beginner
- Terminology: US crochet terms
- Yarn weight: Sport (2), cotton or cotton blend
- Hook: 3.25 mm (US D/3)
- Number of pieces: 7 (5 petals, 1 bobble ring, 1 center bobble)
- Layout: 5 petals in a star, with one petal pointing straight up
- Petal size before border: 1.6 in (4.1 cm) wide x 2.0 in (5.1 cm) long
- Flower size before border: about 3.8 in (9.7 cm) wide x 3.6 in (9.1 cm) tall
- Border depth: 1 round of single crochet, about 0.2 in (0.5 cm)
- Petal size after border: 2.0 in (5.1 cm) wide x 2.2 in (5.6 cm) long
Materials
Choose a smooth, mercerized or matte cotton in sport weight. Cotton holds the petal points crisp and shows the bobbles clearly. Fuzzy or very loose yarn will blur the outline.
- Cream (Color A): 10 g, about 30 m
- Dusty rose (Color B): 4 g, about 12 m
- Tan waxed cotton cord, 1 mm: 18 in (45.7 cm)
- Ivory pearl bead, 12 mm, with a hole that fits your cord when doubled
- Small wooden or pearl bead, 4 mm (optional, as a stopper under the pearl)
Tools:
- 3.25 mm (US D/3) crochet hook
- Tapestry needle
- Scissors
- Stitch marker
- Ruler or tape measure
- Spray bottle and blocking pins
All yarn amounts include about a 20% margin for your gauge swatch and weaving in ends.
Abbreviations (US Terms)
- ch – chain
- sl st – slip stitch
- sc – single crochet
- sc2tog – single crochet 2 together
- dc – double crochet
- MR – magic ring
- st(s) – stitch(es)
- rnd – round
Special stitch – Bobble (4-dc bobble): Yarn over, insert hook in the stitch, yarn over and pull up a loop, yarn over and pull through 2 loops. Repeat from * to * 3 more times in the same stitch (5 loops on hook). Yarn over and pull through all 5 loops.
Color change: Work the last stitch of the old color until 2 loops remain. Then yarn over with the new color and pull through.
Gauge and Checkpoints
Gauge: 20 sc and 24 rows = 4 in (10.2 cm) in sc rows. That works out to 5 sts per inch, so each stitch is 0.2 in (0.5 cm) wide and each row is about 0.17 in tall.
For this small piece, use your first petal as the swatch.
- After Row 5 (pink section): Width 8 sts = 1.6 in (4.1 cm). Length about 0.8 in (2.0 cm).
- After Row 12 (finished petal): Length 2.0 in (5.1 cm) from base to tip.
- After joining: Flower about 3.8 in (9.7 cm) wide.
- After border: Flower 4.2 in (10.7 cm) wide x 4.0 in (10.2 cm) tall.
If your petal is too big: Go down to a 3.0 mm hook, or make the loops on your hook smaller.
If your petal is too small: Go up to a 3.5 mm hook.
Use the same hook for all seven pieces so the petals match.
Petal (Make 5)
Work in rows. Ch 1 at the start of each row does not count as a stitch, and you work 1 sc into each stitch unless the instructions say otherwise. Row 1 is the base of the petal, which goes at the flower center.
With Color B (dusty rose):
Row 1: Ch 3. Sc in 2nd ch from hook and in next ch. Turn. (2 sts)
Row 2: Ch 1, 2 sc in each st across. Turn. (4 sts)
Row 3: Ch 1, 2 sc in first st, sc in next 2 sts, 2 sc in last st. Turn. (6 sts)
Row 4: Ch 1, 2 sc in first st, sc in next 4 sts, 2 sc in last st. Turn. (8 sts)
Row 5: Ch 1, sc in each st across. On the last st, change to Color A. Turn. (8 sts)
Cut Color B, leaving a 6 in (15.2 cm) tail. Check the width now: it should be 1.6 in (4.1 cm).
With Color A (cream):
Row 6: Ch 1, sc in each st across. Turn. (8 sts)
Row 7: Ch 1, sc in each st across. Turn. (8 sts)
Row 8: Ch 1, sc2tog, sc in next 4 sts, sc2tog. Turn. (6 sts)
Row 9: Ch 1, sc in each st across. Turn. (6 sts)
Row 10: Ch 1, sc2tog, sc in next 2 sts, sc2tog. Turn. (4 sts)
Row 11: Ch 1, sc2tog twice. Turn. (2 sts)
Row 12: Ch 1, sc2tog. (1 st) This stitch forms the petal tip.
Fasten off and weave in the tails.
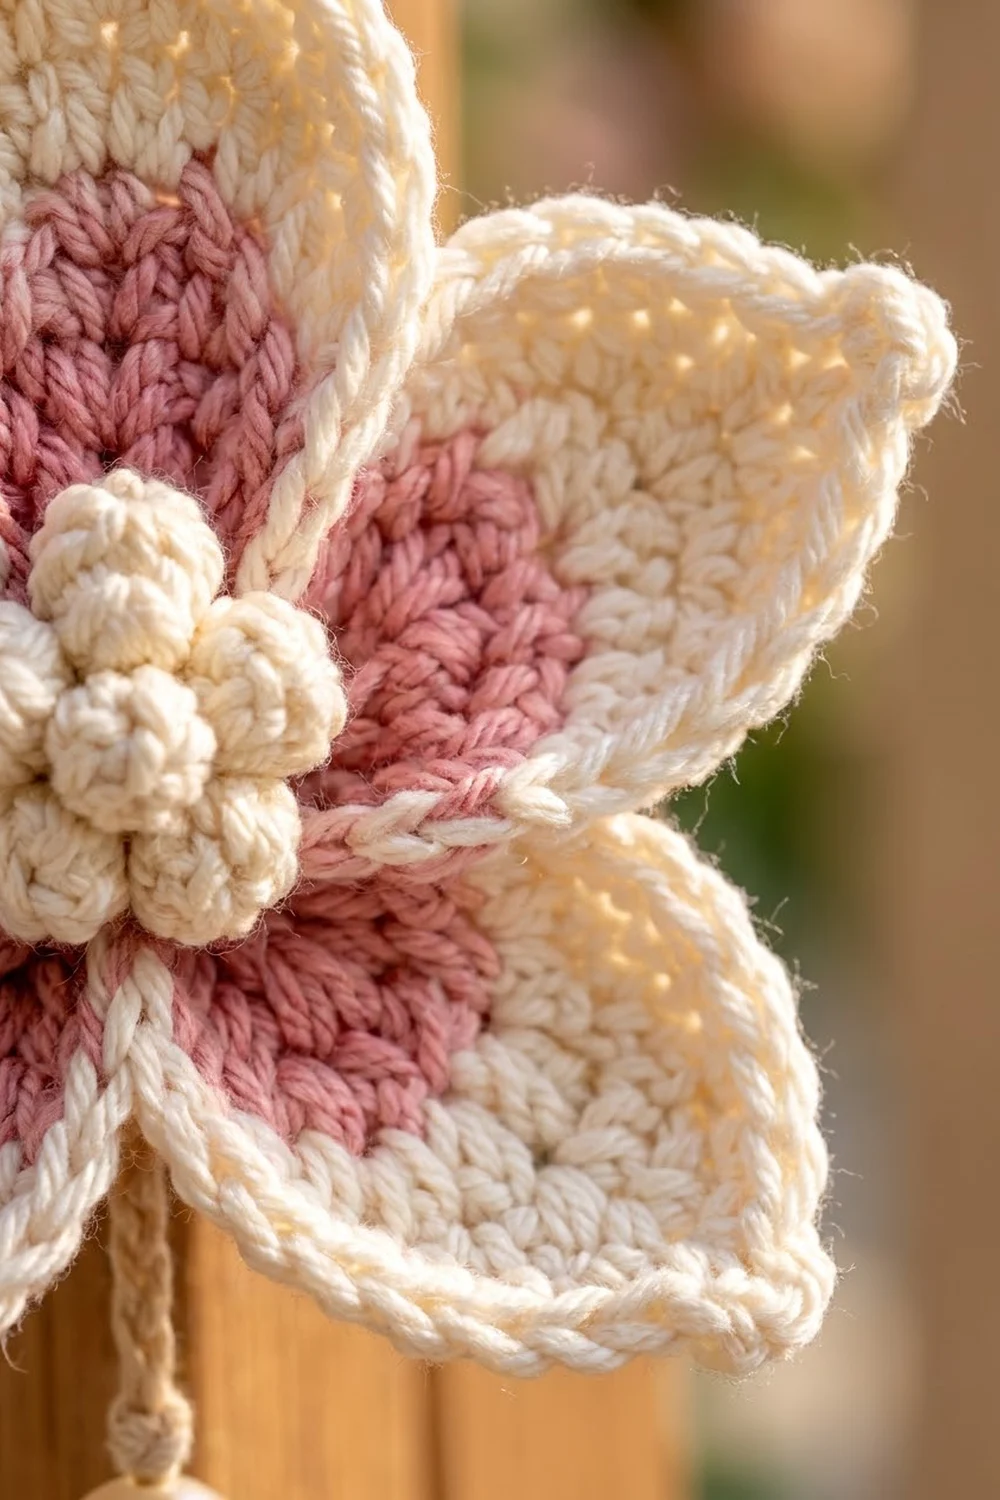
The petal is 12 rows long: 5 rose rows and 7 cream rows. That puts a rose patch at the base and a longer cream section at the tip. Each long side has 12 row-ends. The rose tail and the base chain will be hidden at the center later.
Center Bobble Ring (Make 1)
With Color A:
Rnd 1: MR, ch 1, 6 sc in ring. Pull the ring closed and sl st to the first sc. (6 sts)
Rnd 2: Ch 2 (does not count as a stitch). Bobble in next st, ch 1. Repeat from * to * 5 more times. Sl st to the top of the first bobble. (6 bobbles + 6 ch = 12 sts)
Fasten off and leave a 12 in (30.5 cm) tail for sewing. Push each bobble out to the right side. The ring should measure about 1.0 in (2.5 cm) across.
Center Bobble (Make 1)
With Color A: Make a MR, ch 2, and work 1 bobble into the ring. Pull the ring tight, ch 1 to lock it, and fasten off. Leave an 8 in (20.3 cm) tail. The bobble should be about 0.4 in (1.0 cm) across.
Make All Pieces
Make these pieces and check them before you join:
- Petals: 5. Each uses Color B for Rows 1–5 and Color A for Rows 6–12.
- Bobble ring: 1 in Color A
- Center bobble: 1 in Color A
Layout (right side facing you):
            [P1]
              |
   [P5] ----- O ----- [P2]
             / \
          [P4] [P3]
P1 points straight up. P2 and P5 angle up to the sides, and P3 and P4 angle downward. O is the center, where all five Row 1 bases meet. The pearl will hang in the gap between P3 and P4.
Joining
Method: Whipstitch with Color A and a tapestry needle, working on the wrong side.
- Base ring. Lay the five petals right side down in the layout shown. Thread 12 in (30.5 cm) of Color A. Pass the needle through the 2 foundation loops of Row 1 on each petal in order, P1 through P5. Pull the yarn so the five bases close into a tight ring with no hole. Knot it.
- Side tacks. Line up the row-ends of Rows 1 and 2 where neighboring petals touch, such as the left edge of P1 and the right edge of P2. Whipstitch through 1 row-end from each petal for each of those 2 rows. That gives 2 stitches at each of the 5 seams, for 10 tacks in total.
- Leave the rest free. Rows 3–12 stay unjoined so each petal can show its own outline and point.
Tension: Pull each tack just snug. If you pull too tight, the center will cup. If you leave it loose, a gap will open between the petals.
Size checkpoint: Lay the flower flat. It should measure about 3.8 in (9.7 cm) from the P2 tip to the P5 tip, and 3.6 in (9.1 cm) from the P1 tip to the bottom edge of P3 and P4.
Border
Work the border with Color A on the right side, in one continuous round. Use the same 3.25 mm hook. One sc row-end equals about 1 sc border stitch, so the border will lie flat.
Border per-side count: Each free petal side has 9 row-ends (Rows 3–11). Row 12 is the tip stitch, and Rows 1–2 are already in the seams.
Rnd 1: Join Color A with a sl st in the Row 3 row-end on the right side of P1. Ch 1. Then repeat this for each petal, going clockwise:
- Right side going up: 1 sc in each row-end from Row 3 to Row 11. (9 sc)
- Tip: 3 sc in the Row 12 tip stitch. (3 sc)
- Left side going down: 1 sc in each row-end from Row 11 to Row 3. (9 sc)
- Valley: sc2tog, inserting the hook into the joined Row 2 row-ends of this petal and the next petal. (1 st)
Repeat for all 5 petals and sl st to the first sc.
- Per petal: 9 + 3 + 9 + 1 = 22 sts
- Round total: 5 petals x 22 = 110 sts
- By section: 5 petals x 2 sides x 9 sc = 90 side sts, plus 15 tip sts, plus 5 valley sts = 110
Fasten off and weave in the ends.
Why the math works: At this gauge, one sc row-end is very close to the width of one sc, so 1 sc per row-end will not ruffle or pull in. The 3 sc at each tip turn the corner and sharpen the point. The single sc2tog in each valley pulls the edge in where the petals meet, so every petal gets its own outline. The border adds about 0.2 in (0.5 cm) all around, which brings the petals to 2.0 in (5.1 cm) wide x 2.2 in (5.6 cm) long.
Assembly of Center, Cord, and Pearl
- Bobble ring. Center it over the joined bases on the right side. Whipstitch through the Rnd 1 sts into the petal bases.
- Center bobble. Set it in the middle of the ring and sew it through the flower center. Knot on the back.
- Cord. Fold the 18 in (45.7 cm) cord in half to make a hanging loop about 4 in (10.2 cm) long. Knot the loop at the P1 tip. Run both strands down the wrong side of P1 and through the center, then bring them out at the valley between P3 and P4. Tack the cord to the back of P1 every 0.6 in (1.5 cm) with cream yarn.
- Pearl. Leave about 1 in (2.5 cm) of cord below the valley. Thread the pearl, add the stopper bead if you are using one, tie a double knot, and trim to 0.25 in (0.6 cm).
Final Blocking
- Lightly spray the flower with water until it is damp, but not soaked.
- Pin it right side up on a foam board.
- Pin each tip out so the flower measures 4.2 in (10.7 cm) wide and 4.0 in (10.2 cm) tall.
- Pinch each petal point into shape and place a pin right at the tip.
- Push the valleys gently toward the center so the five petals are evenly spaced.
- Do not pin or flatten the bobbles. Shape them round with your fingers.
- Let the flower dry completely before you unpin it.
Final Quality-Control Checklist
- [ ] All 5 petals have 5 rose rows and 7 cream rows.
- [ ] Each petal is 1.6 in (4.1 cm) wide at Row 5 and 2.0 in (5.1 cm) long before the border.
- [ ] The base ring is closed with no hole showing.
- [ ] The border has 110 sts: 22 per petal.
- [ ] All 5 tips are sharp, and all 5 valleys are tight.
- [ ] The flower measures 4.2 in (10.7 cm) x 4.0 in (10.2 cm).
- [ ] All 7 bobbles stand out on the right side.
- [ ] The hanging loop is centered over P1, and the pearl hangs between P3 and P4.
- [ ] All ends are woven in and the knots are hidden on the back.
Troubleshooting
Petals are different sizes. Your tension changed between petals. Measure Row 5 on each petal and redo any petal that is off by more than 0.1 in (0.3 cm).
The pink section looks jagged at the color change. Make sure you changed color on the last yarn over of Row 5, not at the start of Row 6.
The border ruffles. You probably added extra sc along the sides. Count 9 per side. If the count is right, go down 0.25 mm in hook size for the border only.
The border pulls the petals into a cup. Your border is too tight. Go up 0.25 mm in hook size, or work the sc more loosely.
The tips look rounded. Put the 3 tip sc into the single Row 12 stitch only, and pin the tips firmly when you block.
The flower center sags. Add one or two more tacks through the bobble ring into the petal bases.
The bobbles lie flat. Push each one out from the wrong side. Next time, keep all 4 loops of each dc the same height before you close the bobble.
Care
Spot clean or hand wash in cool water with mild soap, then reshape and dry flat. Remove the pearl first, or keep it dry if its coating is delicate.
Final Notes
The measurements build on each other. Gauge is 5 sts per inch. Each petal reaches 1.6 in (4.1 cm) wide at Row 5 and 2.0 in (5.1 cm) long at Row 12. The joined flower measures about 3.8 in (9.7 cm) wide. The 110-stitch border then brings it to 4.2 in (10.7 cm) x 4.0 in (10.2 cm). If you check each stage, the flower will finish at the right size.
Happy crocheting!