

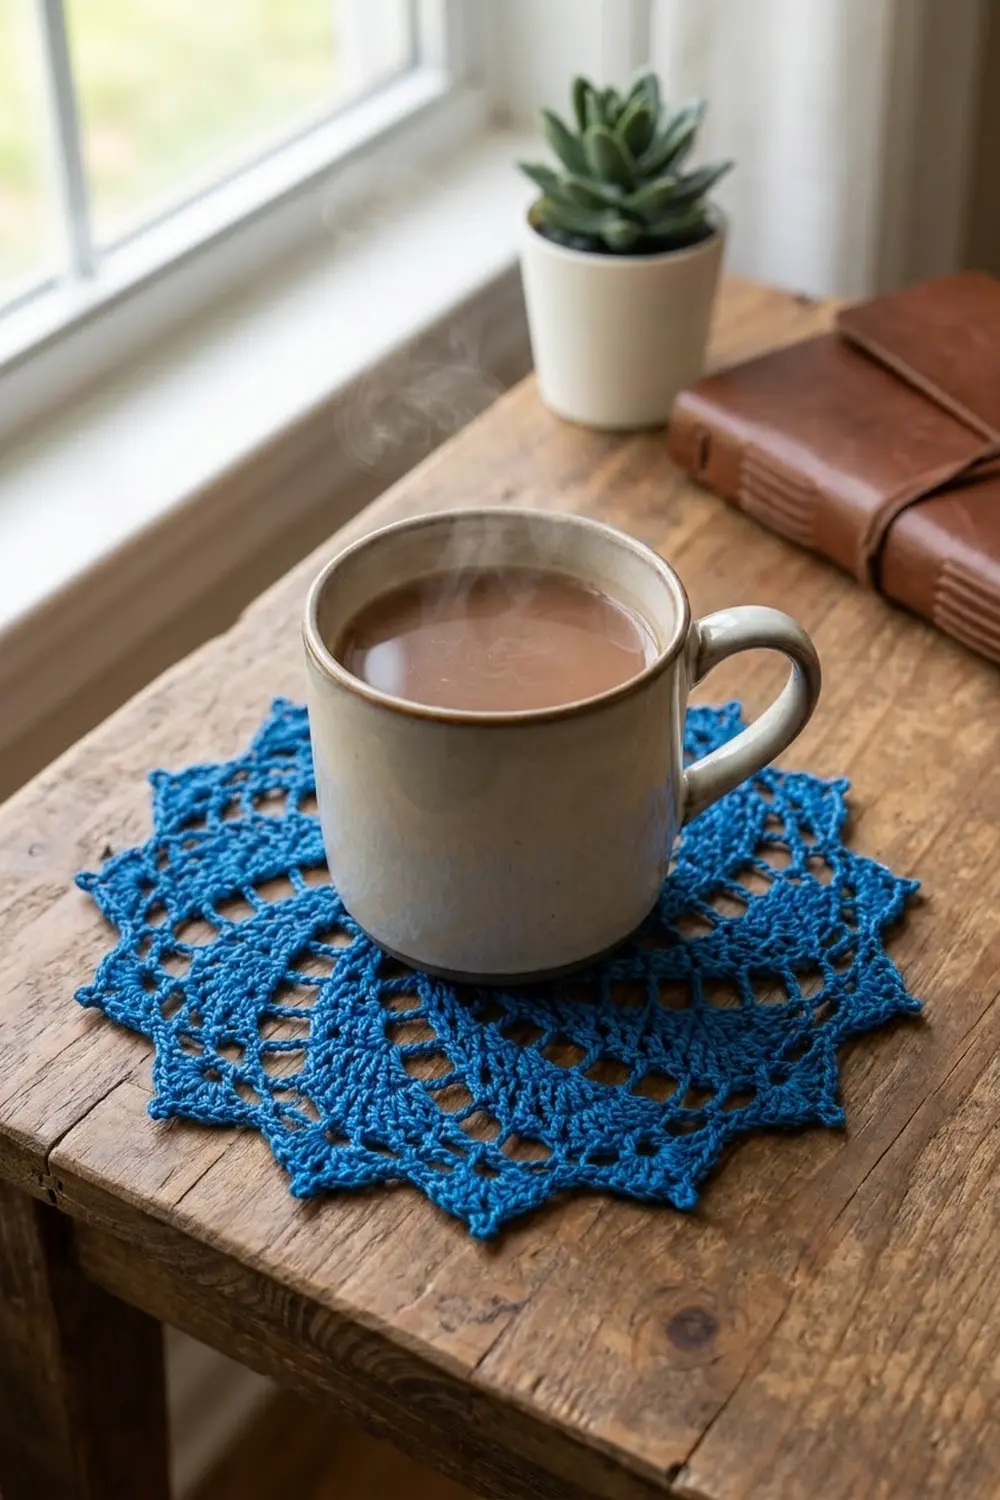
The Cobalt Whirl Mini Doily is a small round lace motif with a lot of movement. Twelve slim arms of double crochet spin out from a tiny center hole and finish in a ring of pointed, picot-tipped scallops. Seen from a distance it looks like a pinwheel caught mid-turn.
This sample is made in one strong cobalt blue thread. A single saturated color lets the spiral read clearly and keeps the lace looking crisp and modern. It works as a coaster, a table accent under a small vase, or a doily to frame and hang.
The pattern uses US crochet terms. The finished doily is 7 in (17.8 cm) across from point to point after blocking, and 6.25 in (15.9 cm) across before the edging.
Construction is simple and fully in the round. You work a solid center, then a round of spaces. Starting in Round 3, the arms move over by part of a group each round, which makes the swirl. The chain spaces between arms get longer every round. A final round shapes the 12 points and adds a picot to each one.
Finished Size and Construction
- Finished size: 7 in (17.8 cm) across, point to point
- Skill level: Easy-intermediate
- Terminology: US crochet terms
- Yarn weight: Size 3 crochet cotton thread (light fingering)
- Hook: 2.25 mm (US B-1)
- Number of pieces: 1
- Layout: Single round motif, 12 spiral repeats
- Piece size: 7 in (17.8 cm) across
- Size before border: 6.25 in (15.9 cm) across, after Round 8
- Border depth: 0.375 in (1.0 cm) on each side
Materials
Yarn: Use a mercerized cotton thread in size 3, or a smooth 100% cotton light fingering yarn. Mercerized cotton gives clear stitches and blocks into sharp points, both of which matter for the swirl. Avoid fuzzy or very stretchy fibers, because they blur the arms and the points won’t hold.
- Cobalt blue: about 25 g (approximately 115 m / 126 yd)
This amount includes a margin of roughly 40% above what the sample used, so you have enough for a gauge swatch and a little frogging.
Tools:
- 2.25 mm (US B-1) crochet hook
- Fine tapestry needle for weaving in ends
- Scissors
- Stitch marker
- Blocking board or foam mat
- Rust-proof pins
- Spray bottle with clean water
- Optional: light spray starch
Abbreviations (US Terms)
- ch – chain
- sl st – slip stitch
- sc – single crochet
- hdc – half double crochet
- dc – double crochet
- tr – treble crochet
- sp – space
- st(s) – stitch(es)
- rep – repeat
- beg – beginning
Special stitch – Picot: Ch 3, sl st in the 3rd ch from the hook.
Note on groups: A “group” means the dc stitches standing next to each other between two chain spaces. In every round, the beg ch-3 counts as the first dc of the first group.
Gauge and Checkpoints
The doily is one piece, so your first few rounds are your gauge swatch. Work Rounds 1–2 and measure them before you go on.
Gauge: Rounds 1–2 = 1.75 in (4.4 cm) across, lightly pressed flat.
Checkpoints (measured flat, before blocking):
- After Round 1: 1 in (2.5 cm)
- After Round 2: 1.75 in (4.4 cm)
- After Round 3: 2.5 in (6.4 cm)
- After Round 4: 3.25 in (8.3 cm)
- After Round 5: 4 in (10.2 cm)
- After Round 6: 4.75 in (12.1 cm)
- After Round 7: 5.5 in (14.0 cm)
- After Round 8: 6.25 in (15.9 cm)
- After Round 9 (blocked): 7 in (17.8 cm), point to point
Too big? Go down to a 2.0 mm hook, or tighten your chains. Loose chains are the most common reason the lace spreads too much.
Too small? Go up to a 2.5 mm hook. If the center cups, your chains are probably tight. Make them a little looser rather than changing the dc stitches.
A difference of 0.25 in (0.6 cm) at any checkpoint is fine. Blocking will even it out.

Pattern
Round 1 (Center)
Make a magic ring. Ch 3 (counts as dc), work 23 dc into the ring. Pull the ring closed, leaving a small hole about 0.25 in (0.6 cm) wide. Join with sl st to the top of the beg ch-3.
Count: 24 dc.
Round 2 (Open Ring)
Ch 3 (counts as dc), dc in the next st, ch 2, dc in each of the next 2 sts, ch 2; rep from * 10 more times. Join with sl st to the top of the beg ch-3.
Count: 24 dc in 12 groups of 2 dc, and 12 ch-2 sps.
To move into position: sl st in the next dc, then sl st into the next ch-2 sp.
Round 3 (The Swirl Begins)
From here on, each group starts in the chain space and then climbs onto the first stitch(es) of the old group. The last stitch(es) of the old group are skipped. That small step is what turns the circle into a spiral.
Ch 3 (counts as dc), dc in the same sp, dc in the next dc, ch 2, skip the next dc, 2 dc in the next ch-2 sp, dc in the next dc, ch 2, skip the next dc; rep from * 10 more times. Join with sl st to the top of the beg ch-3.
Count: 36 dc in 12 groups of 3 dc, and 12 ch-2 sps.
To move into position: sl st in each of the next 2 dc, then sl st into the next ch-2 sp.
Round 4
Ch 3 (counts as dc), dc in the same sp, dc in each of the next 2 dc, ch 3, skip the next dc, 2 dc in the next ch-2 sp, dc in each of the next 2 dc, ch 3, skip the next dc; rep from * 10 more times. Join with sl st to the top of the beg ch-3.
Count: 48 dc in 12 groups of 4 dc, and 12 ch-3 sps.
To move into position: sl st in each of the next 3 dc, then sl st into the next ch-3 sp.
Round 5
The groups now stay at 4 dc. Each round adds 2 dc in the space and skips the last 2 dc of the old group, so the arm moves over by 2 stitches and its width doesn’t change.
Ch 3 (counts as dc), dc in the same sp, dc in each of the next 2 dc, ch 4, skip the next 2 dc, 2 dc in the next ch-3 sp, dc in each of the next 2 dc, ch 4, skip the next 2 dc; rep from * 10 more times. Join with sl st to the top of the beg ch-3.
Count: 48 dc in 12 groups of 4 dc, and 12 ch-4 sps.
To move into position: sl st in each of the next 3 dc, then sl st into the next ch-4 sp.
Round 6
Work as Round 5, but ch 5 between groups (working the 2 dc into each ch-4 sp).
Count: 48 dc in 12 groups of 4 dc, and 12 ch-5 sps.
Move into position as before.
Round 7
Work as Round 5, but ch 6 between groups (working the 2 dc into each ch-5 sp).
Count: 48 dc in 12 groups of 4 dc, and 12 ch-6 sps.
Move into position as before.
Round 8
Work as Round 5, but ch 7 between groups (working the 2 dc into each ch-6 sp). Join with sl st to the top of the beg ch-3. Do not move into a space. Your hook is now on the first dc of the first group, ready for the border.
Count: 48 dc in 12 groups of 4 dc, and 12 ch-7 sps.
Checkpoint: The doily should measure 6.25 in (15.9 cm) across. You should see 12 clear curved arms all turning the same way. Lay it flat. A gentle wave is normal at this stage, but strong ruffling means your chains are too loose. Strong cupping means they are too tight.
Border
Border gauge: The finished point round adds 0.375 in (1.0 cm) all around, bringing the doily from 6.25 in (15.9 cm) to 7 in (17.8 cm) point to point.
Round 9 (Picot Points)
Ch 1. Sc in each of the next 4 dc. In the next ch-7 sp, work (hdc, dc, 2 tr, picot, 2 tr, dc, hdc); rep from * 11 more times. Join with sl st to the first sc. Fasten off.
Count per repeat: 4 sc + 8 sts in the space (hdc, dc, 2 tr, 2 tr, dc, hdc) = 12 sts, plus 1 picot.
Total: 12 repeats × 12 sts = 144 sts plus 12 picots.
Why the math works: Each repeat starts from the Round 8 count of 4 dc + 1 ch-7 sp. The 4 sc go into the 4 dc one for one, so the arm ends stay flat and level. The 8 sts go into the ch-7 sp, which is the only place stitches are added. That one extra stitch, plus the taller tr in the middle, pushes the edge out into a peak right over the space. The picot sits at the top of each peak. With 12 spaces you get exactly 12 points, one between each pair of spiral arms. The points are slightly off-center from the arms, which adds to the spinning look.
Final Blocking
- Weave in all ends along the back of the dc groups. Follow the stitches and don’t pull them across open chain spaces.
- Soak the doily in cool water for 10 minutes, then gently press out the water in a towel. Don’t wring it.
- Lay it face up on the blocking board. Pin the center hole so it is round.
- Pin out the 12 picot points evenly to a 7 in (17.8 cm) circle. Pin opposite points first (1 and 7, then 4 and 10), then fill in the rest. This keeps the shape symmetrical.
- Check that each chain space is shaped into a smooth curve and that each arm sweeps in the same direction.
- If you like, mist lightly with spray starch for a crisper finish.
- Leave it pinned until completely dry, usually 6–12 hours.
Final Quality-Control Checklist
- Exactly 12 spiral arms, all turning the same way
- 48 dc in 12 groups of 4 in Round 8
- 12 points, each with one picot at the tip
- Center hole is small and round, about 0.25 in (0.6 cm)
- Doily measures 7 in (17.8 cm) point to point after blocking
- It lies flat with no cupping or ruffling
- All ends are woven in securely and can’t be seen from the front
Troubleshooting
The arms look straight instead of curved. You may be working the new group into the full old group rather than skipping the last stitch(es). Recheck the “skip” step in each round.
Repeat count is off. Count the groups after each round. A missing group usually happens at the join. Place a marker in the beg ch-3.
The doily cups. The chains are too tight. Work them looser, or add 1 extra ch to each space in Rounds 6–8, and keep doing so consistently.
The doily ruffles. The chains are too loose, or the hook is too big. Go down a hook size or tighten your chains.
The points are rounded and soft. Pin each picot firmly while blocking and use starch. Make sure each peak has 2 tr on both sides of the picot.
The slip-stitch moves look bulky. Keep those sl sts loose and flat. They sit under the next round and will be hidden.
Care
Hand wash in cool water with mild soap, press out the water in a towel, and dry flat. Pin it out again if the points lose their shape.
Final Notes
The measurement chain is short and easy to check: 1 in (2.5 cm) after Round 1, 1.75 in (4.4 cm) after Round 2, 6.25 in (15.9 cm) after Round 8, and 7 in (17.8 cm) after the picot border and blocking. If your stitch counts read 24, 24, 36, 48, then 48 for every round after that, the spiral will form on its own. Then it’s just a matter of shaping the points.
Happy crocheting!