

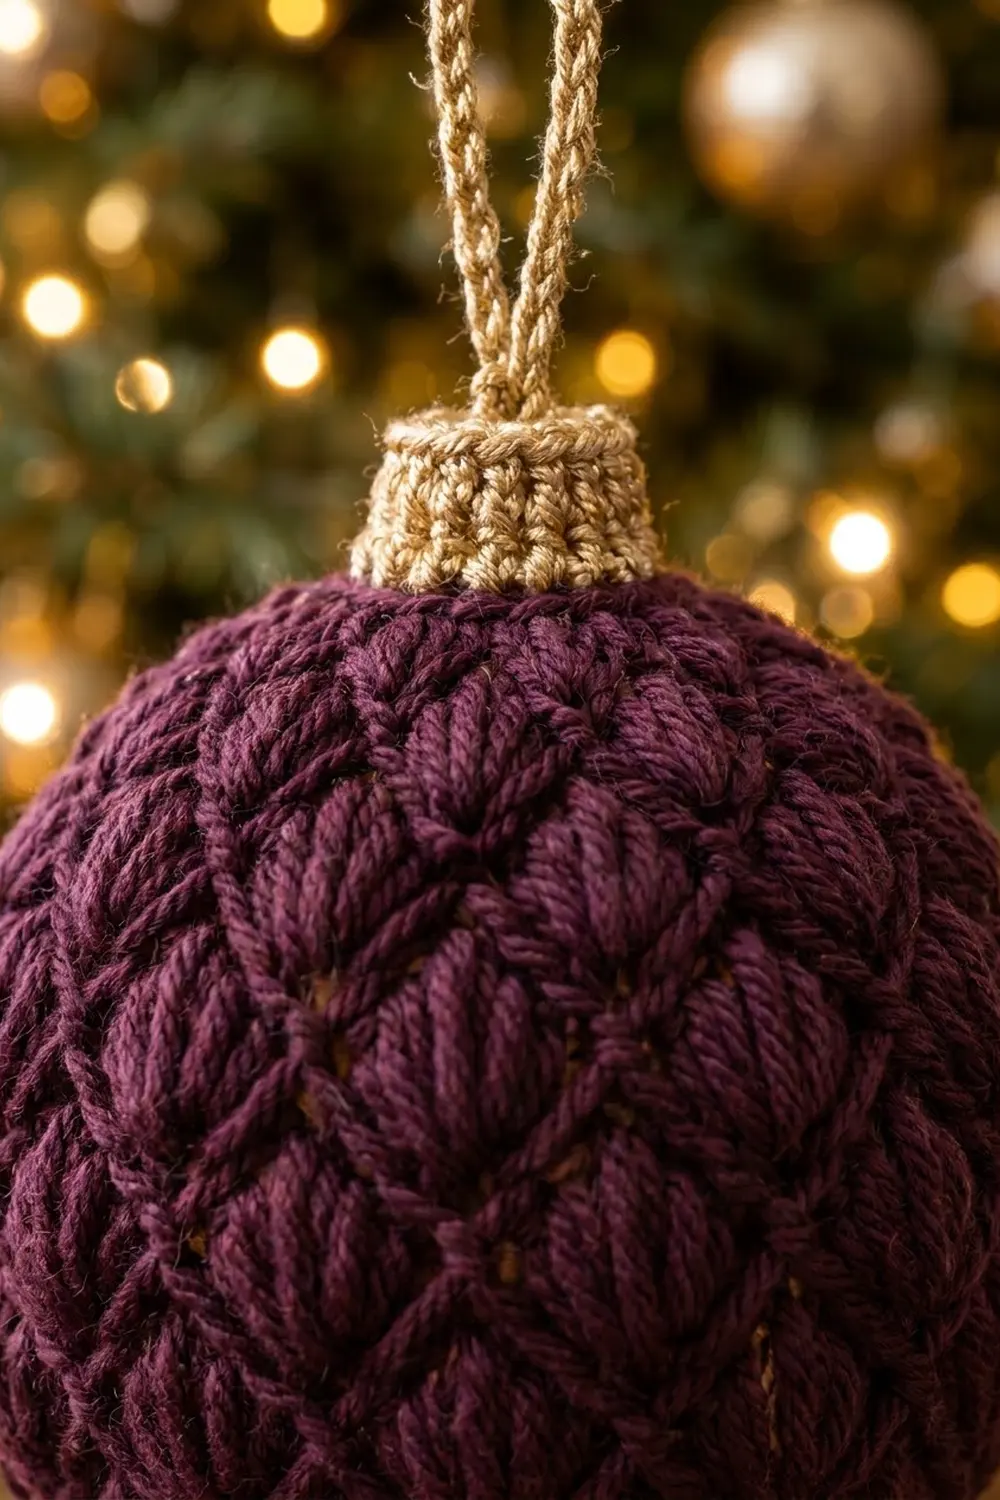
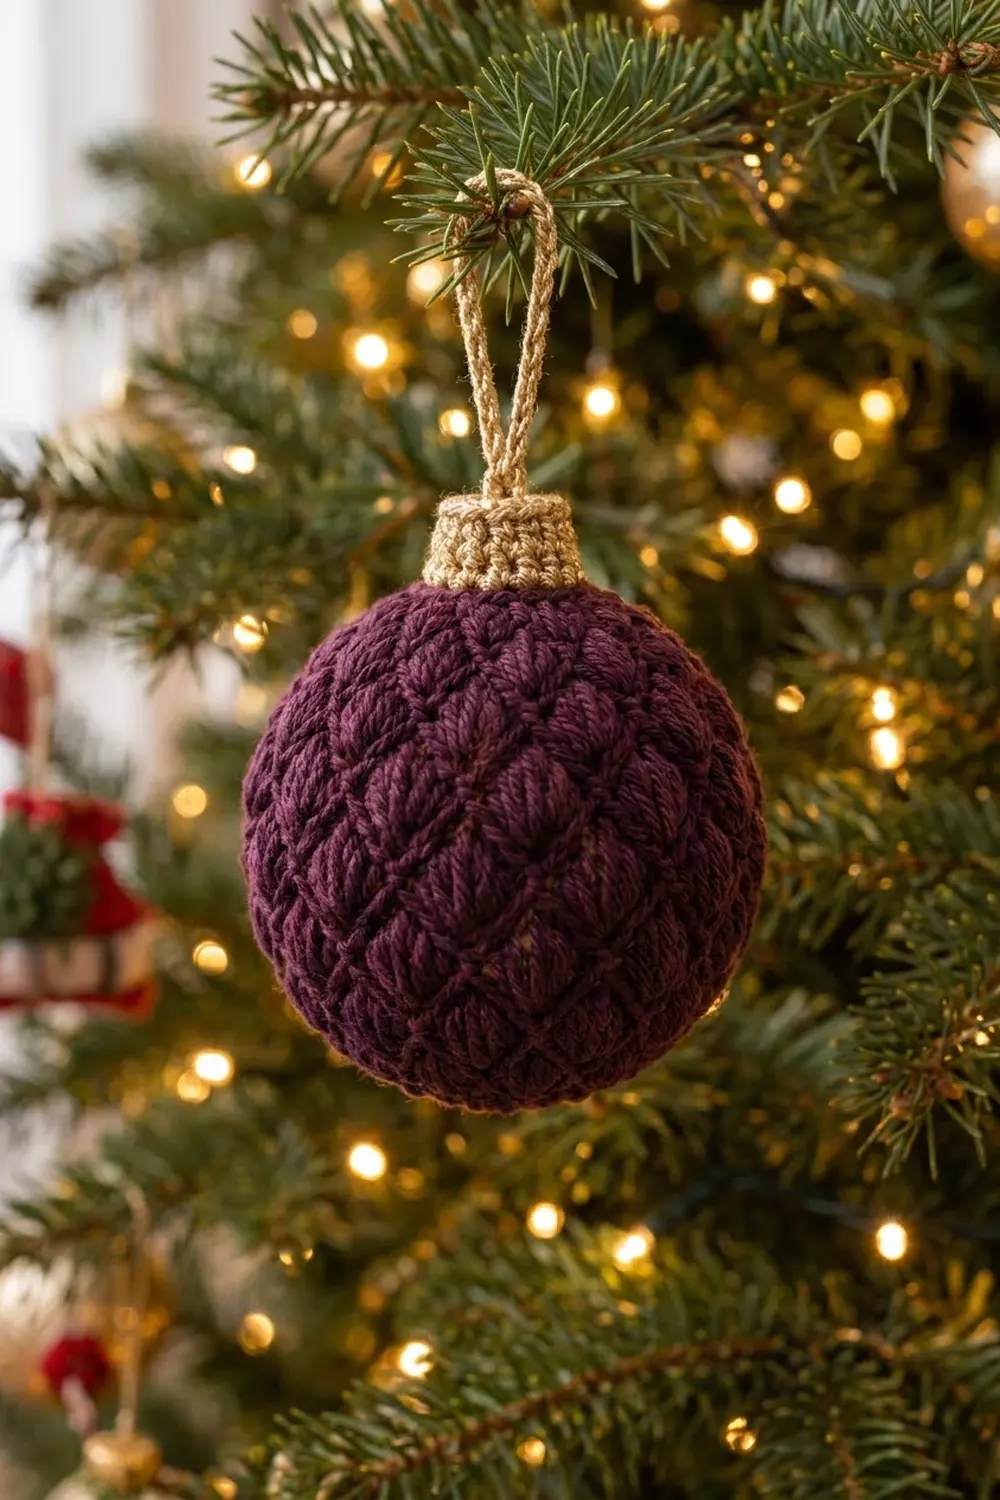
The Sugarplum Lattice ornament is a small, solid crochet ball covered in raised puff stitches. The puffs shift over by two stitches on every textured round, so they line up on the diagonal and make a diamond lattice. A gold collar and corded loop on top make it look like a classic glass bauble.
The ball is a deep plum, and the cap and loop are metallic gold. These are rich, traditional holiday colors that show up well against green branches and warm lights. The puffs catch the light, so the ball looks textured even from across the room.
This pattern uses US crochet terms. The stuffed ball is about 3 in (7.6 cm) across. With the cap it is about 3.5 in (8.9 cm) tall, and with the loop it is about 5.25 in (13.3 cm) tall.
You work the ball as one piece in joined rounds, from the bottom up. First you increase to 48 stitches, then work puff rounds alternating with plain single-crochet rounds, then decrease, stuff, and close the top. Last, you add the gold collar to the leftover front loops and finish with a corded hanging loop.
Finished Size and Construction
- Finished size: 3 in (7.6 cm) ball diameter; 3.5 in (8.9 cm) tall with the cap; 5.25 in (13.3 cm) tall with the loop
- Skill level: Intermediate (puff stitches, shaping in the round)
- Terminology: US
- Yarn weight: DK (light worsted / #3)
- Hook: 3.5 mm (E-4)
- Number of pieces: 1
- Layout: One ball worked in joined rounds, with the cap worked straight onto it
- Piece size: 9.6 in (24.4 cm) around at the widest round
- Size before border (cap): 3 in (7.6 cm) stuffed ball
- Border depth (cap): 0.5 in (1.3 cm) tall, 0.75 in (1.9 cm) across
Materials
Choose a smooth DK yarn with good stitch definition. Mercerized cotton or a cotton blend shows the puffs most clearly. For the gold, use a DK-weight metallic or metallic-blend yarn that is soft enough to make a sturdy chain.
- Plum (Color A): 20 g, about 46 m (50 yd)
- Gold metallic (Color B): 3 g, about 7 m (8 yd)
- 3.5 mm (E-4) crochet hook
- Polyester fiberfill, about 8 g
- 1 stitch marker
- Tapestry needle
- Scissors
These amounts include a small margin for your gauge swatch and tails.
Abbreviations (US Terms)
- ch – chain
- sc – single crochet
- inc – 2 sc in the same stitch
- sc2tog – single crochet 2 together (invisible decrease: insert into the front loops of the next 2 sts, yo, pull through 2 loops, yo, pull through 2 loops)
- sl st – slip stitch
- st(s) – stitch(es)
- BLO / FLO – back loop only / front loop only
- MR – magic ring
- yo – yarn over
Special stitch – Puff: (Yo, insert hook in the st, yo, pull up a loop to about 3/8 in / 1.0 cm) 4 times, so you have 9 loops on the hook. Yo and pull through all 9 loops, then ch 1 to lock. The lock chain does not count as a stitch. On the next round, work into the top of the puff itself and skip the lock chain.
Round rules: Begin every round with ch 1 (doesn’t count). End every round with a sl st into the first st. Put the marker in the first st of each round.
Gauge and Checkpoints
Gauge: 5 sc and 6 rounds = 1 in (2.5 cm). One puff round is about 0.3 in (0.8 cm) tall.
Test first: Work Rounds 1–6 below. The flat disc should measure about 2 in (5.1 cm) across with 36 sts. If it does, keep going with the same disc.
Checkpoints:
– After Round 6: disc 2 in (5.1 cm) across, 36 sts
– After Round 9: 48 sts, about 9.6 in (24.4 cm) around the edge
– After Round 16: cup about 3.3 in (8.4 cm) tall, measured up the side from the magic ring
– Finished arc from bottom to top: about 4.6 in (11.7 cm), which gives a stuffed ball about 3 in (7.6 cm) across
Too big? Go down 0.25–0.5 mm in hook size. Too small? Go up 0.25–0.5 mm. If only the puff rounds are too tall, pull the puff loops up a bit shorter instead of changing hooks.
Ball Pattern (Color A, Plum)
Bottom shaping
Round 1: 6 sc in MR, sl st to first sc. (6)
Round 2: Inc in each st around. (12)
Round 3: (Sc 1, inc) 6 times. (18)
Round 4: (Sc 2, inc) 6 times. (24)
Round 5: (Sc 3, inc) 6 times. (30)
Round 6: (Sc 4, inc) 6 times. (36)
Round 7 (Puff Round A): *Puff in next st, sc 3; repeat from * 9 times. (36: 9 puffs + 27 sc)
Round 8: (Sc 5, inc) 6 times. (42)
Round 9: (Sc 6, inc) 6 times. (48)
Lattice band
Round 10 (Puff Round B): Sc 2, *puff, sc 3; repeat from * 11 times, puff, sc 1. (48: 12 puffs + 36 sc)
Check: 2 + (11 × 4) + 1 + 1 = 48.
Round 11: Sc in each st around. (48)
Round 12 (Puff Round A): *Puff, sc 3; repeat from * 12 times. (48: 12 puffs + 36 sc)
Round 13: Sc in each st around. (48)
Round 14 (Puff Round B): Work as Round 10. (48: 12 puffs)
Round 15: Sc in each st around. (48)
Round 16 (Puff Round A): Work as Round 12. (48: 12 puffs)
Puff Rounds A and B are two stitches apart, which is half of the 4-st repeat. Each puff therefore sits between two puffs of the round below. The plain sc between the puffs makes the sunken diagonal lines of the diamond lattice. You may see a small shift next to the shaping rounds. That’s normal, and it disappears once the ball is stuffed.
Top shaping
Round 17: (Sc 6, sc2tog) 6 times. (42)
Round 18: (Sc 5, sc2tog) 6 times. (36)
Round 19 (Puff Round B on 36): Sc 2, *puff, sc 3; repeat from * 8 times, puff, sc 1. (36: 9 puffs + 27 sc)
Check: 2 + (8 × 4) + 1 + 1 = 36.
Round 20: (Sc 4, sc2tog) 6 times. (30)
Round 21: (Sc 3, sc2tog) 6 times. (24)
Start stuffing firmly now, shaping the ball with your fingers as you go.
Round 22: (Sc 2, sc2tog) 6 times. (18)
Round 23: (Sc 1, sc2tog) 6 times. (12)
Finish stuffing until the ball is firm and evenly round.
Round 24 (closing round): Working in BLO only, sc2tog 6 times. (6)
Fasten off and leave a 6 in (15.2 cm) tail. Weave the tail through the front loops of the 6 sts, pull it tight, and hide the end inside the ball.
Because Round 24 was worked in back loops, Round 23 now has 12 free front loops in a ring at the top. The gold collar is built on these loops.
Stitch summary: Bottom shaping goes 6 → 48 sts over Rounds 1–9. The band holds steady at 48 sts over Rounds 10–16. Top shaping goes 48 → 12 sts over Rounds 17–23, and Round 24 closes the top. The ball has 6 puff rounds (Rounds 7, 10, 12, 14, 16, and 19) and 17 plain sc rounds, plus the closing round.
Border: Gold Cap and Hanging Loop (Color B)
The gold collar works as this piece’s border. It is a short tube of single crochet that stands on the 12 free front loops of Round 23.
Border gauge: Same as the body, 5 sc and 6 rounds = 1 in (2.5 cm). Change hooks if your metallic yarn is noticeably thinner or thicker.
Cap Round 1: Join Color B with a sl st to any free front loop of Round 23. Ch 1, then sc in each free front loop around, and sl st to the first sc. (12)
Cap Round 2: Ch 1, sc in each st around, sl st to first sc. (12)
Cap Round 3: Ch 1, sc in each st around, sl st to first sc. (12)
Cap Round 4 (rim): Sl st in BLO of each st around. (12 sl st)
Working the sl sts in back loops makes a crisp gold ridge at the top of the collar, like the metal cap on a glass bauble.
Why the math works: The cap starts in the 12 front loops of Round 23, one stitch per loop, so it has exactly 12 sts with no extra increases or decreases. At 5 sts per inch, 12 sts make a circumference of 2.4 in (6.1 cm), which is about 0.75 in (1.9 cm) across. Three sc rounds at 6 rounds per inch are 0.5 in (1.3 cm) tall, and the sl st rim adds only a thin ridge. This keeps the cap in proportion: about a quarter of the ball’s 3 in (7.6 cm) width.
Hanging loop: Keep the last rim st on the hook. Ch 22. Skip the next 5 rim sts and sl st into the 6th rim st, directly across the opening. Turn and sl st into each of the 22 chains, working back toward where the loop started. Sl st into the starting rim st and fasten off.
The 22 chains measure about 3.7 in (9.4 cm). Folded in half, they stand about 1.75 in (4.4 cm) above the cap. The second pass of sl sts makes a firm, corded loop that won’t stretch under the weight of the ornament. Weave in all ends inside the cap.
Final Blocking
- Roll the ball between your palms for 30 seconds to spread the stuffing evenly.
- Press any flat spots outward from the inside with the blunt end of your hook, pushing through the gaps between stitches.
- Lightly mist the ball with water, or hold a steam iron 2 in (5.1 cm) away. Don’t let the iron touch the yarn, especially the metallic gold.
- Pinch each puff gently so it stands up full and long.
- Stand the cap straight up and smooth the rim with your fingers.
- Let the ornament dry completely on a towel with the cap facing up.
- Measure: the ball should be 3 in (7.6 cm) across and 3.5 in (8.9 cm) tall with the cap.
Final Quality-Control Checklist
- Ball measures 3 in (7.6 cm) across in both directions
- 6 puff rounds, with the puffs offset into a clear diamond lattice
- No fiberfill showing between stitches
- Top fully closed under the cap
- Cap has 12 sts, stands straight, and is about 0.5 in (1.3 cm) tall
- Rim ridge is even all the way around
- Loop is centered, corded, and about 1.75 in (4.4 cm) tall
- All ends woven in and hidden
Troubleshooting
Puffs look flat or short: Pull each loop up to the full 3/8 in (1.0 cm) before the final yo, and don’t pull the closing chain too tight.
Puffs line up straight instead of on the diagonal: Check that you start Puff Round B with sc 2. That two-stitch offset is what makes the lattice.
Ball is egg-shaped: Your puff rounds are probably too tall. Shorten the puff loops slightly, or add more stuffing at the widest part.
Wrong stitch count after a puff round: You probably worked into the lock chain. Skip it and work only into the top of the puff.
Stuffing shows through: Go down a hook size, or add a thin layer of matching felt inside before stuffing.
Cap flares or leans: Make sure Cap Round 1 goes into the front loops of Round 23 only, and keep your tension firm on the gold rounds.
Loop twists sideways: Check that its two ends are exactly 6 sts apart, directly across the rim from each other.
Care
Spot clean with a damp cloth and mild soap, then let it air dry with the cap up. Don’t machine wash, because the stuffing and the metallic yarn can lose their shape.
Final Notes
This pattern rests on one chain of measurements. Gauge is 5 sc and 6 rounds per inch (2.5 cm). That gives a 2 in (5.1 cm) disc at 36 sts and a 9.6 in (24.4 cm) circumference at 48 sts. The cup reaches about 3.3 in (8.4 cm) after Round 16, and the full arc is about 4.6 in (11.7 cm) from bottom to top. Stuffed, that makes a 3 in (7.6 cm) ball. The 12-st gold cap adds 0.5 in (1.3 cm), and the corded loop adds 1.75 in (4.4 cm), for 5.25 in (13.3 cm) total. Check each stage as you go and the ornament will come out round, firm, and well proportioned.
Happy crocheting!