

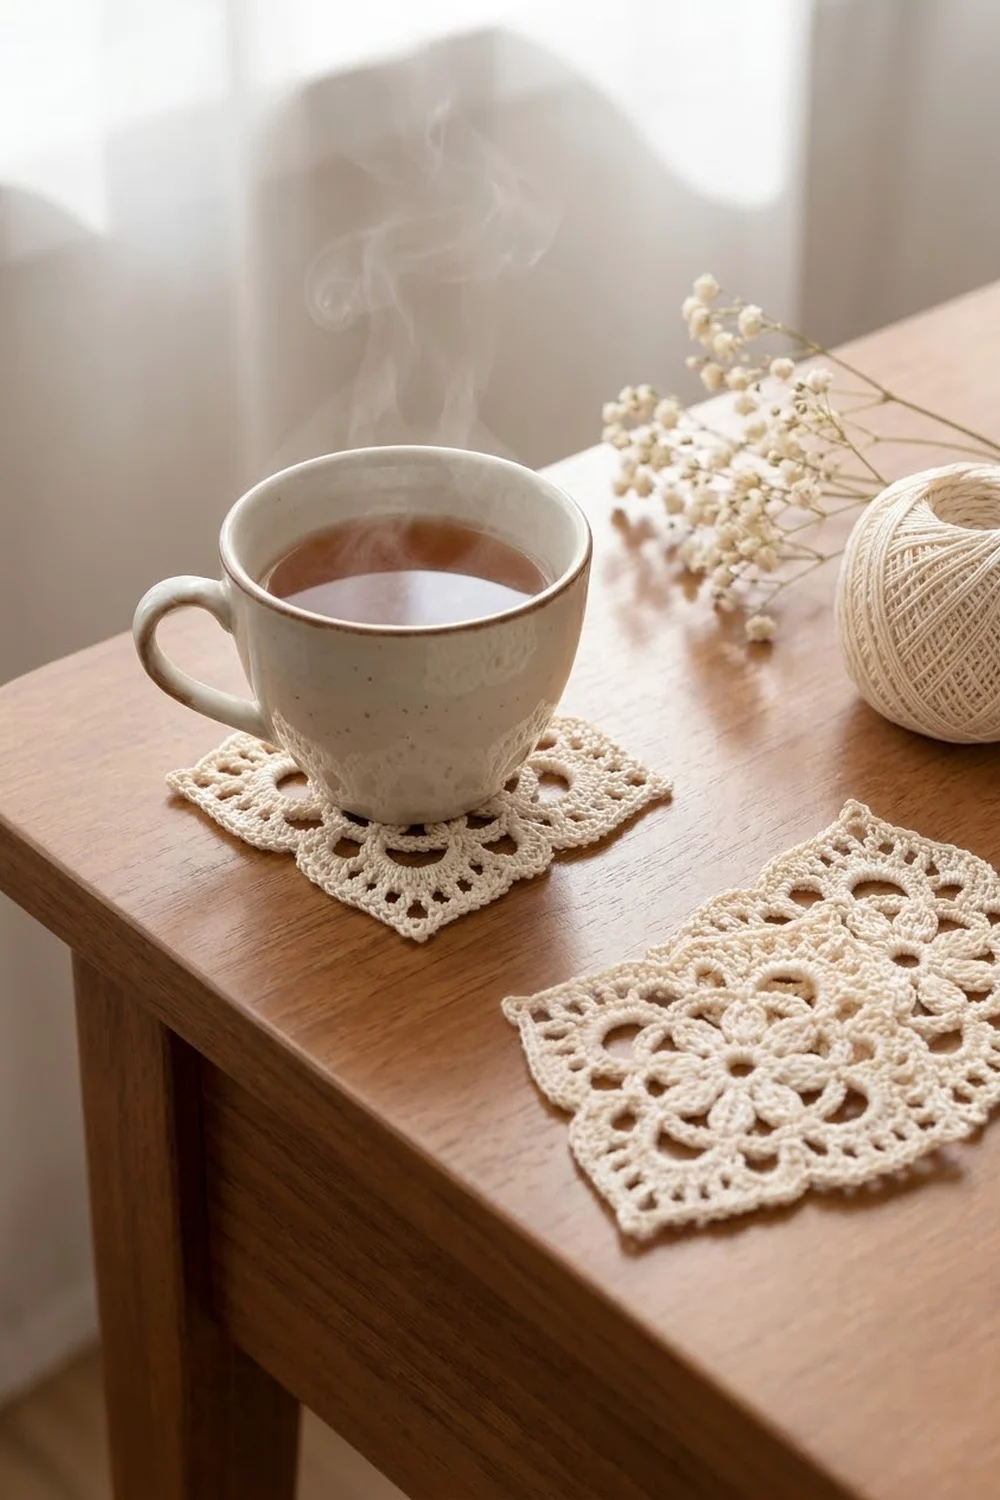
The Heirloom Petal Lace Square is a small, delicate thread motif. Eight oval petals sit around an open center, and a ring of single crochet arches outlines them in a soft scallop. The outer rounds square everything off with a light mesh and a picot edge that finishes in a neat point at each corner.
The motif is worked in one color: ivory or ecru crochet cotton. That keeps it classic and suits doilies, coasters, bookmarks, sachet fronts or a vintage-style accent. It looks best turned on point as a diamond, which is how it’s shown here.
All instructions use US crochet terms. The finished motif measures 3.75 in (9.5 cm) per side and about 5.3 in (13.5 cm) from point to point after blocking.
You work it in the round from a magic ring. First you make a dc center, then a round of 8 cluster petals, then chain arches covered with sc. A round of long chain spans is filled with graded stitches to make the square, and a mesh round and a picot border finish it. It is a single piece with no joining.
Finished Size and Construction
- Finished size: 3.75 in x 3.75 in (9.5 cm x 9.5 cm); diagonal about 5.3 in (13.5 cm)
- Skill level: Intermediate
- Terminology: US crochet terms
- Yarn weight: Lace (0), size 10 crochet thread
- Hook: 1.75 mm steel hook
- Number of pieces: 1
- Layout: Single motif, displayed on point
- Piece size: 3.75 in (9.5 cm) per side
- Size before border: 3.5 in (8.9 cm) per side after Round 7
- Border depth: about 0.125 in (0.3 cm) per edge, not counting picots
Materials
Thread: Use mercerized cotton crochet thread, size 10. Mercerized cotton holds its stitch definition and blocks crisply, which matters for the petals and the picot edge. Avoid fuzzy or stretchy fibers, because they blur the lace.
- Ivory / Ecru: 10 g, about 85 m
That quantity includes a comfortable margin for a gauge swatch and weaving in ends. One motif uses noticeably less.
Tools:
- 1.75 mm steel crochet hook
- Fine tapestry needle or size 22–24 embroidery needle
- Small sharp scissors
- Rustproof pins
- Blocking board or foam mat
- Spray bottle with clean water
- Ruler or tape measure marked in inches and cm
- Optional: light spray starch
Abbreviations (US Terms)
- ch – chain
- sl st – slip stitch
- sc – single crochet
- hdc – half double crochet
- dc – double crochet
- tr – treble crochet
- sk – skip
- sp(s) – space(s)
- st(s) – stitch(es)
- rep – repeat
Special stitches:
- Beginning petal cluster (beg pc): Ch 4. Yo twice, insert hook in the indicated st, yo and pull up a loop, [yo, pull through 2 loops] twice. Rep from * to * 2 more times in the same st. You now have 4 loops on the hook. Yo and pull through all 4 loops.
- Petal cluster (pc): Yo twice, insert hook in the indicated st, yo and pull up a loop, [yo, pull through 2 loops] twice. Rep from * to * 3 more times in the same st. You now have 5 loops on the hook. Yo and pull through all 5 loops.
- Picot: Ch 3, then sl st in the 3rd ch from the hook.
Gauge and Checkpoints
Gauge: Rounds 1–2 measure 1.5 in (3.8 cm) across, measured petal tip to petal tip.
Gauge isn’t critical for one decorative motif. It does matter if you want this exact size, or if you plan to make several motifs that match. Make one complete motif first and measure it at each checkpoint:
- After Round 1: 0.5 in (1.3 cm) across
- After Round 2: 1.5 in (3.8 cm) across
- After Round 4: 2.25 in (5.7 cm) across the flower outline
- After Round 6: 3 in (7.6 cm) per side, measured along the edge between corners
- After Round 7: 3.5 in (8.9 cm) per side
- After Round 8 and blocking: 3.75 in (9.5 cm) per side
If the motif is too big: Change to a 1.5 mm hook, or tighten your chains. Loose chain arches are the most common cause of oversizing.
If the motif is too small: Change to a 2 mm hook. Also check that you’re pulling the tall stitches of the petal clusters to full height.
If it cups: Your arches are too short. Loosen the ch-9 and ch-11 rounds slightly.
If it ruffles: Your arches are too long. Tighten those chains.

Pattern
Round 1: Center Ring
Make a magic ring. Ch 3 (counts as dc), then work 15 dc into the ring. Pull the ring closed, leaving a small open center about 0.125 in (0.3 cm) wide. Join with a sl st to the top of the beg ch-3.
Count: 16 dc.
Round 2: Petals
Work a beg pc in the same st as the join. Ch 2, sk next dc. Pc in the next dc, ch 2, sk next dc. Rep from * 6 more times. Join with a sl st to the top of the beg pc.
Count: 8 pc and 8 ch-2 sps.
Each petal sits on every other dc of Round 1, so the 16 dc divide evenly into 8 petals. Ease each cluster so it lies flat and oval rather than twisted.
Round 3: Chain Arches
Sl st into the first ch-2 sp. Ch 1, then sc in the same sp. Ch 9, sc in the next ch-2 sp. Rep from * 6 more times. Ch 9 and join with a sl st to the first sc.
Count: 8 sc and 8 ch-9 arches.
Each ch-9 arch spans over one petal tip. Lay the arches gently over the petals, not pulled tight against them.
Round 4: Covered Arches
Sl st into the first ch-9 arch. Ch 1. Work 13 sc into the same arch. Work 13 sc into the next ch-9 arch. Rep from * 6 more times. Don’t work into the sc between arches. Join with a sl st to the first sc.
Count: 104 sc (13 sc per arch x 8 arches).
This round makes the scalloped flower outline. Push the sc snugly along each arch so the 13 sts fill it evenly. The 7th sc of each arch is its center point. Mark one of them to check your placement for the next round.
Round 5: Window Spans
Sl st across to the 7th (center) sc of the first arch. Ch 1, then sc in the same st. Ch 11, sk the next 12 sc, sc in the next sc. That sc lands in the center sc of the next arch. Rep from * 6 more times. Ch 11, sk the last 12 sc, and join with a sl st to the first sc.
Count: 8 sc and 8 ch-11 sps.
There are exactly 13 sts from one arch center to the next, so skipping 12 always lands the sc on a center. The ch-11 spans leave rounded open windows above the scallops.
Round 6: Squaring Round
This round turns the circle into a square. The ch-11 sps alternate between side sps (short stitches) and corner sps (tall stitches).
Sl st into the first ch-11 sp. Work the first side sp like this: ch 2 (counts as hdc), 2 hdc, 7 sc, 3 hdc, all in the same sp.
In the next ch-11 sp (corner): 3 dc, 3 tr, ch 5, 3 tr, 3 dc.
In the next ch-11 sp (side): 3 hdc, 7 sc, 3 hdc. In the next ch-11 sp (corner): 3 dc, 3 tr, ch 5, 3 tr, 3 dc. Rep from * 2 more times. Don’t work into the Round 5 sc. Join with a sl st to the top of the beg ch-2.
Count: 100 sts and 4 corner ch-5 sps. That is 4 side groups of 13 sts plus 4 corner groups of 12 sts.
Per side, between corner ch-5 sps: 6 sts from one corner group + 13 side sts + 6 sts from the next corner group = 25 sts.
The graded heights are what square the circle: tr at the corners, dc next to them, then hdc and sc at the side midpoints.
Round 7: Mesh Round
Sl st in each of the next 19 sts: 13 side sts plus 6 corner sts. Then sl st into the corner ch-5 sp.
Ch 3 (counts as dc), then work (dc, ch 3, 2 dc) in the same sp.
Each side: Ch 1, sk next st, dc in next st. Ch 1, sk next st, dc in next st. Rep from * 10 more times, for 12 mesh dc in total. Ch 1, sk the last st of the side.
Next corner: (2 dc, ch 3, 2 dc) in the corner ch-5 sp.
Rep the side and corner steps 2 more times, then work one more side. Join with a sl st to the top of the beg ch-3.
On each side, the 12 mesh dc land on sts 2, 4, 6 and so on up to st 24 of the 25. That leaves 13 ch-1 sps.
Per side, between corner ch-3 sps: 2 corner dc + 12 mesh dc + 13 ch-1 sps + 2 corner dc = 29 sts.
Round total: 64 dc, 52 ch-1 sps and 4 corner ch-3 sps.
Round 8: Picot Border
Sl st in the next dc, then sl st into the corner ch-3 sp. Ch 1, then work (2 sc, ch 5, 2 sc) in the same sp.
Each side: Work into each dc and each ch-1 sp across the 29 side sts like this: sc in each of the next 4 sts, picot. Rep from * 6 more times, for 7 picots. Sc in the last st.
Next corner: (2 sc, ch 5, 2 sc) in the corner ch-3 sp.
Rep the side and corner steps 2 more times, then work one more side. Join with a sl st to the first sc. Fasten off.
Count per side: 29 side sc + 2 corner sc at each end = 33 sc between corner ch-5 loops, with 7 picots per side.
Total: 132 sc, 28 picots and 4 corner ch-5 loops.
Border
Border gauge: Round 7 has 29 sts across 3.5 in (8.9 cm), which is about 8.3 sts per inch (about 3.3 sts per cm). Round 8 keeps that same ratio.
Why the math works:
- Round 8 places exactly 1 sc into each of the 29 stitches and spaces on a side. The conversion is 29 + 0 extra, so the edge neither stretches nor gathers.
- The picots are chains worked off a finished sc, not into new base stitches. They add points without adding width along the base.
- The only extra stitches are at the corners: (2 sc, ch 5, 2 sc) in each ch-3 sp. That gives the extra length needed to turn the corner, and the ch-5 loop forms the pointed tip seen at each diamond point.
- The border adds about 0.125 in (0.3 cm) on each edge, or 0.25 in (0.6 cm) in total per side. That takes the motif from 3.5 in (8.9 cm) to 3.75 in (9.5 cm).
If your border edge waves, your sc is looser than your mesh. Work Round 8 with a 1.5 mm hook.
Final Blocking
- Weave in both tails along the backs of stitches, not across open spaces, then trim.
- Soak the motif in cool water for 5 minutes. Gently press out the water in a towel without wringing.
- Lay it face up on the blocking mat.
- Pin the 4 corner ch-5 loops first, so each side measures 3.75 in (9.5 cm). Check that both diagonals measure about 5.3 in (13.5 cm).
- Pin the center of each side straight.
- Open each of the 7 picots per side with a pin tip so it points outward.
- Pin the centers of the 8 Round 4 scallops so the flower outline is round and even.
- Shape the 8 petals with your fingertips so they lie flat and evenly spaced.
- Mist with light spray starch if you want extra crispness.
- Leave it to dry completely, at least 6 hours, before removing the pins.
Final Quality-Control Checklist
- Center ring is small and closed, with 16 dc
- 8 petals, evenly spaced and untwisted
- 8 covered arches with 13 sc each
- Round 5 sc land exactly on the arch centers
- Corner and side groups alternate correctly in Round 6
- 25 sts per side in Round 6 and 29 sts per side in Round 7
- 33 sc and 7 picots per side in Round 8
- All 4 sides measure 3.75 in (9.5 cm)
- Diagonals match, at about 5.3 in (13.5 cm)
- Ends are woven invisibly and the motif lies flat
Troubleshooting
Petals look skinny or lean sideways: Pull each loop up to full height before working off the tr steps, and keep all 4 tr in the same dc.
Round 4 arches buckle: You have too many sc for your chain length. Work 12 sc per arch, or lengthen the ch-9 slightly. If you change the count, recount Round 5 so it still lands on the arch centers.
Round 5 doesn’t land on the centers: Recount Round 4. It must have exactly 104 sc.
Corners are rounded, not square: Check that the tr and ch-5 are worked in the corner sps and the hdc/sc groups in the side sps. Then block the corners firmly.
Mesh round pulls in: Your ch-1s are too tight. Make them a little looser, or use the next hook size up for Round 7 only.
Picots flop: Close each picot snugly with the sl st, then starch lightly.
Care
Hand wash in cool water with mild soap, press out the water in a towel, and dry flat, re-pinning to 3.75 in (9.5 cm) if needed. Don’t tumble dry.
Final Notes
The measurement chain is short and easy to check:
- 16 dc in Round 1 become 8 petals.
- 8 petals carry 8 arches of 13 sc each, 104 sc in total.
- Those arches anchor 8 window spans, which square off at 25 sts per side.
- The mesh round converts each side to 29 sts at 3.5 in (8.9 cm).
- The border adds 1 sc per stitch plus corner loops, finishing at 3.75 in (9.5 cm) per side and about 5.3 in (13.5 cm) point to point.
If every checkpoint matches, your motif will match too. Happy crocheting!