
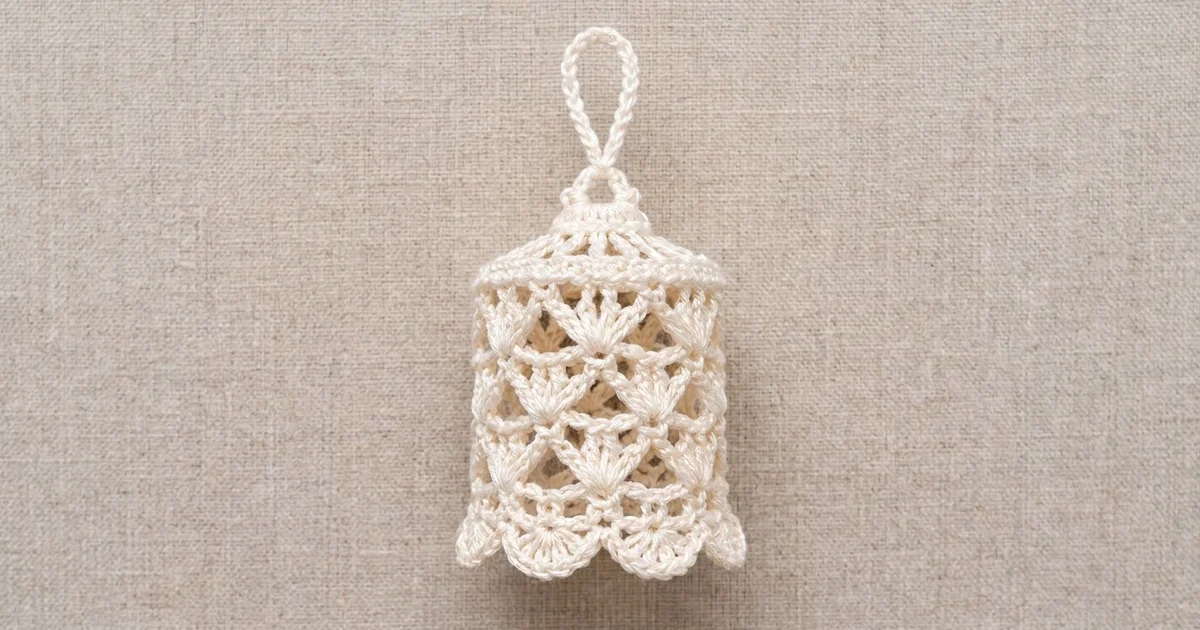
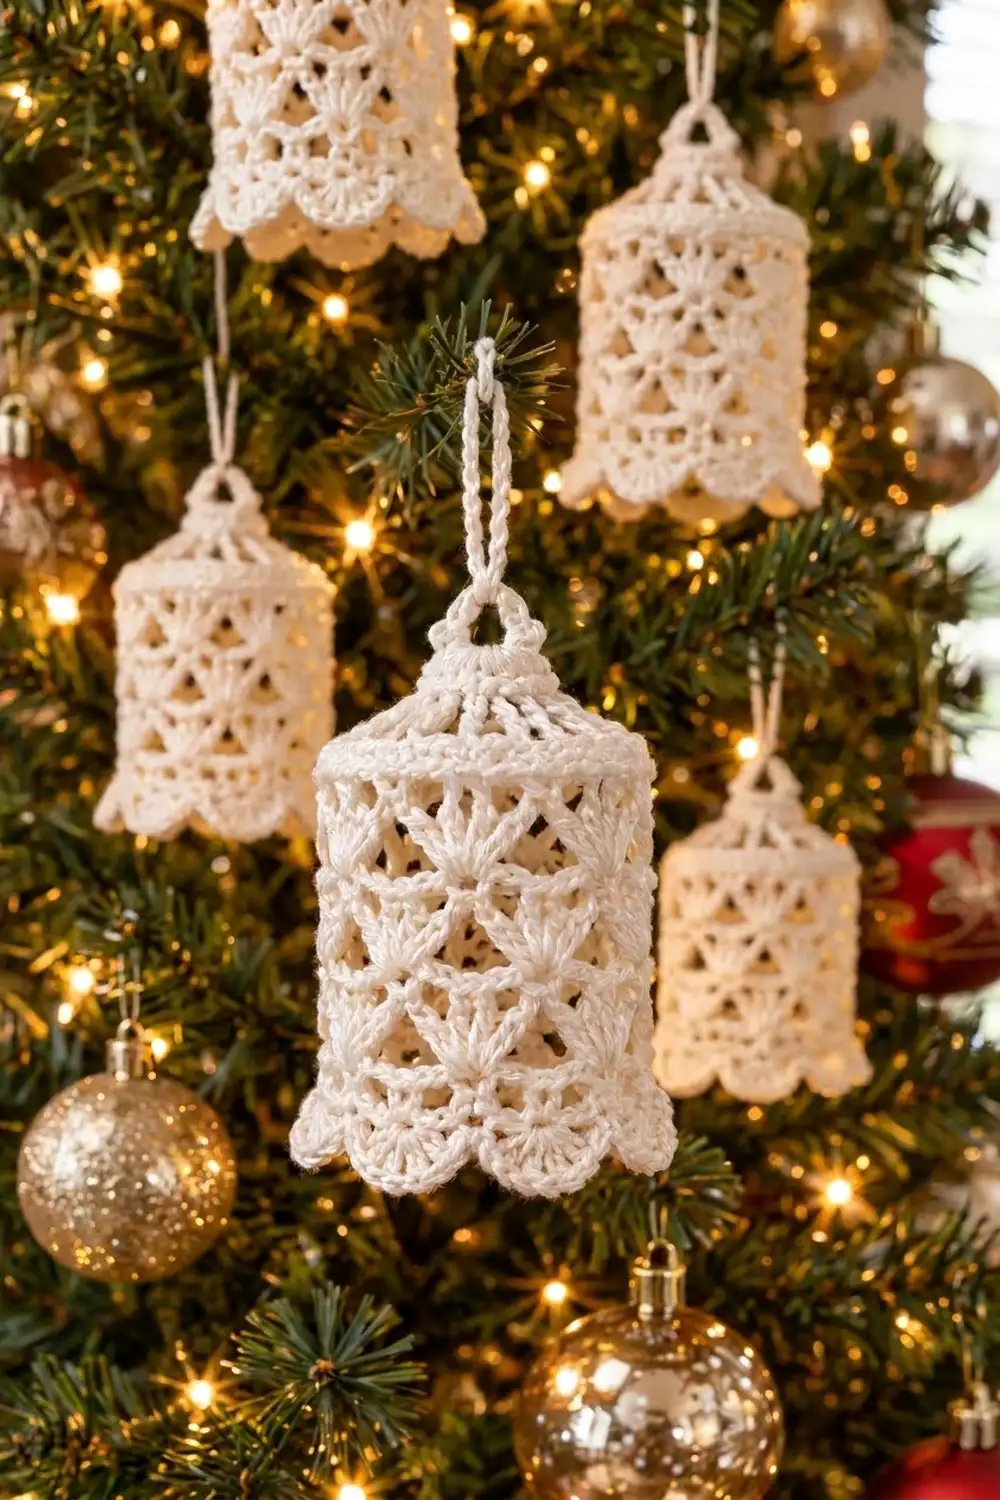
The Frosted Lace Bell is a small heirloom-style ornament worked in ivory cotton thread. It has a gently domed top, a lattice body filled with tiny upward fans, and a softly flared hem that ends in six rounded scallops. A sturdy crocheted hanging loop finishes it, ready for the tree.
The look is classic and vintage: one color, crisp stitch definition, and plenty of open space so tree lights glow through the lace. Ivory or off-white works beautifully, but pure white or a pale metallic thread would also suit.
This pattern uses US crochet terms. The finished bell is about 3.5 in (8.9 cm) tall and 3 in (7.6 cm) wide when laid flat, with a hanging loop of about 1.5 in (3.8 cm).
The bell is worked top down in joined rounds, all in one piece. You start with a small ring, build an open domed top, close it with a solid ridge band, work the fan-and-diamond lattice body, and finish with a flared scalloped hem. No sewing or joining is needed. The only finishing steps are the loop and blocking.
Finished Size and Construction
- Finished size: 3.5 in (8.9 cm) tall x 3 in (7.6 cm) flat width at the body; about 3.75 in (9.5 cm) flat width at the scallop tips
- Skill level: Intermediate
- Terminology: US crochet terms
- Yarn weight: Size 3 cotton crochet thread (fine)
- Hook: 2.25 mm (US B-1)
- Number of pieces: 1
- Layout: Single piece worked in joined rounds, top down
- Piece size: 3.5 in (8.9 cm) tall, 6 in (15.2 cm) body circumference
- Size before border: 2.75 in (7.0 cm) tall after Round 13
- Border depth: 0.75 in (1.9 cm), Rounds 14–16 (flared scalloped hem)
Materials
Yarn: Use a mercerized cotton crochet thread in size 3. Mercerized cotton gives the crisp, slightly glossy stitches that make the lace pop, and it holds starch well. Avoid fuzzy or very soft cotton blends. The fans will blur, and the bell won’t hold its shape.
- Ivory (Main Color): 10 g, about 32 m (35 yd)
The quantity includes a margin of about 25% for your gauge swatch, the hanging loop, and weaving in ends.
Tools:
- 2.25 mm (US B-1) crochet hook
- Tapestry needle with a small eye
- Scissors
- 1 locking stitch marker
- Fabric stiffener or heavy spray starch
- A blocking form: a small glass bottle, spice jar, or a ball of plastic wrap about 2 in (5.1 cm) across
- Rustproof pins and a foam surface
Abbreviations (US Terms)
- ch – chain
- sl st – slip stitch
- sc – single crochet
- dc – double crochet
- BLO – back loop only
- st(s) – stitch(es)
- sp(s) – space(s)
- rnd(s) – round(s)
- beg – beginning
Special stitches:
- V-st (V-stitch): (dc, ch 2, dc) in the same stitch.
- Shell: 5 dc in the same stitch or space.
- Scallop shell: 9 dc in the same space (used only in Round 15).
Gauge and Checkpoints
Gauge: 8 sc and 9 sc rounds = 1 in (2.5 cm).
To check gauge, chain 17 and work 9 rows of sc (16 sc per row). The swatch should measure 2 in (5.1 cm) wide and 1 in (2.5 cm) tall.
Next, work Rounds 1–6 of the bell as a test before going further. This tests your tension in the round, which matters more than the flat swatch.
Checkpoints:
- After Rnd 3: The open disc measures about 1.25 in (3.2 cm) across when flattened.
- After Rnd 6: The dome begins to cup, and the band measures 3 in (7.6 cm) flat width (6 in / 15.2 cm circumference). Dome height is about 0.75 in (1.9 cm).
- After Rnd 9: Total height is about 1.5 in (3.8 cm).
- After Rnd 13: Total height is 2.75 in (7.0 cm), and flat width is still about 3 in (7.6 cm).
- After Rnd 16: Total height is 3.5 in (8.9 cm), and the scallop tips measure about 3.75 in (9.5 cm) flat width.
If your piece is too big: Change to a 2.0 mm hook and work Rounds 1–6 again.
If it’s too small or very stiff: Change to a 2.5 mm hook.
Don’t change the stitch counts. The 48-stitch base is what makes the lace repeat work.
Pattern
Domed Top
Rnd 1: Ch 6, sl st in first ch to form a ring. Ch 1, 12 sc in the ring, join with sl st in first sc. (12 sc)
Rnd 2: Ch 4 (counts as dc + ch 1), dc in next sc, ch 1. Repeat from * 10 more times. Join with sl st in 3rd ch of beg ch-4. (12 dc, 12 ch-1 sps)
Rnd 3: Ch 5 (counts as dc + ch 2), dc in next dc, ch 2. Repeat from * 10 more times. Join with sl st in 3rd ch of beg ch-5. (12 dc, 12 ch-2 sps)
These dc posts form the open spokes of the dome.
Rnd 4 (conversion round): Ch 1, sc in same st, 2 sc in next ch-2 sp, sc in next dc, 2 sc in next ch-2 sp. Repeat from * 10 more times. Join with sl st in first sc. (12 sc worked 1 per dc + 24 sc worked into spaces = 36 sc)
Rnd 5 (growth round): Ch 1, sc in next 2 sts, 2 sc in next st. Repeat from * 11 more times. Join. (48 sc)
Rnd 6 (ridge band): Ch 1, sc in BLO of each st around. Join. (48 sc)
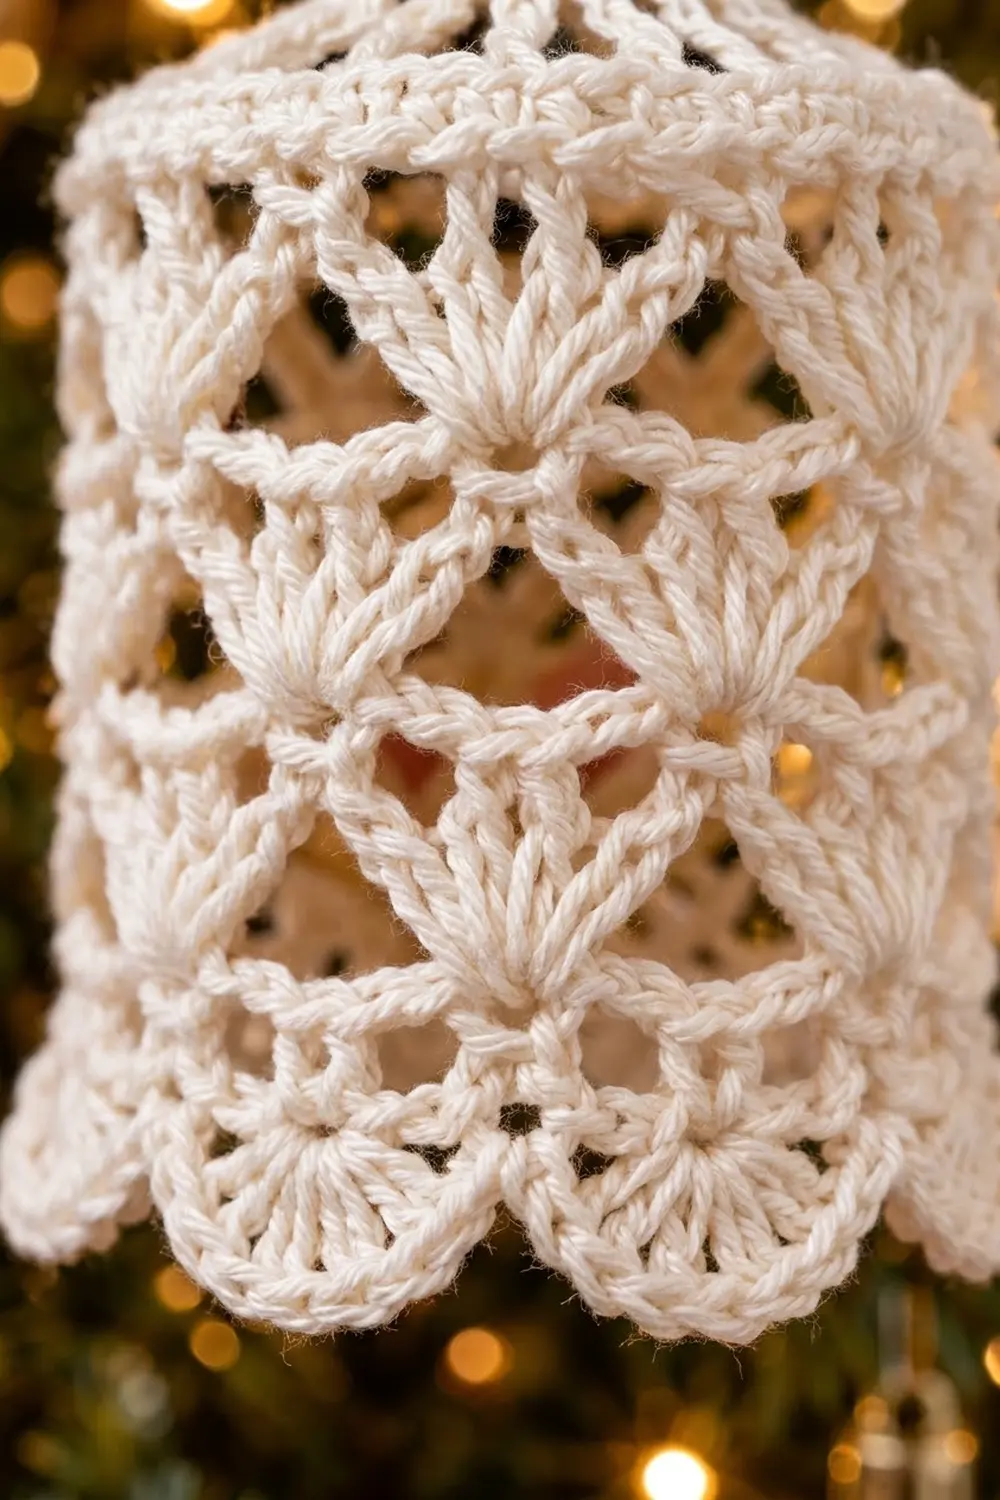
The unworked front loops form a crisp ridge line on the outside where the dome meets the body. The dome will cup naturally because these rounds grow more slowly than a flat circle would.
Lattice Body
The body uses 6 repeats of 8 stitches (6 x 8 = 48). Shells alternate position every other round, and the ch-3 bars between them outline the diamonds.
Rnd 7 (Shell Round A): Ch 1, sc in first st, ch 2, skip 3 sts, shell in next st, ch 2, skip 3 sts, sc in next st, ch 2, skip 3 sts, shell in next st, ch 2, skip 3 sts. Repeat from * 4 more times. Join with sl st in first sc. (6 sc, 6 shells = 30 dc, 12 ch-2 sps)
Rnd 8 (Net Round): Ch 5 (counts as dc + ch 2), dc in same sc (first V-st made), ch 3, sc in center (3rd) dc of next shell, ch 3, V-st in next sc, ch 3, sc in center dc of next shell, ch 3. Repeat from * 4 more times. Join with sl st in 3rd ch of beg ch-5. (6 V-sts, 6 sc, 12 ch-3 sps)
Rnd 9 (Shell Round B): Sl st in next ch-2 sp. Ch 3 (counts as dc), 4 dc in same sp, ch 2, sc in next sc, ch 2, shell in ch-2 sp of next V-st, ch 2, sc in next sc, ch 2. Repeat from * 4 more times. Join with sl st in top of beg ch-3. (6 shells = 30 dc, 6 sc, 12 ch-2 sps)
The shells now sit above the sc of Round 7, offset by half a repeat.
Rnd 10 (Net Round): Sl st in next 2 dc (you are now in the center dc of the shell). Ch 1, sc in same dc, ch 3, V-st in next sc, ch 3, sc in center dc of next shell, ch 3, V-st in next sc, ch 3. Repeat from * 4 more times. Join with sl st in first sc. (6 sc, 6 V-sts, 12 ch-3 sps)
Rnd 11 (Shell Round A): Sl st in next 3 ch, sl st in next dc, sl st in ch-2 sp of V-st. Ch 3 (counts as dc), 4 dc in same sp, ch 2, sc in next sc, ch 2, shell in next V-st sp, ch 2, sc in next sc, ch 2. Repeat from * 4 more times. Join. (6 shells = 30 dc, 6 sc, 12 ch-2 sps)
The shells line up above Round 7’s shells again.
Rnd 12: Repeat Rnd 10. (6 sc, 6 V-sts, 12 ch-3 sps)
Rnd 13: Repeat Rnd 11. (6 shells = 30 dc, 6 sc, 12 ch-2 sps)
This tier is in the Shell Round B position, above Round 9’s shells. Check: the body measures 2.75 in (7.0 cm) tall, with three clear tiers of fans and diamonds. Do not fasten off.
Border: Flared Scalloped Hem
Border gauge: The edging sc in Round 16 should sit at about 8 sc per 1 in (2.5 cm) along the curve. The rim should lie smoothly around each scallop, without cupping or rippling.
Rnd 14 (flare net): Sl st in next 2 dc. Ch 1, sc in same dc (center of shell), ch 4, V-st in next sc, ch 4, sc in center dc of next shell, ch 4, V-st in next sc, ch 4. Repeat from * 4 more times. Join with sl st in first sc. (6 sc, 6 V-sts, 12 ch-4 sps)
The longer ch-4 bars make the hem flare.
Rnd 15 (scallop shells): Sl st in next 4 ch, sl st in next dc, sl st in ch-2 sp of V-st. Ch 3 (counts as dc), 8 dc in same sp, ch 2, sc in next sc, ch 2, scallop shell in next V-st sp, ch 2, sc in next sc, ch 2. Repeat from * 4 more times. Join with sl st in top of beg ch-3. (6 scallop shells = 54 dc, 6 sc, 12 ch-2 sps)
Rnd 16 (rim, trim round): Ch 1, sc in same st and in next 3 dc, 3 sc in next dc (center of scallop), sc in next 4 dc, 2 sc in ch-2 sp, sl st in next sc, 2 sc in next ch-2 sp, sc in next 4 dc, 3 sc in next dc, sc in next 4 dc, 2 sc in ch-2 sp, sl st in next sc, 2 sc in next ch-2 sp. Repeat from * 4 more times. Join with sl st in first sc. Fasten off.
Round 16 count: 60 sts worked 1 per existing st (54 sc into dc + 6 sl st into sc), plus 36 extra (2 more at each of 6 scallop centers = 12, and 2 sc in each of 12 ch-2 sps = 24). Total: 96 sts (90 sc + 6 sl st).
Per scallop: 4 sc + 3 sc + 4 sc + 2 sc + 2 sc = 15 sc, plus 1 sl st = 16 sts. 16 x 6 = 96.
Why the math works: The 48-stitch band divides into 6 repeats of 8, and every round after it keeps exactly 6 repeats. Each V-st in Round 14 becomes one scallop, so you always get 6 even scallops. The 3 sc at each scallop center rounds the curve. The sl st between scallops pulls each valley in so the scallops separate cleanly.
Hanging Loop
Join thread with a sl st in any sc of Round 1 from the inside top. Ch 24, skip 5 sc, and sl st in the next sc of Round 1 (directly across the ring). Ch 1, work 30 sc over the ch-24 loop, packing them tightly. Sl st in the starting sc of Round 1. Fasten off.
The loop stands about 1.5 in (3.8 cm) tall.
Final Blocking
- Weave in all ends along the solid sc rounds, either the Round 6 band or the Round 16 rim, where they are hidden.
- Mix fabric stiffener according to the package, or prepare heavy spray starch.
- Soak the bell completely, then gently squeeze out the excess. Don’t wring it.
- Slide the bell over your blocking form. The body should fit snugly at about 6 in (15.2 cm) circumference.
- Shape the dome by smoothing the spokes so they radiate evenly from the ring.
- Open each fan with your fingertips. Straighten the ch-3 bars so the diamonds are symmetrical.
- Turn the form upside down on foam. Pin each of the 6 scallops so it flares slightly outward, and check that the tips measure about 3.75 in (9.5 cm) across when viewed flat.
- Pin the hanging loop upright.
- Let it dry completely, for at least 12 hours, before removing the form.
Final Quality-Control Checklist
- Height is 3.5 in (8.9 cm), and body flat width is 3 in (7.6 cm).
- The dome has 12 evenly spaced spokes.
- The Round 6 ridge band runs continuously around the bell.
- Each body tier has exactly 6 fans, and the fans alternate position tier to tier.
- Every diamond is closed by ch-3 bars, with no skipped bars.
- There are 6 even scallops, each with a centered 3-sc point.
- The hanging loop is centered over the ring and is firm, not floppy.
- No ends are visible on the outside.
- The bell stands or hangs straight without leaning.
Troubleshooting
The dome ruffles instead of cupping. Your Round 2–3 dc are too loose. Go down a hook size for Rounds 1–5 only.
The top is flat and the band won’t turn down. Work Round 6 firmly in BLO. You can also block the dome over a rounded form.
There are 5 or 7 fans instead of 6. Your Round 5 or Round 6 count is off. Recount to 48 before starting Round 7.
The fans don’t alternate. Check the transition sl sts at the start of Rounds 10 and 11. Shells must go into the V-st spaces, not over the sc.
The hem cups inward. Loosen the ch-4 bars in Round 14, or add 1 sc to each ch-2 sp in Round 16 (3 sc per space). Blocking also helps.
The scallops ripple. Your Round 16 tension is too loose. Rework the round with a firmer hand.
The bell leans. Re-wet it and block it again on a straight-sided form.
Care
Spot clean only, using cool water and a damp cloth. To refresh a soft bell, re-stiffen and reshape it over the same form, then store it flat in tissue between seasons.
Final Notes
The measurement chain is simple:
- Your gauge of 8 sc = 1 in (2.5 cm) sets the 48-stitch band at 6 in (15.2 cm) circumference and 3 in (7.6 cm) flat width.
- The seven lattice rounds take the bell to 2.75 in (7.0 cm).
- The three-round hem adds 0.75 in (1.9 cm), for a finished height of 3.5 in (8.9 cm).
If your band checkpoint after Round 6 is right, everything that follows will fall into place. Make one, then make a whole tree’s worth.
Happy crocheting!