

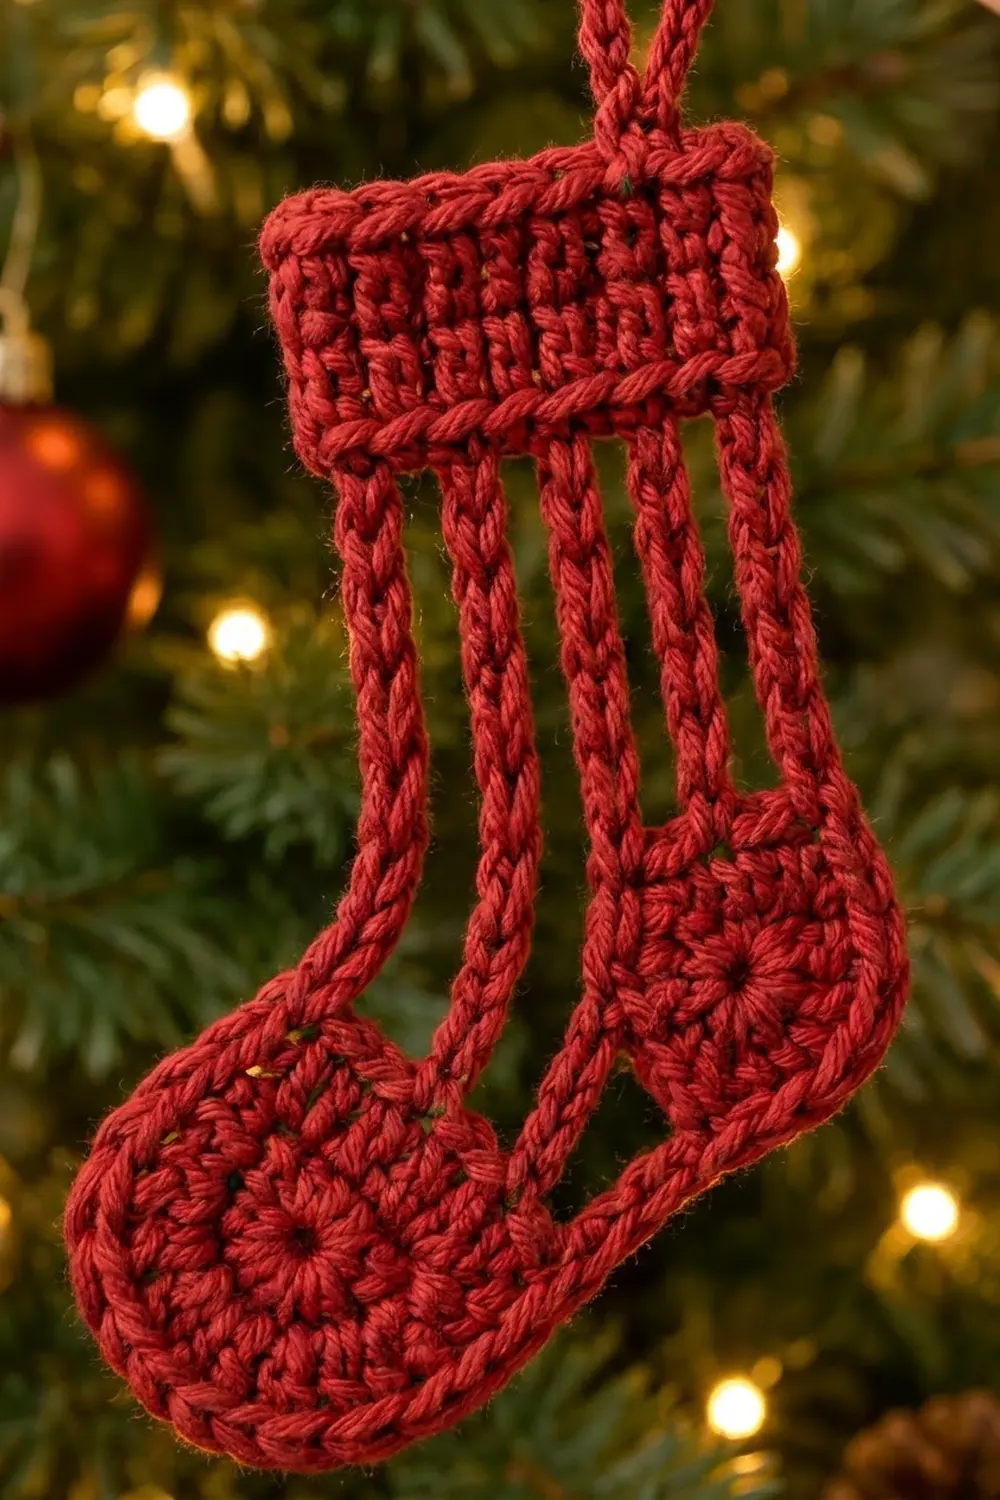
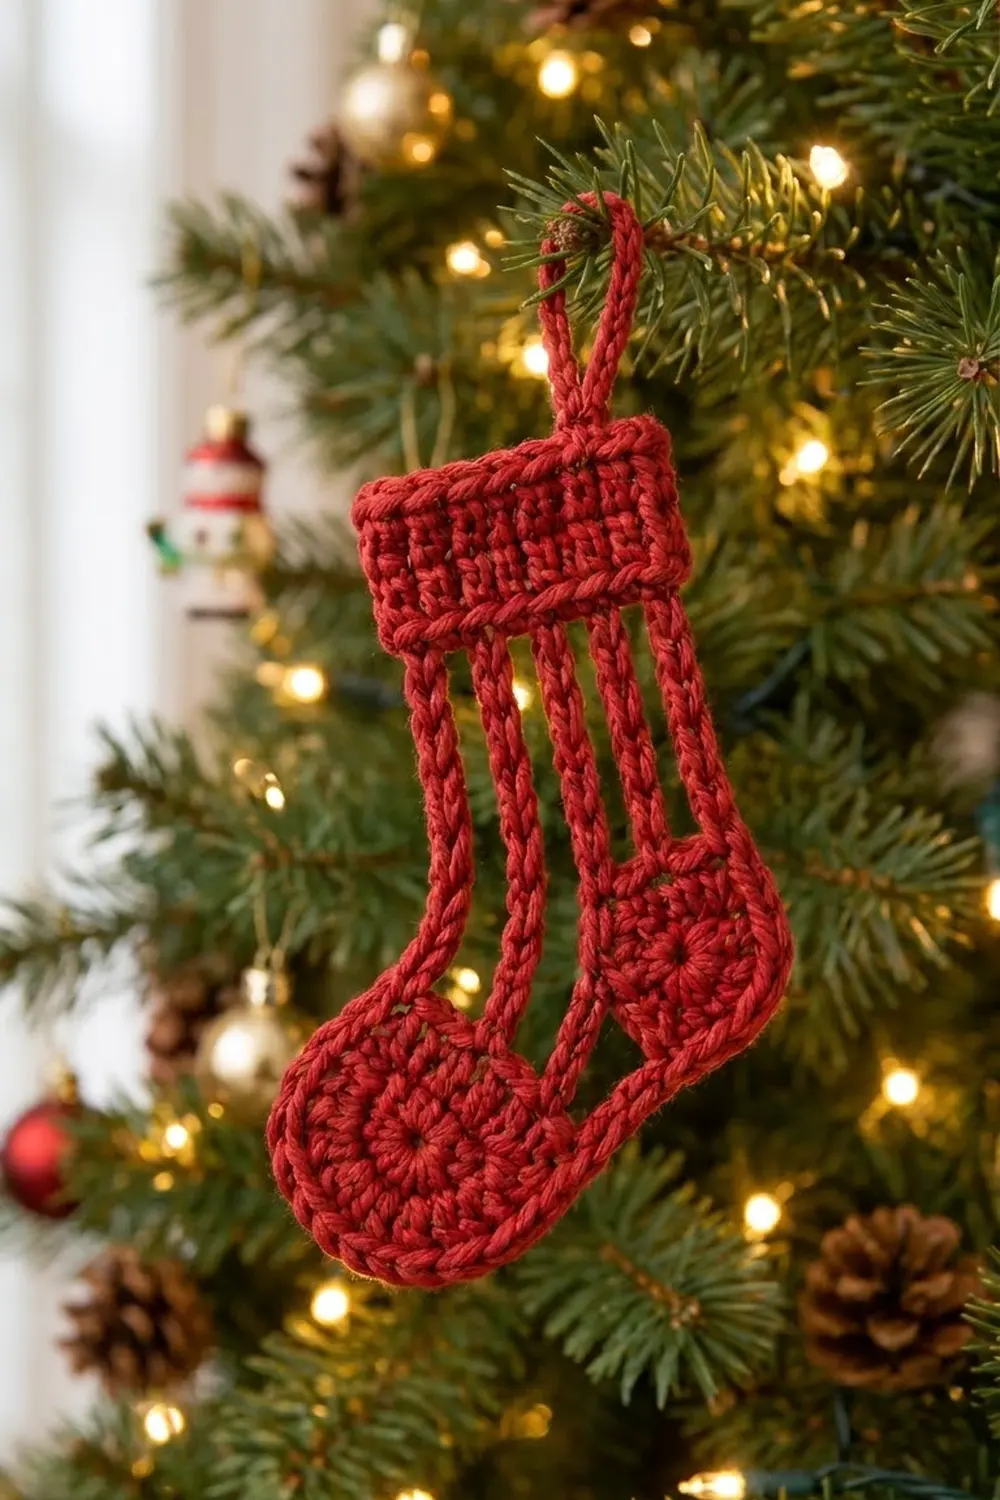
This little stocking is mostly empty space, and that’s why it looks good on a tree. A solid ribbed cuff sits at the top. Four slender cords hang down from it, and two round motifs form the heel and the toe. One raised outline of single crochet runs around the whole silhouette, so the shape stays crisp even with tree lights showing through it.
The sample is worked in one color, a warm Christmas red, in DK-weight cotton. The cuff has vertical ridges from back-loop single crochet. The circles are worked in half double crochet. The outline gives the piece a thick, braided-looking edge. It’s a simple, classic look that suits a whole tree of matching ornaments.
The pattern uses US crochet terms. The finished ornament measures about 3.5 in (8.9 cm) wide and 4.7 in (11.9 cm) tall. The hanging loop adds about 1.25 in (3.2 cm).
Construction is modular, but the result is one single piece. First you crochet the cuff flat in rows, then the heel circle and the toe circle in rounds. Next, pin everything in place and connect it with slip-stitch cords. One border round outlines the whole stocking, and a hanging loop finishes it.
Finished Size and Construction
- Finished size: 3.5 in x 4.7 in (8.9 cm x 11.9 cm), plus a 1.25 in (3.2 cm) loop
- Skill level: Easy / advanced beginner
- Terminology: US crochet terms
- Yarn weight: DK (#3, light), cotton or cotton blend
- Hook: 3.5 mm (E-4)
- Number of pieces: 1 finished ornament, built from 3 components (cuff, heel circle, toe circle)
- Layout: Cuff on top, heel circle under the back half, toe circle under the front and slightly forward
- Component sizes: Cuff 2.5 in x 1 in (6.4 cm x 2.5 cm); heel 1.25 in (3.2 cm) across; toe 1.75 in (4.4 cm) across
- Size before border: 3.1 in x 4.3 in (7.9 cm x 10.9 cm)
- Border depth: 0.2 in (0.5 cm) on each side
Materials
Yarn: Use a smooth, tightly plied DK cotton or a cotton-acrylic blend. Mercerized cotton shows off the stitch texture and keeps the cords from stretching. Avoid fuzzy or very soft yarns, because the open areas need firm edges.
- Red: 10 g, about 24 m (26 yd), per ornament
This amount includes a safety margin of about 30 percent. If you’re making a set of five like the ones on the tree, one 50 g ball is enough.
Tools:
- 3.5 mm (E-4) crochet hook
- 4 locking stitch markers
- Tapestry needle
- Scissors
- Rustproof pins and a foam blocking mat
- Spray bottle with water
- Ruler or measuring tape
Abbreviations (US Terms)
- ch – chain
- sl st – slip stitch
- sc – single crochet
- hdc – half double crochet
- BLO – back loop only
- st(s) – stitch(es)
- MR – magic ring
Special stitch – Slip-stitch cord: Ch the given number. Sl st into the target stitch. Then work 1 sl st into the back bump of each chain, back toward where you started. The cord ends up thick, round, and about the same width as a stitch.
Sc over cord: Insert your hook under the whole cord instead of into a stitch, then complete a sc. This wraps the cord in a tight outline.
Gauge and Checkpoints
Gauge: 20 sc and 21 BLO sc rows = 4 in (10.2 cm). Chain gauge is 6 ch = 1 in (2.5 cm).
Make the cuff first and treat it as your swatch, because it’s small and quick. Measure it before you go on.
Checkpoints:
- Cuff after Row 13: 2.5 in (6.4 cm) wide and 1 in (2.5 cm) tall.
- Heel circle after Round 2: 1.25 in (3.2 cm) across.
- Toe circle after Round 3: 1.75 in (4.4 cm) across.
- Assembled frame before border: 3.1 in x 4.3 in (7.9 cm x 10.9 cm).
- After border: 3.5 in x 4.7 in (8.9 cm x 11.9 cm).
Too big? Go down to a 3.25 mm hook, or pull the working yarn a little tighter. Too small? Go up to a 3.75 mm hook. Change the hook, not the stitch counts. All the counts below depend on each other.
Part 1: Cuff
The cuff is worked flat in short rows. After it’s finished, you turn it sideways so the rows stand vertically. This creates the ribbed columns you see on the top of the stocking.
Foundation: Ch 6.
Row 1: Sc in 2nd ch from hook and in each ch across, turn. (5 sc)
Rows 2–13: Ch 1 (does not count as a st), sc BLO in each st across, turn. (5 sc each row)
At the end of Row 13, fasten off with a 6 in (15.2 cm) tail and weave it in.
Orientation: Turn the cuff so the rows run up and down. Put Row 1 on the left. This is the front (toe side). Row 13 goes on the right. This is the back (heel side). The top and bottom edges each have 13 row-ends. The left and right short sides each have 5 stitches.
Checkpoint: 2.5 in (6.4 cm) wide x 1 in (2.5 cm) tall.
Part 2: Heel Circle
Round 1: MR, ch 2 (does not count as a st), 12 hdc in ring. Sl st to the first hdc to join. (12 hdc)
Round 2: Ch 2, 2 hdc in each st around. Sl st to the first hdc. (24 hdc)
Fasten off and weave in both tails.
Checkpoint: 1.25 in (3.2 cm) across, lying flat.
Part 3: Toe Circle
Round 1: MR, ch 2, 12 hdc in ring. Sl st to the first hdc. (12 hdc)
Round 2: Ch 2, 2 hdc in each st around. Sl st to the first hdc. (24 hdc)
Round 3: Ch 2, hdc in next st, 2 hdc in next st; repeat from * 11 more times. Sl st to the first hdc. (36 hdc)
Fasten off and weave in both tails.
Checkpoint: 1.75 in (4.4 cm) across, lying flat.
Part 4: Marking the Attachment Points
Hold each circle right side up with its join seam at 12 o’clock. Count the stitches clockwise, starting with the first stitch after the seam.
- Toe circle (36 sts, 3 sts per “hour”): Put markers in st 33 (11 o’clock, Cord A), st 3 (1 o’clock, Cord B), and st 12 (4 o’clock, sole cord).
- Heel circle (24 sts, 2 sts per “hour”): Mark st 22 (11 o’clock, Cord C), st 4 (2 o’clock, Cord D), and st 14 (7 o’clock, sole cord).
On the cuff’s bottom edge, the cords go at row-ends 1, 5, 9, and 13, counting from the left. That leaves 4 row-ends between cords, or about 0.75 in (1.9 cm).
Layout: Pin the cuff to your mat. Put the toe circle under the front half, with its left edge about 0.5 in (1.3 cm) past the cuff’s left edge. Its 11 o’clock point should sit about 1.7 in (4.3 cm) below the cuff. Put the heel circle under the back half, with its right edge lined up with the cuff’s right edge. The two circles should almost touch along the bottom.
Part 5: Leg Cords
Leave the pieces pinned while you work, so the cords don’t twist.
Cord A (front edge): Join yarn with a sl st in the bottom of row-end 1 (the bottom-left corner of the cuff). Ch 10, sl st in toe st 33. Sl st in the back bump of each of the 10 ch back up. Sl st again in row-end 1.
Travel: Sl st in each of row-ends 2, 3, 4, and 5. (4 sl st)
Cord B: Ch 10, sl st in toe st 3. Sl st back up the 10 ch, then sl st in row-end 5.
Travel: Sl st in each of row-ends 6–9. (4 sl st)
Cord C: Ch 9, sl st in heel st 22. Sl st back up the 9 ch, then sl st in row-end 9.
Travel: Sl st in each of row-ends 10–13. (4 sl st)
Cord D (back edge): Ch 10, sl st in heel st 4. Sl st back up the 10 ch, then sl st in row-end 13. Fasten off.
Sole cord: Join yarn in toe st 12. Ch 3, sl st in heel st 14. Sl st back along the 3 ch, then sl st in toe st 12. Fasten off.
Cord C is one chain shorter than the others because heel st 22 sits slightly higher than heel st 4. With this difference, all four cords hang straight without sagging.
Checkpoint: Unpin and lay the frame flat. It should measure 3.1 in (7.9 cm) wide and 4.3 in (10.9 cm) tall. The cords should lie flat, not bowed or stretched tight. If a cord pulls, undo it and work the chains more loosely.
Part 6: Border (Outline Round)
The border is a single round of sc that runs around the outside of the silhouette only. Cords B and C, the bottom edge of the cuff between the cords, and the inner sides of the circles all stay unbordered.
Border gauge: 5 sc per 1 in (2.5 cm) on straight edges and over cords. On the curves, the increase rate matches the circle’s next round, so the curves stay flat.
Work with the right side facing. Go clockwise: across the top, down the back, around the heel, across the sole, around the toe, and up the front.
Border Round: Join yarn in the top end of Row 1 (top-left corner).
- Top-left corner: 3 sc in the corner. (3)
- Top edge: 1 sc in each of the next 11 row-ends (row-ends 2–12). (11)
- Top-right corner: 3 sc in the top end of Row 13. (3)
- Back side: 1 sc in each of the 3 middle sts of Row 13. (3)
- Bottom-right corner: 1 sc in the bottom st of Row 13, where Cord D starts. (1)
- Cord D: 8 sc over the cord. (8)
- Heel arc: Working in heel sts 5–14, sc in next st, 2 sc in next st; repeat 4 more times. (15)
- Sole cord: 3 sc over the cord. (3)
- Toe arc: Working in toe sts 13–33, sc in each of next 2 sts, 2 sc in next st; repeat 6 more times. (28)
- Cord A: 8 sc over the cord. (8)
- Bottom-left corner: 1 sc in the bottom st of Row 1. (1)
- Front side: 1 sc in each of the 3 middle sts of Row 1. (3)
Sl st to the first sc to join. Total: 87 sc.
Why the math works:
- Cuff: 21 sts worked 1 per existing st or row-end (13 along the top, 3 + 1 on the back, 1 + 3 on the front), plus 4 extra sc (2 more at each top corner) = 25 sc.
- Heel arc: 10 existing sts + 5 extra = 15 sc. That’s a 3:2 ratio, the same one that would turn 24 sts into 36 in a full next round.
- Toe arc: 21 existing sts + 7 extra = 28 sc. That’s a 4:3 ratio, the same one that would turn 36 sts into 48.
- Cords: 8 + 3 + 8 = 19 sc. A 10-ch cord is about 1.7 in (4.3 cm), and 8 sc lie flat over it without ruffling. The 3-ch sole cord is about 0.5 in (1.3 cm) and takes 3 sc.
- Check: 25 + 15 + 28 + 19 = 87 sc.
Hanging Loop: After the join, sl st across to the middle sc of the top-right corner group. Ch 14 and sl st in that same sc to make a loop. Work 20 sc into the loop, then sl st in the same corner sc. Fasten off and weave in the tail through the border.
Checkpoint: 3.5 in (8.9 cm) wide x 4.7 in (11.9 cm) tall, not counting the loop. The loop rises about 1.25 in (3.2 cm) above the cuff.
Final Blocking
- Weave in any tails that are left. Hide them inside the border or the cuff, never inside a cord, where they would show.
- Spray the ornament lightly until it’s damp, not soaked.
- Lay it right side up on the blocking mat.
- Pin the cuff into a rectangle 2.9 in x 1.2 in (7.4 cm x 3.0 cm), including the border.
- Straighten each cord so it hangs vertically, and pin it at the middle.
- Pin both circles round, about 1.65 in (4.2 cm) across for the heel and 2.15 in (5.5 cm) for the toe, including the border.
- Check the overall size: 3.5 in x 4.7 in (8.9 cm x 11.9 cm).
- Let it dry completely, about 2–4 hours, before you unpin it.
- If you want the ornament stiffer, brush on a light fabric stiffener while it’s still pinned.
Final Quality-Control Checklist
- [ ] Cuff has 13 rows of 5 sts, and the ribs run vertically
- [ ] Heel circle has 24 sts, and the toe circle has 36 sts
- [ ] Four leg cords are attached at row-ends 1, 5, 9, and 13
- [ ] Cords hang straight with no twists
- [ ] Sole cord links the toe at 4 o’clock to the heel at 7 o’clock
- [ ] Border round counts 87 sc
- [ ] Inner cords B and C have no border
- [ ] Hanging loop is firmly attached at the top-right corner
- [ ] Ornament measures 3.5 in x 4.7 in (8.9 cm x 11.9 cm)
- [ ] No tails are visible from the front
Troubleshooting
The circles cup or ruffle. Cupping means you’re working too tight. Ruffling means you’re working too loose. Change your hook, not the increases.
A cord sags or bows. The chain is too loose, or it was stretched while you worked. Undo it and redo it with even, firm chains.
The border pulls the cuff corners inward. Make sure each top corner has 3 sc in it.
The heel arc puckers. Count the increases. You need exactly 5 extra sc across the 10 heel sts.
The ornament leans to one side. Cord C may be too long. Check it against the 9-ch count.
The cords twist. Pin the pieces before you join them, and keep the right side facing you throughout.
The loop stretches over time. Work the 20 sc into the loop firmly, or use 22 sc for a denser loop.
Care
Hand wash in cool water with mild soap. Press out the water in a towel, then reshape and dry flat, pinning the cords straight again if needed.
Final Notes
Each measurement depends on the one before it. The cuff gives you 2.5 in x 1 in (6.4 cm x 2.5 cm). The heel and toe circles measure 1.25 in (3.2 cm) and 1.75 in (4.4 cm). The cords set the frame at 3.1 in x 4.3 in (7.9 cm x 10.9 cm). An 87-stitch border adds 0.2 in (0.5 cm) all around, for a finished size of 3.5 in x 4.7 in (8.9 cm x 11.9 cm).
If you match the gauge at the cuff, the rest falls into place. Make one, check it against every checkpoint, then make a whole set for your tree.
Happy crocheting!