

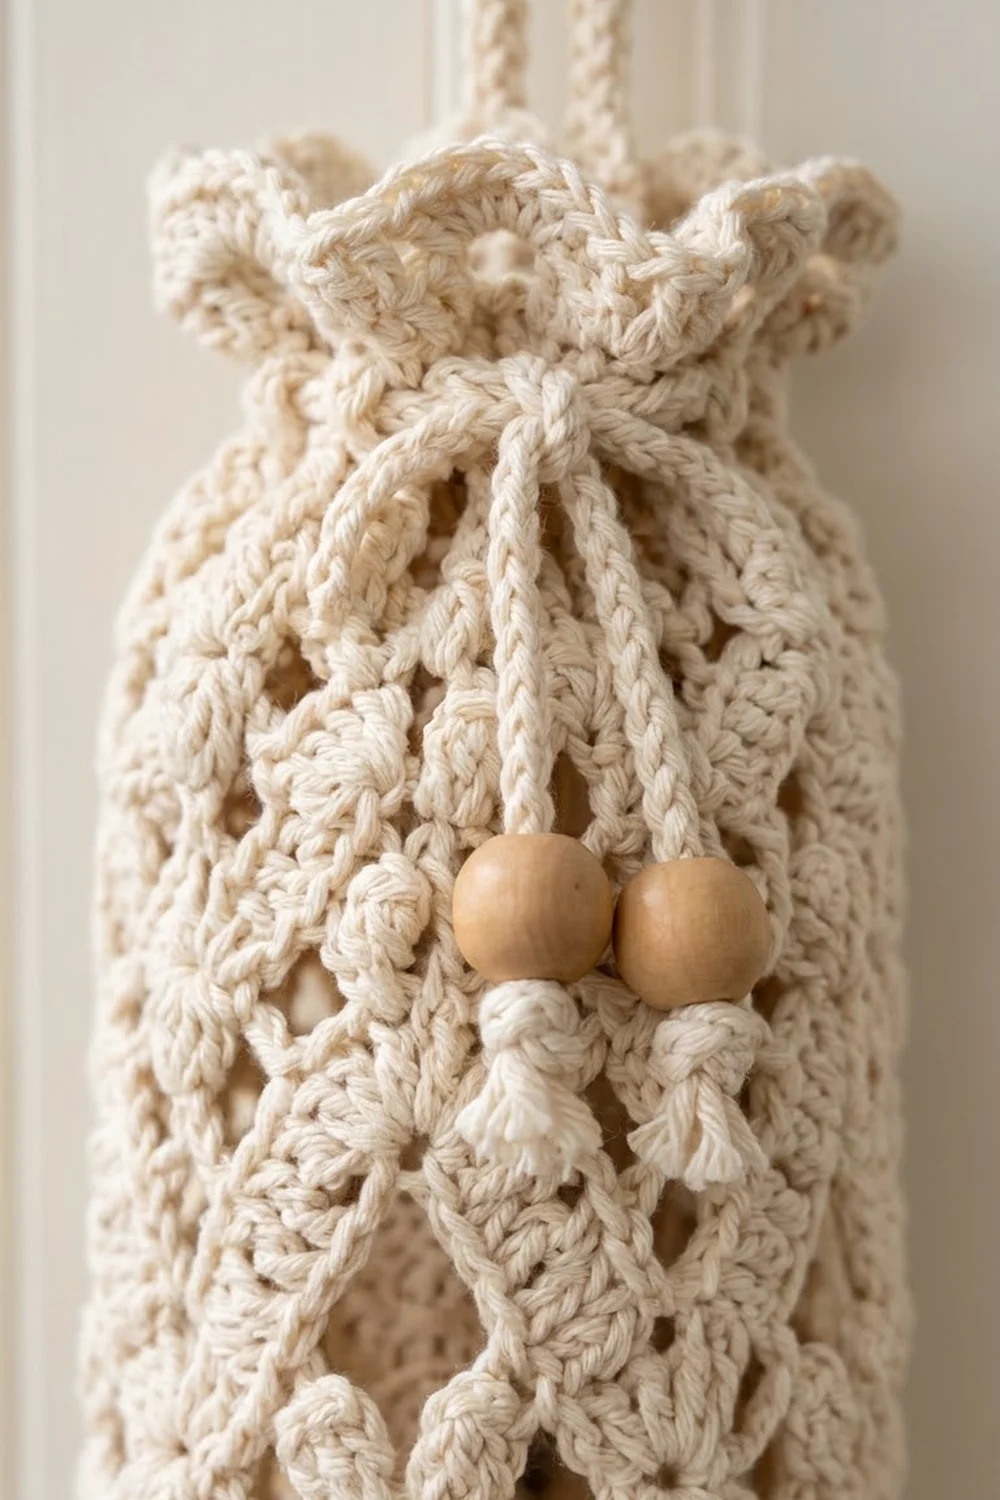
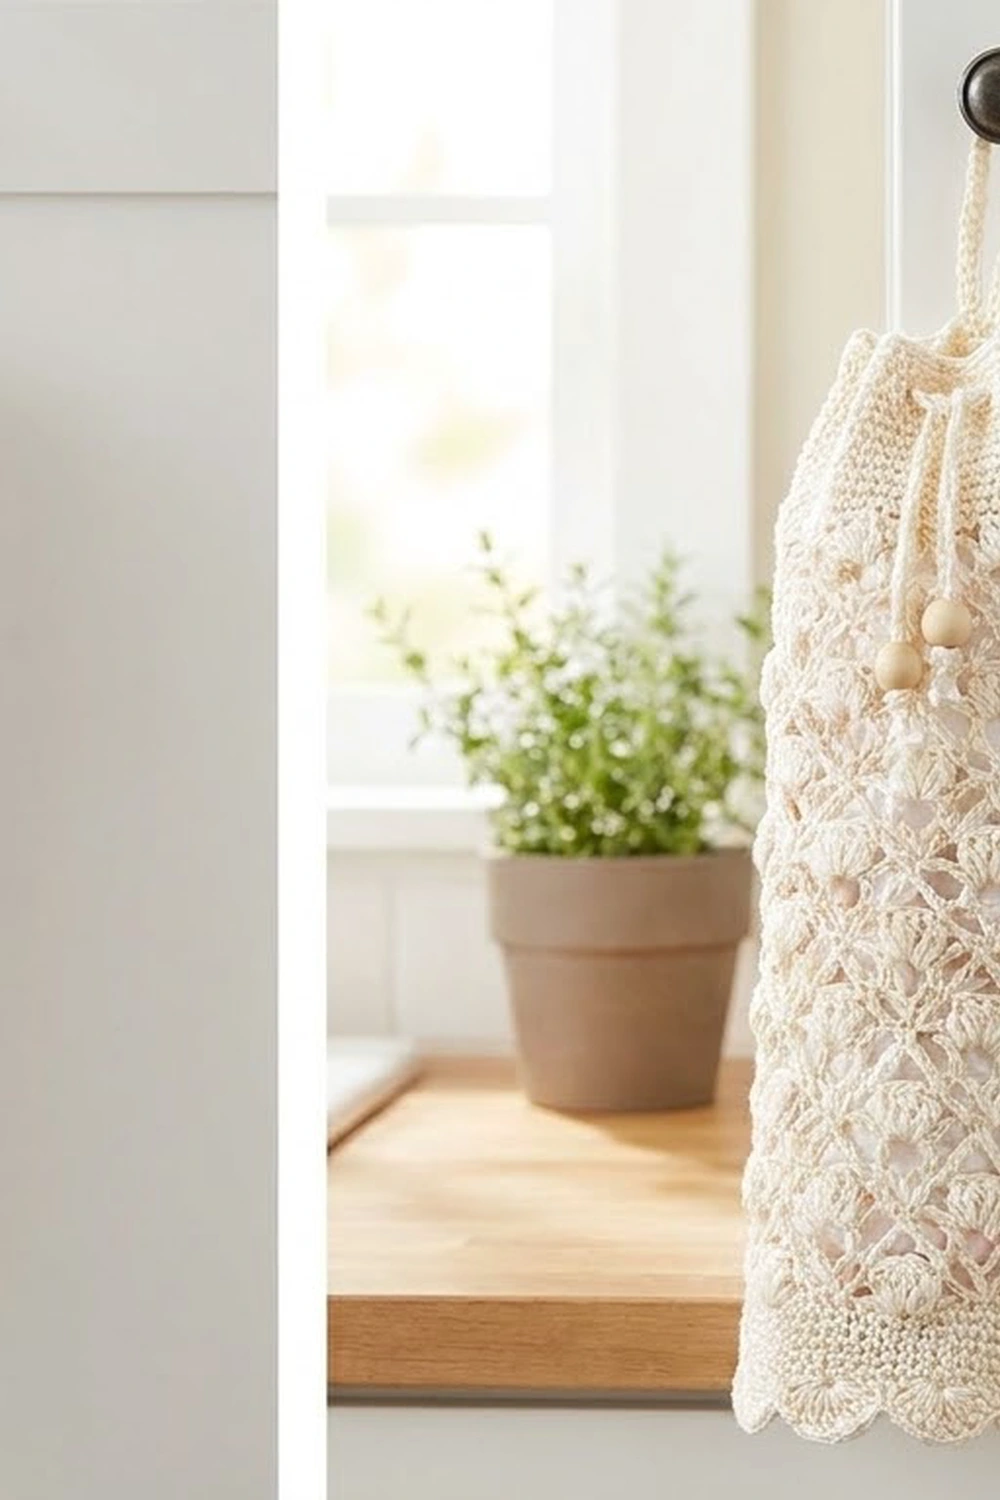
Plastic bags are easy to collect and hard to keep tidy. This holder keeps them in one place and looks good doing it. The Cottage Lattice holder is a slim lace tube in soft cream cotton. It has a diamond lattice of double crochet with small puff clusters, a scalloped shell edge at each end, and a gathered top closed with a beaded drawstring.
The style is farmhouse-cottage. It looks good on a cabinet knob in a white kitchen, and a warm taupe works just as well. Choose a solid, light color so the lattice and puffs stand out.
This pattern uses US crochet terms. The finished holder is about 6 in (15.2 cm) wide laid flat, which is a 12 in (30.5 cm) circumference. It is 22.25 in (56.5 cm) long from the bottom scallop to the top scallop, not counting the hanging loop.
Construction is simple. You work one flat rectangular panel in rows, seam it into a tube, then add the edgings in joined rounds: a scallop at the bottom, and an eyelet round plus scallop at the top. Last, you make a chain drawstring and a strip for the hanging loop.
Finished Size and Construction
- Finished size: 6 in (15.2 cm) wide flat × 22.25 in (56.5 cm) long
- Circumference: 12 in (30.5 cm)
- Skill level: Easy-Intermediate
- Terminology: US
- Yarn weight: DK (#3) cotton
- Hook: 4.0 mm (G-6)
- Number of pieces: 1 main panel, plus 1 drawstring and 1 hanging loop
- Layout: single panel seamed into a vertical tube; seam at center back
- Panel size before seaming: 12.2 in (31.0 cm) wide × 20 in (50.8 cm) tall
- Size before edgings: 12 in (30.5 cm) circumference × 20 in (50.8 cm) tall
- Edging depth: bottom 0.75 in (1.9 cm); top 1.5 in (3.8 cm)
Materials
Yarn: Use a smooth, mercerized or combed DK cotton. Cotton keeps the lattice crisp, is easy to wash, and doesn’t stretch out under the weight of the bags. Avoid fuzzy blends, which blur the diamond openings.
- Cream (main color): 150 g, about 360 m (3 balls of 50 g / 120 m)
For a taupe version, substitute the same amount of light taupe.
Tools:
– 4.0 mm (G-6) crochet hook
– Tapestry needle
– 2 wooden beads, 16 mm, with holes at least 4 mm wide
– Scissors and measuring tape
– Stitch marker
– Rust-proof pins and a blocking mat
Quantities include a margin of about 15–20% for gauge differences and the gauge swatch.
Abbreviations (US Terms)
- ch – chain
- sl st – slip stitch
- sc – single crochet
- dc – double crochet
- sk – skip
- sp – space
- st(s) – stitch(es)
- t-ch – turning chain
- RS / WS – right side / wrong side
Special stitch – Puff: (Yarn over, insert hook in the indicated stitch or space, pull up a loop to dc height) 3 times (7 loops on hook). Yarn over and pull through all 7 loops, then ch 1 to close. The closing ch 1 is part of the puff and does not count as a separate stitch.
Counting note: In this pattern each chain counts as one stitch position. The ch 3 at the start of a row counts as 1 dc. Every row has 61 stitch positions.
Gauge and Checkpoints
Gauge: 20 sts and 8 rows = 4 in (10.2 cm) in the lattice pattern, after blocking. One 4-row pattern repeat = 2 in (5.1 cm) tall. One 6-stitch repeat = 1.2 in (3.0 cm) wide.
Test first: Ch 33 and work Rows 1–6 over 31 stitch positions (5 repeats) to make a swatch. Block it and measure. Five repeats plus the edge stitch should measure 6.2 in (15.7 cm) wide.
Checkpoints:
– After Row 1: panel is 12.2 in (31.0 cm) wide.
– After Row 10: panel is 5 in (12.7 cm) tall.
– After Row 40: panel is 20 in (50.8 cm) tall.
– After seaming: tube is 6 in (15.2 cm) wide laid flat.
– After edgings: total length is 22.25 in (56.5 cm).
Too big? Go down to a 3.75 mm hook. Too small? Go up to a 4.5 mm hook. Change hook size rather than stitch count so that the 6-stitch repeat still lines up with the 10 scallops.
Main Panel
Ch 63.
Row 1 (RS): Dc in 4th ch from hook (the skipped 3 ch count as the first dc) and in each ch across. Turn. (61 dc)
Row 2 (WS): Ch 3 (counts as dc), ch 2, sk 2 sts, puff in next st, ch 2, sk 2 sts, dc in next st; repeat from * 10 times total, working the last dc in the top of the t-ch. Turn.
(11 dc + 10 puffs + 20 ch-2 sps = 61 stitch positions)
Row 3: Ch 3 (counts as dc), 2 dc in next ch-2 sp, ch 1, sk next st (puff or dc); repeat from * 19 times total, 2 dc in last ch-2 sp, dc in top of t-ch. Turn.
(42 dc + 19 ch-1 sps = 61)
This row builds the dc pairs that frame the diamonds. The single ch-1 spaces sit over the puffs and dc from Row 2, so the openings shift halfway and the lattice lines start to slant.
Row 4: Ch 3 (counts as dc), ch 2, sk 2 dc, dc in next ch-1 sp, ch 2, sk 2 dc, puff in next ch-1 sp, ch 2, sk 2 dc, dc in next ch-1 sp; repeat from * 9 times total, ch 2, sk 2 dc, dc in top of t-ch. Turn.
(12 dc + 9 puffs + 20 ch-2 sps = 61)
Row 5: Repeat Row 3. (42 dc + 19 ch-1 sps = 61)
Row 6: Ch 3 (counts as dc), ch 2, sk 2 dc, puff in next ch-1 sp, ch 2, sk 2 dc, dc in next ch-1 sp; repeat from * 9 times total, ch 2, sk 2 dc, puff in last ch-1 sp, ch 2, sk 2 dc, dc in top of t-ch. Turn.
(11 dc + 10 puffs + 20 ch-2 sps = 61)
The puffs in Rows 4 and 6 fall in alternating columns. That offset turns the openings into diamonds and puts a puff at every crossing of the lattice.
Rows 7–38: Repeat Rows 3–6 eight more times. Rows 3–38 are 9 full repeats in total.
Row 39: Repeat Row 3. (42 dc + 19 ch-1 sps = 61)
Row 40: Ch 3 (counts as dc), dc in each dc and in each ch-1 sp across, working the last dc in the top of the t-ch. (61 dc) Fasten off and leave a 30 in (76.2 cm) tail for seaming.
Checkpoint: The panel is 12.2 in × 20 in (31.0 cm × 50.8 cm). It has 40 rows: 1 solid row, 38 lattice rows, and 1 solid row.
Seam the Tube
Fold the panel with the RS together so the two long edges meet. Insert the hook through both edge stitches and use the tail to work 2 sl sts in each row-end: one around the post of the dc and one at its top. That is 80 sl sts for 40 rows. Fasten off and turn the tube RS out.
The first and last dc of each row now sit side by side at the seam. In the edgings you work these two stitches together as one, so the round count is 60 and not 61.
Checkpoint: The tube is 6 in (15.2 cm) wide flat and 12 in (30.5 cm) around.
Border (Edgings)
Border gauge: 5 sc per 1 in (2.5 cm), the same as the body. 60 sts × 0.2 in = 12 in (30.5 cm), so the edgings won’t flare or pull in.
Bottom Edging (worked into the Row 1 foundation chain)
With the RS facing, join yarn at the seam.
Round 1: Ch 1, sc in each foundation ch around, working the 2 chains at the seam together as 1 sc. Join with a sl st to the first sc. (60 sc)
Round 2: Ch 1, sc in the same st, sk 2 sts, 5 dc in next st, sk 2 sts, sc in next st; repeat from * 9 times, sk 2 sts, 5 dc in next st, sk 2 sts, join with a sl st to the first sc. Fasten off.
(10 shells: 50 dc + 10 sc = 60 sts)
Bottom edging depth: 0.75 in (1.9 cm). Leave the bottom open so bags can be pulled out.
Top Edging (worked into Row 40)
With the RS facing, join yarn at the seam.
Round 1: Ch 1, sc in each dc around, working the 2 edge dc at the seam together as 1 sc. Join. (60 sc)
Round 2 (eyelets): Ch 4 (counts as dc + ch 1), sk next st, dc in next st, ch 1, sk next st; repeat from * 28 times, join with a sl st to the 3rd ch of the beginning ch-4.
(30 dc + 30 ch-1 sps = 60 stitch positions)
Round 3: Ch 1, sc in each dc and in each ch-1 sp around. Join. (60 sc)
Round 4: Work as Bottom Round 2. (10 shells = 60 sts) Fasten off.
Top edging depth: 1.5 in (3.8 cm).
Why the math works: 60 is 10 × 6, so the 10 scallops line up with the 10 lattice repeats around the tube, one shell over each diamond column. The 30 eyelets divide evenly into 60, so the drawstring gathers the top evenly.
Drawstring
Ch 112, or enough to reach 28 in (71.1 cm). Sl st in the back bump of each ch across. Fasten off.
Start at the center front, opposite the seam. Weave the drawstring in and out through the ch-1 eyelets of Top Round 2 until both ends come out at the front, 2 eyelets apart. Thread one 16 mm bead onto each end and tie an overhand knot about 0.5 in (1.3 cm) below each bead. Trim the tails to 0.5 in (1.3 cm).
Hanging Loop
Ch 41. Sc in the 2nd ch from hook and in each ch across. (40 sc, about 8 in / 20.3 cm long) Fasten off and leave a long tail.
Fold the strip in half. Sew both ends to the inside of the top edging at center back, through Rounds 1 and 3, so a 4 in (10.2 cm) loop stands above the scallops.
Final Blocking
- Weave in all ends along the seam or inside the solid rows.
- Soak the holder in cool water for 10 minutes, then press out the water. Don’t wring it.
- Roll it in a towel to remove excess water.
- Lay it flat with the seam at center back. Ease it to 6 in (15.2 cm) wide and 20 in (50.8 cm) tall through the body.
- Open each scallop with your fingertips and pin the shell points.
- Push the puffs forward from the inside so they stand out.
- Let it dry completely, flipping it once, before you add the drawstring.
Final Quality-Control Checklist
- Every lattice row has 61 stitch positions.
- Puff columns alternate cleanly from Row 4 to Row 6.
- Tube is 6 in (15.2 cm) wide flat and 12 in (30.5 cm) around.
- Both edgings have exactly 10 shells.
- Seam is flat with no gaps or puckers.
- Drawstring tails come out at the center front and beads are secure.
- Loop is firmly sewn and centered at the back.
- Total length is 22.25 in (56.5 cm).
Troubleshooting
- Puffs collapsing: Pull each loop up to full dc height and close firmly with the ch 1.
- Diamonds look like stripes: Check that you’re working into the ch-1 spaces in Rows 4 and 6, not into the dc.
- Panel getting narrower: You may be missing the t-ch. Always work the last dc into the top of the t-ch.
- Seam ripples: Work exactly 2 sl sts per row-end and keep them loose. A larger hook for the seam can help.
- Scallops ruffle: Your edging tension is looser than the body. Use a hook one size smaller for the edgings.
- Top won’t gather well: Weave through every eyelet, and make sure the cord isn’t twisted.
Care
Hand-wash in cool water or machine-wash on a gentle cycle in a mesh bag. Reshape and dry flat.
Final Notes
Here is the measurement chain. A gauge of 20 sts = 4 in (10.2 cm) gives a 61-stitch panel 12.2 in (31.0 cm) wide. Forty rows at 8 rows = 4 in (10.2 cm) give 20 in (50.8 cm). Seaming makes a tube 12 in (30.5 cm) around with a 60-stitch edge. The edgings add 0.75 in (1.9 cm) at the bottom and 1.5 in (3.8 cm) at the top, for a finished holder 6 in × 22.25 in (15.2 cm × 56.5 cm). If you check each step against these numbers, the lattice, scallops and drawstring will all line up.
Happy crocheting!