

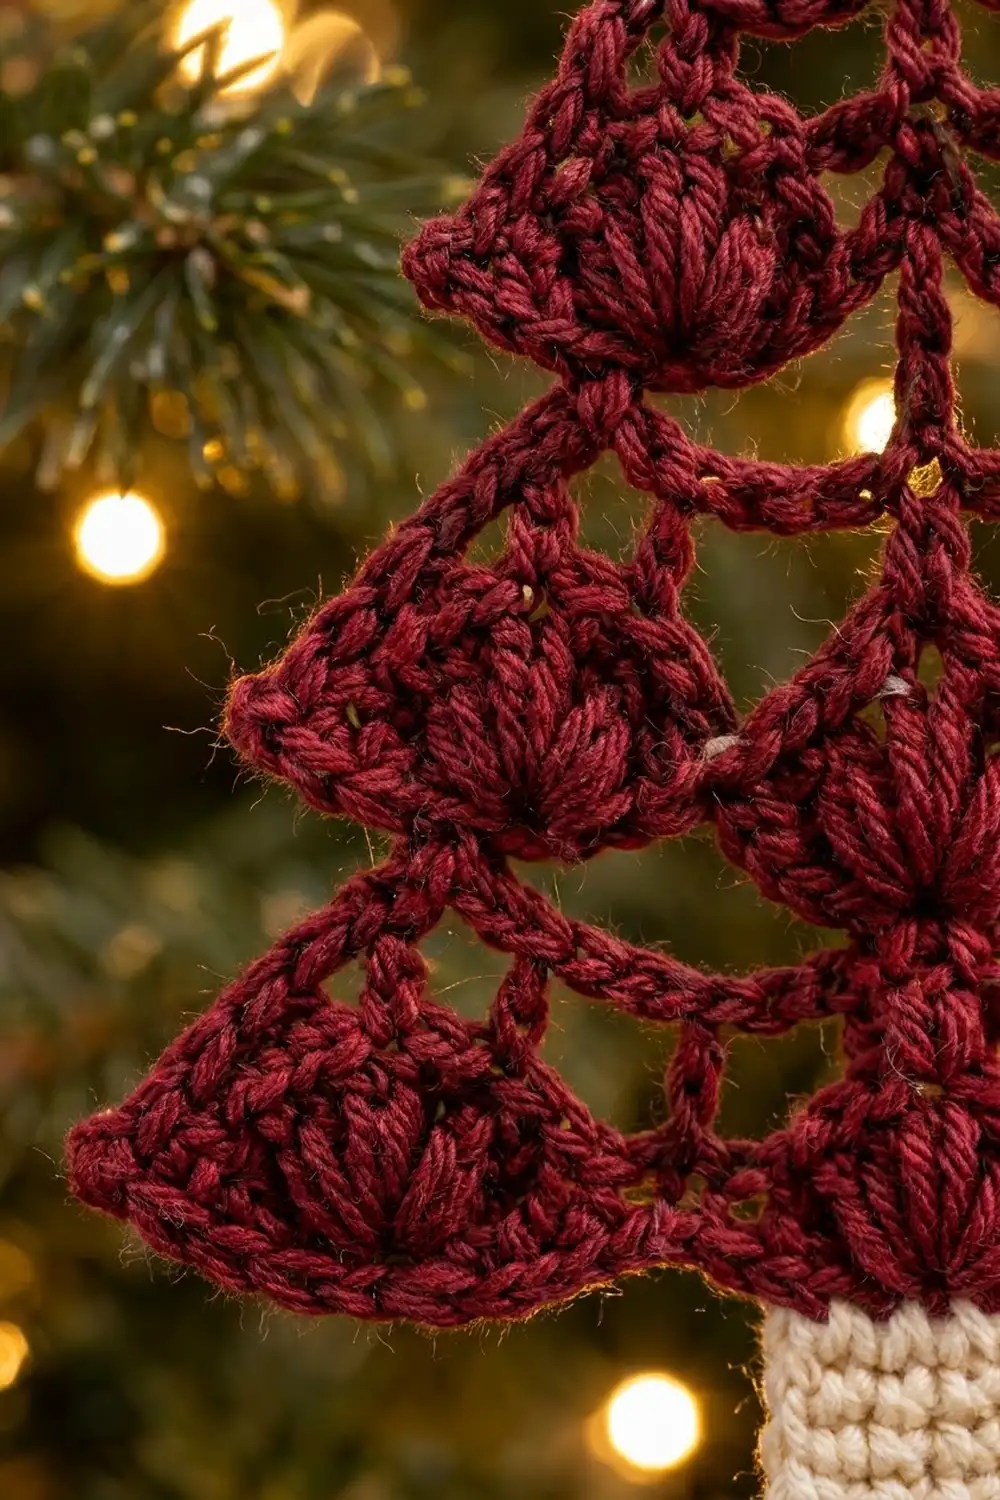
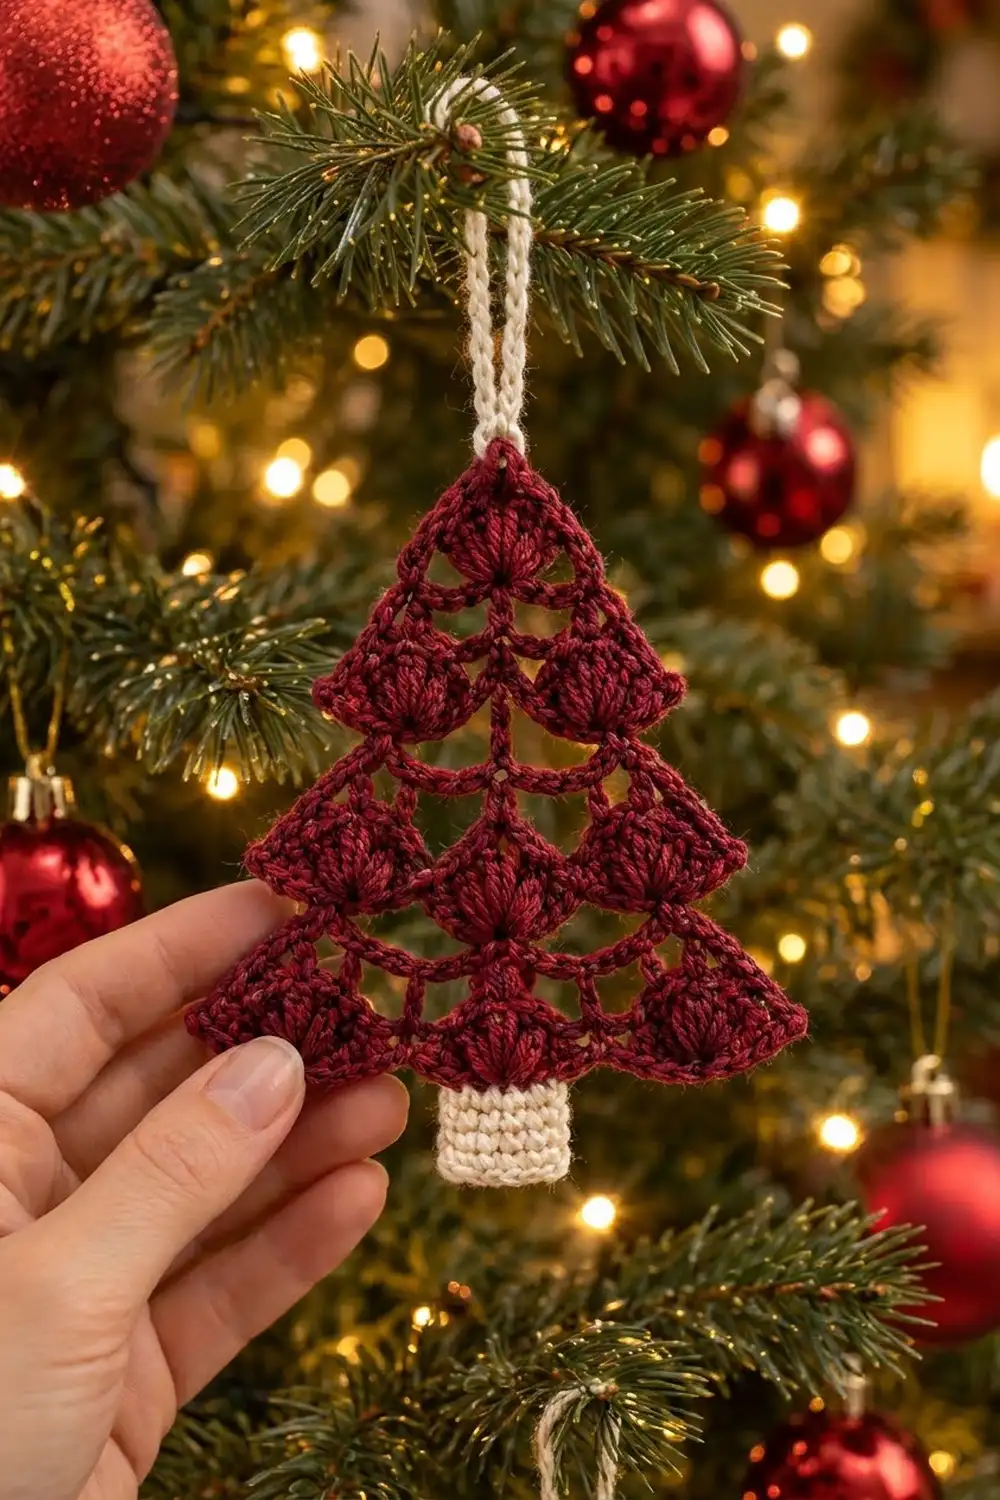
This little tree is a single flat lace ornament: a triangle of shell fans and chain arches in deep cranberry red, finished with a solid cream trunk and a cream hanging cord. It looks delicate on the branch, but it works up fast and holds its shape well after blocking.
The tree has four tiers of fans: one at the tip, then two, then three, then a wider tier of three. Chain arches form an open lattice between the fans, so tree lights glow through the gaps. Each fan row starts in a corner space, so the side edges step outward like real branches.
The pattern uses US crochet terms. The finished ornament measures about 4.75 in (12.1 cm) wide and 5.4 in (13.7 cm) tall including the trunk, not counting the hanging loop.
Construction is simple. You work the tree top-down in seven turned rows, add one round of single crochet around the outline, then work a small trunk in rows off the bottom edge. A slip-stitched cord at the tip finishes it.
Finished Size and Construction
- Finished size: 4.75 in (12.1 cm) wide x 5.4 in (13.7 cm) tall, trunk included
- Skill level: Easy-intermediate
- Terminology: US crochet terms
- Yarn weight: DK / light (#3)
- Hook: 3.5 mm (E-4)
- Number of pieces: 1 (tree, trunk, and cord are worked onto each other; nothing is sewn)
- Layout: Single upright triangle, trunk centered at the bottom, loop at the tip
- Tree size before border: 4.5 in (11.4 cm) wide x 4.25 in (10.8 cm) tall
- Border depth: about 1/8 in (0.3 cm) on each edge
- Tree size after border: 4.75 in (12.1 cm) wide x 4.5 in (11.4 cm) tall
- Trunk: 1 in (2.5 cm) wide x 0.9 in (2.3 cm) tall
Materials
Choose a smooth DK yarn with good stitch definition. Cotton or a cotton-acrylic blend shows the fans clearly and blocks crisply. Avoid fuzzy or brushed yarns, because they fill in the lace gaps. A tightly plied yarn also makes the slip-stitch cord look neat and rope-like.
- Color A, cranberry red: 10 g, about 24 m (26 yd)
- Color B, cream: 4 g, about 10 m (11 yd)
These amounts assume DK yarn of about 120 m per 50 g. They include a margin of roughly 30%, so small leftovers are enough.
Tools:
- 3.5 mm (E-4) crochet hook
- Tapestry needle
- Scissors
- Stitch marker
- Blocking mat and rustproof pins
- Spray bottle with water
- Ruler or tape measure
Abbreviations (US Terms)
- ch: chain
- sl st: slip stitch
- sc: single crochet
- dc: double crochet
- sk: skip
- sp(s): space(s)
- st(s): stitch(es)
- beg: beginning
- RS: right side
Special stitches:
- Fan: 7 dc worked into the same stitch or space. When a fan starts a row, ch 3 counts as the first dc, followed by 6 dc.
- V-st: (dc, ch 2, dc) worked into the same stitch or space. When a V-st starts a row, ch 5 counts as dc + ch 2, followed by 1 dc in the same stitch.
Gauge and Checkpoints
Gauge isn’t critical for an ornament, but it sets the final size and how open the lace looks. This is a single piece, so use Rows 1–3 as your test and measure before you go on.
- Fan gauge: One 7-dc fan (Row 1) = 1.25 in (3.2 cm) wide
- Single crochet gauge (trunk): 20 sc and 22 rows = 4 in (10.2 cm)
Checkpoints:
- After Row 1: 1.25 in (3.2 cm) wide
- After Row 3: 2.5 in (6.4 cm) wide x 1.75 in (4.4 cm) tall
- After Row 5: 3.5 in (8.9 cm) wide x 3 in (7.6 cm) tall
- After Row 7: 4.5 in (11.4 cm) wide x 4.25 in (10.8 cm) tall
- After the border: 4.75 in (12.1 cm) wide x 4.5 in (11.4 cm) tall
Too big? Go down to a 3.25 mm (D-3) hook, or work your chains more tightly. Loose chain arches add the most width.
Too small? Go up to a 3.75 mm (F-5) hook.
Measure lightly flattened lace, not stretched lace. Blocking opens the arches a little, but it won’t fix a full hook-size difference.
Tree Pattern
Use Color A. You work the tree top-down in turned rows. Each fan row begins with a sl st into the first V-st space and leaves the outer dc of that V-st unworked. That’s what creates the stepped, scalloped side edges.
Foundation: Ch 4.
Row 1 (RS): 6 dc in 4th ch from hook (the skipped ch count as the first dc). Turn. (1 fan = 7 dc)
Row 2: Ch 5 (counts as dc + ch 2), dc in first st (V-st made), ch 3, sk 2 dc, sc in next dc (center dc of fan), ch 3, sk 2 dc, V-st in top of beg ch. Turn. (2 V-sts, 1 sc, 2 ch-3 sps)
Row 3: Sl st in first ch-2 sp, ch 3, 6 dc in same sp (fan made), ch 3, sc in next ch-3 sp, ch 3, sc in next ch-3 sp, ch 3, fan in last ch-2 sp. Leave remaining sts unworked. Turn. (2 fans = 14 dc, 2 sc, 3 ch-3 sps)
The two fans sit at the outer corners, with an open chain lattice between them.
Row 4: Ch 5, dc in first st (V-st made), ch 3, sk 2 dc, sc in next dc (center of fan), ch 3, sk 3 dc, sc in next ch-3 sp, ch 2, V-st in next ch-3 sp (center sp), ch 2, sc in next ch-3 sp, ch 3, sk 3 dc, sc in next dc (center of fan), ch 3, sk 2 dc, V-st in top of beg ch-3. Turn. (3 V-sts, 4 sc, 4 ch-3 sps, 2 ch-2 sps)
Row 5: Sl st in first ch-2 sp, ch 3, 6 dc in same sp, ch 3, sc in next ch-3 sp, ch 3, sc in next ch-3 sp, ch 2, sk next ch-2 sp, fan in ch-2 sp of center V-st, ch 2, sk next ch-2 sp, sc in next ch-3 sp, ch 3, sc in next ch-3 sp, ch 3, fan in last ch-2 sp. Turn. (3 fans = 21 dc, 4 sc, 4 ch-3 sps, 2 ch-2 sps)
Row 6: Ch 5, dc in first st, ch 3, sk 2 dc, sc in next dc, ch 3, sk 3 dc, sc in next ch-3 sp, ch 3, sc in next ch-3 sp, ch 3, sk ch-2 sp and 3 dc, V-st in next dc (center of center fan), ch 3, sk 3 dc and ch-2 sp, sc in next ch-3 sp, ch 3, sc in next ch-3 sp, ch 3, sk 3 dc, sc in next dc, ch 3, sk 2 dc, V-st in top of beg ch-3. Turn. (3 V-sts, 6 sc, 8 ch-3 sps)
Row 7: Sl st in first ch-2 sp, ch 3, 6 dc in same sp, [ch 3, sc in next ch-3 sp] 4 times, ch 3, fan in ch-2 sp of center V-st, [ch 3, sc in next ch-3 sp] 4 times, ch 3, fan in last ch-2 sp. (3 fans = 21 dc, 8 sc, 10 ch-3 sps)
Don’t fasten off. Row 7 is the wide bottom tier. Its three fans line up with the Row 5 fans but sit further apart.
Count check: Each half of Row 7 has 5 ch-3 sps and 4 sc between the fans. That gives 2 x 5 = 10 sps and 2 x 4 = 8 sc, which matches the row total.
Border
Border gauge: One round of sc adds about 1/8 in (0.3 cm) on every edge. Width grows from 4.5 in (11.4 cm) to 4.75 in (12.1 cm), and height grows from 4.25 in (10.8 cm) to 4.5 in (11.4 cm).
The border runs around the tree outline only. You add the trunk afterward.
Round 1: Still using Color A, ch 1 and rotate the piece to work along the row ends of the first side.
- Side 1: 2 sc around each row end, from Row 7 up to Row 1. (7 row ends x 2 = 14 sc)
- Tip: 3 sc around the foundation ch at the top point. (3 sc) Place a marker in the center sc of these 3.
- Side 2: 2 sc around each row end, from Row 1 down to Row 7. (14 sc)
- Bottom: Working across Row 7, sc in each dc, sc in each sc, and 3 sc in each ch-3 sp. (21 + 8 + 30 = 59 sc)
Sl st in first sc to join. Fasten off. (Total: 14 + 3 + 14 + 59 = 90 sc)
Why the math works:
- Sides: A dc row end is about two sc tall, so 2 sc per row end keeps the sides flat without ruffling or cupping.
- Bottom: Each ch-3 sp is about three sc wide, so 3 sc per space lies flat.
- Tip: The 3 sc at the tip turn the point.
- Bottom corners: No extra corner stitches are needed, because the curve of each edge fan already turns the corner.
Bottom count by section: Fan (7) + [3 sc, 1 sc] x 4 + 3 sc (19) + center fan (7) + 19 + fan (7) = 59. The 7 sc over the center fan are where the trunk goes.
Trunk
Use Color B with the RS facing. Hold the tree upside down so the bottom edge is on top.
Row 1: Sk the first of the 7 sc over the center fan. Join Color B with sc in the 2nd sc, then sc in next 4 sc. Turn. (5 sc)
Rows 2–5: Ch 1, sc in each sc across. Turn. (5 sc per row)
Fasten off, leaving a 6 in (15.2 cm) tail. The trunk measures 1 in (2.5 cm) wide x 0.9 in (2.3 cm) tall. Run the tail down one side edge to straighten it, then weave it in.
Hanging Cord
Cord: With Color B, join with a sl st in the marked center sc at the tip. Ch 36, then sl st in 2nd ch from hook and in each ch back down. (35 sl sts) Sl st in the same tip sc to close the loop. Fasten off.
The cord is about 5 in (12.7 cm) long before folding. Folded, it forms a loop about 2.5 in (6.4 cm) tall above the tip. Use the tails to secure both cord ends at the tip so the loop stands upright.
Final Blocking
- Weave in all ends through solid stitches (fans, trunk, or border), not through chain arches, where they would show.
- Mist the ornament until it’s damp but not dripping.
- Lay it RS up on a blocking mat.
- Pin the tip, then the two bottom corners, so the base measures 4.75 in (12.1 cm) across.
- Check that the tip-to-bottom-edge height is 4.5 in (11.4 cm), and adjust the pins until it is.
- Pin the outer point of each edge fan so both sides step out evenly.
- Open each chain arch with a pin so the lattice looks even.
- Pin the trunk straight, 1 in (2.5 cm) wide and centered under the center fan.
- Let it dry completely, at least 4 hours, before unpinning.
- Optional: lightly mist with spray starch before drying for a stiffer ornament.
Final Quality-Control Checklist
- [ ] Four fan tiers: 1, 2, 3, 3
- [ ] Every fan has 7 dc
- [ ] Row 7 has 21 dc, 8 sc, and 10 ch-3 sps
- [ ] Border has 90 sc: 14 + 3 + 14 + 59
- [ ] Trunk is 5 sc wide and 5 rows tall, centered under the middle fan
- [ ] Tree measures 4.75 in (12.1 cm) wide and 4.5 in (11.4 cm) tall
- [ ] Total height with trunk is 5.4 in (13.7 cm)
- [ ] Cord is secure and the loop stands upright
- [ ] Both side edges step out evenly at each fan row
- [ ] No tails visible in the lace openings
Troubleshooting
The fans cup or ruffle. Your dc may be taller than your chains. Work the dc slightly shorter, or go down half a hook size.
The tree leans to one side. Check that each V-st in Rows 4 and 6 sits exactly in the center space or center dc. Count spaces from both edges toward the middle.
The center lattice looks baggy. Your chains are loose. Work the ch-3 arches more tightly. If that isn’t enough, use ch 2 instead of ch 3 on Rows 6–7 only, but still work 3 sc in each space in the border.
The border ruffles along the sides. Work 1 sc around the arch-row ends (Rows 2, 4, and 6) instead of 2. That brings each side down to 11 sc and the total down to 84 sc.
The trunk isn’t centered. Count the 7 sc over the center fan again. The trunk must start in the 2nd of them and end in the 6th.
The loop flops forward. Before weaving in, use the tail to stitch the two cord ends together at the base of the loop.
There’s a gap at the tip. Pull the foundation tail snug, then weave it around the 3 tip sc.
Care
Hand wash in cool water, press out the water in a towel, and dry flat, pinned to shape. Store the ornament flat or hanging so the fans keep their form.
Final Notes
Here is the full measurement chain:
- One fan is 1.25 in (3.2 cm) wide.
- Row 3 reaches 2.5 in (6.4 cm) wide.
- Row 5 reaches 3.5 in (8.9 cm) wide.
- Row 7 reaches 4.5 in (11.4 cm) wide by 4.25 in (10.8 cm) tall.
- The 90-sc border brings the tree to 4.75 in (12.1 cm) by 4.5 in (11.4 cm).
- The 5-sc trunk adds 0.9 in (2.3 cm), for a finished height of 5.4 in (13.7 cm).
If your Row 3 checkpoint matches, the rest of the sizes will follow. Make one, then make a whole set for the tree.
Happy crocheting!