

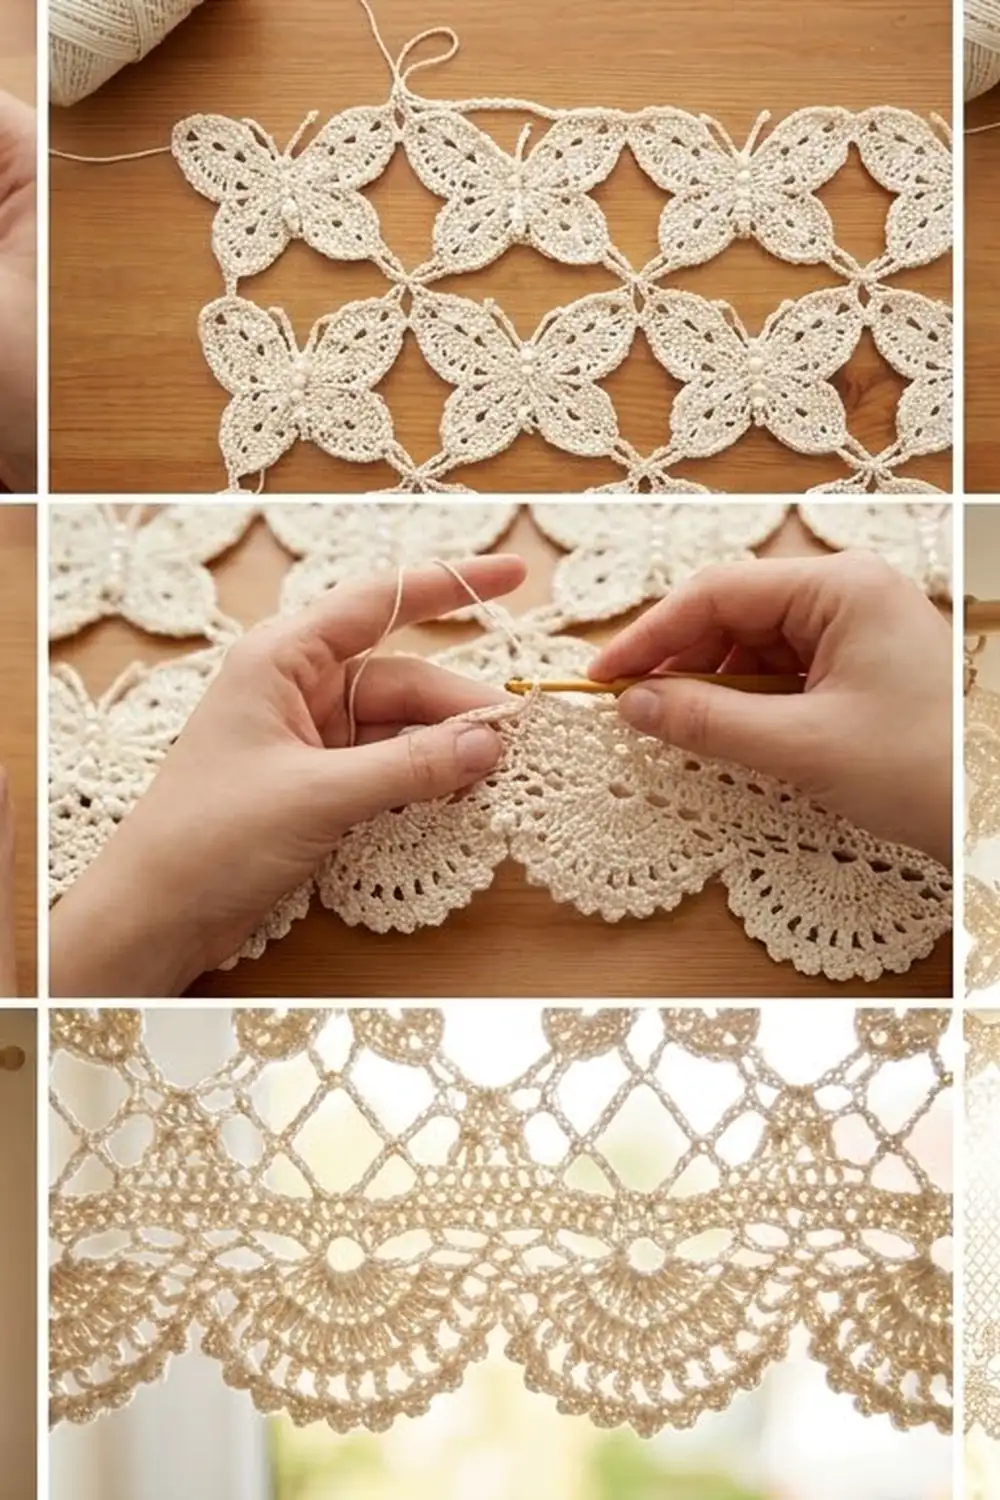
Morning Wings is a lace curtain panel made from cream butterfly motifs joined in a straight grid. Each butterfly has a beaded body, big openwork upper wings, smaller lower wings and a scalloped outline. Chain loops link the motifs, so light comes through diamond-shaped openings between the wing tips.
The palette is a single natural cream cotton. That keeps the panel soft and timeless and lets the stitch texture carry the design. It fits cottage, farmhouse and boho rooms.
The pattern uses US crochet terms. One finished panel measures 34 in (86.4 cm) wide by 80.25 in (203.8 cm) long. The photo shows a pair, so make two panels to cover a window.
Construction is simple to follow. You make one butterfly completely, then join each new motif to its neighbors on the last round (join-as-you-go). This gives a grid 6 motifs wide and 14 motifs tall. Next you work a two-round border all the way around, add a deep scalloped edging across the bottom, then block and hang the panel with clip rings.
Finished Size and Construction
- Finished size (one panel): 34 in × 80.25 in (86.4 cm × 203.8 cm)
- Skill level: Intermediate
- Terminology: US crochet terms
- Yarn weight: Fingering-weight cotton (Super Fine, #1)
- Hook: 2.5 mm
- Number of pieces: 84 butterfly motifs per panel (168 for a pair)
- Layout: 6 motifs wide × 14 motifs tall
- Piece size: 5.5 in (14.0 cm) square, blocked
- Size before border: 33 in × 77 in (83.8 cm × 195.6 cm)
- Border depth: 0.5 in (1.3 cm) on the sides and top; 2.75 in (7.0 cm) at the bottom
Materials
Yarn: Use a mercerized fingering-weight cotton, about 170 m per 50 g. Size 3 crochet thread also works. Mercerized cotton gives crisp stitch definition and drapes well in sunlight. Buy all the yarn from one dye lot.
- Cream: 600 g (about 2,040 m) per panel; one motif uses about 6 g (about 20 m)
The quantities include a margin of roughly 10% for swatching and joining.
Tools:
– 2.5 mm crochet hook
– Tapestry needle
– Stitch markers
– Rustproof pins and blocking mats
– Spray bottle
– Measuring tape
– 7 curtain clip rings per panel
Abbreviations (US Terms)
- ch – chain
- sl st – slip stitch
- sc – single crochet
- hdc – half double crochet
- dc – double crochet
- tr – treble crochet
- sk – skip
- sp – space
- st(s) – stitch(es)
- RS – right side
- rep – repeat
Bobble: Yarn over, insert hook in st, pull up a loop, yarn over, pull through 2 loops (leaves 2 loops on hook). Do this 2 more times in the same st, then yarn over and pull through all 4 loops.
Scallop: (sc, hdc, sc) in one sp.
Gauge and Checkpoints
Border gauge: 15 sc and 16 rows = 2 in (5.1 cm).
Make one complete motif and block it before you start the panel. Check these sizes as you go:
- After the body row: about 1.25 in (3.2 cm) long.
- After Round 2: about 3 in (7.6 cm) tall, loops included.
- After Round 4: upper wingspan about 4.5 in (11.4 cm).
- After Round 5, blocked: 5.5 in (14.0 cm) square. Anything from 5.25–5.75 in (13.3–14.6 cm) is acceptable.
If your motif is too big, go down 0.25 mm in hook size. If it’s too small, go up 0.25 mm. Over 14 motifs, an error of 0.125 in (0.3 cm) per motif adds up to 1.75 in (4.4 cm) in length, so it’s worth checking.
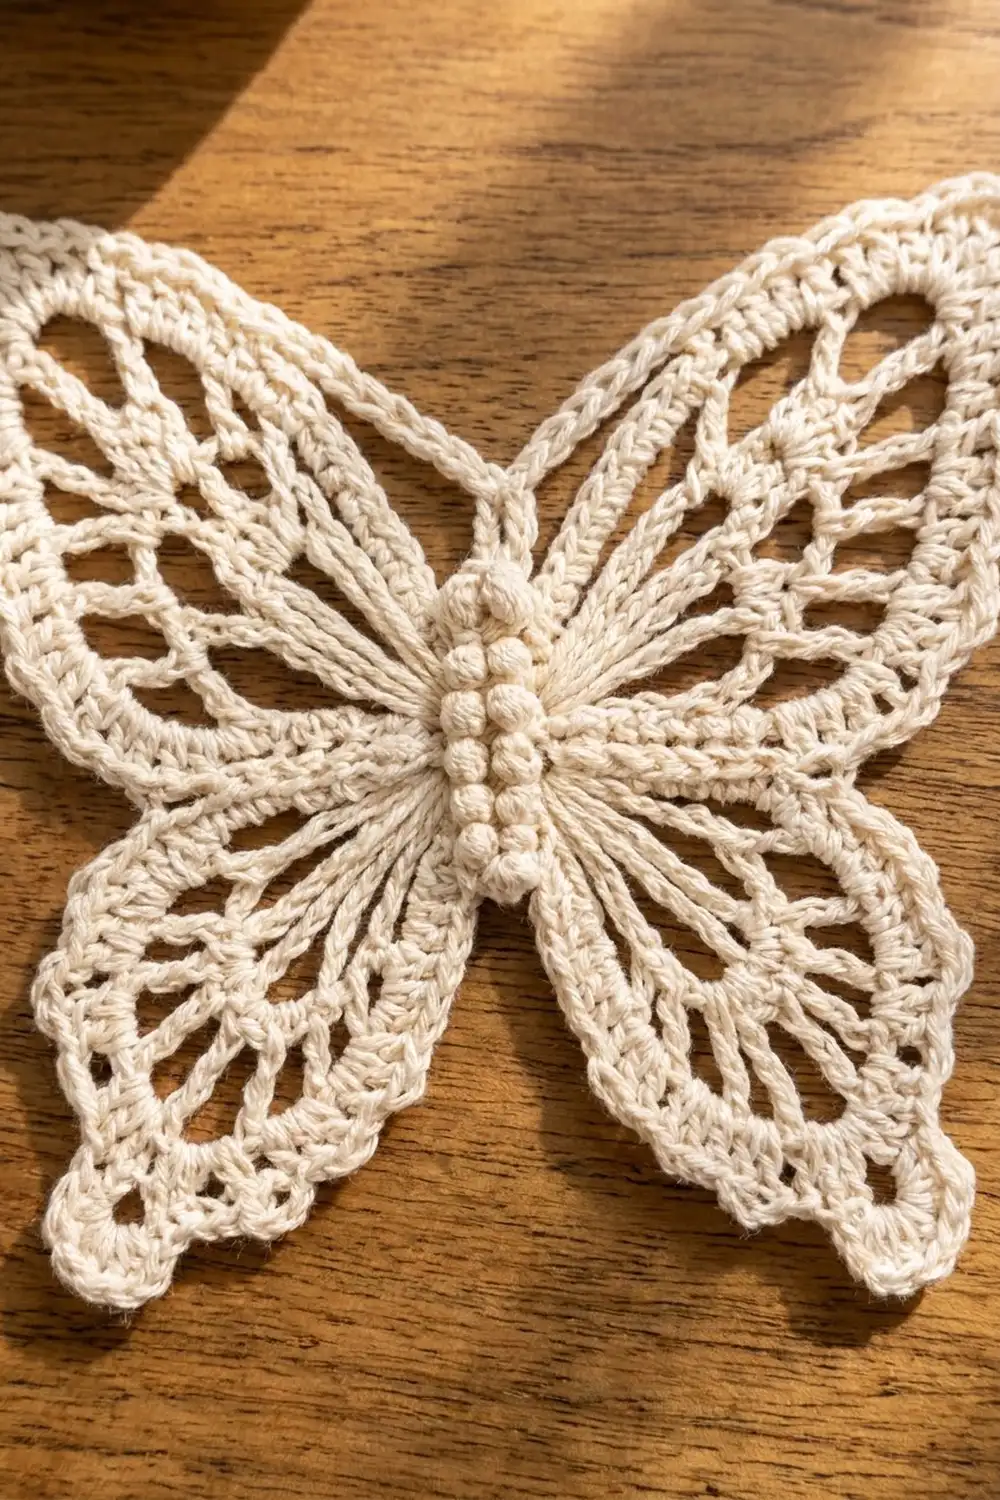
Butterfly Motif (make 84)
Body Row: Ch 8. Sc in 2nd ch from hook, bobble in next ch, sc in next ch; rep from * 2 more times. (7 sts: 4 sc, 3 bobbles)* Push the bobbles to the RS. Do not turn.
Round 1: Ch 1. Work 3 sc in the last sc you made (top end). Working along the underside of the foundation ch, sc in the next 5 ch. Work 3 sc in the free loop of the first ch (bottom end). Working across the top of the Body Row, sc in the next 5 sts. Join with a sl st to the first sc. (16 sc)
Here are the names used for these 16 sts in the next rounds:
– Top end: T1, T2, T3
– Right side: A1–A5
– Bottom end: B1, B2, B3
– Left side: C1–C5
Round 2 (wing loops): Ch 1. Sc in T1, T2 and T3. Ch 11, sk A1–A2, sc in A3. Ch 11, sk A4–A5, sc in B1, B2 and B3. Ch 11, sk C1–C2, sc in C3. Ch 11, sk C4–C5. Join to the first sc. (8 sc + 4 ch-11 loops = 52 sts)
The loops next to the head become the upper wings. The loops next to the tail become the lower wings.
Round 3 (wing veins): Ch 1. Sc in T1, T2 and T3. Work an Upper Wing in the next loop, sc in A3, a Lower Wing in the next loop, sc in B1–B3, a Lower Wing in the next loop, sc in C3 and an Upper Wing in the last loop. Join.
- Upper Wing (all in one loop): sc, ch 2, dc, ch 2, dc, ch 2, tr, ch 2, tr, ch 4, tr, ch 2, tr, ch 2, dc, ch 2, dc, ch 2, sc. (30 sts: 10 posts, 8 ch-2 sps, 1 ch-4 tip)
- Lower Wing (all in one loop): sc, ch 2, dc, ch 2, dc, ch 3, dc, ch 2, dc, ch 2, sc. (17 sts: 6 posts, 4 ch-2 sps, 1 ch-3 tip)
Round total: 8 + (2 × 30) + (2 × 17) = 102 sts
Round 4 (scalloped outline): Ch 1. Sc in each of the 3 head sc.
- Each Upper Wing: sk all the wing posts. Work a scallop in each of the first 4 ch-2 sps, then (2 sc, ch 3, 2 sc) in the ch-4 tip, then a scallop in each of the last 4 ch-2 sps. (31 sts)
- Each Lower Wing: work a scallop in each of the first 2 ch-2 sps, then (2 sc, ch 3, 2 sc) in the tip, then a scallop in each of the last 2 ch-2 sps. (19 sts)
- Body: work 1 sc in each body sc between the wings (the waist sc and the 3 tail sc).
Join. (3 + 31 + 1 + 19 + 3 + 19 + 1 + 31 = 108 sts)
Round 5 (frame): This round turns the butterfly into a square. The four wing tips become the corners.
- Where each side anchors: On every wing half, sc into the center hdc of the scallop nearest the body and of the 2nd scallop from the tip. A lower-wing half has only 2 scallops, so use both of them. In the middle of each side, sc into the body sc: center head sc on the top, waist sc on the left and right, center tail sc on the bottom.
- Start: Join yarn in the upper-right tip ch-3 sp. Ch 1 and work a corner, (sc, ch 3, sc), in that sp.
- Each side: Ch 7, sc in anchor, [ch 5, sc in next anchor] 4 times, ch 7.
- Corner: (sc, ch 3, sc) in the next tip ch-3 sp.
Work the side and corner 4 times in total, leaving out the last corner. Join to the first sc and fasten off.
Stitch count: Each side has 41 sts: the 2 corner sc + 7 + 5 anchor sc + (4 × 5) + 7. The corner ch-3 sps are not counted as part of any side.
Round total: (4 × 41) + (4 × 3) = 176 sts
Make All Pieces
Make 84 motifs per panel, all in Cream, or 168 for a pair. Only the first motif is worked completely on its own. Every motif after that is joined during its Round 5.
Lay out the motifs with every head pointing toward the top edge:
Row 1:  B B B B B B   (top)
Row 2:  B B B B B B
Row 3:  B B B B B B
Row 4:  B B B B B B
Row 5:  B B B B B B
Row 6:  B B B B B B
Row 7:  B B B B B B
Row 8:  B B B B B B
Row 9:  B B B B B B
Row 10: B B B B B B
Row 11: B B B B B B
Row 12: B B B B B B
Row 13: B B B B B B
Row 14: B B B B B B   (bottom)
Joining
Method: Join-as-you-go on Round 5. Work Round 5 as written. On each side that meets a finished motif, join every loop at its midpoint:
- ch-7 loop: ch 3, sl st into the matching ch-7 loop of the finished motif, ch 3.
- ch-5 loop: ch 2, sl st into the matching ch-5 loop, ch 2.
- Corner: sc, ch 1, sl st into the neighbor’s corner ch-3 sp, ch 1, sc. Where 4 motifs meet, sl st into the existing join instead, so all four corners share one point.
Stitch-to-stitch logic: Each sl st replaces the middle ch of its loop. Loop lengths don’t change, so every side still counts 41 sts and the loops line up anchor to anchor. Together, the joined loops form the open diamond lattice.
Tension: Keep the joining sl sts as loose as your other chains. If they’re tight, the seams pucker and the panel narrows.
Checkpoint: One finished row of 6 motifs should measure 33 in (83.8 cm) wide, pinned flat. After 3 rows, the height should be 16.5 in (41.9 cm). The full grid, before the border, is 33 in × 77 in (83.8 cm × 195.6 cm).
Border
Border gauge: 7.5 sc = 1 in (2.5 cm).
Round 1 (sc): With RS facing, join yarn in the first sc after any panel corner. Along each motif side, work:
– 7 sc in each ch-7 loop
– 5 sc in each ch-5 loop
– 1 sc in each sc
That gives 41 sc per motif side. Where two motifs meet along the edge, skip their joined corner sps and go straight from one motif’s last sc to the next motif’s first sc. At each of the 4 panel corners, work 3 sc in the free corner ch-3 sp. Join.
- Top and bottom sides: 6 × 41 = 246 sc each
- Long sides: 14 × 41 = 574 sc each
- Corners: 3 sc × 4 = 12
- Round total: 492 + 1,148 + 12 = 1,652 sc
Round 2 (dc band): Ch 3 (counts as dc). Dc in each sc along the sides. At each corner, dc in the 1st corner sc, (dc, ch 2, dc) in the center corner sc, and dc in the 3rd corner sc. Join.
- Top and bottom sides: 2 + 246 + 2 = 250 dc each
- Long sides: 2 + 574 + 2 = 578 dc each
- Corners: 4 ch-2 sps
- Round total: 500 + 1,156 + 8 = 1,664 sts
Do not fasten off if you’re about to start the scallops. Otherwise fasten off. Rounds 1–2 add 0.5 in (1.3 cm) on every side.
Bottom Scallop (bottom edge only):
Row 1: With RS facing, join yarn in the first dc of the bottom edge. Ch 1, sc in the same dc, ch 3, sk 2 dc, sc in next dc; rep from * 82 more times. The last sc lands in the 250th dc. (84 sc + 83 ch-3 loops = 333 sts)*
Row 2: Turn. Ch 3 (counts as dc) and work 6 dc in the first loop. Sc in the next loop, 7 dc in the next loop; rep from * 40 more times. (42 fans + 41 sc = 335 sts)*
Row 3: Turn. Ch 4 (counts as dc + ch 1). [Dc in next dc, ch 1] 5 times, then dc in the last dc of the fan. Sc in the next sc. Dc in the first dc of the next fan, [ch 1, dc in next dc] 6 times; rep from * 40 more times. (42 fans × 13 sts + 41 sc = 587 sts)*
Row 4: Turn. Ch 1. Work (sc, ch 3, sc) in each ch-1 sp of each fan, and sc in each sc between fans. Fasten off. (42 × 30 + 41 = 1,301 sts)
The scallop adds 2.25 in (5.7 cm). The bottom border is 2.75 in (7.0 cm) in total.
Why the math works: At the border gauge, 41 sc measure 5.47 in, which matches the 5.5 in motif, so the edge lies flat. The 250 dc of the bottom edge minus the first dc leaves 249 = 83 × 3, so the loops of Row 1 divide evenly. With 83 loops (an odd number), the fans and sc alternate and the row starts and ends with a fan, so the scallop edge is symmetrical.
Final Blocking
- Weave in all ends along chain loops, splitting the plies so they hold.
- Soak the panel in cool water for 15 minutes, then press out the water. Do not wring.
- Roll it in towels to absorb the extra moisture.
- Pin it to 34 in (86.4 cm) wide, starting with the top edge.
- Pin the long sides to 80.25 in (203.8 cm), working down from the top.
- Pin each wing tip and each Round 5 corner so the diamond spaces open evenly.
- Pin each scallop point and each Row 4 ch-3 loop.
- Let it dry completely before removing the pins.
If your mats are smaller than the panel, block it in sections and keep every section pinned to the same motif size.
Final Quality-Control Checklist
- Every motif measures 5.5 in (14.0 cm) and every head points up.
- Each motif side counts 41 sts.
- All joins are at loop midpoints, and the 4-way corners share one sl st.
- Border Round 1 counts 246 / 574 sc per side; Round 2 counts 250 / 578 dc.
- The scallop has 42 fans, with a fan at each end.
- The panel measures 34 in × 80.25 in (86.4 cm × 203.8 cm).
- All ends are woven in and invisible from both sides.
Troubleshooting
- The wings cup: Your trebles are too tight. Loosen them, or go up a hook size for Round 3 only.
- The body twists: The bobbles were pushed to different sides. Before Round 1, push all of them to the RS.
- The motifs are different sizes: Your tension changed between sessions. Measure every 10th motif.
- The panel slants: A motif was joined one loop off. Undo that join and line up the corners first.
- The border ruffles: You added sc at the seams. Recount 41 sc per motif side.
- The scallop flares: Your Row 2 fans are too loose. Use 6 dc instead of 7 in a test fan and compare, then keep 7 dc if it lies flat after blocking.
Care
Hand wash in cool water with mild soap and dry flat, re-pinning the scallops if needed. Keep the panel out of the dryer so the lace keeps its shape.
Final Notes
Here is the measurement chain:
– One motif: 5.5 in (14.0 cm)
– Six motifs across: 33 in (83.8 cm)
– Fourteen motifs down: 77 in (195.6 cm)
– Border: 0.5 in (1.3 cm) on the sides and top, 2.75 in (7.0 cm) at the bottom
– Finished panel: 34 in × 80.25 in (86.4 cm × 203.8 cm)
To hang the panel, attach 7 clip rings along the top, one at each motif seam and one at each corner, spaced 5.5 in (14.0 cm) apart. If the first motif is right, everything after it follows.
Happy crocheting!