

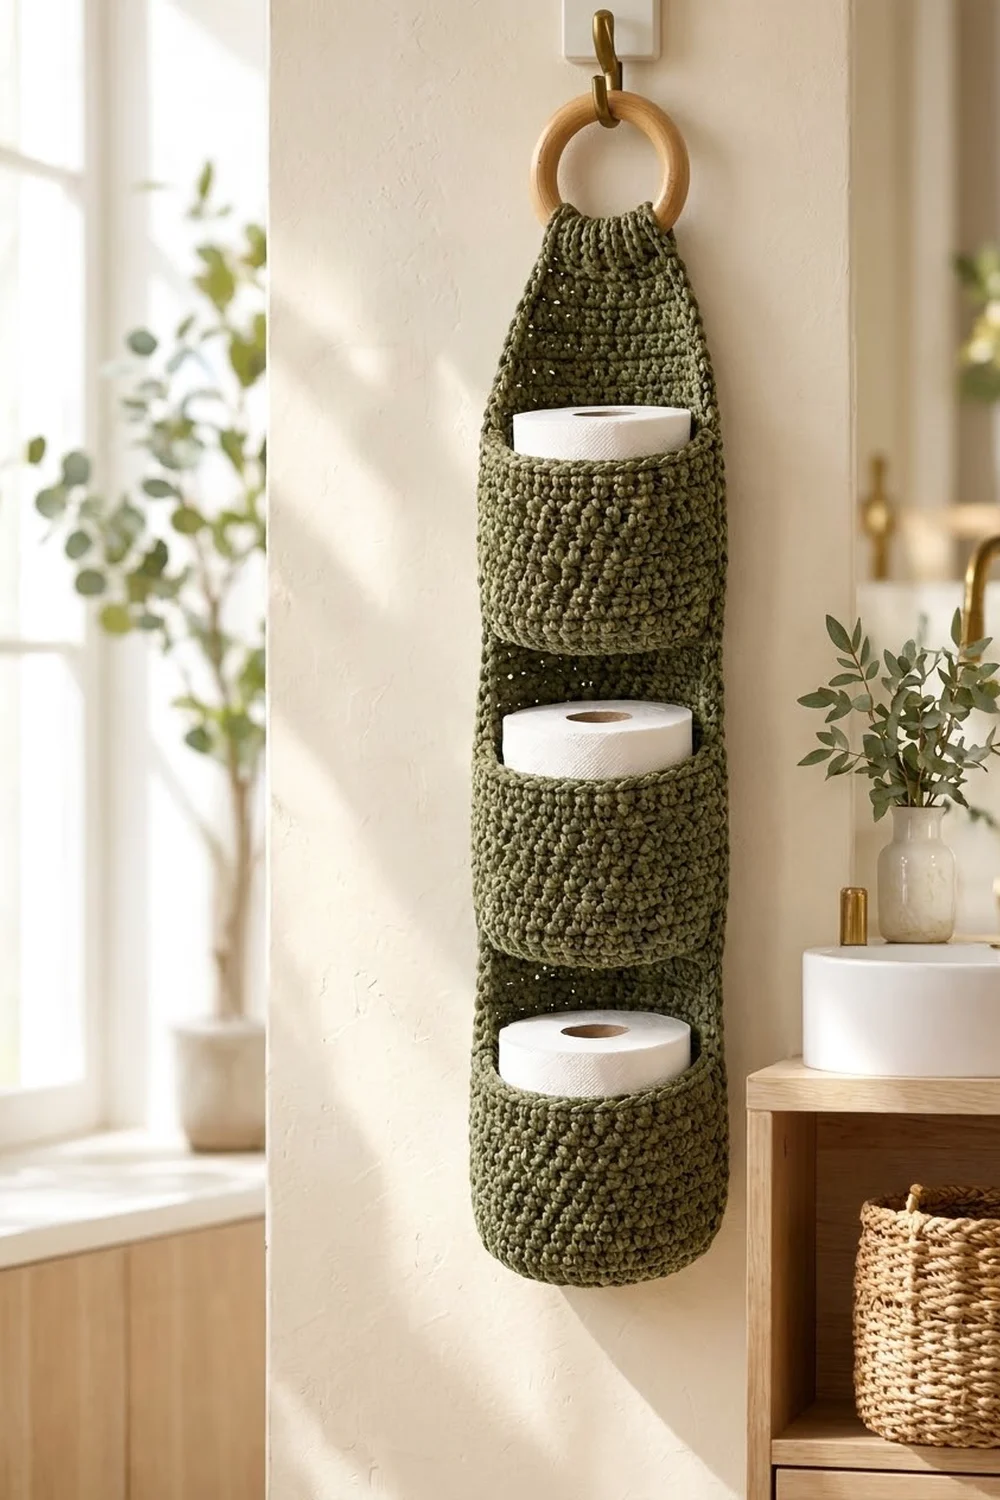
The Olive Grove Hanging Toilet Paper Holder is a tall, narrow wall organizer that holds three spare rolls. It hangs from a natural wooden ring. Three round cup pockets sit down the front of a single back panel, and each pocket holds one roll upright with its top just showing.
The sample is worked in one earthy olive green in bulky yarn. Single crochet gives the fabric a dense, pebbly texture that holds its shape without stiffening. It suits modern farmhouse, boho, and natural-wood bathrooms.
This pattern uses US crochet terms. Once blocked, the panel measures 6.5 in (16.5 cm) wide and about 24.5 in (62.2 cm) tall from the top of the fold, not counting the ring. Each pocket is 5 in (12.7 cm) across and 3.75 in (9.5 cm) tall.
Construction is simple. You crochet the back panel flat in rows, shaping the bottom corners and tapering the top into a strap. You then work three pockets in the round, add a one-round border to the panel, sew the pockets on, and fold the strap over the ring.
Finished Size and Construction
- Finished size: 6.5 in (16.5 cm) wide × about 24.5 in (62.2 cm) hanging length, ring not included
- Skill level: Easy
- Terminology: US crochet terms
- Yarn weight: Bulky (#5)
- Hook: 6.0 mm (US J-10)
- Number of pieces: 4 (1 back panel + 3 pockets)
- Layout: 3 pockets stacked in a single vertical column on the panel
- Piece size: Panel 6 in (15.2 cm) × 25.5 in (64.8 cm) flat before border; each pocket 5 in (12.7 cm) diameter × 3.75 in (9.5 cm) tall
- Size before border: 6 in × 25.5 in (15.2 cm × 64.8 cm)
- Border depth: 1 round, about 0.25 in (0.6 cm)
Materials
Yarn: Use a bulky (#5) cotton-acrylic blend or a sturdy acrylic, about 100 g = 120 m (131 yd) per ball. Cotton blends hold their shape well in a humid bathroom. Avoid fluffy or brushed yarn, because it hides the pebbly texture.
- Olive green: 300 g / 360 m (394 yd), which is 3 balls
The quantities include a margin of about 15% for your gauge swatch and seaming.
Tools:
- 6.0 mm (US J-10) crochet hook
- Wooden ring, 3 in (7.6 cm) outside diameter
- Tapestry needle
- 6–8 locking stitch markers
- Rust-proof pins
- Measuring tape
- Blocking mat and spray bottle
Abbreviations (US Terms)
- ch: chain
- sl st: slip stitch
- sc: single crochet
- sc2tog: single crochet 2 together
- BLO: back loop only
- st(s): stitch(es)
- rnd(s): round(s)
- inc: 2 sc in the same stitch
Special stitch: sc2tog. Insert your hook in the next st, yarn over, and pull up a loop. Insert your hook in the following st, yarn over, and pull up a loop (3 loops on hook). Yarn over and pull through all 3 loops. This turns 2 stitches into 1.
Gauge and Checkpoints
Gauge: 12 sc and 13 rows = 4 in (10.2 cm) in sc worked in rows, after blocking. That works out to 3 sts per inch and 3.25 rows per inch.
Test one piece first. Make one pocket before you start the panel. It is small, it uses the same stitch, and it shows you right away whether a toilet roll will fit.
Checkpoints:
- Pocket Rnd 4: 24 sts, about 2.5 in (6.4 cm) across
- Pocket Rnd 8: 48 sts, about 5 in (12.7 cm) across
- Finished pocket: 16 in (40.6 cm) around and 3.75 in (9.5 cm) tall
- Panel Row 4: 18 sts, 6 in (15.2 cm) wide
- Panel Row 65: 20 in (50.8 cm) long
- Panel Row 75: about 23.1 in (58.7 cm) long
- Panel Row 83: about 25.5 in (64.8 cm) long
If your piece is too big, go down a half or full hook size. Loose pockets let rolls tip forward.
If your piece is too small, go up a hook size. A standard roll is about 4.5 in (11.4 cm) across, and it must slide in easily.
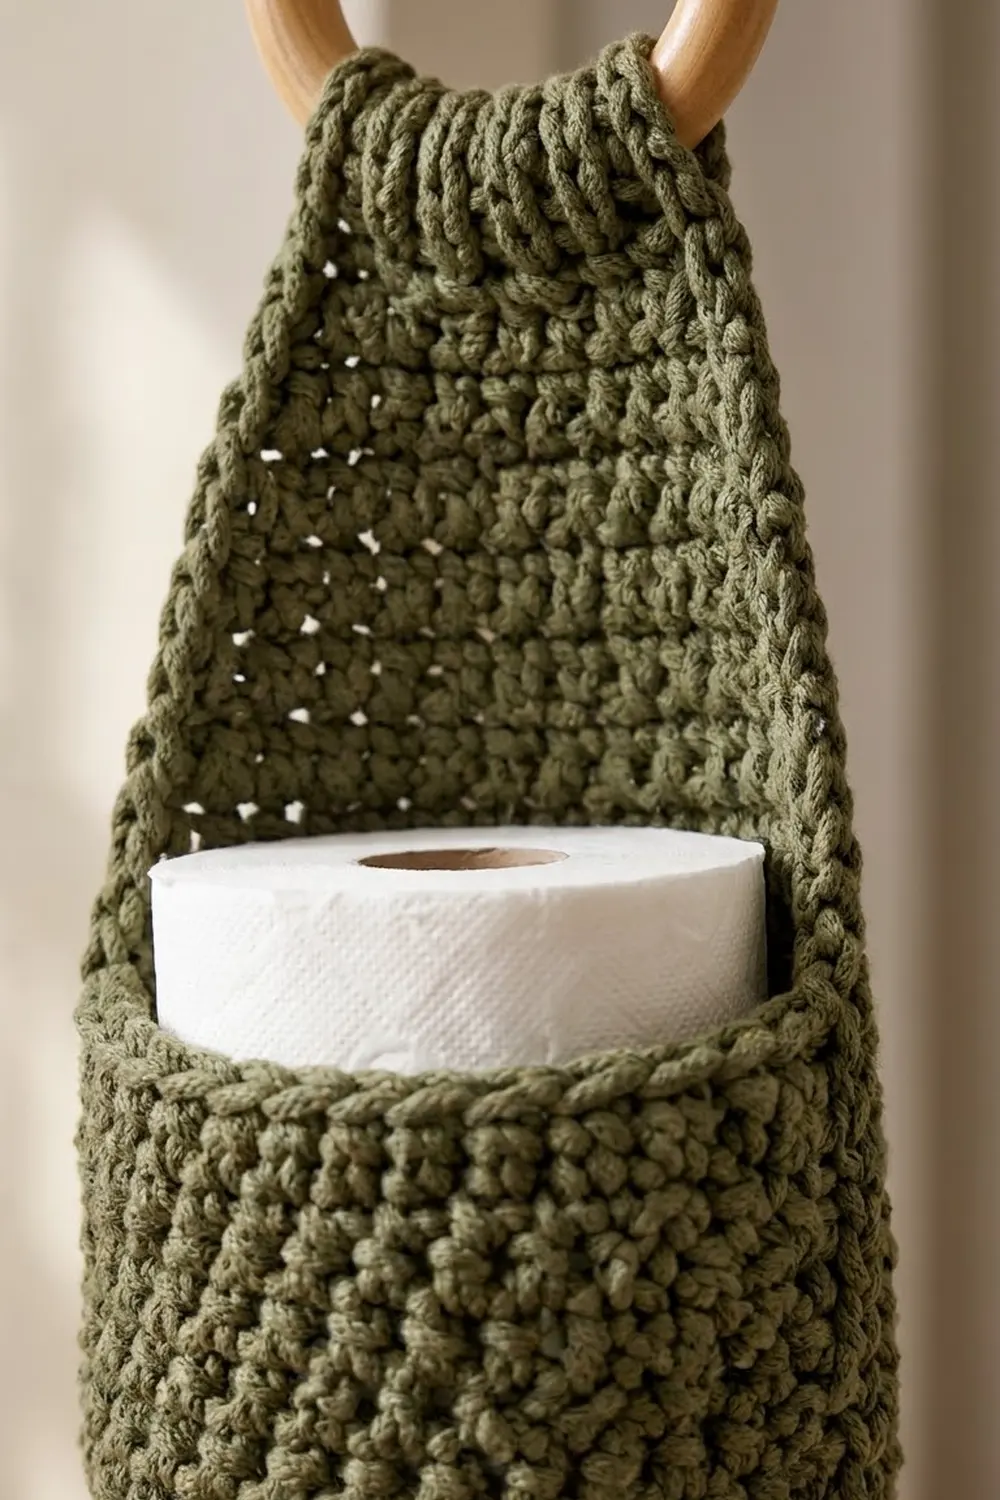
Pocket (Make 3)
You work each pocket in continuous rounds from the center of the base. Use a stitch marker to mark the first stitch of each round, and move it up as you go.
Base:
- Rnd 1: Make a magic ring and work 6 sc into it. (6 sts)
- Rnd 2: Inc in each st around. (12 sts)
- Rnd 3: [Sc 1, inc] 6 times. (18 sts)
- Rnd 4: [Sc 2, inc] 6 times. (24 sts)
- Rnd 5: [Sc 3, inc] 6 times. (30 sts)
- Rnd 6: [Sc 4, inc] 6 times. (36 sts)
- Rnd 7: [Sc 5, inc] 6 times. (42 sts)
- Rnd 8: [Sc 6, inc] 6 times. (48 sts)
Checkpoint: the base should lie flat and measure about 5 in (12.7 cm) across.
Sides:
- Rnd 9 (conversion round): Sc in the BLO of each st around. That is 48 sts worked one in each existing stitch, plus 0 added, for 48 sts. The unused front loops leave a ridge that turns the work upward and marks the edge of the base.
- Rnds 10–20: Sc in each st around. (48 sts in each round)
Rounds 9–20 make 12 side rounds, about 3.7 in (9.4 cm) tall.
Rim:
- Rnd 21 (trim round): Sl st loosely in each st around. That is 48 sl sts worked one in each existing stitch, plus 0 added, for 48 sts. Join with a sl st to the first st.
Fasten off and leave a 24 in (61.0 cm) tail for sewing. Weave in the starting tail.
Checkpoint: the pocket is 16 in (40.6 cm) around and about 3.75 in (9.5 cm) tall. A roll should slip in with about 0.5 in (1.3 cm) of ease, and its top should rise a little above the rim.
Back Panel
You work the panel flat in rows. Ch 1 at the start of each row does not count as a stitch. Turn at the end of each row.
Rounded bottom:
- Foundation: Ch 13.
- Row 1: Sc in the 2nd ch from the hook and in each ch across. Turn. (12 sts)
- Row 2: Ch 1, inc in the first st, sc in the next 10 sts, inc in the last st. Turn. (14 sts)
- Row 3: Ch 1, inc in the first st, sc in the next 12 sts, inc in the last st. Turn. (16 sts)
- Row 4: Ch 1, inc in the first st, sc in the next 14 sts, inc in the last st. Turn. (18 sts)
Checkpoint: the panel is 6 in (15.2 cm) wide at Row 4.
Straight body:
- Rows 5–65: Ch 1, sc in each st across. Turn. (18 sts in each row)
Checkpoint: the panel is 20 in (50.8 cm) long at Row 65.
Taper:
- Row 66: Ch 1, sc2tog, sc in the next 12 sts, sc2tog. Turn. (16 sts)
- Row 67: Ch 1, sc in each st across. Turn. (16 sts)
- Row 68: Ch 1, sc2tog, sc in the next 10 sts, sc2tog. Turn. (14 sts)
- Row 69: Ch 1, sc in each st across. Turn. (14 sts)
- Row 70: Ch 1, sc2tog, sc in the next 8 sts, sc2tog. Turn. (12 sts)
- Row 71: Ch 1, sc in each st across. Turn. (12 sts)
- Row 72: Ch 1, sc2tog, sc in the next 6 sts, sc2tog. Turn. (10 sts)
- Row 73: Ch 1, sc in each st across. Turn. (10 sts)
- Row 74: Ch 1, sc2tog, sc in the next 4 sts, sc2tog. Turn. (8 sts)
- Row 75: Ch 1, sc in each st across. Turn. (8 sts)
Checkpoint: the panel is about 23.1 in (58.7 cm) long at Row 75.
Strap:
- Rows 76–83: Ch 1, sc in each st across. Turn. (8 sts in each row)
The strap is 8 rows, about 2.5 in (6.4 cm) long. Do not fasten off; go straight on to the border.
Make All Pieces
You need 1 back panel and 3 pockets, all in olive green. The 300 g covers everything, including the border and seams.
Layout, from the top down:
        ( ring )
         [strap]
        /taper \
       |  panel |
       | POCKET 3 |  rows 45–57
       |  panel |
       | POCKET 2 |  rows 25–37
       |  panel |
       | POCKET 1 |  rows 5–17
        \______/   rounded bottom
Border
Border gauge: same as the main gauge, 3 sc per inch. Work 1 sc in each stitch along the top and bottom edges, and 1 sc in each row end along the sides.
Rnd 1: Ch 1. Do not turn. Work around the panel as follows:
- Top edge (Row 83): Work 3 sc in the first st, sc in the next 6 sts, and 3 sc in the last st. (12 sc: 8 existing sts + 4 extra corner sts)
- First long side: Work 1 sc in each row end from Row 82 down to Row 2. (81 sc) Skip the row ends of Rows 83 and 1, because their end stitches are the corner stitches already worked into.
- Bottom edge (foundation chain): Work 3 sc in the first ch, sc in the next 10 chs, and 3 sc in the last ch. (16 sc: 12 existing sts + 4 extra corner sts)
- Second long side: Work 1 sc in each row end from Row 2 up to Row 82. (81 sc)
Join with a sl st to the first sc and fasten off.
Total: 182 sts worked one in each existing stitch or row end (8 + 81 + 12 + 81), plus 8 corner extras, for 190 sts.
Why the math works: Each corner gets 3 sc, which adds 2 stitches per corner, enough to turn the corner without cupping. The sides use 1 sc per row end. That is 3.25 sts per inch against a stitch gauge of 3 per inch, so the difference is under 10%, and blocking takes it up without any ruffling. Along the rounded bottom and the taper, the same rule follows the curve smoothly.
After the border, the flat panel measures 6.5 in (16.5 cm) wide by 26 in (66.0 cm) long.
Joining
Method: Whipstitch with the pocket’s own yarn tail, working 1 pocket stitch to 1 panel stitch.
Mark the panel. With the right side facing, mark the center 16 sts of Row 5, Row 25, and Row 45. Leave 1 st unworked at each edge. These rows are the base lines for Pockets 1, 2, and 3.
Mark each pocket. Mark 16 consecutive sts of the Rnd 9 ridge. That is one third of the 48 sts, and this section becomes the back of the pocket. Then mark the 16 rim sts directly above them.
Sew each pocket in 3 steps:
- Base seam: Whipstitch the 16 marked ridge sts to the 16 marked sts of the base row, 1 to 1.
- Side seams: Whipstitch up each end of the 16-st section, 1 pocket round to 1 panel row, through 12 rounds and 12 rows.
- Rim seam: Whipstitch the 16 marked rim sts to the center 16 sts of the matching rim row: Row 17, Row 37, or Row 57.
This leaves 7 rows, about 2.2 in (5.6 cm), of bare panel between each rim and the next pocket’s base. There are 18 rows above the top pocket, enough room to drop in a roll.
Tension: Pull each stitch snug, but do not let it pucker. The back of the pocket should lie flat against the panel, with the front 32 sts curving forward.
Size checkpoint: Each pocket sticks out about 5 in (12.7 cm) from the panel, and the panel still measures 6.5 in (16.5 cm) across.
Final Blocking
- Before folding the strap, mist the whole holder until it is evenly damp.
- Pin the panel flat to 6.5 in × 26 in (16.5 cm × 66.0 cm). Keep the side edges straight and the bottom curve smooth.
- Stuff each pocket with a toilet roll wrapped in a plastic bag so the pockets dry round and upright.
- Let it dry completely, which takes about 24 hours.
- Thread the strap through the wooden ring from front to back. Fold it down over the back, and sew the top edge (Row 83 plus its border) to the back of Row 76. The strap gathers tightly under the ring.
- Weave in all remaining ends on the back of the panel.
Final Quality-Control Checklist
- Panel is 6.5 in (16.5 cm) wide along its full straight section
- Hanging length is about 24.5 in (62.2 cm), not counting the ring
- Border has 190 sts and lies flat, with no ruffles or cupping
- All 3 pockets are 48 sts around and level from side to side
- Each pocket is centered, with 1 panel st showing on each side
- Rolls go in and come out without stretching the pocket
- Strap is sewn securely and the ring does not slip
- No visible knots or loose ends on the front
Troubleshooting
- Pocket too tight for the roll: Remake it with a hook one size larger, or add Rnd 9 [Sc 7, inc] 6 times (54 sts) to the base before the BLO round.
- Pocket flares open at the rim: Work the slip stitch rim more firmly, or switch to a hook one size smaller for Rnd 21.
- Panel edges ripple: Your row gauge is too short. Skip 1 row end for every 13 on each side and keep the corners as written.
- Panel curls lengthwise: Block it again under pins, and let it dry fully before hanging.
- Pocket sags forward: Add a tack stitch at each side seam halfway up.
- Holder twists on the hook: Center the strap fold on the ring and add a second line of stitches across Row 76.
Care
Hand-wash in cool water with mild soap, press out the water in a towel, and dry flat with the pockets reshaped. Take it off the ring before washing.
Final Notes
The measurement chain is short. Gauge of 12 sc = 4 in (10.2 cm) gives an 18-st panel 6 in (15.2 cm) wide, which grows to 6.5 in (16.5 cm) with the border. The 48-st pockets are 16 in (40.6 cm) around, with room for a 4.5 in (11.4 cm) roll. Sew them stitch for stitch at Rows 5, 25, and 45, fold the strap over the ring, and your holder is ready to hang.
Happy crocheting!