

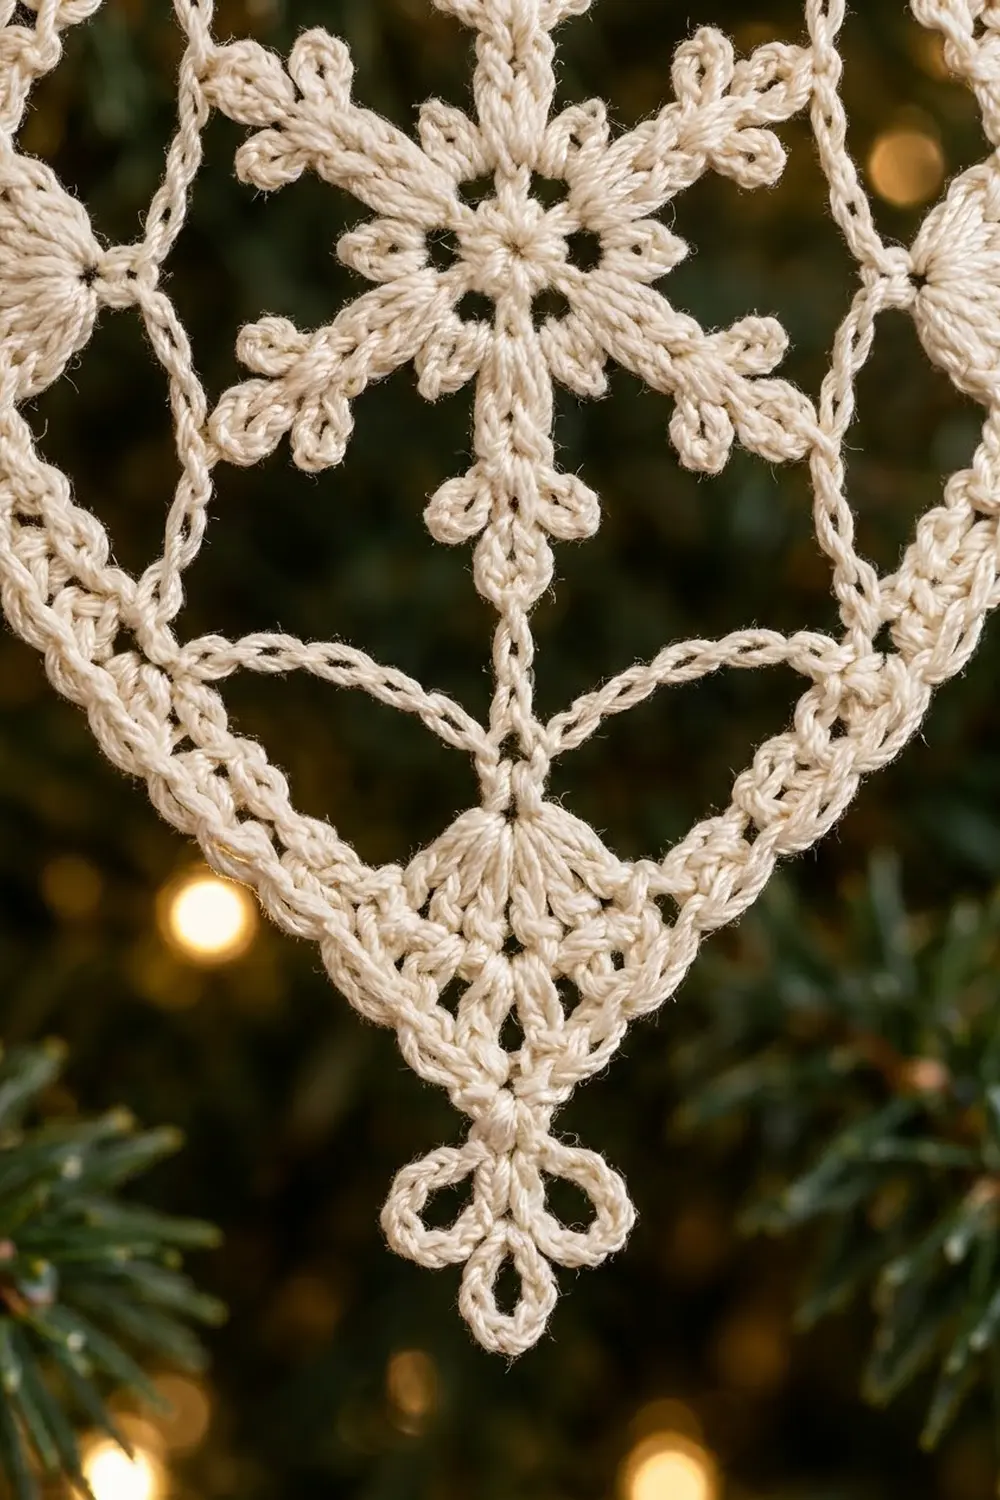
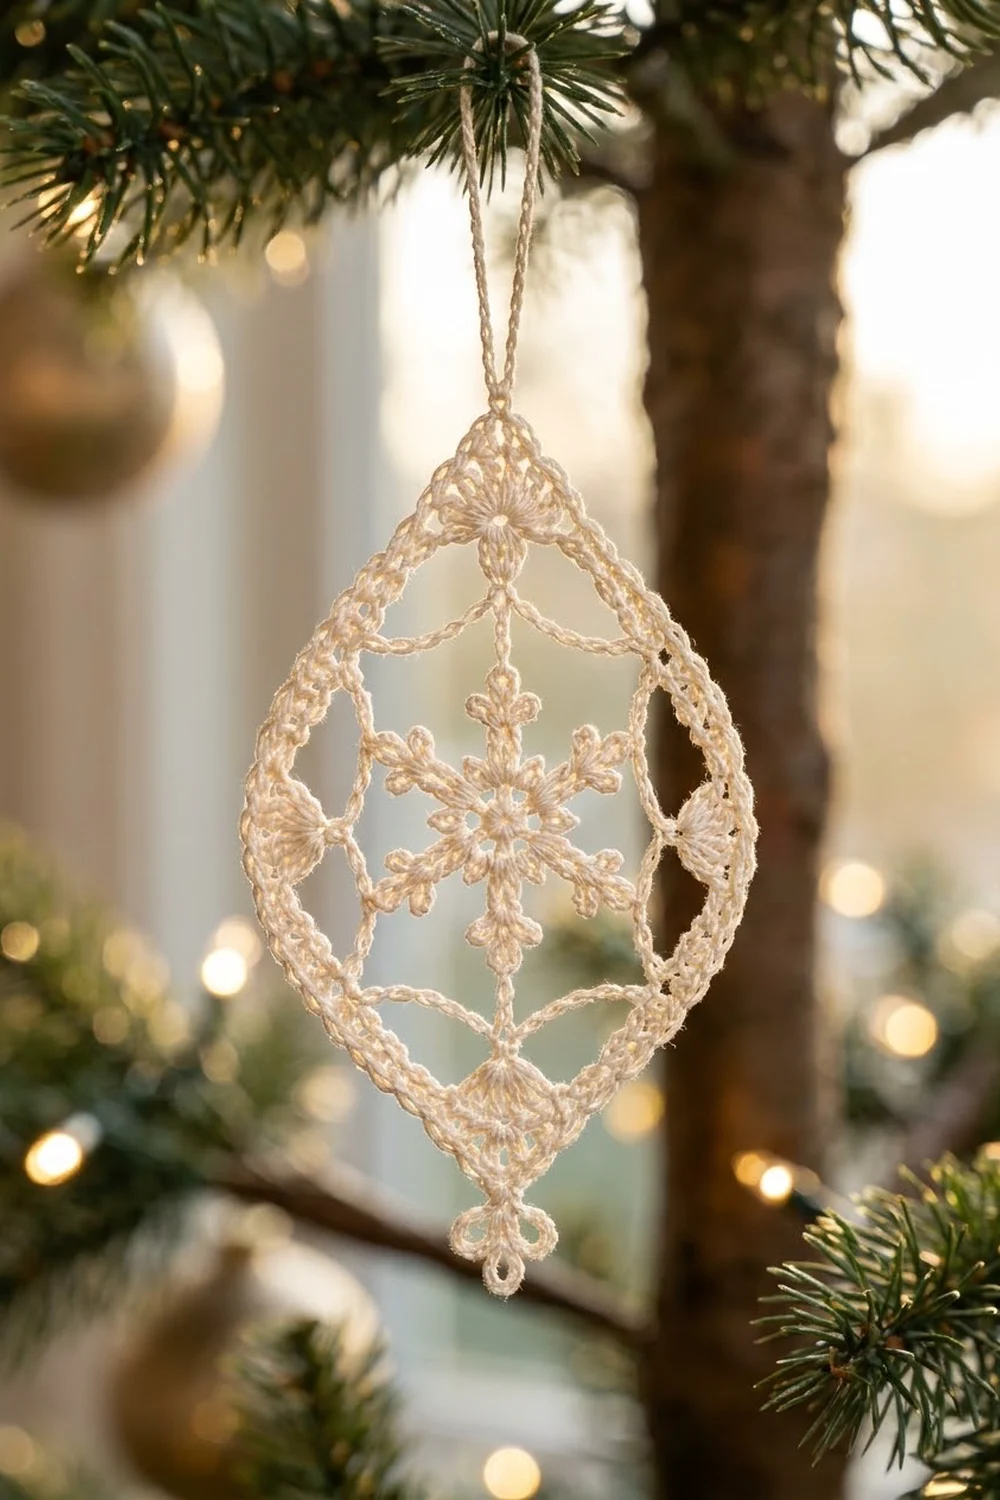
The Frosted Lantern is a lacy thread ornament shaped like a pointed oval, with a six-armed snowflake suspended in the middle. Chain spokes run from the snowflake to a corded frame, and small fan shells add weight at the top, the bottom and both sides. A three-ring trefoil hangs from the lower point and a slim chain loop at the top lets it hang.
It is worked in a single cream cotton thread for a classic heirloom look. The ornament reads as frosted lace against a lit tree. It works just as well tied to a gift or hung in a window.
This pattern uses US crochet terms. The finished ornament measures 3.25 in (8.3 cm) wide by 5 in (12.7 cm) tall for the frame. It is 5.5 in (14.0 cm) tall with the trefoil drop, and about 7.25 in (18.4 cm) overall with the hanging loop.
Construction is continuous and makes one piece. You crochet the snowflake in rounds, link its arm tips with a chain ring, and then work slip-stitched spokes outward. Next you chain the frame between the spoke tips, adding the four fans as you go. Finally you add a dc band, a single-crochet edge, the hanging loop and the trefoil.
Finished Size and Construction
- Finished size: 3.25 in × 5 in (8.3 cm × 12.7 cm) frame; 5.5 in (14.0 cm) tall with the trefoil
- Skill level: Intermediate (thread work, counting long chains)
- Terminology: US crochet terms
- Yarn weight: Size 10 crochet cotton (lace weight)
- Hook: 1.5 mm (US steel size 8)
- Number of pieces: 1
- Layout: Single motif, pointed oval, symmetrical left to right
- Piece size: 3.25 in × 5 in (8.3 cm × 12.7 cm)
- Size before border: 2.75 in × 4.5 in (7.0 cm × 11.4 cm) after Round 7
- Border depth: 0.25 in (0.6 cm), from Rounds 8 and 9
Materials
Thread: Use a mercerized size 10 cotton. Mercerized cotton holds crisp picots, blocks well with starch and keeps its sheen. Avoid fuzzy or acrylic threads, because they blur the spokes and won’t hold the pointed shape.
- Cream / ivory: about 6 g (about 31 m / 34 yd)
The quantity includes a margin of roughly 25% for your gauge swatch, the tails and any re-working.
Tools:
- 1.5 mm (US steel size 8) crochet hook
- Fine tapestry needle or beading needle
- Small sharp scissors
- 2 removable stitch markers
- Spray starch or a fabric stiffener
- Blocking board or foam mat, rust-proof pins, and a paper template of a 3.25 in × 5 in (8.3 cm × 12.7 cm) pointed oval you draw yourself
Abbreviations (US Terms)
- ch – chain
- sl st – slip stitch
- sc – single crochet
- hdc – half double crochet
- dc – double crochet
- sp – space
- st(s) – stitch(es)
- rnd – round
Special stitches
- Picot (tip picot): at the end of a chain, sl st in the 4th ch from the hook. This closes a ch-3 loop.
- Spoke-N: ch N + 3 and sl st in the 4th ch from the hook (this makes the picot). Sl st in each of the remaining N − 1 ch, then sl st into the anchor stitch you started from. The result is a firm, corded spoke N chains long with a picot at its tip. For example, Spoke-14 means ch 17, sl st in the 4th ch from the hook, sl st in the next 13 ch, then sl st into the anchor.
- Fan: 7 dc worked into one picot.
Gauge and Checkpoints
Gauge is less critical for an ornament, but your size depends on it. Work Rounds 1 to 4 as your test piece. If they measure correctly, carry on into the rest of the ornament.
- Chain gauge: 12 ch = 1 in (2.5 cm), slightly relaxed
- Frame gauge: 10.5 dc = 1 in (2.5 cm) along the band in Round 8
Checkpoints:
- After Round 1: the ring measures 0.5 in (1.3 cm) across.
- After Round 3: 1 in (2.5 cm) across the petals.
- After Round 4: 1.75 in (4.4 cm) from arm tip to opposite arm tip.
- After Round 6: the spoke picots span 4 in (10.2 cm) top to bottom and 2.25 in (5.7 cm) side to side.
- After Round 7: 2.75 in × 4.5 in (7.0 cm × 11.4 cm).
- After Round 9: 3.25 in × 5 in (8.3 cm × 12.7 cm).
Too big? Drop to a 1.25 mm hook or tighten your chains. Too small? Move to a 1.75 mm hook. Change the hook rather than the chain counts, because the counts set the shape.
Pattern
Part 1: The Snowflake (Rounds 1–4)
Round 1: Ch 6 and join with a sl st to form a ring. Ch 3 (counts as dc), work 17 dc in the ring, and join with a sl st to the top of the ch-3. (18 dc)
Round 2: Ch 1. Sc in the same st, ch 3, skip 2 dc, sc in the next dc, and repeat from * 4 more times. Ch 3, skip 2 dc, then join with a sl st to the first sc. (6 sc, 6 ch-3 sps)
Round 3 (petals): Sl st into the first ch-3 sp. In each ch-3 sp work (sc, hdc, dc, hdc, sc), then join with a sl st to the first sc. (6 petals, 30 sts)
Each petal makes a small leaf. The Round 2 sc sit in the valleys between the petals.
Round 4 (arms): Sl st behind the petals into the next Round 2 sc and work one arm from it. Repeat for all 6 Round 2 sc.
Arm: Ch 9 and sl st in the 4th ch from the hook (tip picot). Sl st in the next 2 ch. Make the branch pair: [ch 4, sl st in the 4th ch from the hook] twice, then sl st into the same spine ch as the last sl st. Sl st in the next 3 ch, then sl st into the Round 2 sc.
Sl st behind the next petal to reach the next Round 2 sc and work the next arm. After the 6th arm, fasten off. (6 arms, each with 1 tip picot and 1 V-pair of side picots)
Hold the snowflake with one arm pointing straight up. That is your 0° (top) arm. The arms sit at 0°, 60°, 120°, 180°, 240° and 300°.
Checkpoint: 1.75 in (4.4 cm) from tip to tip.
Part 2: The Lattice (Rounds 5–6)
Round 5 (tip ring): Join the thread with a sc in the tip picot of the top arm. Ch 9, sc in the next arm’s tip picot, and repeat from * 4 more times. Ch 9 and join with a sl st to the first sc. (6 sc + 54 ch = 60 sts)
The center (5th) chain of each ch-9 loop is an anchor. Those loops sit at 30°, 90°, 150°, 210°, 270° and 330°. With the 6 tip sc, you now have 12 anchors.
Round 6 (spokes): You are at the top sc (0°). Work around clockwise as follows:
- Spoke-14 from the top sc (0°).
- Sl st in the next 5 ch. Spoke-8 from that 5th ch (30°).
- Sl st in the next 4 ch and the next sc. Spoke-6 (60°).
- Sl st in the next 5 ch. Spoke-4 (90°, side).
- Sl st in the next 4 ch and the next sc. Spoke-6 (120°).
- Sl st in the next 5 ch. Spoke-8 (150°).
- Sl st in the next 4 ch and the next sc. Spoke-14 (180°, bottom).
- Continue the same way: Spoke-8 (210°), Spoke-6 (240°), Spoke-4 (270°, side), Spoke-6 (300°), Spoke-8 (330°).
- Sl st in the next 4 ch and the top sc, then fasten off.
(12 spokes, 12 tip picots)
The long top and bottom spokes create the pointed ends, and the short side spokes keep the waist narrow.
Checkpoint: the picots span 4 in (10.2 cm) top to bottom and 2.25 in (5.7 cm) across.
Part 3: The Frame and Fans (Round 7)
Round 7: Join the thread in the top (0°) picot.
- Ch 3 (counts as dc) and work 6 dc in the same picot. This is the top fan.
- Ch 10, sc in the 30° picot.
- Ch 8, sc in the 60° picot.
- Ch 7, work 7 dc in the 90° picot (right side fan).
- Ch 7, sc in the 120° picot.
- Ch 8, sc in the 150° picot.
- Ch 10, work 7 dc in the 180° picot (bottom fan).
- Ch 10, sc in the 210° picot.
- Ch 8, sc in the 240° picot.
- Ch 7, work 7 dc in the 270° picot (left side fan).
- Ch 7, sc in the 300° picot.
- Ch 8, sc in the 330° picot.
- Ch 10, then join with a sl st to the top of the beginning ch-3.
Count: 4 fans × 7 dc = 28 dc, plus 8 sc, plus 100 ch (2 × [10 + 8 + 7 + 7 + 8 + 10]). That gives 136 sts.
Place a marker in the 4th dc of the top fan and another in the 4th dc of the bottom fan. These two dc are the axis stitches.
Per side: From one axis dc to the other, each side holds 3 fan dc + 50 ch + 4 sc + 7 side-fan dc + 3 fan dc = 67 sts. Then 67 × 2 + 2 axis dc = 136.
Checkpoint: 2.75 in × 4.5 in (7.0 cm × 11.4 cm).
Border
The border is the two-row frame band. It works directly into Round 7.
Border gauge: 10.5 dc = 1 in (2.5 cm). Round 8 holds 138 dc, so it measures about 13 in (33.0 cm) around.
Round 8 (dc band): Ch 3 (counts as dc) in the same st as the join, then dc in the next 2 dc. Work (dc, ch 2, dc) in the marked top axis dc. Dc in every st and every chain to the bottom axis dc, then work (dc, ch 2, dc) in it. Dc in each remaining st and join with a sl st to the top of the ch-3.
Count: 136 sts worked 1 per existing st, plus 2 extra dc (1 at each point) = 138 dc and 2 ch-2 point sps.
Per side: 67 dc between the point groups, plus the 2 point dc that border that side.
Round 9 (corded edge and hanging loop): Ch 1 and sc in the same st and in each dc to the top ch-2 sp. In the top sp work (sc, ch 40, sc); this ch-40 is the hanging loop. Sc in each dc to the bottom ch-2 sp. In the bottom sp work (sc, ch 2, sc). Sc in each remaining dc and join with a sl st to the first sc. Fasten off.
Count: 138 sc worked 1 per dc, plus 4 sc in the point sps = 142 sc, plus the ch-40 loop and 1 ch-2 sp.
Per side: 69 sc on the dc, plus 1 sc from each point sp = 71 sc. Then 71 × 2 = 142.
Trefoil drop: Join the thread with a sl st in the bottom ch-2 sp. [Ch 8, sl st in the same sp] 3 times. Work 12 sc into each ch-8 loop, sl st in the sp, and fasten off. (3 rings, 36 sc) The drop hangs 0.5 in (1.3 cm) below the point.
Why the math works: Every border stitch maps onto exactly one Round 7 stitch, and extra stitches are added only at the two points. The chain bars are worked 1 dc per chain, so the band lies flat. The extra dc and ch-2 at each point sharpen the tips without cupping the sides. The side fans have no extra increases, so the waist stays soft and rounded.
Final Blocking
- Weave in all tails along the frame band, not through the spokes, and trim.
- Soak the ornament in cool water and press it gently in a towel.
- Pin it onto your 3.25 in × 5 in (8.3 cm × 12.7 cm) pointed-oval template. Pin the top and bottom points first, then the two side fans.
- Pin each spoke picot so its spoke runs straight. Check that the snowflake sits centered.
- Pin out the 6 snowflake tips and the branch picots.
- Open the hanging loop and spread the 3 trefoil rings evenly.
- Saturate with spray starch, or brush on a fabric stiffener, and let it dry completely, about 12 hours.
- Unpin it and check that it measures 3.25 in × 5 in (8.3 cm × 12.7 cm).
Final Quality-Control Checklist
- [ ] There are 6 arms, each with a tip picot and a V-pair of side picots
- [ ] There are 12 spokes in the order 14-8-6-4-6-8-14-8-6-4-6-8
- [ ] There are 4 fans of 7 dc each, at the top, bottom and both sides
- [ ] Round 7 = 136 sts; Round 8 = 138 dc + 2 ch-2 sps; Round 9 = 142 sc
- [ ] The left and right halves mirror each other
- [ ] The frame measures 3.25 in × 5 in (8.3 cm × 12.7 cm)
- [ ] The hanging loop is secure and the trefoil rings are even
- [ ] The tails are hidden and the ornament lies flat after starching
Troubleshooting
Frame ruffles: Your chains are too loose. Rework Round 7 with firmer chains, or move down a hook size for the border.
Frame cups or curls inward: Your dc are too tight over the chains. Loosen your tension, or work Round 8 with a hook 0.25 mm larger.
Points look rounded: You may have skipped the (dc, ch 2, dc) or worked it in the wrong dc. Recheck the axis markers.
Spokes sag: The sl sts back down the spoke were too loose. Work them snugly, and starch heavily when blocking.
The shape is lopsided: A spoke has the wrong length. Count the spoke chains against the 14-8-6-4-6-8 sequence.
Snowflake twists off-center: Pin the 0° and 180° spokes along a straight line on the template before pinning anything else.
Care
Hand wash in cool water, lay flat, and re-starch after washing. Store flat in tissue paper so the points and picots keep their shape.
Final Notes
The measurement chain runs like this. The snowflake measures 1.75 in (4.4 cm) after Round 4. The spoke tips reach 4 in × 2.25 in (10.2 cm × 5.7 cm) after Round 6. The chained frame is 2.75 in × 4.5 in (7.0 cm × 11.4 cm) after Round 7. The 0.25 in (0.6 cm) border brings the frame to 3.25 in × 5 in (8.3 cm × 12.7 cm), the trefoil brings the height to 5.5 in (14.0 cm), and the loop brings it to 7.25 in (18.4 cm) overall.
If each checkpoint matches, the ornament will block into a crisp, lantern-shaped snowflake.
Happy crocheting!