

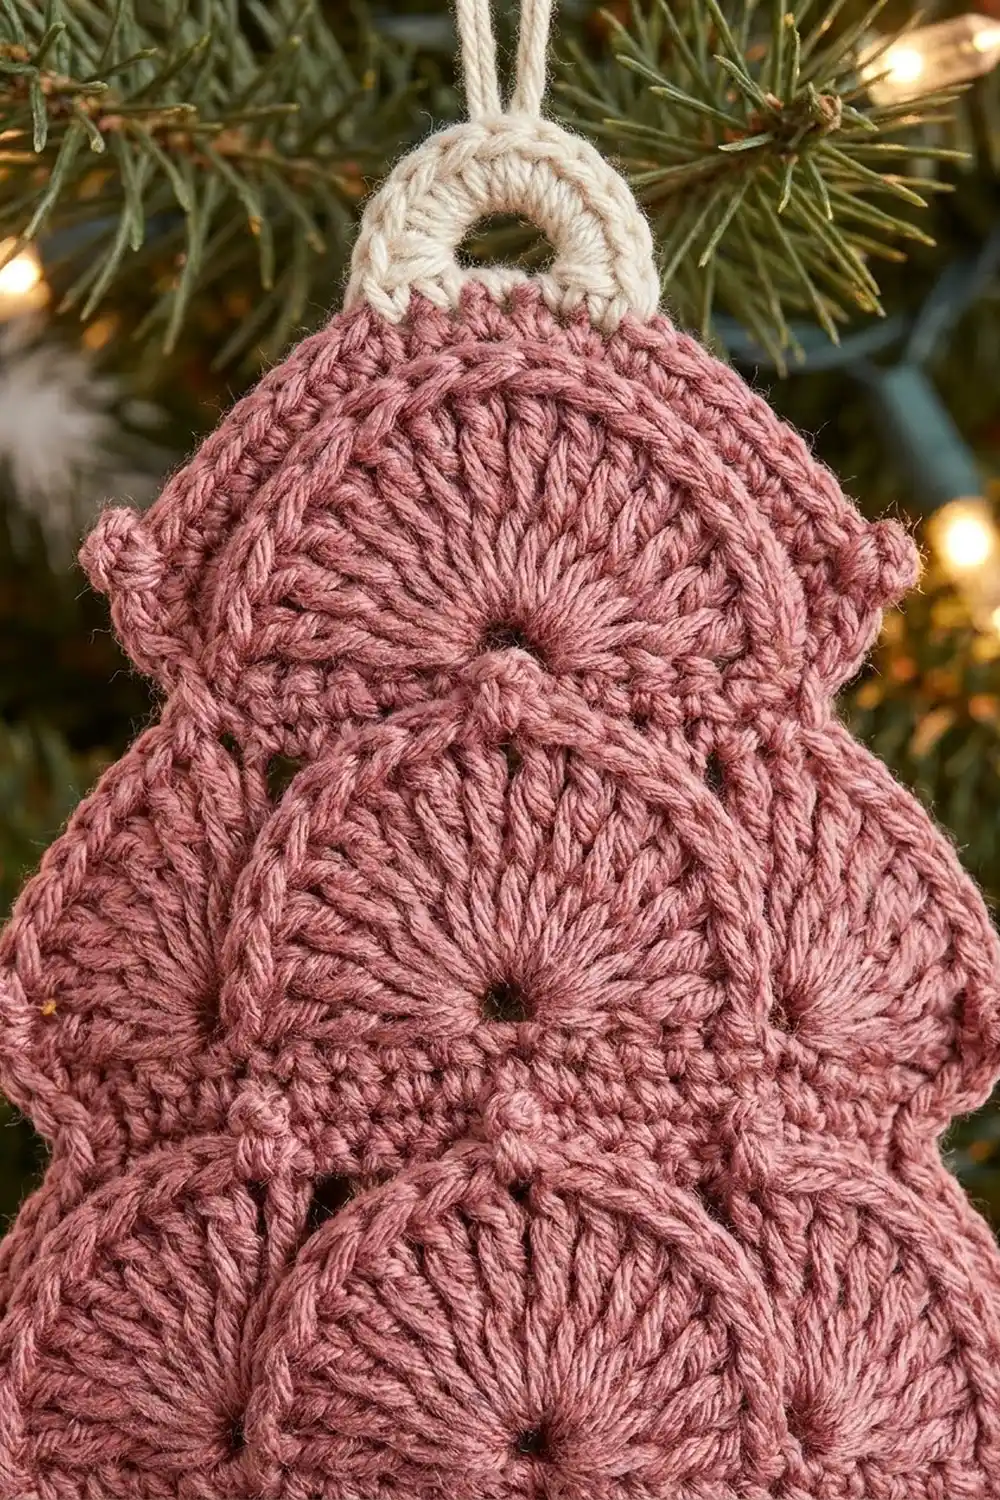
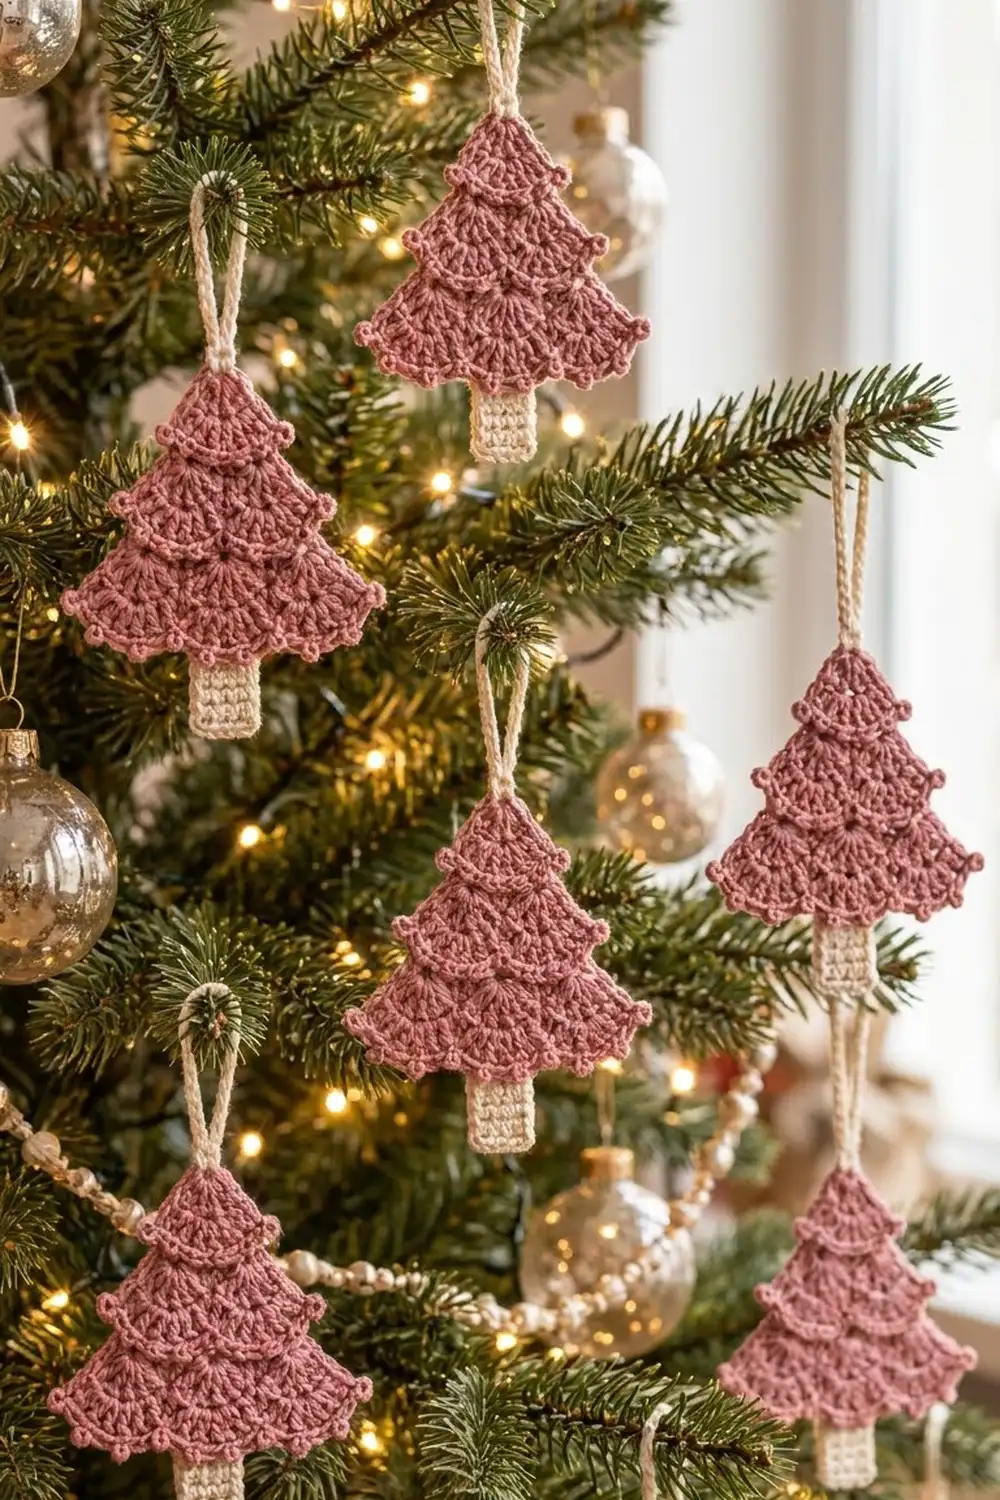
The Rosewood Tiers ornament is a small flat Christmas tree made of three layers of shell fans. The top tier has one fan, the middle tier has two and the bottom tier has three. Each tier ends in a crisp rim that sits slightly on top of the tier below, so the tree looks layered rather than flat.
The body is dusty rose and the trunk and hanging loop are cream. Picots at the tier corners, plus a row of picots along the bottom edge, add a vintage, lacy finish. It suits a natural tree or a muted, cottage-style color scheme.
This pattern uses US crochet terms. The finished ornament is 3.75 in (9.5 cm) wide and 4 in (10.2 cm) tall without the loop, or 5.5 in (14.0 cm) including the loop.
You make the tree in one piece from the top point down. Each tier ends with an edge row worked into one loop of the last row. The next tier is worked into the other, unused loop, which is what makes each tier sit on top of the next. You then add the trunk at the back of the bottom tier and finish with the hanging loop.
Finished Size and Construction
- Finished size: 3.75 in (9.5 cm) wide × 4 in (10.2 cm) tall; 5.5 in (14.0 cm) including loop
- Skill level: Easy-intermediate
- Terminology: US
- Yarn weight: DK (#3) cotton or cotton blend
- Hook: 3.5 mm (E-4)
- Number of pieces: 1 (worked in one piece)
- Layout: Single ornament; 3 tiers (1 fan, 2 fans, 3 fans) + trunk + loop
- Piece size: Tree body 3.75 in (9.5 cm) wide × 3 in (7.6 cm) tall
- Size before border: 3.5 in (8.9 cm) wide × 2.75 in (7.0 cm) tall, measured before the bottom picot edge
- Border depth: about 0.25 in (0.6 cm), including picots
Materials
Use a smooth, mercerized or matte DK cotton. Cotton gives clear stitch definition and holds the picots well, and it blocks flat. Acrylic also works, but the fans will look softer and less crisp.
- Color A, dusty rose: 7 g / 15 m (16 yd)
- Color B, cream: 3 g / 7 m (8 yd)
Tools:
– 3.5 mm (E-4) crochet hook
– Tapestry needle
– Scissors
– Stitch markers (2)
– Blocking mat and rust-proof pins
– Spray bottle with water
– Ruler or tape measure
These quantities include a margin of about 30% for your gauge swatch and weaving in ends. If you plan to make several ornaments, one 50 g ball of Color A is enough for about 6 trees.
Abbreviations (US Terms)
- ch – chain
- sl st – slip stitch
- sc – single crochet
- dc – double crochet
- sk – skip
- st(s) – stitch(es)
- MR – magic ring
- RS / WS – right side / wrong side
- t-ch – turning chain
- RS loop – the top loop of a stitch that lies on the right side of the work
- WS loop – the top loop of a stitch that lies on the wrong side of the work
Special stitch – Picot: Ch 3, sl st in the 3rd ch from the hook.
Layering rule: Edge rows always go into the RS loops of the row below. The next tier always goes into the WS loops of that same row. Which loop is “front” or “back” changes depending on which side is facing you, so follow the RS/WS wording and not front/back.
Gauge and Checkpoints
Gauge: 20 dc × 9 rows = 4 in (10.2 cm); 22 sc × 24 rows = 4 in (10.2 cm).
Gauge is less critical for an ornament than for a garment, but the fans only lie flat at the right tension. Make Tier 1 as your test piece before continuing.
Checkpoints:
– After Tier 1: 1.75 in (4.4 cm) wide × 1 in (2.5 cm) tall
– After Tier 2: 2.75 in (7.0 cm) wide × 2 in (5.1 cm) tall
– After Row 6: 3.5 in (8.9 cm) wide × 2.75 in (7.0 cm) tall
– After Edge 3: 3.75 in (9.5 cm) wide × 3 in (7.6 cm) tall
– Trunk: 0.9 in (2.3 cm) wide, hanging 1 in (2.5 cm) below the edge
If your piece is too big by more than 0.25 in (0.6 cm), go down one hook size, to 3.25 mm (D-3). If it is too small, go up to 3.75 mm (F-5). If the fans ripple, your dc stitches are too tall; if they cup, they are too short. Change the hook first, then check the height you pull your loops to.
Pattern
Work with Color A for all three tiers. At the start of a row, ch 3 counts as the first dc and ch 1 does not count as a stitch.
Tier 1 (One Fan)
Row 1 (RS): Make an MR. Ch 3, then work 4 dc in the ring. Pull the ring tight. (5 dc)
The fan spreads from a point instead of forming a full half-circle, which gives the top of the tree its cone shape.
Row 2 (WS): Ch 3, turn. Work 2 dc in the next st, 3 dc in the center st and 2 dc in the next st, then 1 dc in the top of the t-ch. (9 dc)
Edge 1 (RS): Ch 1, turn. Working into the RS loops only, make (sc, picot) in the first st, sc in each of the next 7 sts, and (sc, picot) in the last st. (9 sc + 2 picots)
Check Tier 1 against the checkpoint above now.
Tier 2 (Two Fans)
Row 3 (WS): Turn. Working into the unused WS loops of Row 2: sc in the first st, then [sk 1, 5 dc in the next st, sk 1, sc in the next st] 2 times. (2 shells; 3 sc + 10 dc = 13 sts)
Stitches used: 1 + (1 + 1 + 1 + 1) × 2 = 9, which matches all 9 stitches of Row 2.
Row 4 (RS): Ch 3, turn; this is the first dc, over the last sc. Work 2 dc in each of the next 2 dc, 3 dc in the center dc of the shell and 2 dc in each of the next 2 dc, then 1 dc in the next sc. Repeat from * once more. The last dc goes in the final sc. (Each fan = 11 dc; row total 1 + 11 + 1 + 11 + 1 = 25 dc)
Place a marker in the 13th stitch, which is the dc between the two fans.
Edge 2 (WS): Ch 1, turn. You now have the WS facing, but you still work into the RS loops (the loops farthest from you), so this rim also lands on the front. Make (sc, picot) in the first st, sc in each of the next 11 sts, (sc, picot) in the marked st, sc in each of the next 11 sts, and (sc, picot) in the last st. (25 sc + 3 picots)
Tier 3 (Three Fans)
Row 5 (RS): Turn. Working into the unused WS loops of Row 4: sc in the first st, then [sk 3, 7 dc in the next st, sk 3, sc in the next st] 3 times. (3 shells; 4 sc + 21 dc = 25 sts)
Stitches used: 1 + 8 × 3 = 25, which matches Row 4. The middle shell lands in the marked stitch 13, so it sits right under the dip between the two Tier 2 fans and staggers the tiers.
Row 6 (WS): Ch 3, turn; this is the first dc. Work 1 dc in the next dc, 2 dc in each of the next 2 dc, 3 dc in the center dc, 2 dc in each of the next 2 dc and 1 dc in the next dc, then 1 dc in the next sc. Repeat from * 2 more times. (Each fan = 13 dc; row total 1 + (13 + 1) × 3 = 43 dc)
The stitch positions are: st 1 is the t-ch, Fan 1 is sts 2–14, sts 15 and 29 are the dc between fans, Fan 2 is sts 16–28, Fan 3 is sts 30–42, and st 43 is the last dc. Stitch 22 is the exact center. Check the “After Row 6” size now.
Next, work Edge 3 as given in the Border section below. Then add the trunk and the loop.
Trunk
Hold the tree with the WS facing and the bottom edge at the top.
Row 1: Join Color B with a sc in the WS loop of st 20 of Row 6. Sc in the WS loops of sts 21–24. (5 sc)
Because the trunk comes from the loops behind the picot edge, it sits behind the bottom tier like the other layers.
Rows 2–7: Ch 1, turn, sc in each st across. (5 sc)
Fasten off. The trunk is 7 rows deep; about 1 in (2.5 cm) of it shows below the edge.
Hanging Loop
With Color B, join with a sl st through the top point of the magic ring, between Row 1’s t-ch and the first dc. Ch 20 and sl st in the same spot. Ch 1, then work 26 sc over the ch-20 loop, covering the chain completely. Sl st to the first sc and fasten off. (26 sc)
The covered loop stands about 1.5 in (3.8 cm) tall. Weave in all ends along the WS loops, in matching colors.
Border
The border is the picot edge on the bottom tier. Edge 3 is the final row of the tree.
Border gauge: Work 1 sc per stitch, at the dc width of 20 sts per 4 in (10.2 cm). The edge then measures the same as Row 6, so the border neither gathers nor flares.
Edge 3 (RS): Ch 1, turn. Working into the RS loops only of Row 6: (sc, picot) in the first st, then sc in each of the next 2 sts, (sc, picot) in the next st, sc in each of the next 3 sts, (sc, picot) in the next st, sc in each of the next 3 sts, (sc, picot) in the next st, sc in each of the next 2 sts and (sc, picot) in the next st. Repeat from * 2 more times. Fasten off. (43 sc + 13 picots)
Count per section:
– Each fan (13 sts): 13 sc and 3 picots, on fan sts 3, 7 and 11
– Each joining dc and the last st: 1 sc + 1 picot each, so 3 more picots
– First st: 1 sc + 1 picot
– Totals: 1 + (14 × 3) = 43 sc and 1 + (4 × 3) = 13 picots
Why the math works: Each repeat covers exactly 14 stitches, which is one 13-stitch fan plus the dc after it. Three repeats plus the first stitch use all 43 stitches. Within each fan, stitch 7 is the center, and picots on sts 3 and 11 sit exactly 4 stitches either side of it, so every scallop is symmetrical. The picots on the joining stitches mark the dips between fans, and the first and last picots mark the corners.
The smaller tiers follow the same logic. Edge 1 has 9 sc with 2 corner picots, and Edge 2 has 25 sc with 3 picots: one at each corner and one at the dip between the fans. Each edge row is always 1 sc per stitch. The border adds about 0.25 in (0.6 cm) all around, taking the body from 3.5 in (8.9 cm) to 3.75 in (9.5 cm) wide.
Final Blocking
- Spray the ornament until it is evenly damp but not dripping.
- Lay it RS up on a blocking mat.
- Pin the top point and the trunk’s bottom center so the tree hangs on a straight center line.
- Pin the two bottom corner picots so the base is 3.75 in (9.5 cm) wide.
- Ease each fan into an even curve. Pin the dips between fans upward slightly so the scallops show.
- Fold each tier’s rim down so it overlaps the tier below evenly.
- Pin the trunk square at 0.9 in (2.3 cm) wide and straighten the loop.
- Let it dry completely, at least 6 hours, before unpinning.
Final Quality-Control Checklist
- Tier 1 has 1 fan, Tier 2 has 2 fans and Tier 3 has 3 fans
- Row 6 has 43 dc, and the middle fan of Tier 3 is centered under the dip in Tier 2
- All three edge rims are on the RS
- Picots: 2 on Tier 1, 3 on Tier 2, 13 on Tier 3
- The trunk is centered, 5 sts wide and attached behind the bottom edge
- The loop is covered in sc with no chain showing
- Size is 3.75 in (9.5 cm) × 4 in (10.2 cm) without the loop
- All ends are woven in invisibly on the WS
Troubleshooting
- The rim is on the back: You worked the edge into the WS loops. Rip back to the end of the tier and work the edge into the RS loops.
- The fans ruffle: Your dc are too loose. Go down one hook size, or block firmly.
- The fans cup: Your tension is too tight. Go up one hook size.
- The shells don’t fit: Recount the row below; it must have 9 sts for Tier 2 or 25 sts for Tier 3.
- The trunk is off-center: Count to st 20 from either end of Row 6. The row is symmetrical, so both ends give the same position.
- The loop twists: Cover the chain completely and block it straight.
Care
Hand wash in cool water with mild soap, press out the water with a towel and lay flat to dry. Store the ornament flat, not by its loop, so the fans keep their shape.
Final Notes
Everything depends on gauge. At 20 dc per 4 in (10.2 cm), Tier 1 should be 1.75 in (4.4 cm) wide and Tier 2 should be 2.75 in (7.0 cm). Row 6 gives you 3.5 in (8.9 cm), and the picot edge brings the base to 3.75 in (9.5 cm). The trunk and loop take the total height to 5.5 in (14.0 cm). If each checkpoint matches, the finished tree will too.
Happy crocheting!