

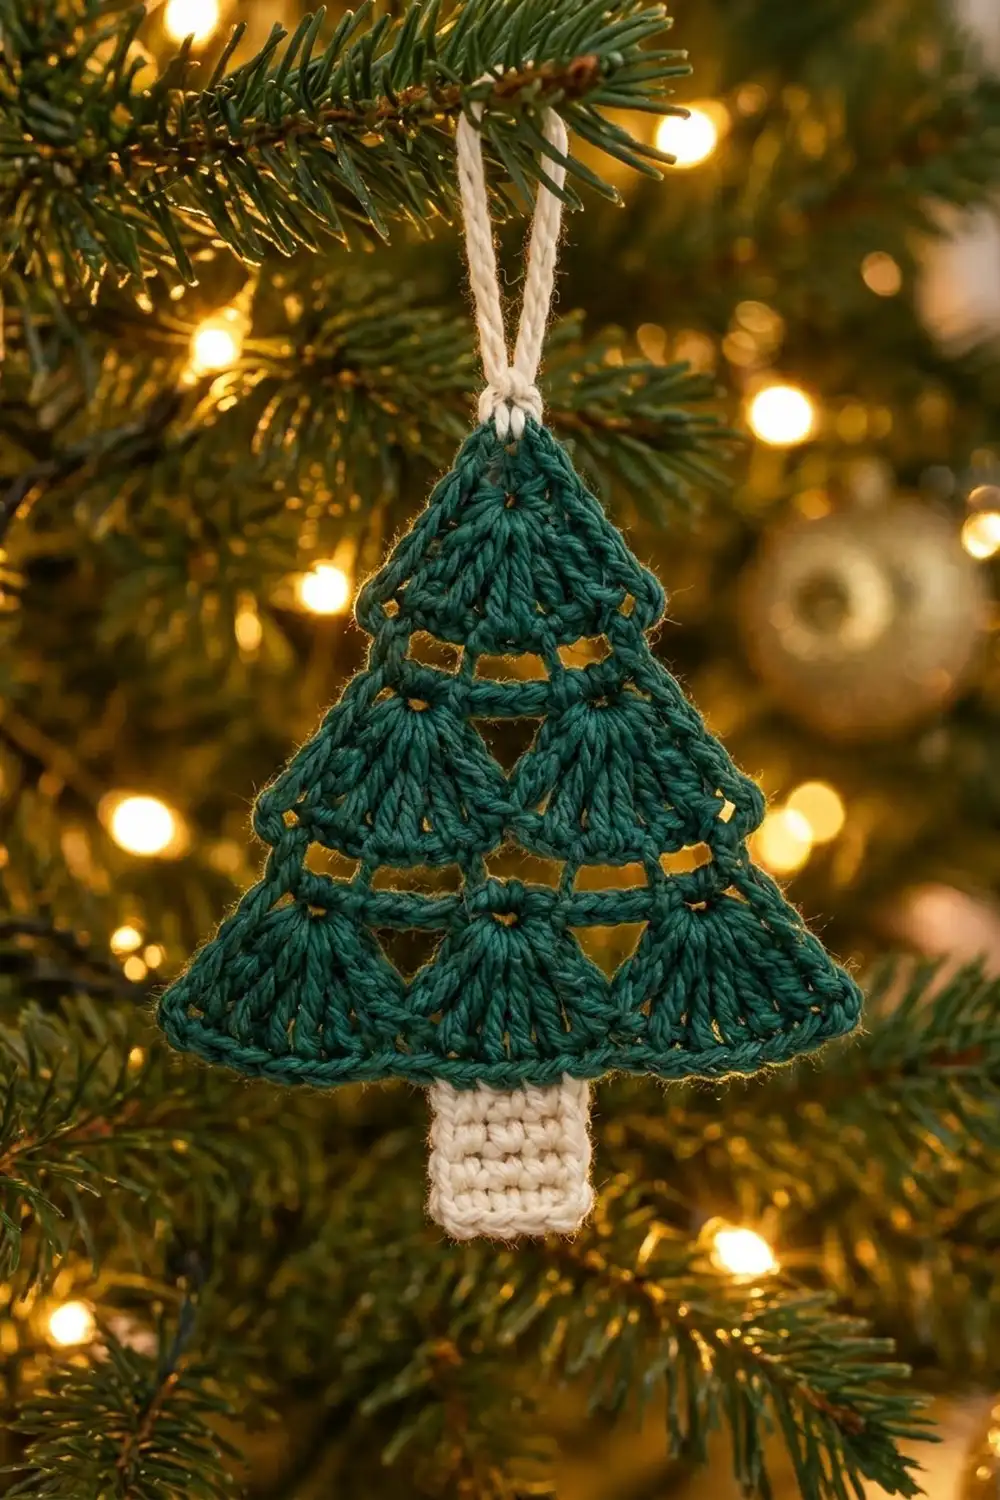
The Evergreen Fan Christmas Tree Ornament is a small, flat tree made from stacked fans of tall stitches. Three tiers of fans grow from the top down: one fan at the peak, two in the middle, and three across the bottom. Little triangle windows open between the fans, and slim slits run under each tier. The open texture makes the tree look light and lacy, even though it is worked in one piece.
The tree body is a deep evergreen green. The trunk is a small cream rectangle of single crochet, and a twisted cream cord makes the hanging loop. The style is classic and cozy. It suits a real tree, a gift package or a door handle.
This pattern uses US crochet terms. The finished tree measures 4.25 in (10.8 cm) wide at the base and 4.25 in (10.8 cm) tall from the peak to the bottom of the trunk. The hanging loop adds 2.5 in (6.4 cm) above the peak.
The construction is simple. You work the green triangle in 6 turned rows, starting with a single fan at the peak. After each fan row comes a single crochet “bar” row that sets up the next, wider tier. One round of single crochet outlines the triangle. You work the cream trunk directly onto the bottom edge and thread the cord through the peak at the end.
Finished Size and Construction
- Finished size: 4.25 in (10.8 cm) wide x 4.25 in (10.8 cm) tall, plus a 2.5 in (6.4 cm) loop
- Skill level: Easy
- Terminology: US crochet terms
- Yarn weight: DK (3) cotton
- Hook: 3.25 mm (D-3)
- Number of pieces: 1 crocheted piece (tree with attached trunk), plus 1 twisted cord
- Layout: Triangle with 3 tiers of fans (1, 2, 3) and the trunk centered below
- Triangle size after border: 4.25 in (10.8 cm) wide x 3 in (7.6 cm) tall
- Triangle size before border: 3.75 in (9.5 cm) wide x 2.5 in (6.4 cm) tall
- Border depth: 0.25 in (0.6 cm), one round of single crochet
- Trunk: 1.2 in (3.0 cm) wide x 1.25 in (3.2 cm) tall
Materials
Choose a smooth, mercerized DK cotton. Cotton gives crisp fans and clean triangle windows, and it holds its shape after blocking. Fuzzy or very soft acrylic yarn will blur the openwork.
- Color A, evergreen green: 8 g (about 17 m)
- Color B, cream: 3 g (about 6 m), for the trunk and the cord
These amounts are for one ornament and include a small margin for checking gauge and weaving in ends.
Tools:
- 3.25 mm (D-3) crochet hook
- Tapestry needle
- Scissors
- Stitch markers (3)
- Ruler or tape measure
- Blocking mat and rust-proof pins
- Spray bottle with water
Abbreviations (US Terms)
- ch – chain
- sc – single crochet
- tr – treble crochet
- sl st – slip stitch
- sk – skip
- st(s) – stitch(es)
- sp – space
- RS / WS – right side / wrong side
Fan: 7 tr worked into the same stitch or space. Each fan starts as a single point and spreads downward into a wedge.
Gauge and Checkpoints
Gauge: about 6 sc = 1 in (2.5 cm) and about 7 sc rows = 1 in (2.5 cm) in Color A.
Because the tree is small, the tree itself is your gauge test. Work Rows 1 and 2, then measure before you go on.
Checkpoints (before blocking, lightly flattened):
- After Row 2: 1.25 in (3.2 cm) wide x 0.75 in (1.9 cm) tall
- After Row 4: 2.5 in (6.4 cm) wide x 1.6 in (4.1 cm) tall
- After Row 6: 3.75 in (9.5 cm) wide x 2.5 in (6.4 cm) tall
- After Round 7 (border): 4.25 in (10.8 cm) wide x 3 in (7.6 cm) tall
Each tier adds about 1.25 in (3.2 cm) of width. That steady step keeps the sides straight.
If your piece is too big: Go down to a 3 mm hook, or make your tr stitches a little shorter.
If your piece is too small: Go up to a 3.5 mm (E-4) hook. A difference of 0.125 in (0.3 cm) is fine and will block out.
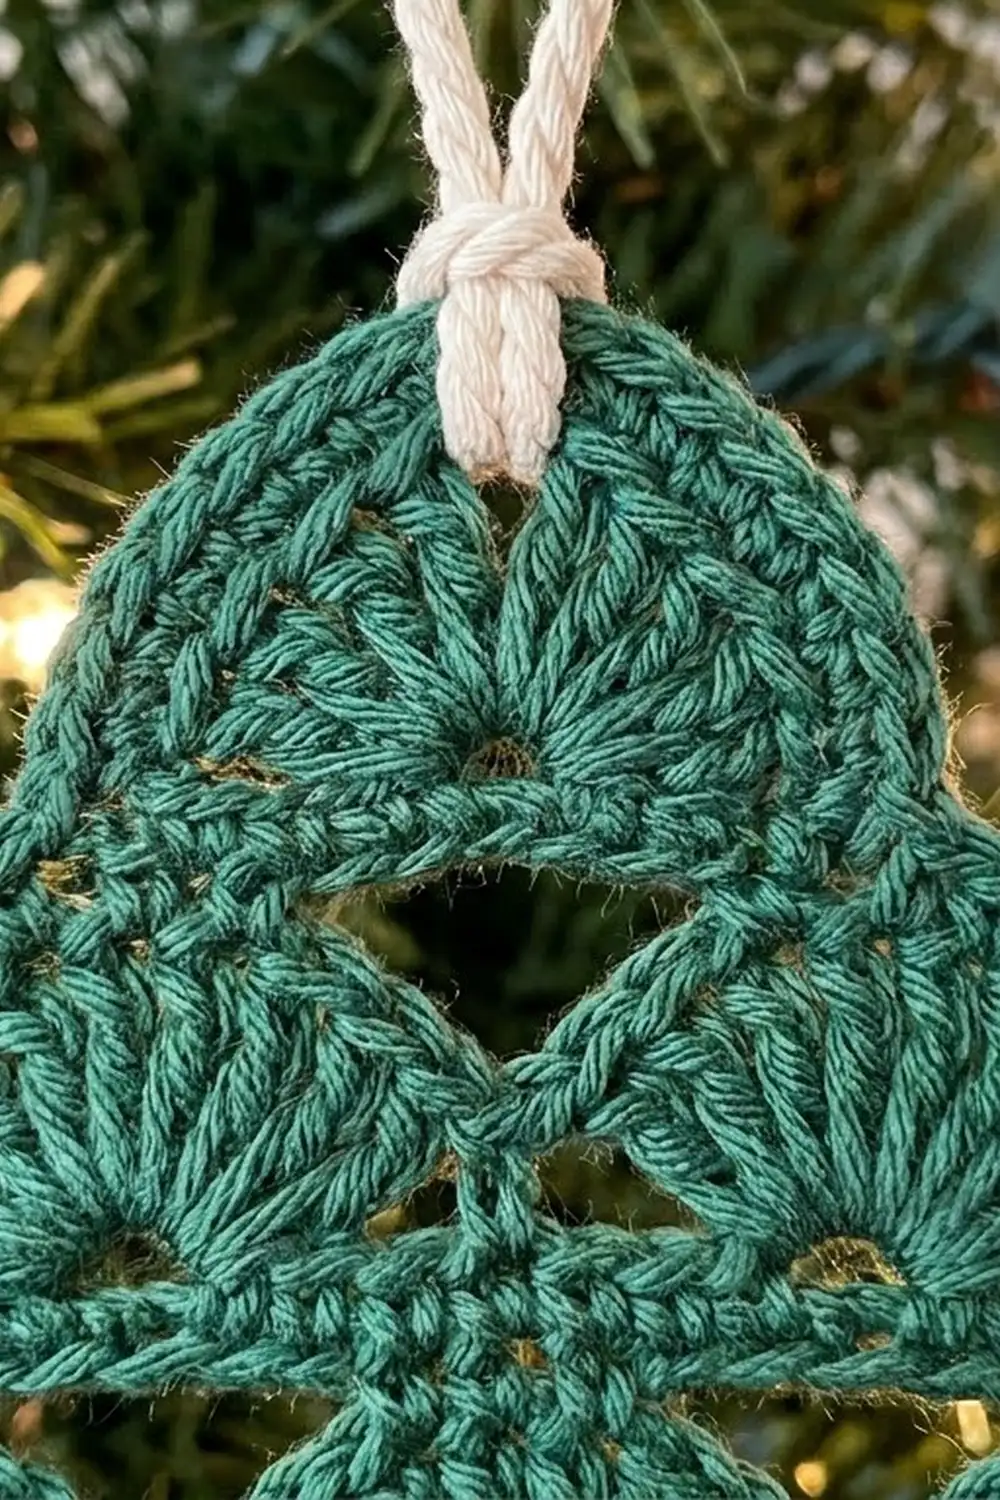
Tree Body (Color A)
You work the tree from the peak down. Each fan hangs from the row above it, so its point sits at the top and its wide edge at the bottom.
Row 1 (RS), Tier 1: Ch 4, 7 tr in 4th ch from hook. Turn. (7 tr; the beginning ch-3 does not count as a stitch.)
The chain holding the fan is the peak of the tree. Mark it so you can find it again for the border and the loop.
Row 2 (WS), Bar 1: Ch 1. Sc in first tr, ch 2, sk 2 tr, sc in next tr (center tr), ch 2, sk 2 tr, sc in last tr. Turn. (3 sc and 2 ch-2 sps = 7 sts.)
The ch-2 spaces make the slim slits under the first fan.
Row 3 (RS), Tier 2: Ch 4 (does not count). 7 tr in first sc, sc in center sc, 7 tr in last sc. Turn. (14 tr and 1 sc = 15 sts; 2 fans.)
The two fans grow from the outer corners of Tier 1. The sc between them stays short, so the fans lean toward each other and leave an open triangle above that sc.
Row 4 (WS), Bar 2: Ch 1. Sc in first tr, ch 2, sk 2 tr, sc in next tr, ch 2, sk 2 tr, sc in last tr of this fan; ch 1, sk center sc; sc in first tr of next fan, ch 2, sk 2 tr, sc in next tr, ch 2, sk 2 tr, sc in last tr. Turn. (6 sc, 4 ch-2 sps and 1 ch-1 sp = 15 sts.)
The ch-1 bridges the gap between the two fans and closes the first triangle window. Don’t pull this chain tight. It should lie flat across the tops of the fans.
Row 5 (RS), Tier 3: Ch 4 (does not count). 7 tr in first sc, sk ch-2 sp, sc in next sc, sk ch-2 sp and next sc, 7 tr in center ch-1 sp, sk next sc and ch-2 sp, sc in next sc, sk ch-2 sp, 7 tr in last sc. Turn. (21 tr and 2 sc = 23 sts; 3 fans.)
Check where things landed. The outer fans start at the outer corners, and the center fan sits right under the Tier 2 window. The two sc fall at the centers of the Tier 2 fans.
Row 6 (WS), Bottom Bar: Ch 1. Sc in each of next 7 tr, ch 1, sk sc, sc in each of next 7 tr, ch 1, sk sc, sc in each of last 7 tr. (21 sc and 2 ch-1 sps = 23 sts.) Do not fasten off.
The two ch-1 sps close the two triangle windows of Tier 3. The bottom edge is now solid and straight.
Border (Color A)
Border gauge: About 6 sc per inch on the bottom edge and about 5.5 sc per inch along each slanted side. Each tr row end gets 5 sc because the fan edge is long and diagonal. Each sc row end gets 1 sc.
In this pattern, the slanted-side counts do not include corners. You work each corner as a separate 3-sc group and count it separately.
Round 7 (RS): Ch 1, turn so the RS faces you.
- Bottom edge: 3 sc in first sc (corner), sc in next 6 sc, sc in ch-1 sp, sc in next 7 sc, sc in ch-1 sp, sc in next 6 sc, 3 sc in last sc (corner). (27 sc, including both 3-sc corner groups.)
- First slanted side: Work up the row ends: 5 sc along Row 5, 1 sc in Row 4, 5 sc along Row 3, 1 sc in Row 2, 5 sc along Row 1. (17 sc.) The corner group already covers the end of Row 6.
- Peak: 3 sc in the marked foundation ch at the peak. (3 sc.)
- Second slanted side: Work down the row ends: 5 sc along Row 1, 1 sc in Row 2, 5 sc along Row 3, 1 sc in Row 4, 5 sc along Row 5. (17 sc.)
- Sl st to first sc. Fasten off and weave in ends.
Total: 27 + 17 + 3 + 17 = 64 sc.
Why the math works: The bottom edge has 23 sts. The 21 non-corner sts get 1 sc each and the 2 corner sts get 3 sc each, so 21 + 6 = 27. Each slanted side spans 3 tiers, and each tier gives 5 + 1 = 6 sc. Subtract 1 at the bottom, where the corner already covers Row 6: 18 − 1 = 17. A slanted side is about 3.125 in (7.9 cm) long, so 17 sc plus half of each corner group comes close to the 5.5 sc per inch border gauge. The 3-sc groups add just enough to turn the sharp corners without cupping.
Trunk (Color B)
Count the 27 bottom-edge sc of Round 7 from either outer corner, with the 3 corner sc as sts 1 to 3. Place markers in st 11 and st 17. These 7 sts sit directly under the center fan, with 10 sts on each side.
Row 1 (RS): With RS facing, join Color B with a sl st in st 11. Ch 1, sc in same st and in each of next 6 sts. Turn. (7 sc.)
Rows 2 to 9: Ch 1, sc in each sc across. Turn. (7 sc.)
After Row 9, the trunk measures 1.2 in (3.0 cm) wide x 1.25 in (3.2 cm) tall. Fasten off and weave the ends into the sides of the trunk.
Twisted Cord Hanging Loop (Color B)
- Cut one 18 in (45.7 cm) strand of Color B.
- Fold it in half and twist both ends together firmly in one direction.
- Hold the ends and let the strand fold and twist back on itself. Knot the ends. The cord measures about 8 in (20.3 cm).
- Thread one end of the cord through the peak, just under the border sc, from front to back.
- Adjust it so the loop stands 2.5 in (6.4 cm) above the peak.
- Wrap a short length of Color B 4 times around both strands of the cord just above the peak, then knot it on the WS. This makes the neat wrapped band at the base of the loop.
- Knot the cord ends on the WS, trim them to 0.5 in (1.3 cm), and tuck the tails under the border.
Final Blocking
- Spray the tree lightly with water until it is damp, not soaked.
- Lay it RS up on a blocking mat.
- Pin the two bottom corners 4.25 in (10.8 cm) apart.
- Pin the peak 3 in (7.6 cm) above the bottom edge, centered.
- Pin along each slanted side so it forms a straight line.
- Shape each fan into a smooth wedge, and open each triangle window with a pin or your fingertip.
- Pin the trunk straight and square at 1.2 in (3.0 cm) x 1.25 in (3.2 cm).
- Let it dry completely, about 6 to 12 hours.
For a firmer ornament, spray it lightly with starch before the final drying.
Final Quality-Control Checklist
- Tier 1 has 1 fan, Tier 2 has 2 fans and Tier 3 has 3 fans.
- Every fan has exactly 7 tr.
- There are 3 triangle windows: 1 in Tier 2 and 2 in Tier 3.
- Each bar row has visible slits under the fans.
- The bottom edge of Round 7 has 27 sc, and each slanted side has 17 sc.
- The trunk is centered under the middle fan, with 10 sts on each side.
- The triangle is 4.25 in (10.8 cm) wide x 3 in (7.6 cm) tall.
- The full ornament is 4.25 in (10.8 cm) tall without the loop.
- The loop is 2.5 in (6.4 cm) tall and the wrap is tight.
- All ends are woven in securely.
Troubleshooting
The fans ruffle instead of lying flat. Your tr stitches are too loose or the bar rows are too tight. Make the tr slightly shorter, or loosen the sc in the bar rows.
The triangle windows are closed up. The ch-1 bridges in Rows 4 and 6 are too tight. Work them a little looser, and open the windows when you block.
The sides are wavy. You may have too many border sc along the sides. Recount to 17 per side.
The border cups at the corners. Make sure each corner has exactly 3 sc, not 2.
The trunk is off-center. Recount the bottom edge from the outer corner, counting the 3 corner sc as sts 1 to 3.
The loop flops sideways. Tighten the wrap, and knot the cord ends close to the peak on the WS.
Care
Hand wash in cool water with mild soap, press the water out in a towel and dry flat. If the fans lose their shape, pin and block again.
Final Notes
Here is the full measurement chain for this ornament. Row 2 measures 1.25 in (3.2 cm) wide and Row 4 measures 2.5 in (6.4 cm). Row 6 measures 3.75 in (9.5 cm) wide x 2.5 in (6.4 cm) tall. The border adds 0.25 in (0.6 cm) on every edge, giving a 4.25 in (10.8 cm) x 3 in (7.6 cm) triangle. The 1.25 in (3.2 cm) trunk brings the total height to 4.25 in (10.8 cm), and the cord adds a 2.5 in (6.4 cm) loop.
Check each step as you go, and your tree will finish with straight sides, crisp fans and clean windows. Make one for the tree, then a few more for gifts and gift tags.
Happy crocheting!