

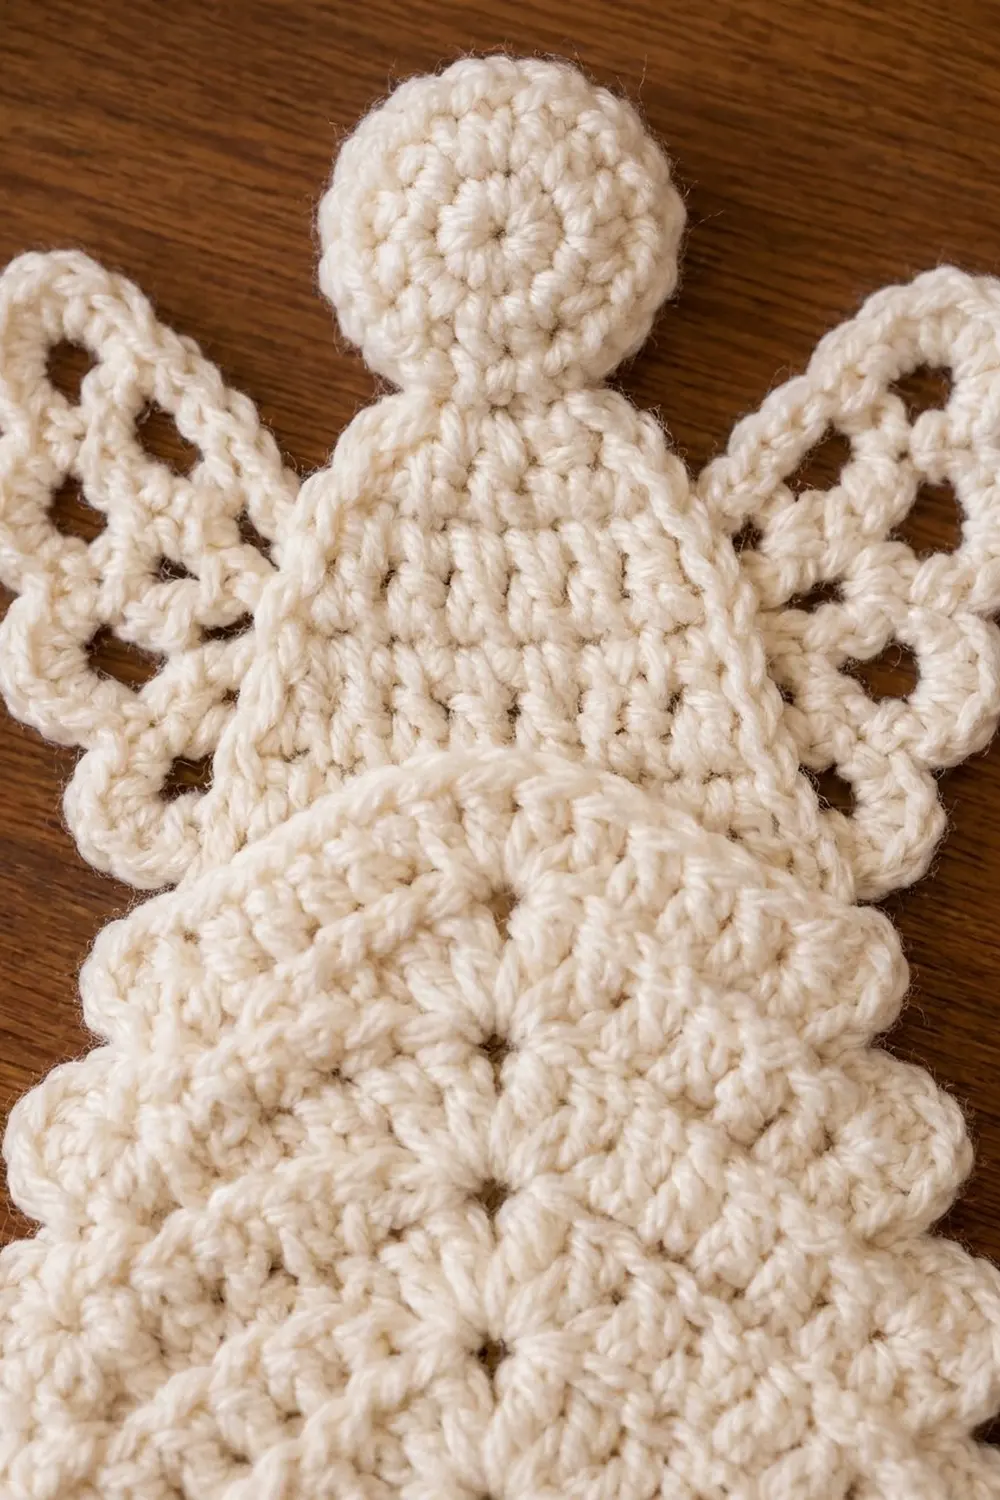
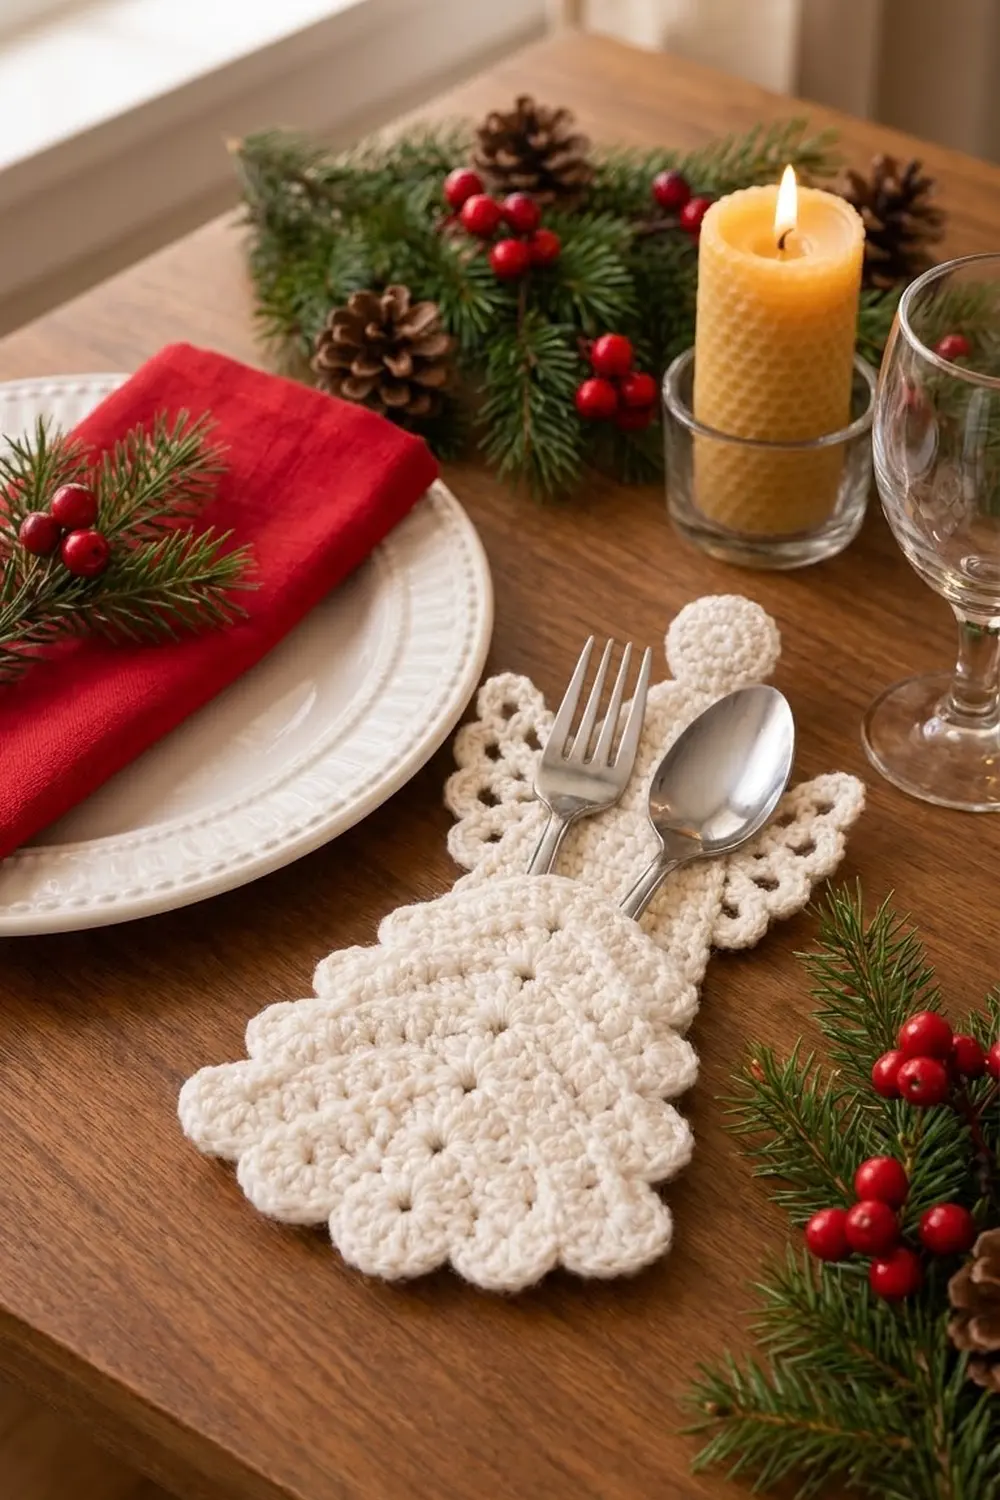
This little angel holds a fork and spoon at each place setting. She is worked in a single cream yarn. She has a round head, two lacy wings with open loops, and a tiered skirt that works as a pocket. A center line of eyelets runs down the skirt, and seven rounded shells finish the hem.
The style is simple and classic, so it suits a white-and-green holiday table, a rustic wooden one, or a wedding setting. The pattern uses US crochet terms throughout.
The finished holder measures about 7 in (17.8 cm) wide at the hem and 9.25 in (23.5 cm) tall from the top of the head to the scallop tips.
You make five pieces: a back panel, a skirt pocket, a head and two wings. You sew the head and wings to the back. Then you lay the pocket over the lower back and join the two layers with a single crochet border. Last, you add the scalloped hem.
Finished Size and Construction
- Finished size: 7 in (17.8 cm) wide × 9.25 in (23.5 cm) tall
- Skill level: Easy-intermediate
- Terminology: US
- Yarn weight: Worsted (#4) cotton
- Hook: 4.0 mm (G-6)
- Number of pieces: 5 (back, pocket, head, 2 wings), joined into one holder
- Layout: Head on top, a wing on each side of the upper body, pocket over the lower back
- Piece sizes:
- Back: 6.25 in (15.9 cm) wide × 6.75 in (17.1 cm) tall
- Pocket: 6.25 in (15.9 cm) × 3.5 in (8.9 cm)
- Head: 2 in (5.1 cm) across
- Each wing: 1.75 in (4.4 cm) × 2.75 in (7.0 cm)
- Size before border: 6.25 in (15.9 cm) wide × 8.5 in (21.6 cm) tall
- Border depth at hem: 0.75 in (1.9 cm)
Materials
Yarn: Use a smooth, worsted-weight cotton or cotton blend. Cotton keeps its shape, stands up to washing, and gives clear eyelets and scallops. Avoid fuzzy acrylics, which blur the lacy wing loops.
- Cream/ivory: 35 g (about 66 m / 72 yd)
This amount includes a margin of about 20% for swatching and sewing tails.
Tools:
– 4.0 mm (G-6) crochet hook
– Tapestry needle
– 4 locking stitch markers
– Rust-proof pins
– Blocking mat or folded towel
– Spray bottle
– Scissors
Abbreviations (US Terms)
- ch – chain
- sl st – slip stitch
- sc – single crochet
- hdc – half double crochet
- dc – double crochet
- tr – treble crochet
- st(s) – stitch(es)
- sp – space
- sk – skip
- tch – turning chain
- MR – magic ring
- RS / WS – right side / wrong side
Special stitches:
– dc2tog (double crochet 2 together): (Yarn over, insert hook in next st, pull up a loop, yarn over, pull through 2 loops) twice. Yarn over and pull through all 3 loops on hook.
– Shell: 5 dc worked in the same stitch.
Gauge and Checkpoints
Gauge: 16 dc × 9 rows = 4 in (10.2 cm), lightly blocked.
That works out to 4 dc per inch, and each dc row is about 0.44 in (1.1 cm) tall.
Make the head first and use it as your test piece. It is small and quick, and it shows right away whether your tension matches:
- After Round 2, the head should measure 1.75 in (4.4 cm) across.
- After Round 3, it should measure 2 in (5.1 cm).
Checkpoints for the other pieces:
– Back, Row 1: 6.25 in (15.9 cm) wide
– Back, after Row 8: 3.25 in (8.3 cm) across the top row and about 3.5 in (8.9 cm) tall
– Back, after Row 15: 6.75 in (17.1 cm) tall
– Pocket, Row 1: 3.25 in (8.3 cm) wide
– Pocket, after Row 7: 6.25 in (15.9 cm) measured along the row
– Pocket, after Row 8: about 3.5 in (8.9 cm) tall at the sides
If your pieces come out too big, go down half a hook size. If they come out too small, go up half a hook size.
The back and pocket must match each other more closely than they need to match the stated size. Always make both with the same hook.
Head
Work in joined rounds with the RS facing.
Round 1: MR, ch 3 (counts as dc), 11 dc in ring. Sl st to the top of ch-3. (12 dc)
Round 2: Ch 3, dc in the same st, 2 dc in each st around. Sl st to the top of ch-3. (24 dc)
Round 3 (trim): Ch 1, sc in each st around. Sl st to the first sc. (24 sc = 24 worked 1-per-stitch + 0 added)
Fasten off and leave a 12 in (30.5 cm) tail for sewing. The head should lie flat and measure 2 in (5.1 cm) across.
Wings (Make 2)
Foundation: Ch 4 and sl st in the first ch to form a ring.
Row 1: Ch 3 (counts as dc), 5 dc in the ring. Turn. (6 dc)
The stitches cover only half the ring, so the wing forms a fan. The bare half of the ring becomes the straight edge you sew to the body.
Row 2: Ch 1, sc in the first dc, then (ch 5, sc in the next dc) 5 times. Turn. (5 ch-5 loops, 6 sc)
Row 3: Ch 1, work 7 sc in each ch-5 loop, then sl st in the last sc of Row 2. (35 sc)
The loops stay open in the middle and are outlined in sc, which gives the wing its lacy look. Fasten off and leave a 10 in (25.4 cm) tail.
Each wing should measure about 1.75 in (4.4 cm) from the ring to the loop tips and 2.75 in (7.0 cm) across the fan.
Back Panel
Worked from the bottom up in rows.
Row 1: Ch 27. Dc in the 4th ch from the hook (the 3 skipped ch count as the first dc) and in each ch across. Turn. (25 dc)
Row 2: Ch 3 (counts as dc), sk the first st, dc in each st across, ending with a dc in the top of the tch. Turn. (25 dc)
Decrease row: Ch 2, dc in the next st (together these count as the first dc2tog). Dc in each st to the last 2 sts, then dc2tog. Turn. Each decrease row removes 2 stitches.
Rows 3–8: Work the decrease row 6 times. Each row has 2 fewer stitches than the row before:
– Row 3: 23 sts
– Row 4: 21 sts
– Row 5: 19 sts
– Row 6: 17 sts
– Row 7: 15 sts
– Row 8: 13 sts
Checkpoint: Row 8 is 3.25 in (8.3 cm) wide, and the panel is about 3.5 in (8.9 cm) tall.
Row 9: Work as Row 2. (13 sts)
Row 10: Decrease row. (11 sts)
Row 11: Work as Row 2. (11 sts)
Row 12: Decrease row. (9 sts)
Rows 13–14: Work as Row 2. (9 sts each)
Row 15 (shoulders): Ch 1, sc in the first st, hdc in the next st, dc in the next 5 sts, hdc in the next st, sc in the last st. (9 sts)
The short stitches at each end round off the shoulders. Fasten off.
Checkpoint: The back is 6.25 in (15.9 cm) wide at the bottom, 2.25 in (5.7 cm) wide at the shoulders, and 6.75 in (17.1 cm) tall.
Skirt Pocket
The pocket is worked from the top down. It has a center line of ch-1 eyelets. Rows that add a stitch on each side of the center make the rows angle away from that line. Adding a stitch at the edges every other row makes the side edges step out in tiers.
Row 1 (RS): Ch 15.
– Dc in the 4th ch from the hook (the 3 skipped ch count as the first dc) and in the next 4 ch. (6 dc)
– Ch 1, sk the next ch.
– Dc in each of the last 6 ch. (6 dc)
– Turn.
Row 1 has 6 dc per side and a ch-1 sp in the center. That makes 13 positions, about 3.25 in (8.3 cm) wide. The foundation chain is the open top edge of the pocket.
Increase row: Ch 3 (counts as dc), dc in the first st. Dc in each dc to the ch-1 sp, then work (dc, ch 1, dc) in the ch-1 sp. Dc in each dc to the tch, then 2 dc in the top of the tch. Turn. This adds 2 dc per side: one at the outer edge and one at the center.
Straight row: Ch 3 (counts as dc), sk the first st. Dc in each dc to the ch-1 sp, ch 1, sk the sp. Dc in each dc across, ending with a dc in the top of the tch. Turn. The count stays the same, and the eyelet continues down the center.
Work the rows as follows. Each total is that row’s own complete count.
| Row | Type | Per side | Total |
|---|---|---|---|
| 2 | Increase | 8 dc | 16 dc + ch-1 sp |
| 3 | Straight | 8 dc | 16 dc + ch-1 sp |
| 4 | Increase | 10 dc | 20 dc + ch-1 sp |
| 5 | Straight | 10 dc | 20 dc + ch-1 sp |
| 6 | Increase | 12 dc | 24 dc + ch-1 sp |
| 7 | Straight | 12 dc | 24 dc + ch-1 sp |
Checkpoint: Row 7 has 25 positions (24 dc plus the center sp) and measures 6.25 in (15.9 cm) along the row. There are three tier steps down each side, one at each increase row.
Row 8 (leveling row): This row uses tall stitches at the sides and short stitches at the center. That evens out the slight dip the angled rows create, so the lower edge lies nearly straight.
– Ch 4 (counts as tr), tr in the next 2 sts.
– Dc in the next 3 sts, hdc in the next 3 sts, sc in the next 3 sts.
– Sc in the ch-1 sp.
– Sc in the next 3 sts, hdc in the next 3 sts, dc in the next 3 sts.
– Tr in the last 3 sts.
(Total 25 sts: 12 + 1 + 12)
Fasten off. The lower edge should be straight to within 0.25 in (0.6 cm). The pocket is about 3.5 in (8.9 cm) tall at the sides.
Make All Pieces
You need one color, cream:
- Back: 1
- Pocket: 1
- Head: 1
- Wings: 2
Layout (front view):
              [  HEAD  ]
   [WING]  [ BACK  Rows 9–15 ]  [WING]
           [ POCKET over BACK Rows 1–8 ]
           (  7 scallop shells at hem  )
Joining
Head: Place the head behind the shoulders so that 0.25 in (0.6 cm), about the depth of Round 3, overlaps Row 15 of the back. With the tail, whipstitch the head’s Round 3 to Row 15, working from the WS. Use small stitches that don’t show from the front.
Wings: Tuck the straight edge of each wing behind a side edge of the back at Rows 10–13, overlapping by 0.25 in (0.6 cm). Angle the loops slightly upward. Whipstitch along the overlap from the WS.
The wingspan should measure 5.5 in (14.0 cm).
Pocket: Lay the back RS up and place the pocket on top of it, also RS up.
The rows line up one-to-one:
– Pocket Row 8 sits on the back’s foundation edge, 25 stitches over 25 stitches.
– Pocket Row 1 sits level with back Row 8, 13 positions over 13 stitches.
– The 8 row-ends on each side of the pocket match the back’s row-ends from Rows 1–8.
At the increase rows, the pocket edge is up to 1 stitch wider than the back, so the back never shows beside the skirt.
Pin each row-end pair and the bottom edge. The actual join happens in Border Round 1.
Size checkpoint: The holder is 6.25 in (15.9 cm) wide × 8.5 in (21.6 cm) tall.
Keep the whipstitches snug but not pulled tight. Tight stitches make the head and wings cup.
Border
Border gauge: Work about 4 sc per inch along stitch edges, matching the dc gauge.
Along row-ends, work 2 sc per row-end. A dc row is 0.44 in (1.1 cm) tall and 2 sc cover 0.5 in (1.3 cm). That small surplus eases around the tier steps without ruffling.
Corner stitches in this border are counted as part of the top and bottom edges. The side counts do not include corners.
Round 1 (sc join): With the RS of the pocket facing, join the yarn in the first foundation stitch at one top corner of the pocket.
- Top edge (pocket only): 3 sc in the corner st, sc in each of the next 11 positions, 3 sc in the last st. (17 sc = 13 worked 1-per-position + 4 extra at the corners) The back stays loose here, which leaves the pocket open.
- Side (through both layers): Work 2 sc in each of the 8 row-end pairs. (16 sc)
- Bottom (through both layers): Insert the hook through each Row 8 st of the pocket and the matching foundation st of the back. Work 3 sc in the first st, sc in each of the next 23 sts, 3 sc in the last st. (29 sc = 25 + 4 extra)
- Second side: Work as the first side. (16 sc)
- Sl st to the first sc. (Round total: 78 sc)
Fasten off.
Row 2 (scallops, bottom edge only): Join the yarn in the center sc of the bottom-left corner group.
– Ch 1, sc in the same st.
– Sk 1, shell in the next sc, sk 1, sc in the next sc. Repeat from * 6 more times.
That gives 7 shells and 8 sc.
Why the math works: Each repeat uses 4 sc. 1 + (4 × 7) = 29, which matches the bottom count exactly. The 4th shell falls on the 15th sc, which is the center of the hem, so the scallops are symmetrical.
Fasten off. The border adds 0.75 in (1.9 cm) at the hem: 0.25 in (0.6 cm) for the sc round and 0.5 in (1.3 cm) for the shells.
Final Blocking
- Weave in all ends along stitches of the same color. Keep the ends out of the pocket opening.
- Lightly mist the holder until it is damp, not soaked.
- Lay it face up on the mat.
- Pin the hem straight at 7 in (17.8 cm) wide, with one pin in each scallop tip.
- Pin the center height to 9.25 in (23.5 cm).
- Open each wing loop with a pin, and pin the wingspan to 5.5 in (14.0 cm).
- Press the head flat to 2 in (5.1 cm).
- Let it dry completely before you unpin it.
Final Quality-Control Checklist
- Head is 2 in (5.1 cm) and flat
- Each wing has 5 open loops of 7 sc
- Back measures 6.25 in × 6.75 in (15.9 × 17.1 cm)
- Pocket has an eyelet in every row along the center
- Each pocket side shows 3 tier steps
- Border Round 1 totals 78 sc
- Hem has 7 shells, with one centered
- Pocket opens freely and holds a fork and spoon
- Finished size is 7 in × 9.25 in (17.8 × 23.5 cm)
Troubleshooting
- Pocket cups or waves: Your center increases are too tight or too loose. Check that you work (dc, ch 1, dc) only on Rows 2, 4 and 6.
- The back shows beside the skirt: The back was crocheted more loosely than the pocket. Remake the back with a hook half a size smaller.
- Scallops flare: You probably worked extra sc on the bottom edge. Recount to 29.
- Wings flop: Tighten the ch-5 loops, or sew the wings 2 rows deeper into the back.
- Cutlery won’t fit: Make sure the top edge was worked through the pocket only.
Care
Hand wash in cool water with mild soap. Press out the water in a towel and dry flat, reshaping the scallops while damp.
Final Notes
Each stage builds on the one before:
- The head checks your gauge: 16 dc = 4 in (10.2 cm).
- The back tapers from 25 stitches to 9.
- The pocket grows from 13 positions to 25, matching the back row for row.
- Border Round 1 joins the layers with 78 sc.
- The 29 bottom sc divide exactly into 7 shells.
If each checkpoint is right, your angel finishes at 7 in × 9.25 in (17.8 × 23.5 cm). Make one for every place setting.
Happy crocheting!