

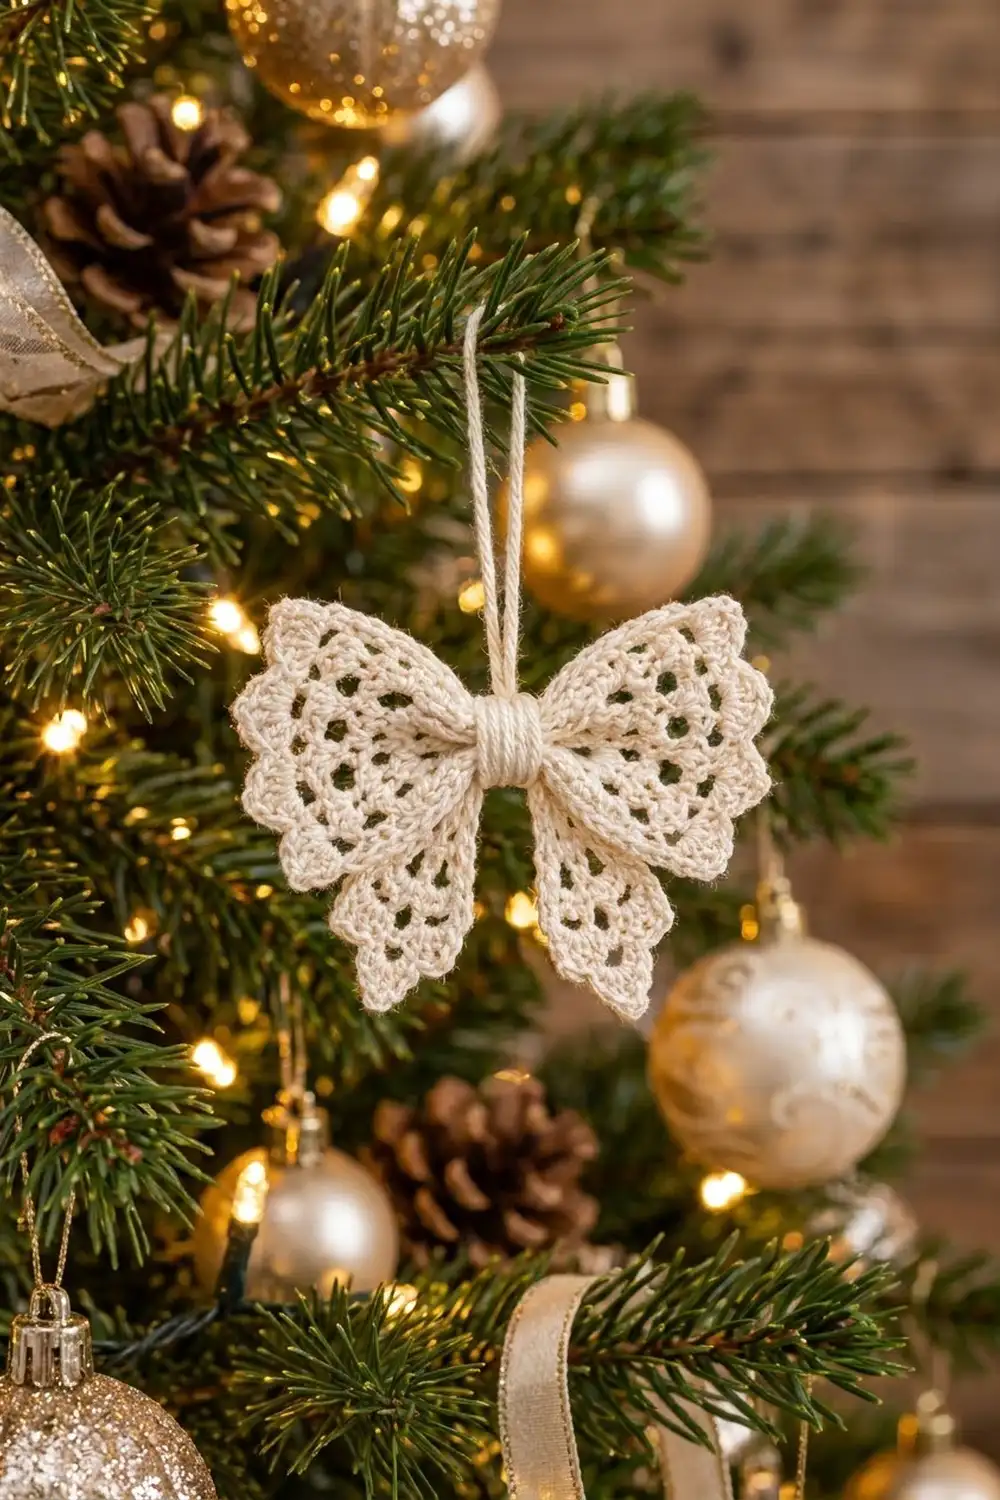
This little bow has a vintage look: two lacy fan wings, two scalloped tails, and a neat ribbed knot pinched tightly at the center. Worked in cream cotton thread, it looks like heirloom lace among the branches, and the tree lights shine through its open mesh.
The design uses one color only, so it suits any palette. Ivory looks soft and classic next to gold and glass ornaments, but white, red, or metallic thread works just as well.
The pattern is written in US crochet terms. The finished bow measures about 3.5 in (8.9 cm) wide and 3 in (7.6 cm) tall, plus a hanging loop of about 2 in (5.1 cm).
Construction is simple. You crochet two wings and two tails in short rows from the point outward and add a scalloped border to each one. Then you make a small ribbed wrap and a slip-stitch cord. Finally, you stack the pieces, pinch them, and wrap them at the center to form one ornament.
Finished Size and Construction
- Finished size: 3.5 in (8.9 cm) wide x 3 in (7.6 cm) tall, loop not included
- Skill level: Intermediate (fine thread, small hook)
- Terminology: US crochet terms
- Yarn weight: Lace (0), size 10 cotton crochet thread
- Hook: 1.75 mm steel hook (US steel 4)
- Number of pieces: 6 (2 wings, 2 tails, 1 center wrap, 1 cord loop)
- Layout: wings on the top layer, tails underneath, wrap around the center, loop at the back
- Piece size: wing 1.5 in (3.8 cm) long; tail 1.9 in (4.8 cm) long; wrap 0.6 x 1.2 in (1.5 x 3.0 cm)
- Size before border: wing 1.2 in (3.0 cm) long; tail 1.6 in (4.1 cm) long
- Border depth: about 0.3 in (0.8 cm)
Materials
Choose a mercerized size 10 cotton crochet thread. Mercerized cotton has a slight sheen, holds starch well, and gives crisp stitch definition, which matters for lace this small. Avoid fuzzy or very soft thread because the holes will blur.
- Cream (ivory) size 10 cotton thread: 5 g, about 18 m (20 yd) per bow
For a set of six bows, plan on 30 g, about 108 m (118 yd).
Tools:
- 1.75 mm steel crochet hook (US steel 4)
- Fine tapestry needle with a small eye
- Small sharp scissors
- Stitch marker
- Blocking mat and rustproof pins
- Spray starch or diluted fabric stiffener
Quantities include a margin of about 20% for gauge differences, thread tails, and a test piece.
Abbreviations (US Terms)
- ch – chain
- sl st – slip stitch
- sc – single crochet
- dc – double crochet
- BLO – back loop only
- sk – skip
- sp – space
- st(s) – stitch(es)
- tch – turning chain
- rep – repeat
Special stitch – Shell: work 5 dc in the same stitch.
Turning chains: ch 3 counts as 1 dc. Ch 4 counts as 1 dc + ch 1. Ch 5 counts as 1 dc + ch 2.
Gauge and Checkpoints
Gauge: 10 dc and 5 dc rows = 1 in (2.5 cm) with size 10 thread and a 1.75 mm hook.
Make one wing first and use it as your gauge swatch. Lace this small is easier to measure piece by piece than with a flat square.
Checkpoints for the wing (measured from the point straight out to the edge):
- After Row 3: 0.6 in (1.5 cm)
- After Row 6: 1.2 in (3.0 cm). The top edge holds 31 sts and measures about 3.1 in (7.9 cm) along its curve.
- After the border: 1.5 in (3.8 cm)
Checkpoints for the tail:
- After Row 8: 1.6 in (4.1 cm) long, with the bottom edge about 1.3 in (3.3 cm) wide
- After the border: 1.9 in (4.8 cm)
If your wing is too big, go down to a 1.5 mm hook. If it is too small, go up to a 2 mm hook. If the fan cups instead of lying flat, your increases are too tight, so loosen your chains in the mesh rows. If it ruffles strongly, your dc are too loose, so tighten them slightly.
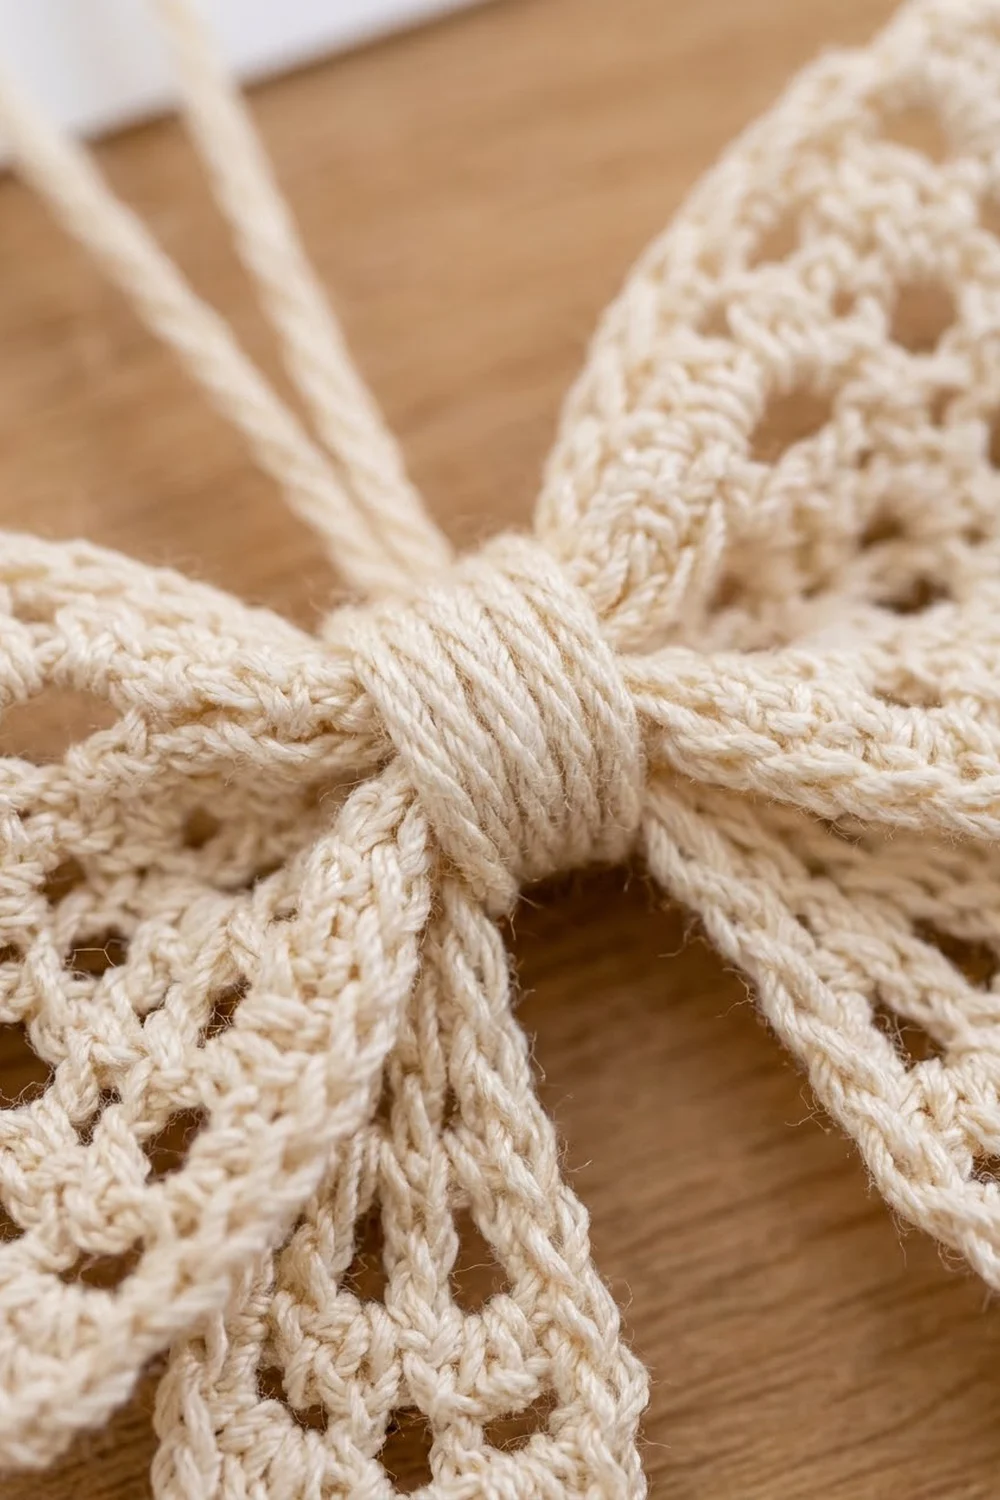
Wing (Make 2)
Wings are worked in rows from the center point outward, forming a fan.
Row 1: Ch 4, 8 dc in 4th ch from hook. Turn. (9 dc; the skipped ch-3 counts as the first dc)
Row 2: Ch 3, 2 dc in each of next 7 sts, dc in top of beginning ch. Turn. (16 dc)
Row 3 (large mesh): Ch 5, sk next 2 sts, dc in next st, ch 2, sk next 2 sts 4 times, dc in top of tch. Turn. (6 dc + 5 ch-2 sps = 16 sts)
Row 4 (growth): Ch 3, 3 dc in next ch-2 sp, dc in next dc 5 times, working the last dc in the 3rd ch of tch. Turn. (21 dc)
Row 5 (small mesh): Ch 4, sk next st, dc in next st, ch 1, sk next st 9 times, dc in top of tch. Turn. (11 dc + 10 ch-1 sps = 21 sts)
Row 6 (growth): Ch 3, 2 dc in next ch-1 sp, dc in next dc 10 times, working the last dc in the 3rd ch of tch. Turn. (31 dc)
Row 3 forms the larger rounded holes near the center. Row 5 forms the finer ring of holes near the edge. Check your measurements now, before adding the border.
Tail (Make 2)
Tails are also worked from the point outward, but they grow slowly, which makes the long teardrop shape.
Row 1: Ch 4, 4 dc in 4th ch from hook. Turn. (5 dc)
Row 2: Ch 3, dc in same st, dc in each of next 3 sts, 2 dc in top of tch. Turn. (7 dc)
Row 3 (mesh): Ch 4, sk next st, dc in next st, ch 1, sk next st 2 times, dc in top of tch. Turn. (4 dc + 3 ch-1 sps = 7 sts)
Row 4 (growth): Ch 3, dc in same st, dc in next ch-1 sp, dc in next dc 2 times, dc in next ch-1 sp, 2 dc in 3rd ch of tch. Turn. (9 dc)
Row 5 (mesh): Ch 4, sk next st, dc in next st, ch 1, sk next st 3 times, dc in top of tch. Turn. (5 dc + 4 ch-1 sps = 9 sts)
Row 6 (growth): Ch 3, dc in same st, dc in next ch-1 sp, dc in next dc 3 times, dc in next ch-1 sp, 2 dc in 3rd ch of tch. Turn. (11 dc)
Row 7 (mesh): Ch 4, sk next st, dc in next st, ch 1, sk next st 4 times, dc in top of tch. Turn. (6 dc + 5 ch-1 sps = 11 sts)
Row 8 (growth): Ch 3, dc in same st, dc in next ch-1 sp, dc in next dc 4 times, dc in next ch-1 sp, 2 dc in 3rd ch of tch. Turn. (13 dc)
Each growth row adds exactly 2 sts, one at each edge, so the tail widens evenly on both sides.
Center Wrap (Make 1)
Row 1: Ch 7, sc in 2nd ch from hook and in each ch across. Turn. (6 sc)
Rows 2–12: Ch 1, sc in BLO of each st across. Turn. (6 sc)
The wrap measures 0.6 x 1.2 in (1.5 x 3.0 cm). The back-loop ridges give the center its wound, knotted look. Fasten off, leaving an 8 in (20.3 cm) tail.
Hanging Cord (Make 1)
Ch 49. Sl st in 2nd ch from hook and in each ch across. (48 sl sts)
The cord should measure about 4 in (10.2 cm); adjust the chain if needed. The slip stitches firm the chain into a neat, slightly twisted-looking cord. Fasten off, leaving 4 in (10.2 cm) tails at both ends.
Make All Pieces
All pieces use cream thread:
- Wings: 2
- Tails: 2
- Center wrap: 1
- Hanging cord: 1
Layout, front view:
            [ Cord loop ]
[ Wing L ]  [  Wrap  ]  [ Wing R ]
       [ Tail L ]  [ Tail R ]
The wings sit on the top layer with their points facing inward. The tails sit behind them with their points up at the center, flaring down and outward. The wrap covers all four points, and the cord rises from behind the wrap.
Border
Each wing and each tail gets its own border before assembly. Because you border each piece separately, there are no seams or joined edges to work over. Every count below comes from that piece’s own final row.
Border gauge: 2 sc per dc row along the side edges, and 1 sc per st across the last row.
Wing Border
Round 1: Ch 1, sc in each of the 31 sts across the top, ch 1 (corner). Work 2 sc in the side of each of the 6 rows down the edge (12 sc). Sc in the foundation ch at the point (1 sc). Work 2 sc in the side of each of the 6 rows up the other edge (12 sc). Ch 1 (corner), sl st to first sc. (56 sc + 2 corner ch-1 sps)
Round 2: Ch 1, sc in first sc, sk next 2 sc, shell in next sc, sk next 2 sc, sc in next sc 5 times. Sl st in corner ch-1 sp, sl st in each of the next 25 sc along the sides and point, sl st in corner ch-1 sp, sl st to first sc. Fasten off, leaving an 8 in (20.3 cm) tail. (5 shells)
Why the math works: Each scallop repeat uses 6 sts (2 skipped, 1 shell, 2 skipped, 1 sc), and the edge starts with 1 sc. So 1 + (5 x 6) = 31, which is exactly the top count. The sides and point total 12 + 1 + 12 = 25, which matches the 25 slip stitches.
Tail Border
Round 1: Ch 1, sc in each of the 13 sts across the bottom, ch 1 (corner). Work 2 sc in the side of each of the 8 rows up the edge (16 sc). Sc in the foundation ch at the point (1 sc). Work 2 sc in the side of each of the 8 rows down the other edge (16 sc). Ch 1 (corner), sl st to first sc. (46 sc + 2 corner ch-1 sps)
Round 2: Ch 1, sc in first sc, sk next sc, shell in next sc, sk next sc, sc in next sc 3 times. Sl st in corner ch-1 sp, sl st in each of the next 33 sc, sl st in corner ch-1 sp, sl st to first sc. Fasten off, leaving an 8 in (20.3 cm) tail. (3 shells)
Why the math works: Each tail scallop repeat uses 4 sts, so 1 + (3 x 4) = 13, which matches the bottom edge. The sides and point total 16 + 1 + 16 = 33. The shorter repeat lets the narrow tail hold three smaller, slightly fuller scallops.
Joining
Method: tacking and wrapping with the tapestry needle and matching thread.
- Stack the wings. Lay both wings right side up with their points facing each other, overlapping the points by 0.2 in (0.5 cm).
- Add the tails. Slide the tails underneath, points up, tucked under the overlapped wing points. Angle each tail about 30 degrees outward from vertical.
- Tack the center. Using one of the 8 in (20.3 cm) tails, sew 3–4 stitches straight through all four points. Pull firmly, then wrap the thread twice around the center to pinch it to about 0.4 in (1.0 cm) tall.
- Place the cord. Fold the cord in half. Lay both cord ends against the back of the pinched center, pointing down, so the loop stands about 2 in (5.1 cm) above the bow.
- Wrap the center. Place the wrap vertically over the front of the pinch, with the ridges running across. Bring both short ends to the back, over the cord ends.
- Close the wrap. Whip stitch Row 1 to Row 12, matching stitch to stitch. Each short end has 6 sts, so join them 1 to 1 for all 6. Stitch through the cord ends as you go to lock the loop in place.
Tension advice: Pull the center tacking firmly so the wings fan out and lift. Keep the wrap seam snug but not tight. If you overtighten it, the wrap rolls and the ridges disappear.
Size checkpoint: The assembled bow should measure 3.5 in (8.9 cm) wide and 3 in (7.6 cm) tall. Weave in all ends inside the wrap.
Final Blocking
- Mix spray starch or dilute fabric stiffener following its label.
- Lightly mist or dip the bow until damp, then blot it in a towel.
- Pin it flat on a blocking mat, right side up.
- Pin out each shell tip on the wings (5 per wing) and the tails (3 per tail).
- Open the mesh holes with the tip of a pin.
- Shape the wings so they lift slightly from the wrap. For more lift, tuck a rolled tissue under each wing.
- Check the size: 3.5 in (8.9 cm) wide and 3 in (7.6 cm) tall.
- Let it dry completely, for at least 6 hours, before unpinning.
Final Quality-Control Checklist
- Each wing has 31 sts in Row 6 and 5 even shells.
- Each tail has 13 sts in Row 8 and 3 even shells.
- Both wings are the same size, and both tails are the same size.
- Mesh holes are open and evenly spaced.
- The wrap covers all four points completely.
- The cord loop is centered and secure.
- The bow measures 3.5 in (8.9 cm) x 3 in (7.6 cm).
- All ends are hidden inside the wrap.
Troubleshooting
The wing cups like a bowl. Your growth rows are too tight. Loosen your tension or go up a hook size for Rows 4 and 6.
The wing ruffles. Your dc are too loose, or you added extra sts. Recount Row 6 for 31 sts.
The scallops do not end evenly. Recount the edge in Border Round 1. It must be 31 sc across the top of each wing and 13 sc across the bottom of each tail.
The tail leans to one side. You missed an edge increase. Each growth row must start and end with 2 dc.
The wrap shows gaps. Pull the center pinch tighter before adding the wrap, or add 1 more row to the wrap.
The bow droops on the tree. Starch it again, or use fabric stiffener for a firmer finish.
Care
Hand wash in cool water with mild soap, press out the water in a towel, and re-block with starch. Store the bow flat in a box so the wings keep their shape.
Final Notes
The measurement chain is short and easy to check. A gauge of 10 dc and 5 rows per 1 in (2.5 cm) gives a wing that is 1.2 in (3.0 cm) long before the border and 1.5 in (3.8 cm) after it. The tail grows from 1.6 in (4.1 cm) to 1.9 in (4.8 cm). Stacked, pinched, and wrapped, the pieces make a bow 3.5 in (8.9 cm) wide and 3 in (7.6 cm) tall.
Make one, then make a whole set for the tree, a gift package, or a wreath.
Happy crocheting!