

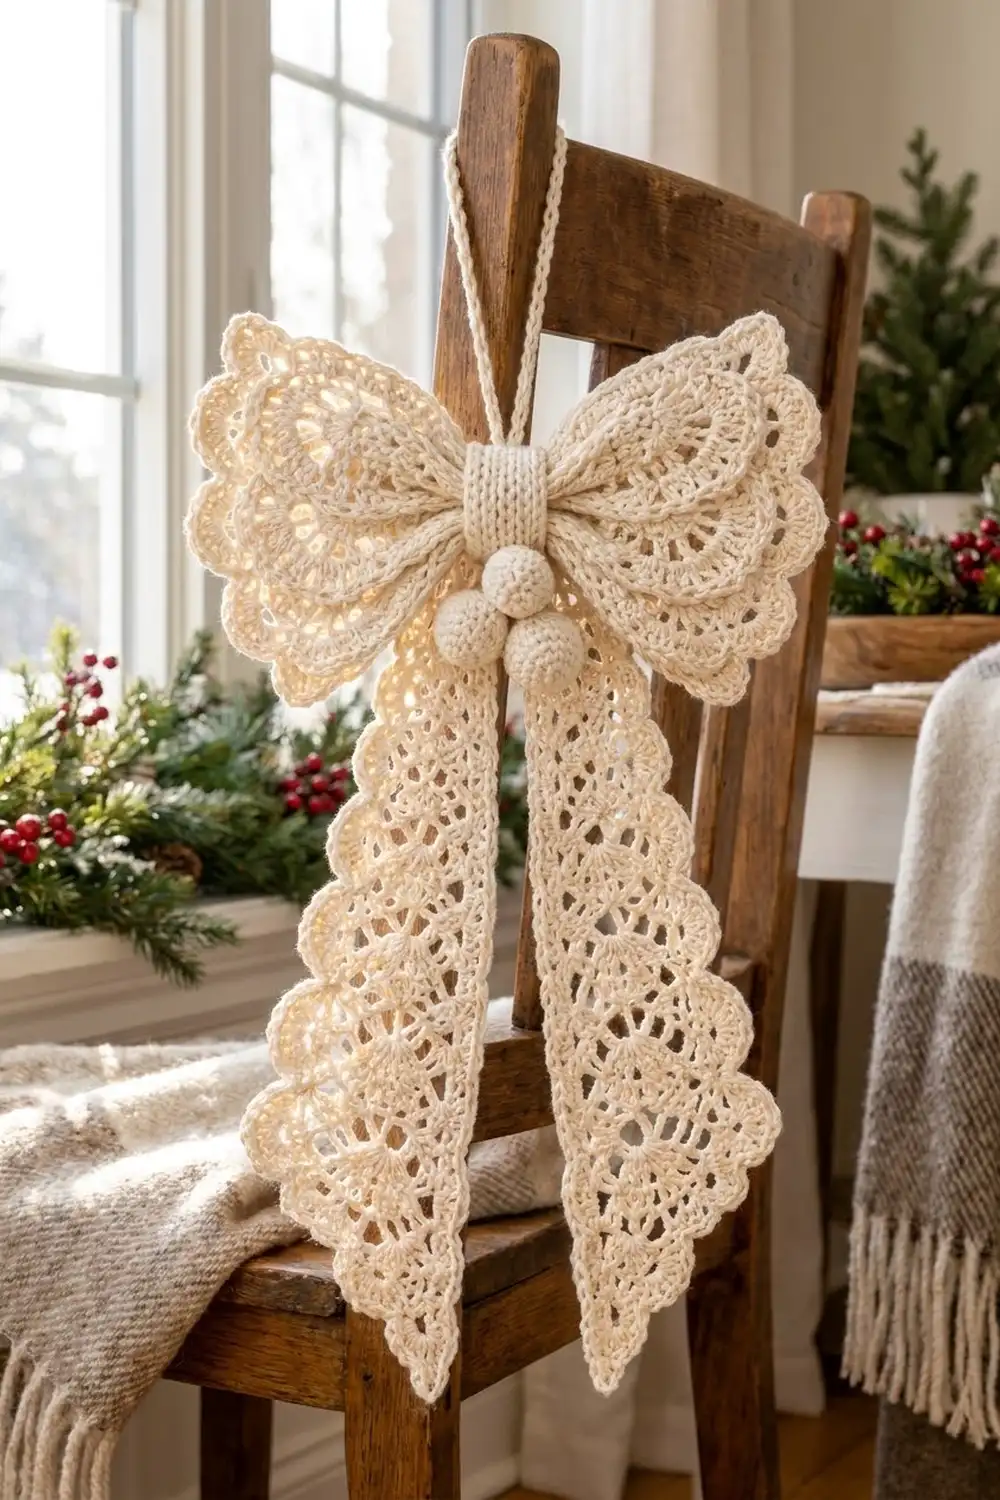
The Snowdrift Lace Door Bow is a large, soft ivory bow for front doors, mantels, and wreaths. Each side has two stacked lace loops with scalloped shell edges. Below the band hang two long openwork tails that widen toward the bottom and end in scalloped points.
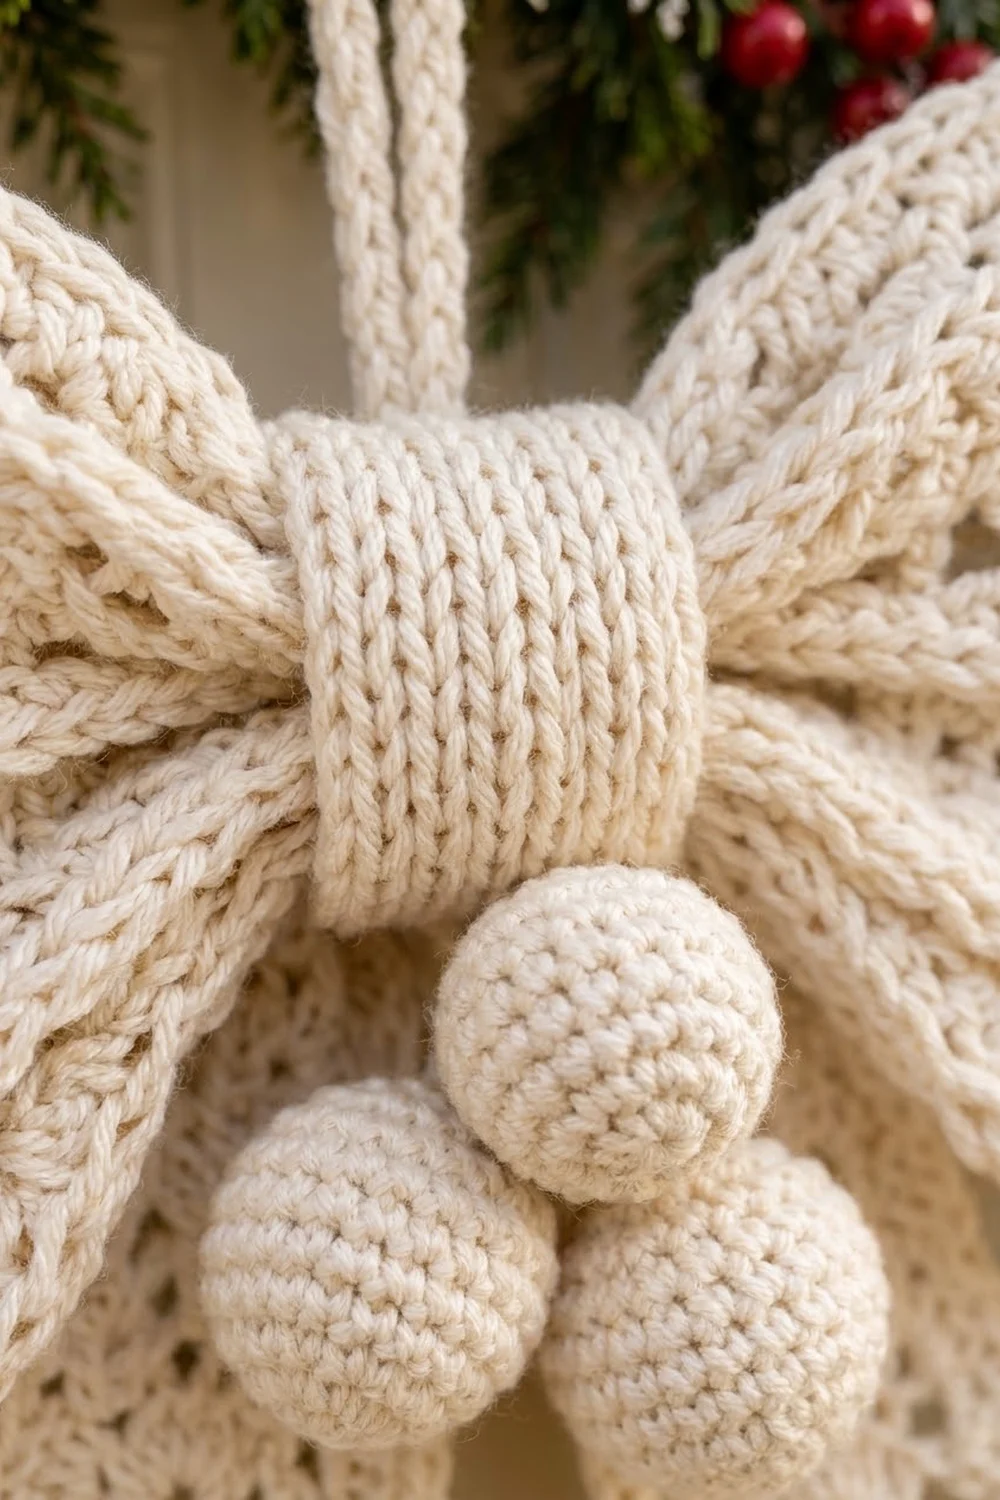
A ribbed center band wraps the gathered middle, with three small crocheted balls clustered at its base and a chain cord at the top for hanging. The bow is all one warm ivory or cream color, so the lace texture does the work.
This pattern uses US crochet terms. The finished bow is about 14 in (35.6 cm) wide and 20 in (50.8 cm) tall, not counting the hanging loop.
Construction is modular:
- Work the loops as mesh wedges, starting from a magic ring at the tip.
- Work the tails flat from the narrow top down to a point.
- Give every loop and tail a two-round shell border, then block.
- Gather the pieces, wrap them with the band, and sew on the balls and cord.
Finished Size and Construction
- Finished size: about 14 in (35.6 cm) x 20 in (50.8 cm), plus a 6 in (15.2 cm) hanging loop
- Skill level: Intermediate
- Terminology: US
- Yarn weight: Worsted (#4) cotton or cotton blend
- Hooks: 5.0 mm (H-8) for most pieces; 4.0 mm (G-6) for the balls
- Number of pieces: 11 (2 large loops, 2 small loops, 2 tails, 1 band, 3 balls, 1 cord)
- Layout: a small loop stacked on a large loop on each side; tails behind the center; band wrapped around the middle; balls below the band
- Piece size after border:
- Large loop: 5.5 in (14.0 cm) per side
- Small loop: 4.5 in (11.4 cm) per side
- Tail: 17.25 in (43.8 cm) long, 3.5 in (8.9 cm) wide at the top and 5.5 in (14.0 cm) at the widest
- Size before border:
- Large loop: 4 in (10.2 cm) per side
- Small loop: 3 in (7.6 cm) per side
- Tail: 16.5 in (41.9 cm) long, 2 in (5.1 cm) to 4 in (10.2 cm) wide
- Border depth: 0.75 in (1.9 cm)
Materials
Use a smooth cotton or cotton blend in worsted weight. Cotton shows the lace clearly, blocks crisply, and holds the scallops’ shape on a sheltered door. Avoid fuzzy yarns, because they blur the mesh.
- Ivory/cream: 150 g, about 275 m (300 yd)
This quantity includes a margin of about 15% for swatching and yarn tails.
Tools:
- 5.0 mm (H-8) and 4.0 mm (G-6) hooks
- Tapestry needle
- A small handful of polyester fiberfill
- Rust-proof pins and a blocking mat
- Spray bottle
- Scissors and a tape measure
Abbreviations (US Terms)
- ch – chain
- sl st – slip stitch
- sc – single crochet
- dc – double crochet
- inc – 2 sc in the same stitch
- sc2tog – single crochet 2 together
- BLO – back loop only
- MR – magic ring
- sp – space
- st(s) – stitch(es)
- tch – turning chain
- RS – right side
Special stitches:
- Mesh: one dc plus one ch-1 sp, about 0.5 in (1.3 cm) wide.
- Shell: 5 dc in the same st.
- Corner shell: 7 dc in the same ch-2 sp.
Gauge and Checkpoints
Mesh gauge (5.0 mm hook): 4 meshes x 4 rows = 2 in (5.1 cm) square.
Band gauge: 20 sc = 4.5 in (11.4 cm); 8 rows of BLO sc = 1.75 in (4.4 cm).
Make one small loop first. It’s your gauge swatch, and you’ll use it in the bow.
Checkpoints:
- Loop, Row 4: each straight edge is 2 in (5.1 cm).
- Small loop, Row 6: each edge is 3 in (7.6 cm).
- Large loop, Row 8: each edge is 4 in (10.2 cm).
- Tail, Row 10: 5 in (12.7 cm) long and 2 in (5.1 cm) wide.
- Tail, Row 33: 16.5 in (41.9 cm) long.
- After the border: 5.5 in (14.0 cm) per side for large loops and 4.5 in (11.4 cm) for small loops.
If your piece is too big, go down 0.5 mm. If it’s too small, go up 0.5 mm. Recheck at Row 4.
Loops (Make 2 Large, 2 Small)
Each loop is a square mesh wedge worked in turned rows. The magic ring is the tip, which gets gathered at the center of the bow. A ch-3 “spine” runs from the tip to the opposite corner, which points outward. Each row adds one mesh on each side of the spine.
With the 5.0 mm hook:
Row 1 (RS): MR, ch 4 (counts as dc + ch 1), dc in ring, ch 3, dc in ring, ch 1, dc in ring. Turn and pull the ring closed. (4 dc, 2 ch-1 sps, 1 spine)
Row 2: Ch 4 (counts as dc + ch 1), dc in next dc, ch 1, (dc, ch 3, dc) in ch-3 sp, ch 1, dc in next dc, ch 1, dc in 3rd ch of tch. Turn. (6 dc, 4 ch-1 sps, 1 spine)
Row 3 and all following rows: Ch 4 (counts as dc + ch 1), [dc in next dc, ch 1] to the spine, (dc, ch 3, dc) in ch-3 sp, [ch 1, dc in next dc] across, working the last dc in 3rd ch of tch. Turn.
Each row’s complete count is 2 x (row number) + 2 dc and 2 x (row number) ch-1 sps, plus the spine:
- Row 3: 8 dc, 6 ch-1 sps
- Row 4: 10 dc, 8 ch-1 sps
- Row 5: 12 dc, 10 ch-1 sps
- Row 6: 14 dc, 12 ch-1 sps
Small loop: stop after Row 6. Each side has 7 dc and 6 meshes and measures 3 in (7.6 cm).
Large loop: keep going.
- Row 7: 16 dc, 14 ch-1 sps
- Row 8: 18 dc, 16 ch-1 sps
Stop after Row 8. Each side has 9 dc and 8 meshes and measures 4 in (10.2 cm). Don’t fasten off; go straight into the Loop Border.
Tails (Make 2)
The tails are worked from the narrow top down to the point. Three row types repeat:
Mesh row: Ch 4 (counts as dc + ch 1), [dc in next dc, ch 1] across, dc in 3rd ch of tch. Turn. (The count stays the same.)
Increase row: Ch 4 (counts as dc + ch 1), dc in first dc, [ch 1, dc in next dc] across, working the last dc in 3rd ch of tch, ch 1, dc in same ch. Turn. (Adds 1 mesh at each edge.)
Decrease row: Sl st in first ch-1 sp and next dc, ch 4 (counts as dc + ch 1), [dc in next dc, ch 1] across, ending with dc in the dc before the last mesh. Leave the last mesh unworked. Turn. (Removes 1 mesh at each edge.)
With the 5.0 mm hook, ch 12.
- Row 1: Dc in 6th ch from hook, [ch 1, skip next ch, dc in next ch] 3 times. Turn. (4 meshes; 5 dc, counting the skipped chs as a dc)
- Rows 2–10: Mesh row. (4 meshes, 5 dc)
- Row 11: Increase row. (6 meshes, 7 dc)
- Rows 12–20: Mesh row. (6 meshes, 7 dc)
- Row 21: Increase row. (8 meshes, 9 dc)
- Rows 22–30: Mesh row. (8 meshes, 9 dc)
- Row 31: Decrease row. (6 meshes, 7 dc)
- Row 32: Decrease row. (4 meshes, 5 dc)
- Row 33: Decrease row. (2 meshes, 3 dc)
Fasten off. The tail is 16.5 in (41.9 cm) long, 2 in (5.1 cm) wide at the top and 4 in (10.2 cm) at the widest. Rows 31–33 form a 45° point.
Center Band (Make 1)
With the 5.0 mm hook, ch 21.
- Row 1: Sc in 2nd ch from hook and in each ch across. Turn. (20 sc)
- Rows 2–8: Ch 1, sc BLO in each st across. Turn. (20 sc)
Fasten off, leaving a 12 in (30.5 cm) tail for sewing. The band measures 4.5 in (11.4 cm) x 1.75 in (4.4 cm). The ridges run along its length, so they look like vertical ribs once the band is wrapped.
Balls (Make 3)
With the 4.0 mm hook, work in continuous rounds.
- Rnd 1: 6 sc in MR. (6)
- Rnd 2: Inc in each st around. (12)
- Rnd 3: [Sc in next st, inc] 6 times. (18)
- Rnds 4–6: Sc in each st around. (18)
- Rnd 7: [Sc in next st, sc2tog] 6 times. (12) Stuff firmly.
- Rnd 8: Sc2tog 6 times. (6)
Fasten off, close the hole, and leave a tail for sewing. Each ball is about 1.25 in (3.2 cm) across.
Hanging Cord (Make 1)
With the 5.0 mm hook, ch 61. Sl st in the back bump of the 2nd ch from hook and in each ch across. (60 sl st) The cord is about 12 in (30.5 cm) long and folds into a 6 in (15.2 cm) loop.
Make All Pieces
Work in this order: loop and tail bodies, their borders, blocking, then assembly. Every piece is ivory.
- Large loops: 2
- Small loops: 2
- Tails: 2
- Center band: 1
- Balls: 3
- Hanging cord: 1
Layout (front view):
                 [ cord ]
[Large][Small]  [ BAND ]  [Small][Large]
                  o o o
              [Tail]  [Tail]
Joining
The pieces are sewn together with ivory yarn, not joined edge-to-edge, so there are no seam counts to match except on the band.
- Stack the loops. Lay a small loop on a large loop, RS up, with the tips and spines lined up. Whipstitch the tips together through Rows 1–2 only. Repeat for the other side.
- Place the loops. Lay both stacks with their tips meeting at the center and overlapping by 0.5 in (1.3 cm). The outer corners point left and right.
- Gather the center. Weave a strand through all four layers along a vertical line 0.75 in (1.9 cm) from the center. Pull until the center is 1.5 in (3.8 cm) tall, then knot it at the back.
- Attach the tails. Lay both tails behind the center with their top edges overlapping and angled slightly apart. Tack each one down with 4–5 stitches.
- Wrap the band. Wrap it around the center with the ribs vertical. At the back, whipstitch the short edges together row-end to row-end: 8 to 8, one stitch per row.
- Add the balls. Sew one ball at the base of the band and two side by side just below it, all touching.
- Add the cord. Fold the cord in half and sew both ends to the back of the band.
Tension: Gather firmly but don’t crush the lace. The loops should puff forward slightly.
Size checkpoint: The bow should measure about 14 in (35.6 cm) across and 20 in (50.8 cm) from the top of the loops to the tail points.
Border
Work the border on each loop and tail before assembly. The sc round adds 0.25 in (0.6 cm) and the shell round adds 0.5 in (1.3 cm), for a total of 0.75 in (1.9 cm).
Loop Border
Round 1 (RS): Work around all 4 sides in this order, then join to the first sc:
- (sc, ch 2, sc) in the spine ch-3 sp
- 2 sc in each ch-1 sp along the first outer side
- (sc, ch 2, sc) in the top of the edge st
- 2 sc around each row-end post down to the tip
- (sc, ch 2, sc) in the ring
- 2 sc around each row-end post up the next side
- (sc, ch 2, sc) in the top of the edge st
- 2 sc in each ch-1 sp along the last side
Each side’s count includes its 2 corner sc:
- Large loop: 18 sc per side (16 + 2 corner sc), 72 sc total, 4 ch-2 sps
- Small loop: 14 sc per side (12 + 2 corner sc), 56 sc total, 4 ch-2 sps
Round 2: Sl st in the first ch-2 sp, ch 3 (counts as dc), 6 dc in the same sp. Then work each side: sc in the next st, [skip 1, shell in next st, skip 1, sc in next st] across, and skip the last st. Work a corner shell in each of the remaining ch-2 sps, with a side between each. Join and fasten off.
- Large loop: 4 shells per side, using 1 + 16 + 1 = 18 sts. (20 sc, 16 shells, 4 corner shells)
- Small loop: 3 shells per side, using 1 + 12 + 1 = 14 sts. (16 sc, 12 shells, 4 corner shells)
Tail Border
Leave the top edge plain, because it hides under the band.
Row 1 (RS): Join at a top corner and work:
- 2 sc around each row-end post down the long side (66 sc)
- Across the point: sc in top of tch, 3 sc in ch-1 sp, sc in middle dc, 3 sc in next ch-1 sp, sc in last dc (9 sc)
- 2 sc around each row-end post up the other side (66 sc)
Turn. (141 sc)
Row 2: Ch 1, sc in first st, [skip 1, shell in next st, skip 1, sc in next st] 35 times. Fasten off. (36 sc, 35 shells)
Why the Math Works
- The edge lies flat: there are 2 sc for every 0.5 in (1.3 cm) mesh or row.
- The loop sides divide evenly: each scallop uses 4 sts, and a loop side of 2n + 2 sts (n = rows) equals 1 + (4 x n/2) + 1. That’s why both loop sizes use an even number of rows.
- The tails divide evenly: 141 = (4 x 35) + 1.
- A shell lands on the tail point: the middle stitch, number 71, is the base of shell 18.
Final Blocking
- Weave in all ends except the sewing tails.
- Soak the loops and tails in cool water for 10 minutes, then press them in a towel.
- Pin the large loops to 5.5 in (14.0 cm) per side and the small loops to 4.5 in (11.4 cm).
- Pin the tails to 17.25 in (43.8 cm) long, 3.5 in (8.9 cm) at the top, and 5.5 in (14.0 cm) at the widest.
- Pin the center of each shell so the scallops open evenly.
- Let everything dry completely before assembly.
Final Quality-Control Checklist
- Before Round 2, large loops have 18 sts per side and small loops have 14.
- Every side has the correct number of shells.
- Each tail has 33 rows, 35 shells, and a shell at the point.
- The band’s ribs run vertically.
- The balls are firm and match in size.
- The loops are symmetrical and the gather is centered.
- The bow measures 14 in (35.6 cm) x 20 in (50.8 cm).
Troubleshooting
- Loop cups: The spine is too tight. Use ch 4 for the spine instead of ch 3.
- Loop ruffles: The ch-1 sps are loose. Go down a hook size.
- Wavy tail edges: Work 2 sc per row-end, not 3.
- Crowded corners: Make sure you skip the last st before each corner shell.
- Stuffing shows through the balls: Use a smaller hook.
- Bow tips forward: Sew the cord higher on the band.
Care
Hand wash in cool water, press dry in a towel, and reshape flat. Keep the bow out of direct rain.
Final Notes
The whole bow follows from one gauge: 4 meshes = 2 in (5.1 cm).
- Loops: 4 in (10.2 cm) and 3 in (7.6 cm) bodies border out to 5.5 in (14.0 cm) and 4.5 in (11.4 cm).
- Tails: 16.5 in (41.9 cm) bodies border out to 17.25 in (43.8 cm).
- Assembled bow: about 14 in (35.6 cm) x 20 in (50.8 cm).
Check your gauge early, and the rest will fall into place.
Happy crocheting!