

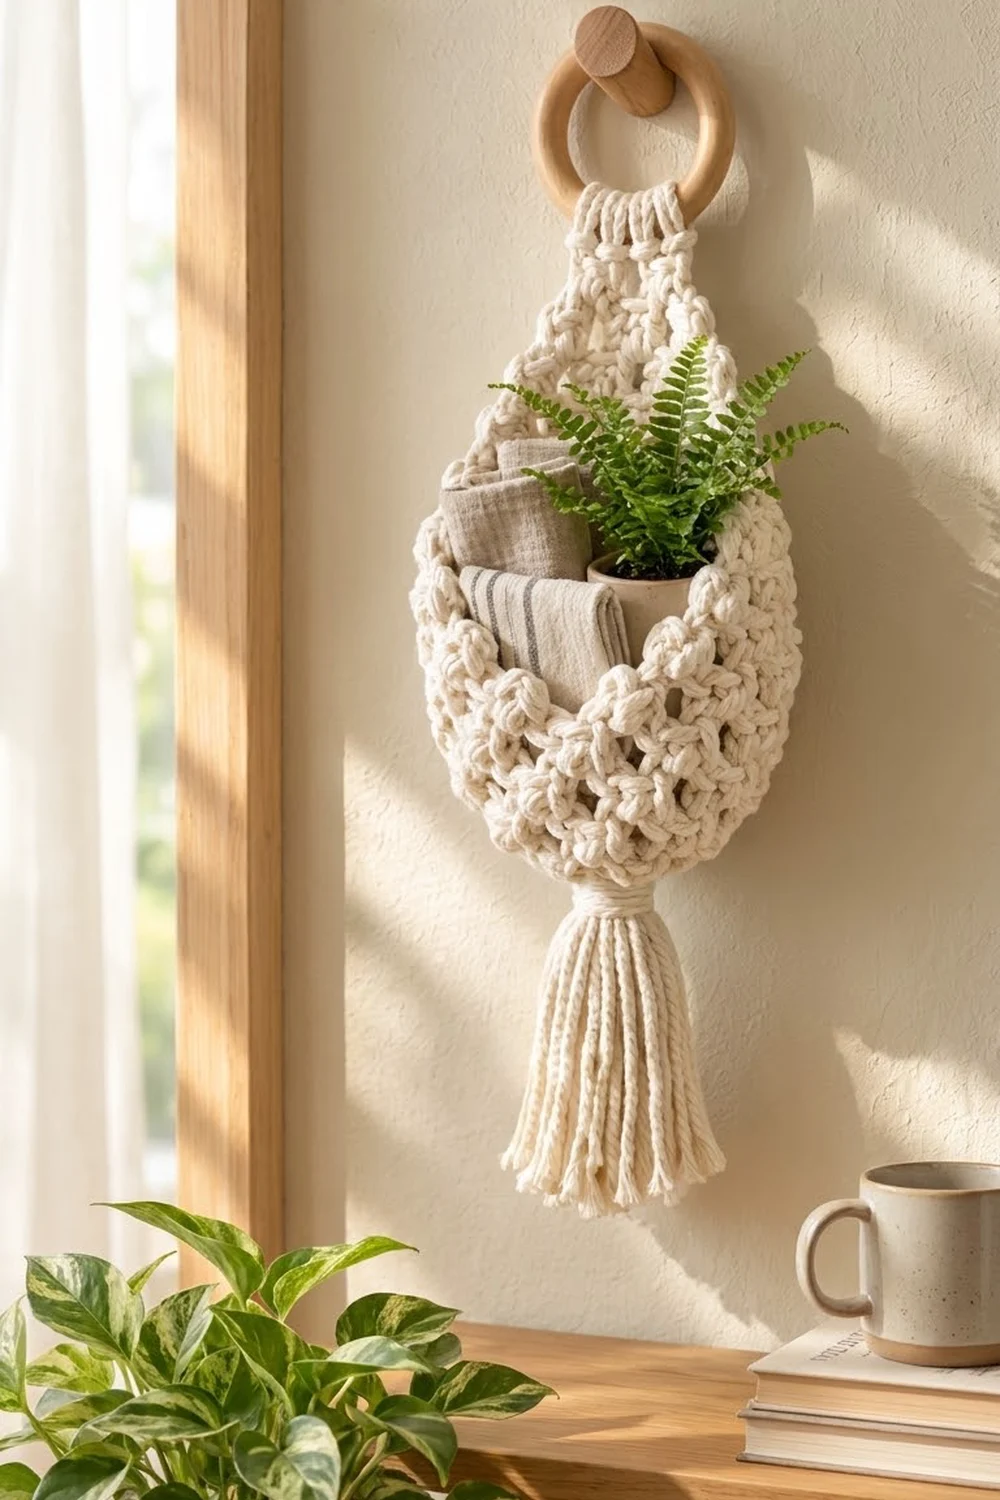
The Driftwood Teardrop Wall Pocket is a hanging pouch shaped like a raindrop. It is wide and rounded at the bottom, narrows to a slim neck, and hangs from a wooden ring. A full tassel finishes the bottom point. Use it for folded washcloths, brushes, a small plant, or anything you want off the counter.
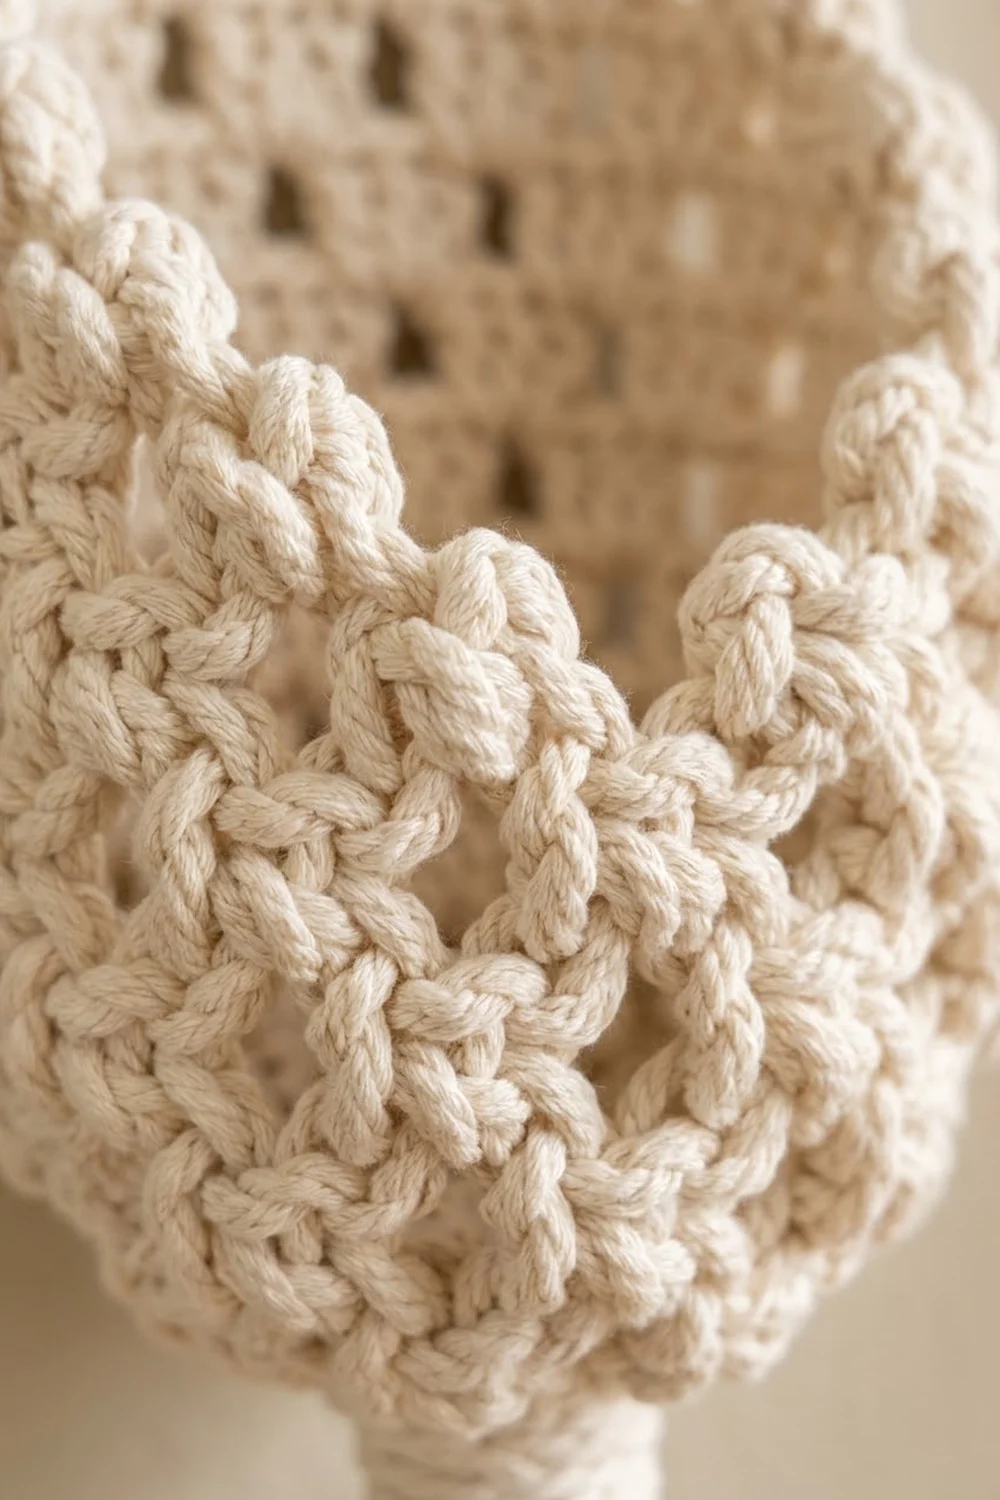
The whole piece is one natural cream color. Chunky cotton gives the texture its weight: rows of plump three-double-crochet clusters alternate with solid single crochet rounds, and skipped stitches leave small open windows between the clusters. The look is calm, boho and macramé-inspired, and it suits a bathroom, an entryway or a plant corner.
This pattern uses US crochet terms. The finished pouch is about 7 in (17.8 cm) wide when flat and 12.8 in (32.5 cm) tall from the bottom point to the ring row. After the border, the front pocket edge sits about 6.5 in (16.5 cm) above the bottom point. The tassel adds 6 in (15.2 cm) below.
The construction is simple. You crochet a cone-shaped bottom in rounds and keep working in rounds for the pocket. Then you work only the back half in rows, decreasing to a narrow neck, and the last row encloses the ring. A two-row edging finishes the opening, and a separate tassel is tied to the bottom point.
Finished Size and Construction
- Finished size: 7 in (17.8 cm) wide x 12.8 in (32.5 cm) tall, plus the ring and a 6 in (15.2 cm) tassel
- Skill level: Easy-intermediate
- Terminology: US crochet terms
- Yarn weight: Super bulky (#6) cotton
- Hook: 6.5 mm (US K-10.5)
- Number of pieces: 1 crocheted pouch plus 1 tassel
- Layout: One hanging piece; no joining
- Piece size: 7 in (17.8 cm) wide when flat
- Front pocket height before border: 6 in (15.2 cm)
- Border depth: about 0.5 in (1.3 cm), worked only around the pocket opening
Materials
Choose a soft super bulky cotton or cotton-blend yarn with about 80 m per 100 g. Single-twist cotton cord about 5 mm thick also works if it matches the gauge. Avoid stiff three-ply macramé rope, which splits and makes clusters hard to close.
- Cream (natural): 100 g / 80 m (87 yd) for the pouch, edging and tassel
This amount includes a margin of about 30 percent. The pouch uses around 45 m (49 yd) and the tassel around 10 m (11 yd).
Tools:
- 6.5 mm (US K-10.5) crochet hook
- 1 wooden ring, 3 in (7.6 cm) outer diameter
- Large-eye blunt tapestry needle
- Scissors and a stitch marker
- A stiff card, 7 in (17.8 cm) tall, for the tassel
- Measuring tape
- Spray bottle and pins for blocking
Abbreviations (US Terms)
- ch chain
- sl st slip stitch
- sc single crochet
- sc2tog single crochet 2 together
- dc double crochet
- inc 2 sc in the same st
- rev sc reverse single crochet (crab stitch)
- sk skip
- st(s) stitch(es)
- sp space
- rnd round
- RS / WS right side / wrong side
Special stitch – cluster (cl): Yarn over, insert the hook in the st and pull up a loop, then yarn over and draw through 2 loops. Repeat from * twice more in the same st, so you have 4 loops on the hook. Yarn over and draw through all 4 loops. Each cl counts as 1 st.
Special stitch – ring sc: Hold the bottom bar of the wooden ring flat against the top of the row. Insert the hook in the next st below the ring. Yarn over with the working yarn coming from above the ring and pull up a loop. Yarn over above the ring again and draw through both loops. This stitch encloses the ring bar.
Gauge and Checkpoints
Gauge: 9 sc and 10 sc rows = 4 in (10.2 cm). In pattern, 2 cluster rows plus 2 sc rows = 2.4 in (6.1 cm) tall.
This is a single piece, so the opening rounds work as your gauge test. Measure before you go further.
Checkpoints:
- After Rnd 4 (18 sts), the flattened cone is 4 in (10.2 cm) across the top.
- After Rnd 6 (32 sts), the flattened pouch is 7 in (17.8 cm) across.
- After Rnd 12, the pouch is 6 in (15.2 cm) from the bottom point to the top edge.
- After back panel Row 7, the back is 10.4 in (26.4 cm) from the bottom point.
- After Row 10, the back is 11.6 in (29.5 cm).
- After Row 13 (the ring row), the total height is 12.8 in (32.5 cm).
If the piece is too big, go down to a 6 mm (US J-10) hook. If it is too small, go up to a 7 mm hook. Change the hook and start over instead of changing the stitch counts, because the cluster repeat needs exactly 32 sts.
Pouch Body (Worked in Rounds)
Join each round with a sl st to its first st. Do not turn. Mark the first st of each round.
Rnd 1: Make a magic ring, ch 1, and work 6 sc into the ring. Pull it tight and join. (6 sts)
Rnd 2: Ch 1, (sc in next st, inc) 3 times. Join. (9 sts)
Rnd 3: Ch 1, (sc in next 2 sts, inc) 3 times. Join. (12 sts)
Rnd 4: Ch 1, (sc in next st, inc) 6 times. Join. (18 sts)
Rnd 5: Ch 1, (sc in next 2 sts, inc) 6 times. Join. (24 sts)
Rnd 6: Ch 1, (sc in next 2 sts, inc) 8 times. Join. (32 sts)
The slow increases in Rnds 1-3 make the pointed teardrop tip. The faster increases in Rnds 4-6 round out the belly. At this stage the cone is about 2.4 in (6.1 cm) tall.
Rnd 7 (cluster round): Ch 2 (does not count as a st). Work 1 cl in the same st as the join, then ch 1 and sk the next st. Work 1 cl in the next st, ch 1, sk the next st. Repeat from * around. Join to the top of the first cl. (16 cl + 16 ch-1 sps = 32 sts)
Rnd 8 (sc round): Ch 1, sc in each cl and in each ch-1 sp around. Join. (32 sts)
Rnds 9-12: Repeat Rnds 7-8 twice. (32 sts in each round)
Each ch-1 space sits above a skipped stitch, which makes the open windows. The clusters stack directly on top of each other, so the windows line up in neat columns.
Checkpoint: 7 in (17.8 cm) wide and 6 in (15.2 cm) tall. Do not fasten off.
Back Panel (Worked in Rows)
Flatten the pouch so the round join sits on the right-hand fold. The back panel uses the 17 sts that start at the join. Leave the other 15 sts unworked; they become the front pocket edge.
Row 1 (RS, cluster row): Ch 2 (does not count). Work 1 cl in the same st as the join, then (ch 1, sk 1 st, cl in next st) 8 times. Turn. (9 cl + 8 ch-1 sps = 17 sts)
Row 2 (WS): Ch 1, sc2tog, sc in each st across to the last 2 sts, sc2tog. Turn. (15 sts)
Row 3: Ch 2, cl in first st, (ch 1, sk 1 st, cl in next st) 7 times. Turn. (8 cl + 7 ch-1 sps = 15 sts)
Row 4: Repeat Row 2. (13 sts)
Row 5: Ch 2, cl in first st, (ch 1, sk 1 st, cl in next st) 6 times. Turn. (7 cl + 6 ch-1 sps = 13 sts)
Row 6: Repeat Row 2. (11 sts)
Row 7: Ch 2, cl in first st, (ch 1, sk 1 st, cl in next st) 5 times. Turn. (6 cl + 5 ch-1 sps = 11 sts)
Row 8: Ch 1, sc2tog, sc in next 7 sts, sc2tog. Turn. (9 sts)
Row 9: Ch 1, sc2tog, sc in next 5 sts, sc2tog. Turn. (7 sts)
Row 10: Ch 1, sc2tog, sc in next 3 sts, sc2tog. (5 sts)
Don’t turn or cut the yarn. Pull up a long loop, take the hook out, and put a marker in the loop so it can’t unravel. You’ll finish the neck after the border.
Border
Border gauge: Along the panel sides, work 2 sc into each cluster row-end and 1 sc into each sc row-end. Across the front, work 1 sc into each st.
With the RS facing, join new yarn with a sl st in the row-end of Row 10 on the right-hand side of the back panel.
Border Row 1: Ch 1. Work 14 sc down the right side of the panel: 2 sc in each of Rows 7, 5, 3 and 1, and 1 sc in each of Rows 10, 9, 8, 6, 4 and 2. Then sc in each of the 15 unworked front sts. Work 14 sc up the left side the same way. Do not turn. (14 + 15 + 14 = 43 sts)
Border Row 2: Ch 1. Working from left to right, rev sc in each st back to the start. Fasten off. (43 sts)
Why the math works: A cluster row is about 0.8 in (2.0 cm) tall. At 9 sc per 4 in (10.2 cm), that height holds 1.8 sc, so you round up to 2. A sc row is 0.4 in (1.0 cm) tall and holds 0.9 sc, so it gets 1. Each side is therefore 4 x 2 + 6 x 1 = 14 sts, which matches the edge length, so the border won’t ruffle or pucker. The 15 front sts are worked 1 to 1, so the pocket width stays the same. The border lifts the front edge to about 6.5 in (16.5 cm).
Neck and Ring
Put the held loop from Row 10 back on your hook.
Row 11: Ch 1, turn, sc in each st across. Turn. (5 sts)
Row 12: Ch 1, sc in each st across. Turn. (5 sts)
Row 13 (ring row): Ch 1, work 1 ring sc in each st across. (5 sts)
Fasten off and leave an 8 in (20.3 cm) tail. Weave the tail down through the neck stitches to reinforce the area that carries the weight.
Checkpoint: 12.8 in (32.5 cm) from the bottom point to the top of Row 13.
Tassel
- Wrap yarn around the 7 in (17.8 cm) card 24 times. Cut along one edge to get 24 strands, each about 14 in (35.6 cm) long.
- Lay the strands side by side. Tie them together at the center with a 12 in (30.5 cm) strand, leaving the tie ends long.
- Fold the bundle in half at the tie. You now have 48 ends.
- About 1 in (2.5 cm) below the fold, wrap a 30 in (76.2 cm) strand around the bundle 8-10 times. Knot it and hide the ends inside the wrap.
- Thread the tie ends from the outside to the inside through the center of Rnd 1. Knot them firmly inside the pouch.
- Trim the tassel evenly so it hangs 6 in (15.2 cm) below the wrap.
Final Blocking
- Weave in all remaining tails along solid sc rounds, not through the windows.
- Mist the pouch until it is damp but not dripping.
- Fill the pocket with a rolled hand towel to shape the belly and teardrop curve.
- Lay the pouch flat, back down. Pin the neck straight and centered, and pin the sides to a width of 7 in (17.8 cm).
- Ease the front border into a smooth, gentle curve.
- Mist the tassel and finger-comb the strands straight.
- Let everything dry completely, which takes 12-24 hours, then take out the towel.
Final Quality-Control Checklist
- Rounds 1-6 have 6, 9, 12, 18, 24 and 32 sts; Rnds 7-12 have 32 sts each.
- Each cluster round has 16 clusters, and the windows line up vertically.
- Rows 1-13 have 17, 15, 15, 13, 13, 11, 11, 9, 7, 5, 5, 5 and 5 sts.
- The border has 43 sts (14 + 15 + 14).
- Width is 7 in (17.8 cm), front height 6.5 in (16.5 cm), total height 12.8 in (32.5 cm).
- The ring is fully enclosed and the neck is centered over the pocket.
- The tassel is knotted securely inside and trimmed level at 6 in (15.2 cm).
Troubleshooting
The bottom is flat, not pointed: You increased too fast in Rnds 2-3. Keep those rounds to 3 increases each.
The clusters slant: Work each cl into the sc directly above the cl in the previous cluster round.
The windows are closing up: Your tension is too tight. Relax your grip or go up one hook size.
The panel edges wave: You have too many row-end stitches. Use exactly 14 per side.
The neck twists: Check that Rows 11-13 each have 5 sts and that every ring sc faces the same way.
The pouch sags when full: Use a firmer cotton, or weave an extra strand up through the neck to reinforce it.
Care
Spot clean when you can. If needed, hand wash in cool water with mild soap, press out the water in a towel, and dry flat over a rolled towel to keep the teardrop shape.
Final Notes
Each stage builds on the last. The gauge is 9 sc per 4 in (10.2 cm). The 32 sts in Rnd 6 set the width at 7 in (17.8 cm). Six pattern rounds raise the pocket to 6 in (15.2 cm). The back panel decreases from 17 sts to 5 and reaches 11.6 in (29.5 cm). The 43-st border raises the front to 6.5 in (16.5 cm). The neck and ring rows bring the total to 12.8 in (32.5 cm), and the 6 in (15.2 cm) tassel finishes the piece. If you hit every checkpoint, the pocket will hang straight and keep its teardrop shape.
Happy crocheting!