

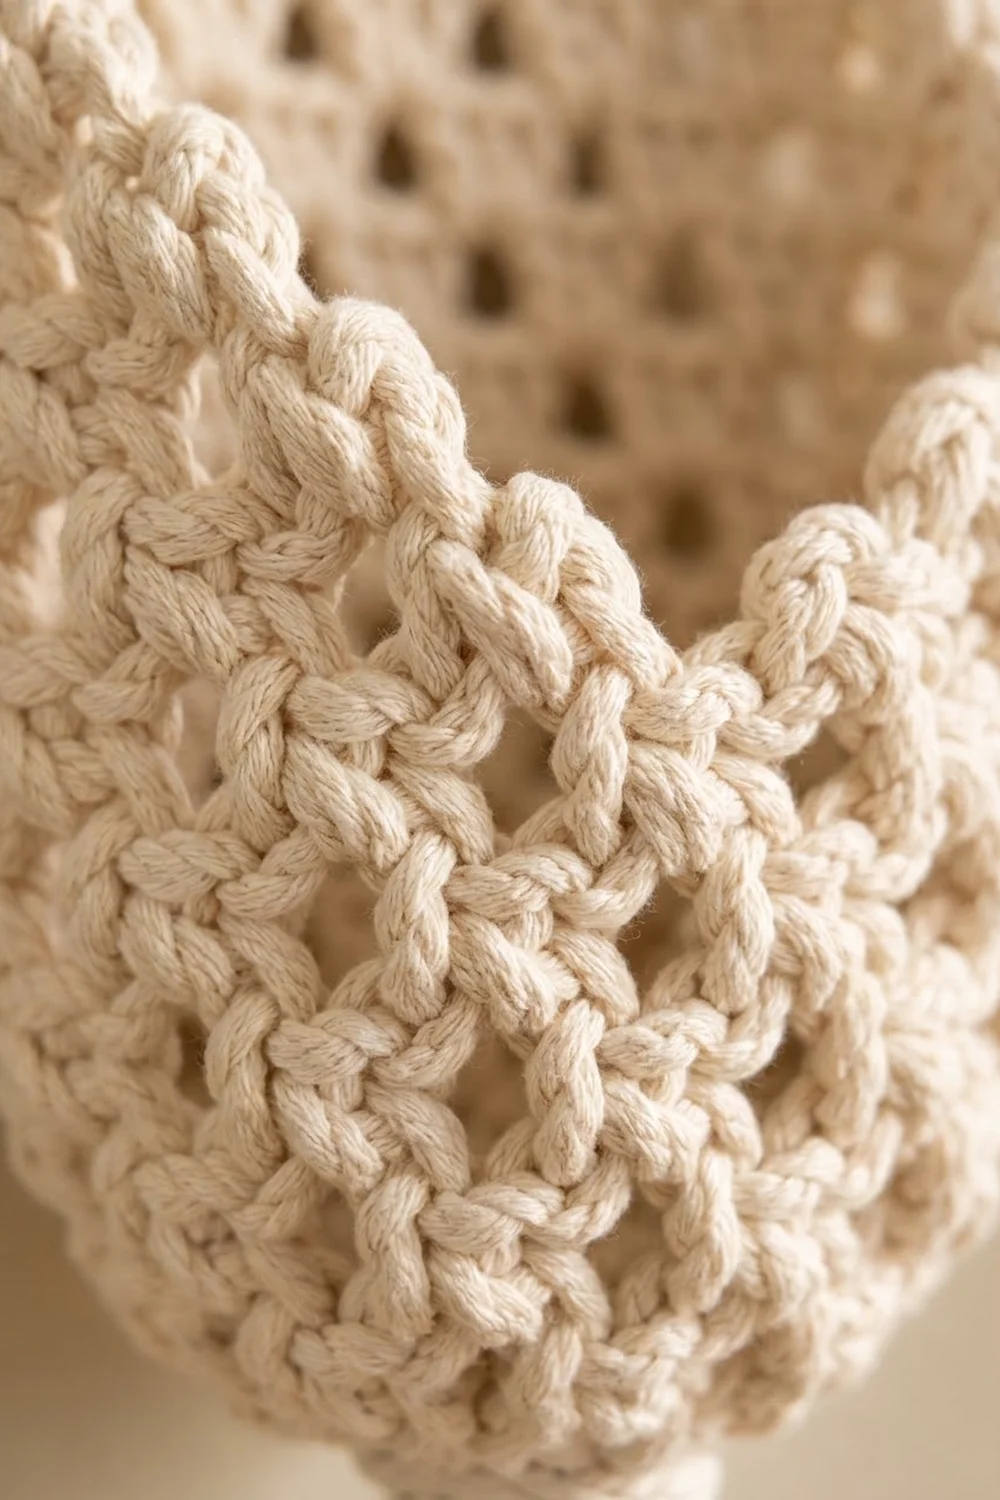
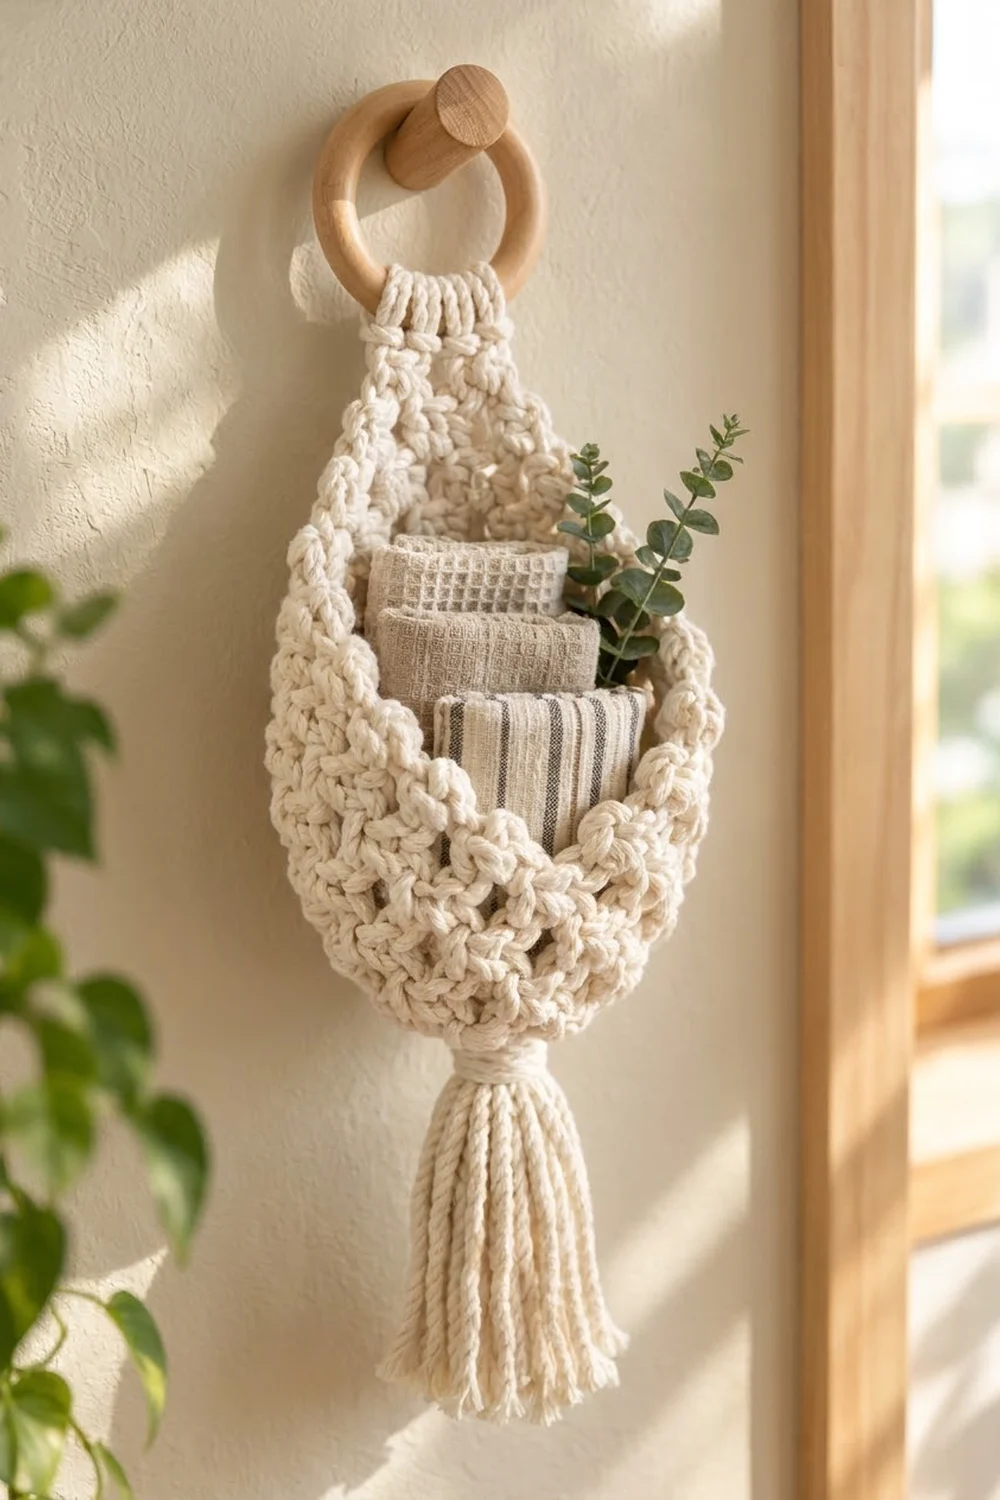
The Willow Drop is a teardrop-shaped wall pocket in soft cream cotton cord. Chunky clusters make a textured, open mesh. The back panel rises into a slim tab that wraps a wooden ring, and a full fringe tassel hangs from the bottom tip.
It works with boho, farmhouse, and Scandinavian decor. Use it for folded washcloths, dried stems, brushes, or a small trailing plant in a lined pot. The piece uses one color only, which keeps the look calm and lets the texture stand out.
This pattern uses US crochet terms. The finished pocket measures about 7 in (17.8 cm) wide and 15 in (38.1 cm) tall from the bottom tip to the top of the ring tab. The tassel adds 6 in (15.2 cm) below the wrap.
You work the pocket in joined rounds from the bottom tip upward, alternating cluster mesh rounds with single crochet rounds. Then you work the back half flat in decreasing rows to form the panel and tab. A two-row rim finishes the opening. Last, you wrap the tab around the ring and add the tassel.
Finished Size and Construction
- Finished size: 7 in (17.8 cm) wide x 15 in (38.1 cm) tall, plus a 6 in (15.2 cm) tassel
- Skill level: Easy-Intermediate
- Terminology: US
- Yarn weight: Bulky (5), 3 mm single-strand cotton cord
- Hook: 6 mm (J-10)
- Number of pieces: 1 crocheted pocket, plus a tassel
- Layout: Single piece hung vertically from one ring
- Body size before panel: 7 in (17.8 cm) wide x 9 in (22.9 cm) tall
- Size before border: 7 in (17.8 cm) x 13.3 in (33.8 cm), excluding the tab
- Border depth: about 0.5 in (1.3 cm) rolled rim
Materials
Choose a soft, single-twist or braided cotton cord about 3 mm thick. It should hold its shape without feeling stiff. Avoid very loose macramé string, which splits on the hook and makes the clusters blur.
- Cream cotton cord: 300 g / 120 m. This covers about 100 m for the pocket and 13 m for the tassel.
- 6 mm (J-10) crochet hook
- Wooden ring, 3 in (7.6 cm) diameter
- Large-eye tapestry needle
- 2 stitch markers
- Sharp scissors
- Tape measure
- Piece of cardboard 6.5 in (16.5 cm) tall, for the tassel (optional)
The quantities above include a margin of about 15% for gauge swatches and differences in cord weight.
Abbreviations (US Terms)
- ch: chain
- sc: single crochet
- inc: 2 sc in the same stitch or space
- sc2tog: single crochet 2 together
- dc: double crochet
- sl st: slip stitch
- sk: skip
- st(s): stitch(es)
- sp: space
- rev sc: reverse single crochet (crab stitch)
- MR: magic ring
- RS: right side
Special stitch: Cluster (cl). Yarn over, insert the hook into the stitch, pull up a loop, yarn over, pull through 2 loops. Repeat from * to * twice more in the same stitch (4 loops on hook). Yarn over and pull through all 4 loops.
Beginning cluster (beg-cl): Ch 3, then work the cluster steps twice in the same stitch (3 loops on hook). Yarn over and pull through all 3 loops.
Counting rule: In every mesh round or row, each cluster counts as 1 stitch and each ch-1 counts as 1 stitch.
Gauge and Checkpoints
Gauge: 12 sc = 4 in (10.2 cm). One mesh round plus one sc round = 1 in (2.5 cm) tall.
Your first test piece is the bottom of the pocket itself. Work Rounds 1 to 7 and measure before going further:
- After Round 3: 12 sts. The tip flattens to about 2 in (5.1 cm) wide.
- After Round 7: 24 sts. Flat width is 4 in (10.2 cm) and height is 4 in (10.2 cm).
- After Round 13: 42 sts. Flat width is 7 in (17.8 cm) and height is 6 in (15.2 cm).
- After Round 19: the body is 7 in (17.8 cm) wide and 9 in (22.9 cm) tall.
- After Row A9: total height is 13.3 in (33.8 cm).
If your piece is too big, go down to a 5.5 mm (I-9) hook. If it is too small, go up to a 6.5 mm (K-10.5) hook. Width matters most, because the rim and panel math depends on 42 stitches equaling 14 in (35.6 cm) around.
Pocket Body (Worked in Joined Rounds)
Do not turn between rounds. Join each round with a sl st to the first stitch. Place a marker in the first stitch of each round.
Round 1: Make a MR. Ch 1, work 6 sc into the ring, then join. (6 sts) Pull the ring tight, leaving a small opening for the tassel tie later.
Round 2: Ch 1. Sc in next st, inc in next st. Repeat 3 times and join. (9 sts)
Round 3: Ch 1. Sc in next 2 sts, inc in next st. Repeat 3 times and join. (12 sts)
These slow increases make the narrow, pointed tip of the teardrop.
Round 4 (mesh): Beg-cl in the first st, ch 1, sk next st. Cl in next st, ch 1, sk next st. Repeat to the end. Join to the top of the beg-cl. (6 cl + 6 ch-1 = 12 sts)
Round 5: Ch 1. Sc in next st, inc in next st. Repeat 6 times and join. Work into each cluster top and each ch-1 sp. (18 sts)
Round 6 (mesh): Repeat Round 4. (9 cl + 9 ch-1 = 18 sts)
Round 7: Ch 1. Sc in next 2 sts, inc in next st. Repeat 6 times and join. (24 sts)
Round 8 (mesh): Repeat Round 4. (12 cl + 12 ch-1 = 24 sts)
Round 9: Ch 1. Sc in next 3 sts, inc in next st. Repeat 6 times and join. (30 sts)
Round 10 (mesh): Repeat Round 4. (15 cl + 15 ch-1 = 30 sts)
Round 11: Ch 1. Sc in next 4 sts, inc in next st. Repeat 6 times and join. (36 sts)
Round 12 (mesh): Repeat Round 4. (18 cl + 18 ch-1 = 36 sts)
Round 13: Ch 1. Sc in next 5 sts, inc in next st. Repeat 6 times and join. (42 sts)
Round 14 (mesh): Repeat Round 4. (21 cl + 21 ch-1 = 42 sts)
Round 15: Ch 1, sc in each st around, then join. (42 sts)
Round 16 (mesh, offset): Sl st into the next st. Starting from there, repeat Round 4. (21 cl + 21 ch-1 = 42 sts) The offset places the clusters above the previous spaces, which makes the diamond-shaped holes.
Round 17: Repeat Round 15. (42 sts)
Round 18 (mesh, offset): Repeat Round 16. (42 sts)
Round 19: Repeat Round 15. (42 sts) Do not fasten off.
Rounds 15 to 19 hold the widest part of the teardrop: 42 sts at 3 sts per inch is 14 in (35.6 cm) around, or 7 in (17.8 cm) flat.
Back Panel and Tab (Worked in Rows)
Flatten the pocket so the join sits at the right-hand fold. Stitches 1 to 21 form the back and stitches 22 to 42 form the front. You work only the back stitches now and turn at the end of each row.
Row A1 (mesh): Beg-cl in st 1. Ch 1, sk next st, cl in next st. Repeat 10 times, ending in st 21. Turn. (11 cl + 10 ch-1 = 21 sts)
Row A2: Ch 1, (sc2tog) twice, sc in next 13 sts, (sc2tog) twice. Turn. (17 sts)
Row A3 (mesh): Beg-cl in the first st. Ch 1, sk next st, cl in next st. Repeat to the end and turn. (9 cl + 8 ch-1 = 17 sts)
Row A4: Ch 1, (sc2tog) twice, sc in next 9 sts, (sc2tog) twice. Turn. (13 sts)
Row A5 (mesh): Repeat Row A3. (7 cl + 6 ch-1 = 13 sts)
Row A6: Ch 1, (sc2tog) twice, sc in next 5 sts, (sc2tog) twice. Turn. (9 sts)
Row A7 (mesh): Repeat Row A3. (5 cl + 4 ch-1 = 9 sts)
Row A8: Ch 1, sc2tog, sc in next 5 sts, sc2tog. Turn. (7 sts)
Row A9: Ch 1, sc2tog, sc in next 3 sts, sc2tog. Turn. (5 sts)
The panel is now about 4.3 in (10.9 cm) tall. Its sloped sides form the U-shaped scoop of the opening.
Tab, Rows A10 to A21: Ch 1, sc in each st, then turn. (5 sts) Work 12 rows in total. The tab is about 1.7 in (4.3 cm) wide and 4 in (10.2 cm) long. Fasten off and leave a 16 in (40.6 cm) tail.
Border (Rim Edging)
Border gauge: Along the row ends, work 2 sc per mesh row and 1 sc per sc row. A mesh row is about twice as tall as an sc row, so this keeps the edge matched to the panel height.
Edging Row 1 (RS): Join the cord at the top of the right panel edge, just below the tab, at the end of Row A9. Work down the panel edge in row ends:
– Right panel edge: 4 mesh rows x 2 sc + 5 sc rows x 1 sc = 13 sc
– Front: 1 sc in each of sts 22 to 42 of Round 19 = 21 sc
– Left panel edge: = 13 sc
Total: 47 sc. Do not turn.
Edging Row 2: Ch 1. Working from left to right, rev sc in each st back across the edge. (47 sts) Fasten off.
Why the math works: Each panel edge rises 4.3 in (10.9 cm), and 13 sts at 3 sts per inch covers that height. The slope makes the edge slightly longer than the stitch count, so the rim pulls in gently and cups the opening. That pull is what gives the teardrop its rounded lip. The 21 front stitches are exactly half of the 42-stitch round, so the front stays a flat 7 in (17.8 cm).
Ring Tab and Tassel
Ring: Pass the tab from front to back through the wooden ring. Fold it down against the back panel and sew the last row to Row A9 with the tail. The loop is about 2 in (5.1 cm) deep. Weave in the ends.
Tassel:
1. Cut 30 strands, each 15 in (38.1 cm) long. Cut 1 tie cord 20 in (50.8 cm) long and 1 wrap cord 36 in (91.4 cm) long.
2. Lay the strands in an even bundle. Tie the center tightly with the tie cord.
3. Thread both tie-cord ends up through the Round 1 opening. Knot them firmly inside the pocket so the folded center sits snugly against the tip.
4. Smooth all 60 ends downward. Wrap the wrap cord tightly around the bundle about 1 in (2.5 cm) below the tip, for a 0.75 in (1.9 cm) collar. Hide the end under the wraps with the needle.
5. Trim the strands so they hang 6 in (15.2 cm) below the collar.
Final Blocking
- Wet the pocket and squeeze it gently in a towel. Do not wring it.
- Stuff the body lightly with a plastic bag or a folded towel to shape a rounded 7 in (17.8 cm) teardrop.
- Pin the back panel flat on a board. Check that the total height is about 13.3 in (33.8 cm) below the tab fold.
- Shape the rim with your fingers so it rolls slightly outward.
- Dampen the tassel and comb it straight with your fingers.
- Let everything dry completely for 24 hours, then trim the tassel again if needed.
Final Quality-Control Checklist
- Round 19 has 42 sts, and the flat width is 7 in (17.8 cm).
- The mesh rounds show even diamond-shaped holes, with no missed ch-1 spaces.
- The back panel tapers evenly on both sides through 21, 17, 13, 9, 7, and 5 sts.
- The rim has 13 + 21 + 13 = 47 sts, with no gaps at the panel corners.
- The tab is sewn flat and the ring hangs straight.
- The tassel collar is tight and centered, and the fringe ends are even.
Troubleshooting
The tip is flat instead of pointed: You probably increased 6 times in Rounds 2 to 3. Use only 3 increases per round there.
The clusters lean or stack into straight columns: Check the offset sl st at the start of Rounds 16 and 18.
The panel edges wave: Your edging is too loose. Go down one hook size for Edging Row 1 only.
The rim flares open: You worked extra stitches into the row ends. Recount for 13 per side.
The pocket sags forward: Fill it evenly, or sew the tab shorter by 1 row.
The tassel collar slips: Wrap tighter and stitch through the wraps once before hiding the end.
Care
Hand wash in cool water with mild soap and dry the pocket flat, with the body stuffed so it keeps its shape. Comb the tassel straight while it is still damp.
Final Notes
The size depends on one chain of measurements. Twelve sc equal 4 in (10.2 cm). The body grows to 42 stitches, which gives a 7 in (17.8 cm) width. Ten sc rounds and nine mesh rounds bring the body to 9 in (22.9 cm). The back panel tapers from 21 to 5 sts over 4.3 in (10.9 cm). A 47-stitch rim, a 4 in (10.2 cm) tab around a 3 in (7.6 cm) ring, and a 6 in (15.2 cm) tassel finish the piece. If you check each measurement as you go, the pocket will hang straight on the wall.
Happy crocheting!