

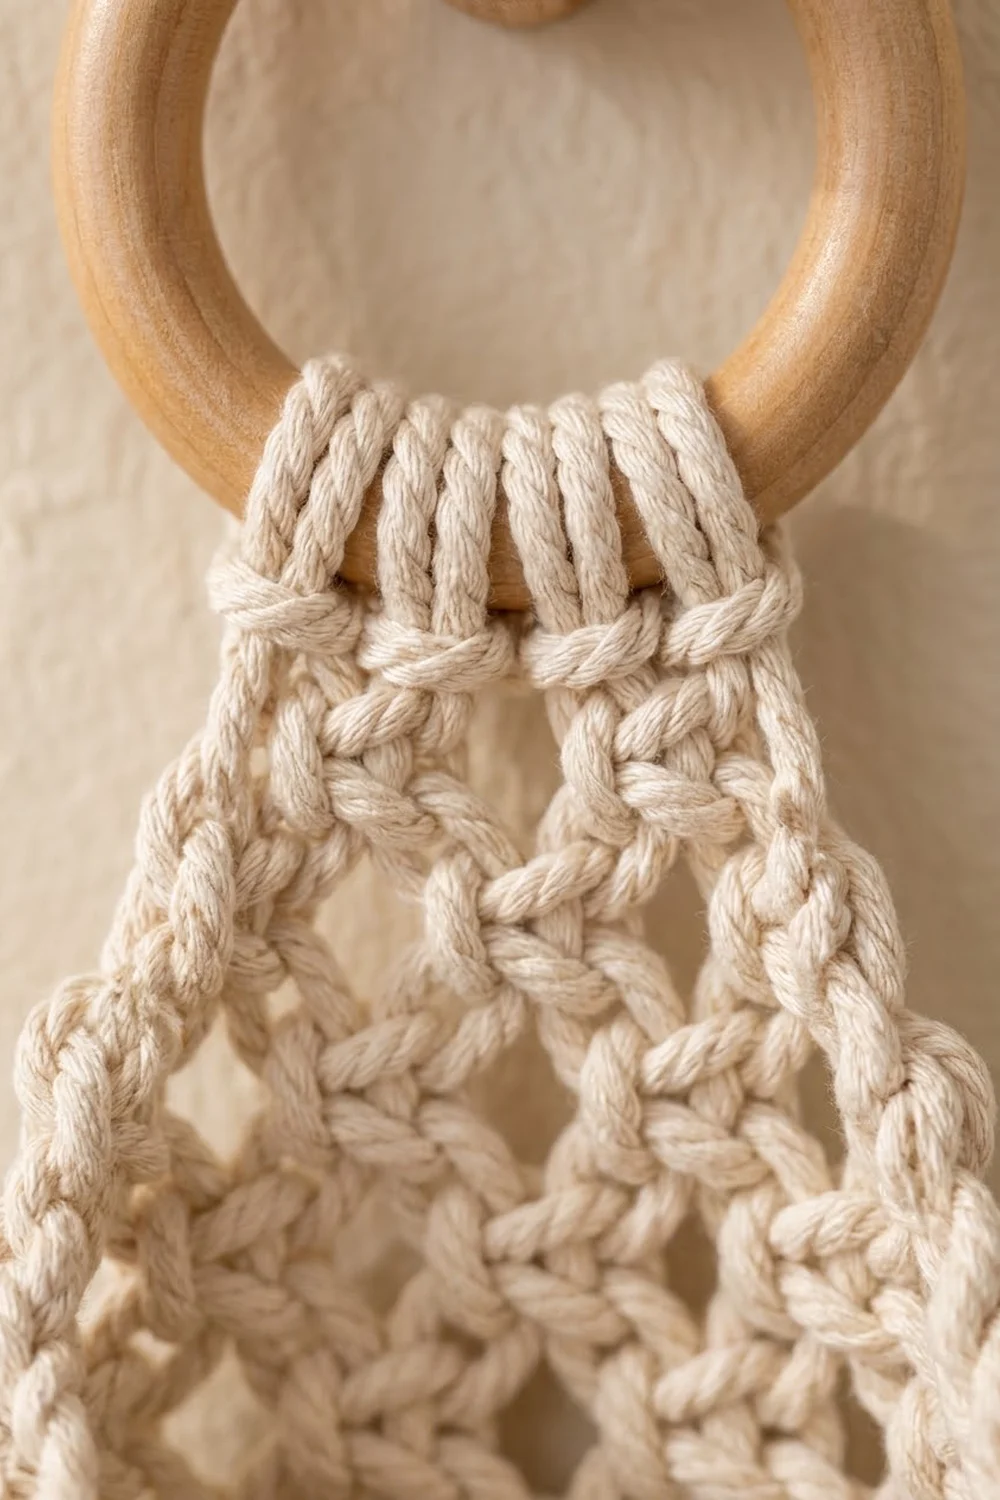
The Willow Drop is a teardrop-shaped wall pocket made in chunky cotton cord. It hangs from a wooden ring and has a soft macramé-style tassel at the bottom. The open diamond mesh lets light through, and the pouch still holds rolled washcloths, a small brush, dried stems or a trailing pothos in a lightweight pot.
The pocket uses one color only, natural cream cotton cord. The mood is calm and boho, and the piece suits a bathroom, entryway or nursery wall. All instructions use US crochet terms.
The finished pocket is 7 in (17.8 cm) wide and about 14.25 in (36.2 cm) long from the bottom tip to the top of the folded hanging band. The tassel adds about 7 in (17.8 cm) below the tip.
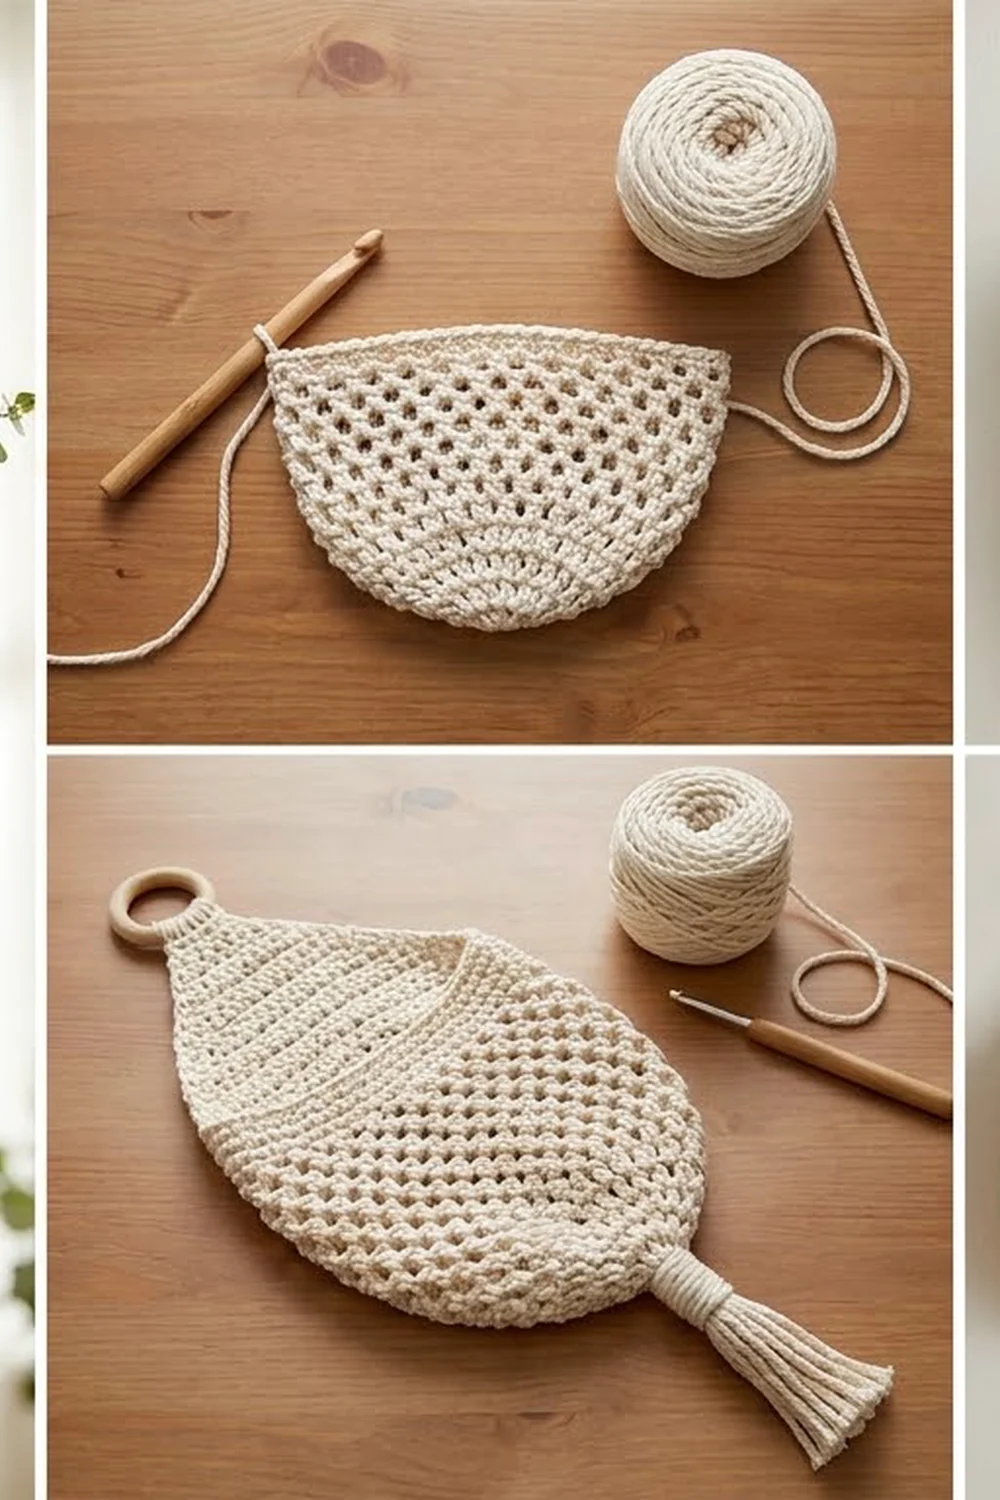
The construction is simple. You work a pointed pouch in the round from the bottom tip up, using a single crochet and chain-3 mesh. Then you work the back panel in rows, narrowing it to a point, and finish with a solid band that folds over the ring. A two-row trim neatens the opening, and the tassel is added last.
Finished Size and Construction
- Finished size: 7 in (17.8 cm) wide × 14.25 in (36.2 cm) long, plus a 7 in (17.8 cm) tassel
- Skill level: Advanced beginner
- Terminology: US crochet terms
- Yarn weight: 3 mm plied cotton cord (works like super bulky #6)
- Hook: 6.5 mm (US K-10.5)
- Number of pieces: 1 (the tassel is attached, not sewn)
- Layout: Single pouch, no assembly
- Pouch circumference: 14 mesh loops = 14 in (35.6 cm), which lies flat at 7 in (17.8 cm)
- Size before border: 7 in (17.8 cm) wide at the opening
- Border depth: 0.25 in (0.6 cm), so the widest point after trim is 7.5 in (19.1 cm)
Materials
Yarn: Use a soft 3 mm 3-ply cotton macramé cord or a super bulky cotton yarn with a firm twist. Single-twist cord is harder to crochet because it splits. Choose a cord that holds its shape, since the pocket has to carry a little weight.
- Natural cream: about 220 g / 70 m (77 yd)
- About 60 m (66 yd) for the pouch and trim
- About 9 m (10 yd) for the tassel and wrap
These quantities include roughly a 10% margin. You can make the pocket from one 250 g cone with a little to spare.
Tools:
– 6.5 mm (US K-10.5) crochet hook
– One 3 in (7.6 cm) unfinished wooden ring
– Large-eye tapestry needle
– Sharp scissors
– Locking stitch markers (2)
– Tape measure
– Small spray bottle and a rolled towel for blocking
Abbreviations (US Terms)
- ch – chain
- sl st – slip stitch
- sc – single crochet
- hdc – half double crochet
- MR – magic ring
- st(s) – stitch(es)
- loop – a ch-3 space made in the mesh
Special stitches:
- Mesh (M): sc in the next loop, ch 3. This makes 1 new loop.
- Loop increase (Linc): (sc, ch 3, sc, ch 3) all in the same loop. This makes 2 new loops.
- Round close: On every mesh round, replace the final ch 3 with ch 1, hdc in the first sc of the round. The ch 1 + hdc counts as the last loop and leaves your hook in the middle of it, ready for the next round.
Gauge and Checkpoints
Mesh gauge: 4 loops wide × 5 mesh rounds = 4 in (10.2 cm). That makes each loop 1 in (2.5 cm) wide and each round 0.8 in (2.0 cm) tall.
Sc gauge (band and trim): 8 sc = 2.25 in (5.7 cm).
Crochet the pouch through Round 5 first and use it as your gauge swatch. Flatten it and measure across: it should be 7 in (17.8 cm) wide.
Checkpoints:
1. End of Round 5: 7 in (17.8 cm) flat width.
2. End of Round 9: 6.9 in (17.5 cm) from tip to top edge.
3. End of Row 8: the back panel measures 6.4 in (16.3 cm) above Round 9, so 13.3 in (33.8 cm) from the tip.
4. After the band is folded: 14.25 in (36.2 cm) total.
If your pouch is too wide, go down to a 6 mm (US J-10) hook. If it is too narrow, go up to a 7 mm hook. Don’t change the loop counts: the shaping depends on them.
Pouch (Worked in Rounds from the Bottom Tip)
Round 1: Make an MR, ch 1, work 7 sc into the ring, then sl st to the first sc. Pull the ring tight but leave a pencil-sized hole for the tassel. (7 sc)
Round 2: Ch 1. Work (sc in the next sc, ch 3) 6 times, then sc in the last sc and close the round (ch 1, hdc in the first sc). (7 loops)
Round 3 (growth): Ch 1. In the hdc loop just made, work a Linc. Then work M in the next loop, [Linc in the next loop, M in the next loop] twice, and M in the last loop. Close the round.
Loops worked: 7. Round 3 total: 10 loops.
Round 4 (growth): Ch 1. Work [Linc in the next loop, M in the next loop] 4 times, then M in each of the last 2 loops. Close the round.
Loops worked: 10. Round 4 total: 14 loops.
Round 5: Ch 1. Work M in each loop around and close the round. (14 loops)
Check gauge now: the pouch should flatten to 7 in (17.8 cm) wide.
Rounds 6–9: Repeat Round 5. (14 loops each round)
The pouch now measures about 6.9 in (17.5 cm) from tip to top edge: 0.5 in (1.3 cm) for Round 1 plus 8 mesh rounds × 0.8 in (2.0 cm).
Flatten the pouch so the round close sits at one side fold. Number the loops of Round 9 from 1 (the hdc loop) to 14, going in your working direction. Place a marker in loop 8.
- Loops 1–8 become the back panel base.
- Loops 9–14 stay unworked and form the front lip of the opening.
Back Panel (Worked in Rows)
This section creates the rising, narrowing back of the teardrop. The front lip stays lower, which gives the scooped opening seen on the finished pocket.
Row stitches:
– Even row: Turn, ch 4 (this is the first loop). Sc in the first loop, then (ch 3, sc in the next loop) across. The last sc goes into the previous row’s turning loop. The loop count stays the same.
– Decrease row: Turn, sl st into the first loop, ch 1, sc in the same loop, then (ch 3, sc in the next loop) across. You make no turning loop, so the row has 1 loop fewer.
Row 1: Ch 1. Sc in the hdc loop (loop 1), then (ch 3, sc in the next loop) 7 times, ending in loop 8. (7 loops)
Row 2: Work an even row. (7 loops)
Row 3: Work a decrease row. (6 loops)
Row 4: Work an even row. (6 loops)
Row 5: Work a decrease row. (5 loops)
Row 6: Work an even row. (5 loops)
Row 7: Work a decrease row. (4 loops)
Row 8: Work an even row. (4 loops)
Checkpoint: The back panel rises 6.4 in (16.3 cm) above the front lip. It is 7 in (17.8 cm) wide at the base and 4 in (10.2 cm) wide at Row 8.
Hanging Band
Row 9 (conversion row): Turn, ch 1, then 2 sc in each of the 4 loops.
Count: 4 loops × 2 sc = 8 sc. The panel gathers from 4 in (10.2 cm) to 2.25 in (5.7 cm), which creates the teardrop point.
Rows 10–13: Ch 1, turn, sc in each sc across. (8 sc each row)
The band is now about 2 in (5.1 cm) long. Fasten off and leave a 16 in (40.6 cm) tail.
Attach the ring: Pass the band through the wooden ring from front to back and fold it over the rim. With the tail, whipstitch each stitch of Row 13 to the matching stitch at the base of Row 10 on the back side, 8 stitches in total. The band forms a snug tube around the ring, adding about 1 in (2.5 cm) of folded height. Weave in the end.
Border (Opening Trim)
The trim runs in one continuous strip: down the left side of the back panel, across the front lip and up the right side. Hold the pocket front-facing.
Border gauge: The trim matches the sc gauge of 8 sc = 2.25 in (5.7 cm), which is about 3.5 sc per inch.
Row 1 (conversion row): Join the yarn at the left side of the back panel, at the base of Row 9.
– Left side: Work 2 sc into each row end of Rows 8 down to 1. That’s 8 row ends × 2 sc = 16 sc.
– Front lip: Work 3 sc into each of loops 9–14 of Round 9. That’s 6 loops × 3 sc = 18 sc.
– Right side: Work 2 sc into each row end of Rows 1 up to 8. That’s 8 row ends × 2 sc = 16 sc.
Row 1 total: 16 + 18 + 16 = 50 sc.
Row 2: Ch 1, turn, then sl st loosely in each sc across. (50 sl st) Fasten off and weave in the end.
Why the math works: Each front loop is 1 in (2.5 cm) wide, and 3 sc at 3.5 sc per inch cover about 0.86 in (2.2 cm). This makes the lip slightly firm, so it hugs your contents instead of gaping. Each side row is 0.8 in (2.0 cm) tall, and 2 sc cover about 0.57 in (1.4 cm). This gently straightens the jagged edge left by the decrease rows without pulling the panel inward. The trim adds 0.25 in (0.6 cm) on each side, bringing the widest point from 7 in (17.8 cm) to 7.5 in (19.1 cm).
Tassel
- Cut 20 strands, each 16 in (40.6 cm) long.
- With a hook, pull all 20 strands halfway through the tip hole from Round 1. You now have 40 ends of 8 in (20.3 cm) hanging below the tip.
- Cut a 30 in (76.2 cm) strand for the wrap. Wrap it tightly around the bundle 1 in (2.5 cm) below the tip for about 0.5 in (1.3 cm) of height. Thread the tail into the wrap and down into the bundle.
- Trim the ends evenly so they hang 7 in (17.8 cm) below the tip.
Final Blocking
- Lightly mist the whole pocket with water until it is damp but not dripping.
- Stuff the pouch with a rolled hand towel so it fills out to 7 in (17.8 cm) wide.
- Pull the mesh diamonds open evenly with your fingers, working from the tip upward.
- Smooth the back panel into a straight teardrop shape, keeping the point centered under the ring.
- Comb the tassel ends straight with your fingers. Leave them plied, or untwist them for a fluffier look.
- Hang the pocket by its ring and let it dry completely, about 24 hours.
- Remove the towel and measure: it should be 7.5 in (19.1 cm) wide with trim and 14.25 in (36.2 cm) long.
Final Quality-Control Checklist
- Rounds 5–9 each have exactly 14 loops.
- The back panel steps down 7, 7, 6, 6, 5, 5, 4, 4 loops over Rows 1–8.
- Row 9 and the band each have 8 sc.
- The trim has 50 sc: 16 + 18 + 16.
- The ring is centered and the band seam is hidden at the back.
- The front lip sits 6.9 in (17.5 cm) above the tip and curves smoothly.
- The tassel wrap is tight, and the ends are even at 7 in (17.8 cm).
- All ends are woven in at least 2 in (5.1 cm).
Troubleshooting
The pouch is flared or ruffled at the bottom. You probably did an extra Linc. Recount Rounds 3 and 4: they should have 10 and 14 loops.
The pouch twists in a spiral. Make sure every round closes with ch 1, hdc in the first sc, and that each new round starts in that hdc loop.
The back panel leans to one side. Make sure every decrease row starts with a sl st into the first loop and no turning loop.
The front lip gapes open. Work only 2 sc in the two center lip loops. This changes the lip count from 18 to 16 sc and the trim total from 50 to 48.
The band is too loose on the ring. Whipstitch through both loops of each stitch, or remove Row 13.
The holes look closed and dense. Your tension is too tight. Go up a hook size and check that each ch-3 loop is 1 in (2.5 cm) wide.
Care
Spot clean or hand wash cold and reshape while damp. Dry hanging by the ring, away from direct heat, to keep the teardrop shape.
Final Notes
The measurement chain is simple:
– 14 loops at 1 in (2.5 cm) each make a 14 in (35.6 cm) circumference, which lies flat at 7 in (17.8 cm).
– Nine rounds bring the front lip to 6.9 in (17.5 cm).
– Eight back-panel rows add 6.4 in (16.3 cm) and narrow from 7 to 4 loops.
– Row 9 gathers the top to 8 sc, 2.25 in (5.7 cm) wide.
– The folded band brings the total to 14.25 in (36.2 cm).
– The 50-stitch trim finishes the edge at 7.5 in (19.1 cm) wide.
Check each step as you go, and the pocket will hang straight and hold its shape on the wall.
Happy crocheting!