

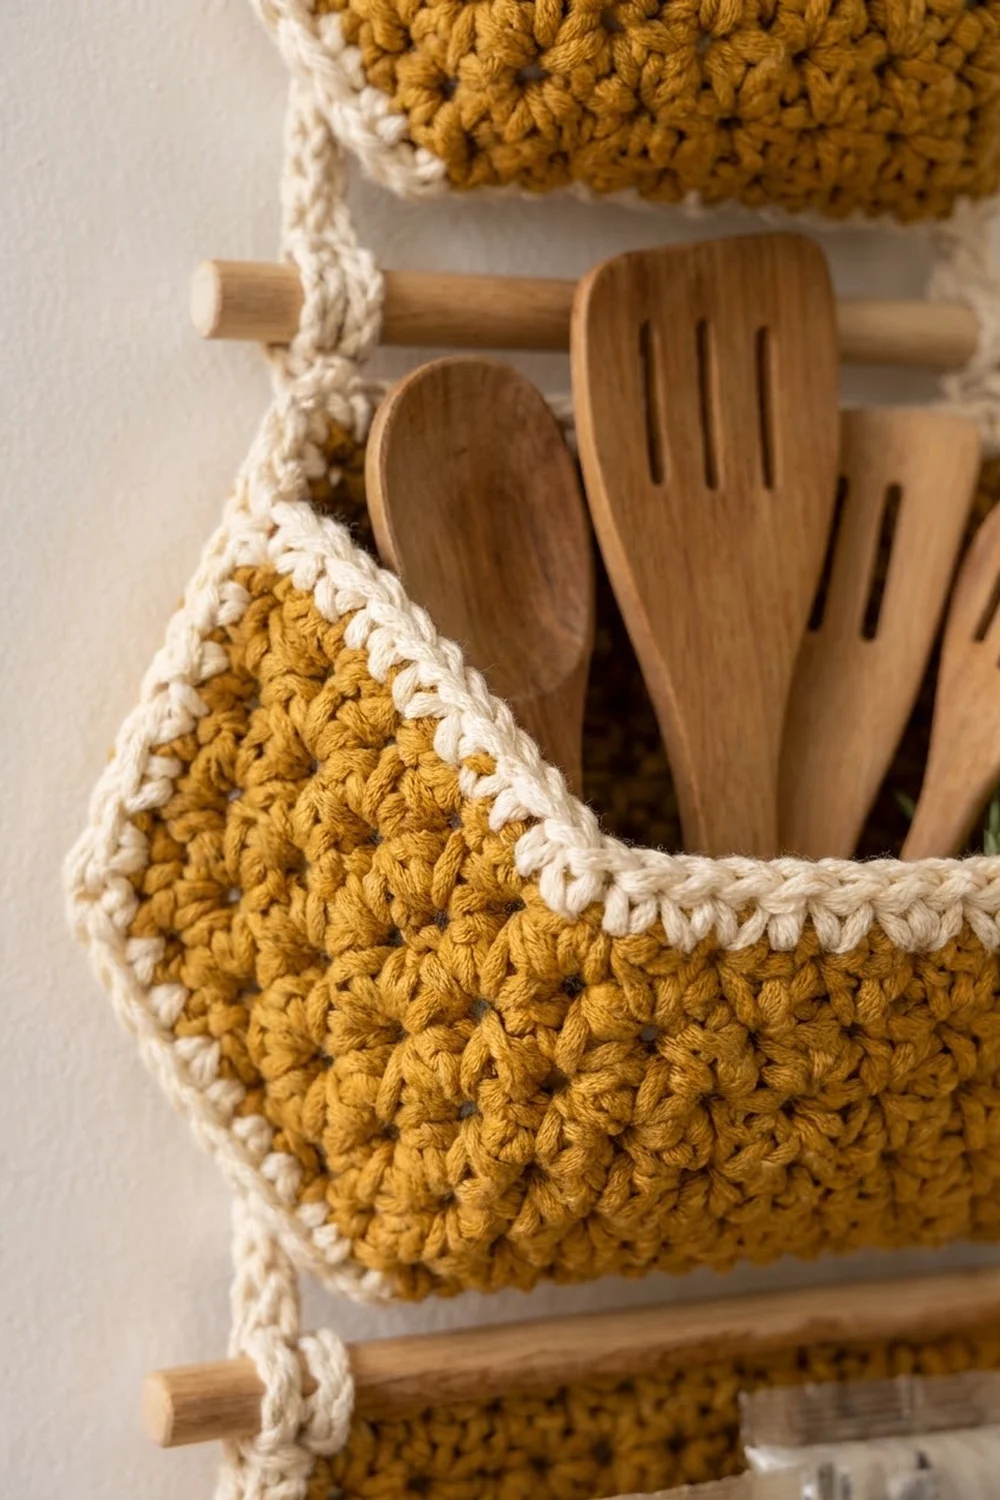
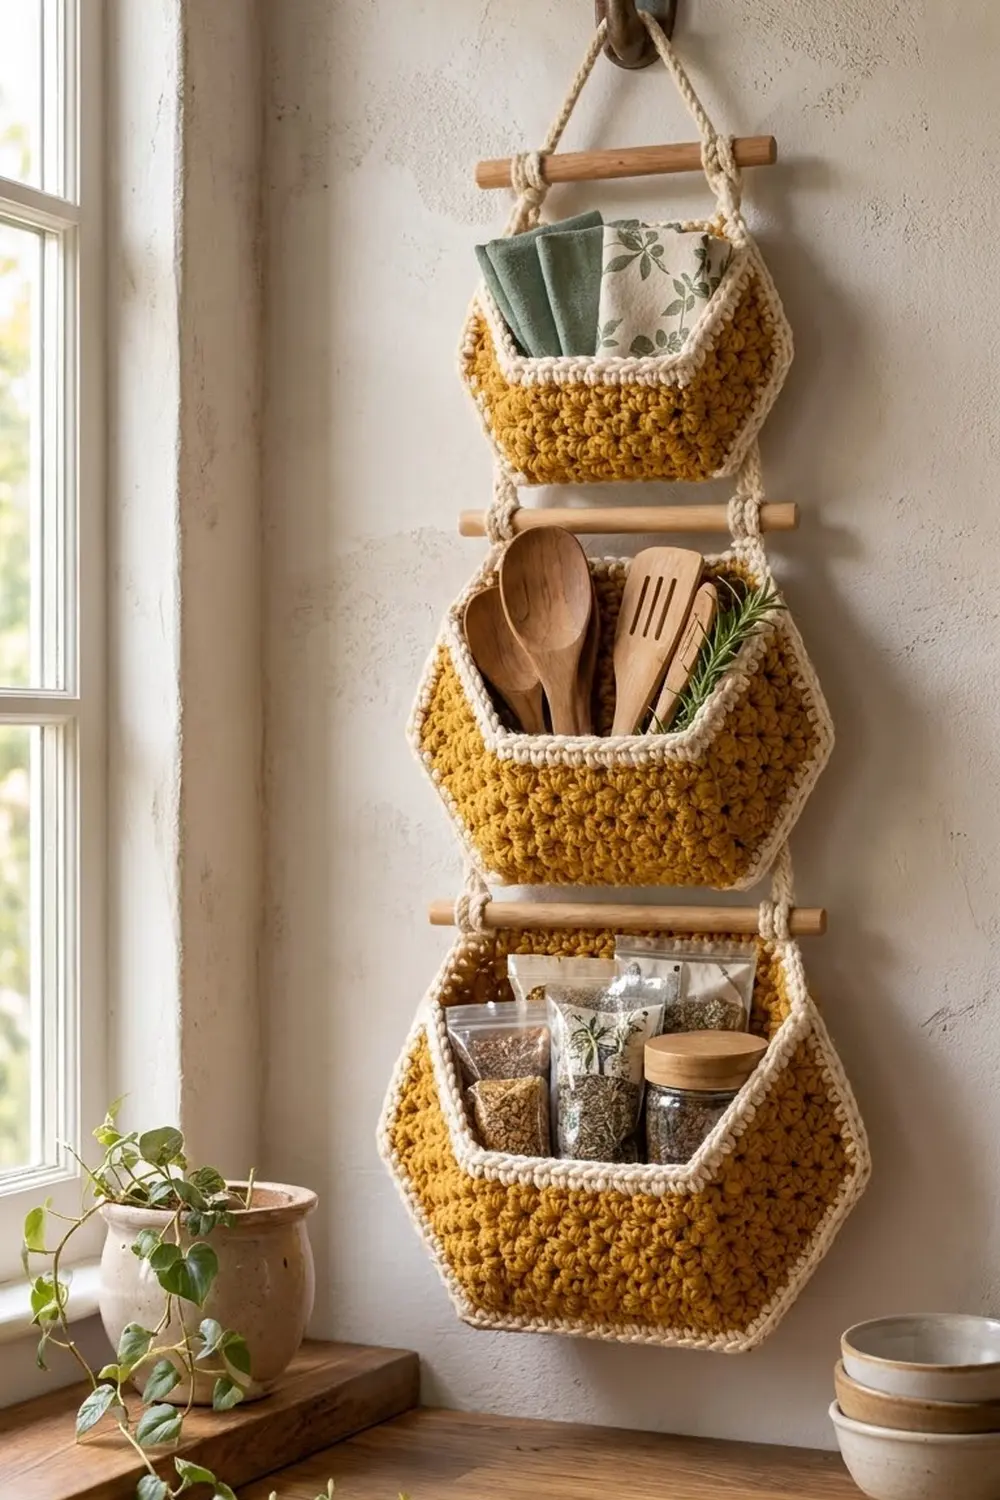
This three-tier organizer is made of three hexagon baskets in small, medium and large sizes. They hang one under the other from wooden dowels and natural cotton cord. The pebbly mustard texture looks a bit like honeycomb, and cream trim outlines every base and rim so each basket stands out against a wall.
The design is warm and farmhouse in style. It works well in a kitchen for utensils, tea or spice packets, or in an entry or bathroom for small things. The pattern uses US crochet terms throughout.
Finished baskets measure 8.0 in (20.3 cm), 10.2 in (25.9 cm) and 12.4 in (31.5 cm) corner to corner. The assembled organizer is about 24.3 in (61.7 cm) tall and 14 in (35.6 cm) wide at the bottom dowel.
You work each basket from the center out as a flat hexagon in turned rounds of lemon peel stitch. Next comes one cream edge round. Then the walls rise straight up from the back loops, and a two-round cream rim finishes the top. Short straps and clove-hitched cords join the three baskets to the dowels.
Finished Size and Construction
- Finished size (assembled): about 24.3 in (61.7 cm) tall x 14 in (35.6 cm) wide
- Skill level: Easy-Intermediate
- Terminology: US crochet terms
- Yarn weight: Bulky (#5)
- Hook: 6.0 mm (US J-10)
- Number of pieces: 3 baskets, 6 straps, 3 dowels, 2 cords
- Layout: 1 column x 3 tiers, small at the top and large at the bottom
- Small basket: 8.0 in (20.3 cm) corner to corner, 6.9 in (17.5 cm) flat to flat, 3.5 in (8.9 cm) tall
- Medium basket: 10.2 in (25.9 cm) corner to corner, 8.8 in (22.4 cm) flat to flat, 4.2 in (10.7 cm) tall
- Large basket: 12.4 in (31.5 cm) corner to corner, 10.7 in (27.2 cm) flat to flat, 4.8 in (12.2 cm) tall
- Size before border (walls only, no rim): 3.0 in (7.6 cm), 3.7 in (9.4 cm) and 4.3 in (10.9 cm) tall
- Border depth: about 0.5 in (1.3 cm)
Materials
Pick a firm bulky yarn with good stitch definition. A cotton blend or a sturdy acrylic will keep the walls standing. Soft, fuzzy yarns hide the lemon peel texture and make floppy baskets.
Yarn
– Color A, Mustard: 400 g / about 560 m (small 75 g, medium 115 g, large 165 g, plus margin)
– Color B, Cream: 100 g / about 140 m
Hanging hardware
– Three wooden dowels, 1/2 in (1.3 cm) in diameter, cut to 10 in (25.4 cm), 12 in (30.5 cm) and 14 in (35.6 cm)
– Cream cotton macramé cord, 5 mm: two lengths of 48 in (121.9 cm), 96 in (243.8 cm) in total
– One sturdy wall hook
Tools
– 6.0 mm (US J-10) crochet hook
– Stitch markers (at least 7)
– Tapestry needle
– Scissors and measuring tape
– Optional: plastic canvas or a cardboard hexagon to stiffen each base
All yarn and cord amounts include a margin of about 10–15% for swatching and tension differences.
Abbreviations (US Terms)
- ch – chain
- sc – single crochet
- dc – double crochet
- sl st – slip stitch
- st(s) – stitch(es)
- BLO – back loop only
- inc – 2 sts worked into the same stitch
- rev sc – reverse single crochet (crab stitch)
- MR – magic ring
Lemon peel pattern (LP): Alternate sc and dc in every stitch, always starting the round with sc: sc, dc, sc, dc and so on. Because every round is turned, the short sc stitches sit next to the taller dc stitches and push outward. This makes the pebbly texture. Every LP round in this pattern has an even stitch count, so it always ends with a dc.
LP inc: Work the next two pattern stitches into the same stitch. For example, if the next stitch in the sequence is sc, work (sc, dc) into one stitch.
Rev sc: Work single crochet from left to right (right-handed) into the next stitch to the right. This makes a corded, rope-like edge.
Turned round: Join with sl st to the first sc, ch 1 and turn. The ch 1 does not count as a stitch.
Gauge and Checkpoints
Gauge: 11 sts and 12 rounds = 4 in (10.2 cm) in LP. One round is about 0.33 in (0.8 cm) tall.
Test one piece first. Start the small basket and stop after Round 6 (36 sts). Lay it flat. It should measure about 4.4 in (11.2 cm) corner to corner, with each side about 2.2 in (5.6 cm).
Checkpoints:
– After the last LP base round: small 7.3 in (18.5 cm), medium 9.5 in (24.1 cm), large 11.6 in (29.5 cm) corner to corner
– After the cream edge round: small 8.0 in (20.3 cm), medium 10.2 in (25.9 cm), large 12.4 in (31.5 cm) corner to corner
– After the walls: small 3.0 in (7.6 cm), medium 3.7 in (9.4 cm), large 4.3 in (10.9 cm) tall
Too big: Go down one hook size, to 5.5 mm (US I-9). Too small: Go up one hook size, to 6.5 mm (US K-10.5). If the base cups, your increases are too tight. If it ruffles, they are too loose. Fix this before you start the walls.
Basket Base (All Sizes)
All three bases follow the same formula: Round k has 6k stitches. Each round has 6 increases that stack into 6 straight corners. Place a marker in the second stitch of each increase and move it up every round.
With Color A:
Round 1: MR, ch 1, 6 sc in ring. Join with sl st to the first sc, ch 1 and turn. (6 sts)
Round 2: LP inc in each st around. Turned round. (12 sts)
Round 3: LP in next 1 st, LP inc in next st; repeat from * 6 times. Turned round. (18 sts)*
Round 4: LP in next 2 sts, LP inc in next st; repeat from * 6 times. (24 sts)*
Rounds 5 and up: Each round adds one stitch to every side. In Round k, work LP in next (k − 2) sts, LP inc in next st; repeat from * 6 times. (6k sts)*
Rounds 5 through 10 give 30, 36, 42, 48, 54 and 60 sts.
- Small: Stop after Round 10. (60 sts, 10 per side)
- Medium: Continue to Round 13: Round 11 = 66, Round 12 = 72, Round 13 = 78. (78 sts, 13 per side)
- Large: Continue to Round 16: Round 14 = 84, Round 15 = 90, Round 16 = 96. (96 sts, 16 per side)
Fasten off Color A.
Cream Base Edge Round
Join Color B in the first stitch of the last round. This is one more increase round, worked in plain sc.
- Small, Round 11: Ch 1, sc in next 9 sts, 2 sc in next st; repeat from * 6 times. (66 sts, 11 per side)*
- Medium, Round 14: Ch 1, sc in next 12 sts, 2 sc in next st; repeat from * 6 times. (84 sts, 14 per side)*
- Large, Round 17: Ch 1, sc in next 15 sts, 2 sc in next st; repeat from * 6 times. (102 sts, 17 per side)*
Join with sl st to the first sc and fasten off. In this pattern, a “side” means the stitches from just after one corner up to and including the next corner pair. The corner stitches are already counted in each side and are never added again.
Lay the base flat and check the corner-to-corner measurement before you go on. If you use a stiffener, cut it now, slightly smaller than the base.
Walls
Join Color A in any stitch, with the outside of the base facing you.
Wall Round 1 (conversion round): Ch 1, sc in BLO of each st around. Do not turn. The unworked cream front loops form a ridge around the bottom edge.
– Small: 66 worked one per stitch + 0 added = 66 sts
– Medium: 84 + 0 = 84 sts
– Large: 102 + 0 = 102 sts
Turn at the end of this round.
Wall Round 2 and up: LP around with no increases. Turned round. The count stays at 66, 84 or 102.
- Small: Work to Wall Round 9 (9 wall rounds in total), 3.0 in (7.6 cm) tall.
- Medium: Work to Wall Round 11, 3.7 in (9.4 cm) tall.
- Large: Work to Wall Round 13, 4.3 in (10.9 cm) tall.
The walls go straight up because the count never changes. The stacked corners of the base set where the six wall faces fold. Fasten off Color A.
Make All Pieces
Color A, Mustard:
– 1 small basket (bases Rounds 1–10, 9 wall rounds)
– 1 medium basket (Rounds 1–13, 11 wall rounds)
– 1 large basket (Rounds 1–16, 13 wall rounds)
Color B, Cream:
– 3 base edge rounds and 3 rims
– 6 straps, 2 per basket. For each strap: ch 13, sc in 2nd ch from hook and in each ch across. (12 sc, about 4.4 in / 11.2 cm)
Layout grid (front view):
            /\        <- cord loop on hook
 [======= 10 in dowel =======]
        |  SMALL   |
 [======== 12 in dowel ========]
       |  MEDIUM   |
 [========= 14 in dowel =========]
      |   LARGE    |
Joining
Straps to baskets. Each basket hangs from its two side corners, at the left and right points of the hexagon rim. Fold a strap in half over the dowel for that basket. Sew both strap ends to the inside of the wall at one side corner, covering the top 0.75 in (1.9 cm) of the strap with stitches. Repeat on the opposite corner. Sew through the rim’s cream stitches and the first LP round below them, stitch for stitch, so the load is spread over two rounds. Each basket should hang about 1 in (2.5 cm) below its dowel.
Cords to dowels. Tie the two cords together with an overhand knot 4 in (10.2 cm) from one end to make the top of the hanging loop. Bring one cord down to each end of the 10 in (25.4 cm) dowel and tie a clove hitch about 0.5 in (1.3 cm) in from the end, outside the strap. Measure 6.5 in (16.5 cm) down from the top dowel and clove-hitch the cords to the 12 in (30.5 cm) dowel. Measure 7 in (17.8 cm) further down and clove-hitch them to the 14 in (35.6 cm) dowel. Trim the tails to 3 in (7.6 cm) below the last knots and unravel the cord ends.
Tension. Tighten each hitch firmly, but don’t make it so tight that the dowel can’t be adjusted yet. Hang the piece and level each dowel by eye, then cinch the hitches tight.
Size checkpoint. Gaps between tiers: about 2.0 in (5.1 cm) below the small basket and 1.8 in (4.6 cm) below the medium. From the top dowel to the bottom of the large basket is about 19.3 in (49.0 cm). With the top loop added, the total height is about 24.3 in (61.7 cm).
Border (Top Rim)
Border gauge: 11 cream sc = 4 in (10.2 cm), the same as the LP body. This is why the rim needs no increases or decreases.
Join Color B in the last wall round of any basket, at one corner.
Rim Round 1: Ch 1, sc in each st around. Join, do not turn.
– Small: 66 sts, 11 per side
– Medium: 84 sts, 14 per side
– Large: 102 sts, 17 per side
Rim Round 2: Ch 1, rev sc in each st around. Join and fasten off. The count stays the same: 66 / 84 / 102, with 11 / 14 / 17 per side.
Why the math works: The walls hold the same count as the cream base edge round, so each side of the rim lines up exactly over its side of the base. For example, small sides are 11 stitches at the base edge, through every wall round, and on both rim rounds. Six sides x 11 = 66. Adding stitches would make the rim ruffle, and skipping them would pull it in. The rev sc gives a rope-like edge about 0.5 in (1.3 cm) deep and stops the rim from stretching.
Final Blocking
- Weave in all ends on the inside of each basket, going along the rounds for at least 2 in (5.1 cm).
- Mist each basket lightly with water until damp, not soaked.
- Push the base flat from the inside and set it on a hexagon of cardboard if you have one.
- Stuff the basket firmly with a towel or plastic bags so the walls stand straight.
- Pinch each of the six wall corners into a crisp fold, lined up with the corners of the base.
- Smooth the rim level and roll the rev sc edge slightly outward.
- Let it dry fully, for at least 24 hours.
- Slip in any base stiffeners, then attach the straps.
Final Quality-Control Checklist
- Base counts: 60 / 78 / 96 before the cream edge round, 66 / 84 / 102 after it
- Each base lies flat with six straight corners
- The cream ridge shows evenly at the outside bottom edge
- Wall heights: 3.0 / 3.7 / 4.3 in (7.6 / 9.4 / 10.9 cm) before the rim
- Rims hold 11 / 14 / 17 stitches per side with no ruffling
- The straps are sewn through two rounds, and each basket hangs level
- Dowel spacing: 6.5 in (16.5 cm) and 7 in (17.8 cm)
- All ends are woven in and the clove hitches are tight
Troubleshooting
Base curls up like a bowl: The increases are too tight, or you skipped one. Count each side, then loosen the stitches at the increases.
Base ruffles: Your tension is too loose, or you increased twice in one round. Go down a hook size.
Corners drift into a spiral: Turned rounds should cancel out drift. Check that you turn every round and move the markers each time.
Texture looks flat: You may have stopped turning, or you started a round with dc. Always start with sc and turn.
Walls lean outward: You may have added stitches. Count the wall round, then block over a firmer form.
Basket tilts forward: Check that the straps sit exactly at the two side corners and are the same length.
Care
Spot clean with mild soap and cool water, then reshape and dry flat over a stuffed form. Take the baskets off the dowels before any deeper washing.
Final Notes
The measurement chain sets the size of everything. Gauge of 11 sts = 4 in (10.2 cm) gives a small base of 7.3 in (18.5 cm) after Round 10 and 8.0 in (20.3 cm) after the cream round. The walls then rise 3.0 in (7.6 cm), and the rim adds 0.5 in (1.3 cm), for 3.5 in (8.9 cm). The medium and large baskets follow the same steps to 10.2 in (25.9 cm) and 12.4 in (31.5 cm). The dowel spacing then sets the assembled height of 24.3 in (61.7 cm). If each checkpoint matches, the finished organizer will hang straight and level.
Happy crocheting!