

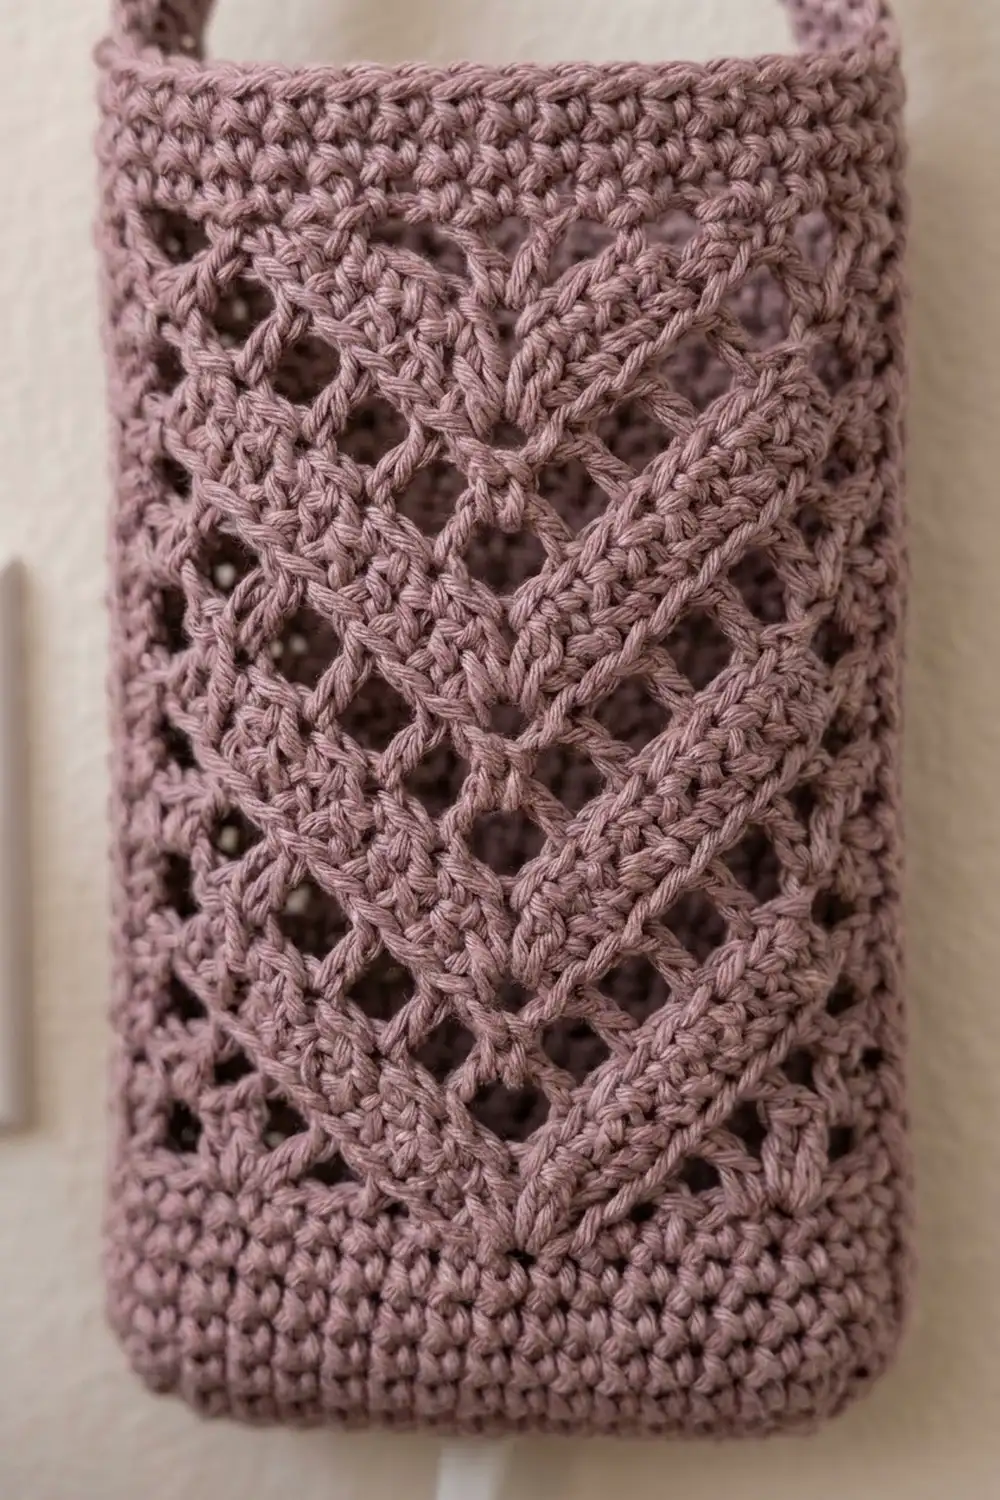
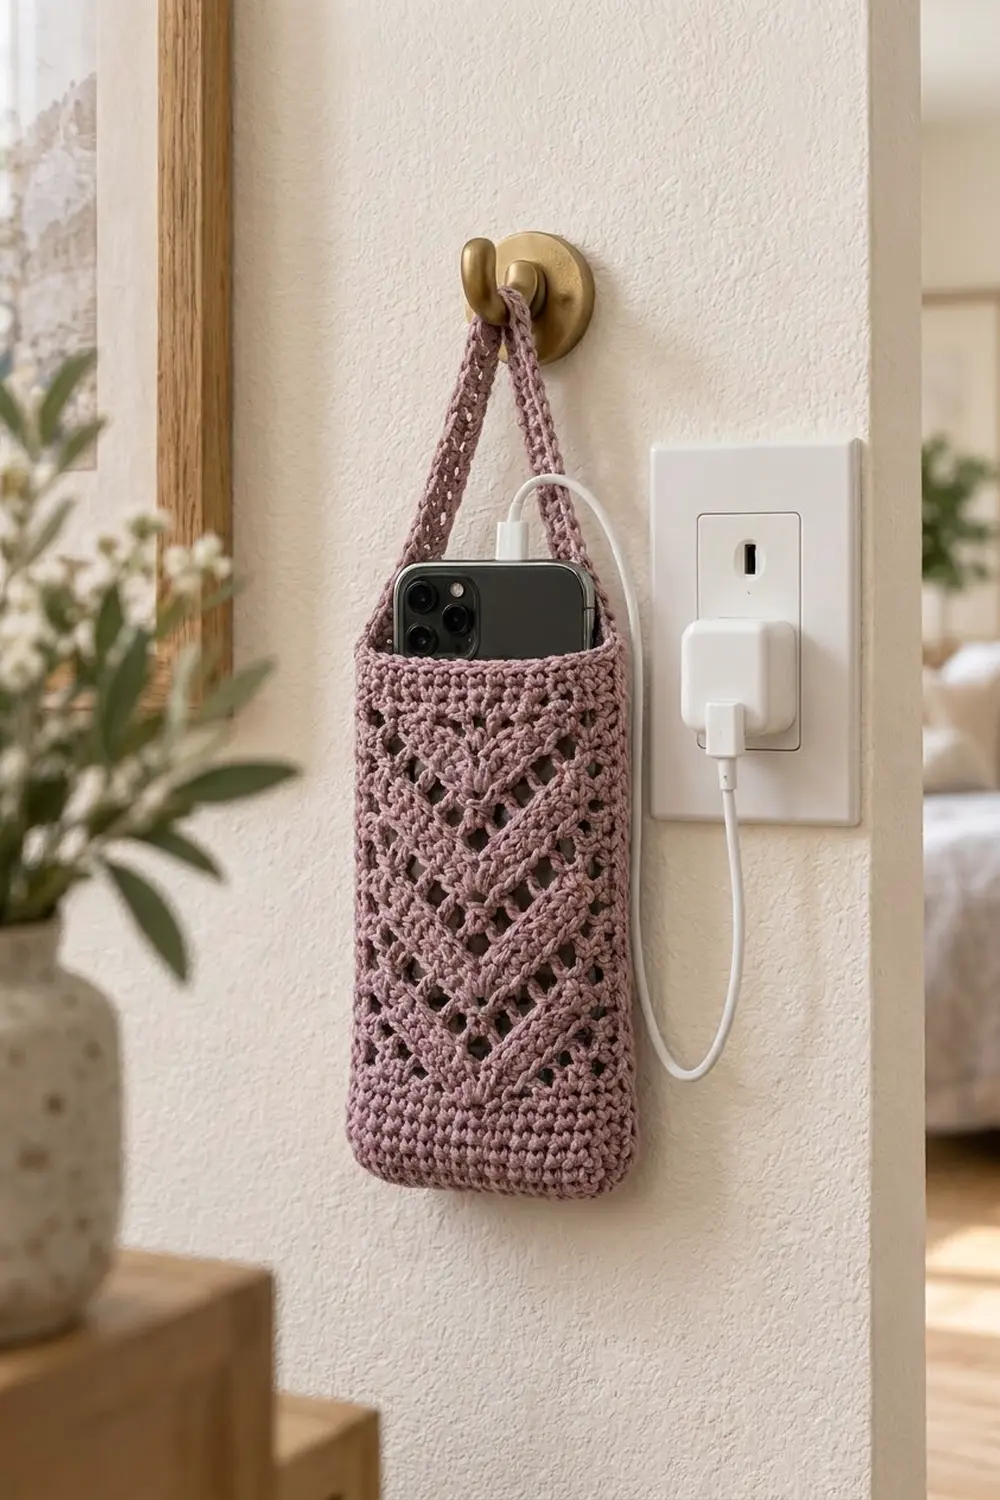
This hanging phone holder keeps your phone off the counter while it charges. It is a slim, tall pouch in soft dusty mauve cotton. Open lace rounds form nested chevrons that point down toward the base, and solid single-crochet bands sit at the bottom and the rim to frame the lace. A narrow strap rises from both side folds, so it hangs neatly from a wall hook or a drawer knob.
The design is quiet and modern. The mesh lets you see a little of the phone, and the solid bands give the pouch enough structure to stand upright. The chevron repeats on both front and back, so the holder looks the same whichever way it hangs.
The pattern uses US crochet terms. The finished pouch measures about 4 in (10.2 cm) wide when flat, 6.25 in (15.9 cm) tall and 0.8 in (2.0 cm) deep. The strap is 12 in (30.5 cm) long.
You start with a small flat rectangle for the base. You then work the walls in joined rounds without turning: a solid band, ten chevron lace rounds and a solid top band. The strap is worked in rows from one side fold and joined to the opposite fold with slip stitches. The result is one continuous piece with no separate panels to sew.
Finished Size and Construction
- Finished size: 4 in (10.2 cm) wide flat x 6.25 in (15.9 cm) tall x 0.8 in (2.0 cm) deep
- Circumference: 8 in (20.3 cm), 36 stitches
- Strap: 12 in (30.5 cm) long x 0.67 in (1.7 cm) wide
- Skill level: Easy-intermediate
- Terminology: US
- Yarn weight: Worsted (#4) cotton
- Hook: 4.0 mm (G-6)
- Number of pieces: 1 (base, walls and strap are worked as one continuous piece)
- Layout: A single upright pouch with a strap from side fold to side fold
- Base size: 3.1 in (7.9 cm) x 0.8 in (2.0 cm)
- Size before top band: 4 in (10.2 cm) wide x 5.45 in (13.8 cm) tall
- Top band depth: 0.8 in (2.0 cm), 4 rounds
Materials
Yarn: Use a smooth worsted-weight cotton or cotton blend. Cotton holds the lace shape, resists stretching under the phone’s weight and shows stitch definition well. Avoid fuzzy or very stretchy acrylics, because the strap can lengthen over time.
- Dusty Mauve: 55 g, about 100 m (109 yd)
The quantity includes a margin of about 20% for your gauge swatch and for tension differences.
Tools:
- 4.0 mm (G-6) crochet hook
- Tapestry needle
- Scissors
- 2 locking stitch markers
- Measuring tape or ruler
- Rust-proof pins and a blocking surface
- Optional: a phone-sized piece of card for blocking
Abbreviations (US Terms)
- ch – chain
- sl st – slip stitch
- sc – single crochet
- sc2tog – single crochet 2 together
- dc – double crochet
- BLO – back loop only
- sk – skip
- st(s) – stitch(es)
- sp – space
- RS – right side
Special lace units (each one uses 2 stitches):
- M (mesh unit): Dc in next st, ch 1, sk next st.
- S (solid unit): Dc in each of next 2 sts.
In the lace rounds, every dc and every ch-1 space counts as 1 stitch. When you work “in next st” and that stitch is a ch-1 space, insert your hook into the space under the chain. Each lace round has 36 stitches, made of 18 units (9 per face).
Beginning of a round: If the round starts with M, ch 4 (counts as dc and ch 1), then sk next st. If it starts with S, ch 3 (counts as dc), then dc in next st. Always join with sl st to the 3rd ch of the beginning chain.
Gauge and Checkpoints
Gauge: 18 sc x 20 rows = 4 in (10.2 cm), and 18 dc x 9 rows = 4 in (10.2 cm).
The pouch itself is your best test piece. Make the base and Rounds 1–5, then measure before you go on. That takes about 15 minutes and protects the whole fit.
Checkpoints:
- Base: 3.1 in (7.9 cm) x 0.8 in (2.0 cm).
- After Round 5: Flattened width is 4 in (10.2 cm) and the band is 1 in (2.5 cm) tall above the base edge.
- After Round 15: Total height is 5.45 in (13.8 cm).
- After Round 19: Total height is 6.25 in (15.9 cm).
- Strap: 12 in (30.5 cm) before you join it.
If your piece is too big: Go down half a hook size, to 3.75 mm. If the sc is right but the lace rounds are too tall, try pulling up a slightly shorter loop on each dc.
If your piece is too small: Go up half a hook size, to 4.5 mm. A pouch that is too small will not fit a phone in a case, so fix this before the lace section.
Pattern
Base
Worked flat in rows.
Foundation: Ch 15.
Row 1: Sc in 2nd ch from hook and in each ch across. (14 sts)
Rows 2–4: Ch 1, turn, sc in each st across. (14 sts)
Fasten off, leaving a 6 in (15.2 cm) tail. The base should be 3.1 in (7.9 cm) x 0.8 in (2.0 cm).
Walls: Bottom Band
Worked in joined rounds with RS facing. Do not turn.
Round 1 (pick-up round): Join yarn in the end of Row 3 on either short end. This puts the start of the round in the middle of a short end, which becomes a side fold.
Ch 1, sc in the same row-end, then sc in the end of Row 4. Rotate and sc in each of the 14 sts across Row 4. Sc in the ends of Rows 4, 3, 2 and 1 on the second short end. Rotate and sc in each of the 14 foundation chains on the opposite side. Sc in the ends of Rows 1 and 2. Join with sl st to the first sc.
Count: 2 + 14 + 4 + 14 + 2 = 36 sts.
Place marker A in st 1, at side fold A. Place marker B in st 19. Side fold B sits between sts 18 and 19. Sts 1–18 are the front face and sts 19–36 are the back face. Each face has 14 long-side sts plus 2 sts from each half short end, which makes 18.
Round 2: Ch 1, sc in BLO of each st around, join. (36 sts) This makes a crisp ridge where the base turns up into the walls.
Rounds 3–5: Ch 1, sc in each st around, join. (36 sts)
Checkpoint: Flattened width is 4 in (10.2 cm). The band is 1 in (2.5 cm) tall.
Walls: Chevron Lace
Each face repeats the 9-unit sequence below, so each round works the sequence twice: once for the front (sts 1–18) and once for the back (sts 19–36). The center of each face falls between its 9th and 10th sts, which is unit 5. Each round the solid units move outward by one unit, so the solid lines climb in a V away from the center.
Round 6 (Chevron A): Work (M, M, M, M, S, M, M, M, M) twice. Join. (36 sts: 20 dc and 16 ch-1 sps)
Round 7 (Chevron B): Work (M, M, M, S, M, S, M, M, M) twice. Join. (36 sts: 22 dc and 14 ch-1 sps)
Round 8 (Chevron C): Work (M, M, S, M, M, M, S, M, M) twice. Join. (36 sts: 22 dc and 14 ch-1 sps)
Round 9 (Chevron D): Work (M, S, M, M, M, M, M, S, M) twice. Join. (36 sts: 22 dc and 14 ch-1 sps)
Round 10 (Chevron E): Work (S, M, M, M, M, M, M, M, S) twice. Join. (36 sts: 22 dc and 14 ch-1 sps)
In Round 10 the S units meet at each side fold, so you will see 4 solid dc there. That is correct.
Rounds 11–15: Repeat Rounds 6–10 once. (36 sts each round)
You now have two nested chevrons on each face. Checkpoint: The 10 lace rounds measure about 4.45 in (11.3 cm), and the total height is 5.45 in (13.8 cm).
Top Band (Border)
The top band frames the lace and gives the rim its structure.
Border gauge: 18 sc = 4 in (10.2 cm), the same as the bottom band, and 5 rounds = 1 in (2.5 cm).
Round 16 (conversion round): Ch 1, sc in each dc and each ch-1 sp around. The beginning chain counts as a dc. Join.
Count: 36 sts worked 1 per existing stitch + 0 added = 36 sts, with 18 on the front (sts 1–18) and 18 on the back (sts 19–36).
Rounds 17–19: Ch 1, sc in each st around, join. (36 sts: 18 front + 18 back)
Fasten off with an invisible join.
Why the math works: Every round from Round 1 to Round 19 has 36 stitches, so the walls stay straight with no flare. Each face has 18 sts, and 18 ÷ 4.5 sts per in = 4.0 in (10.2 cm), which matches the flattened width of the base band. The top band adds 4 sc rounds at 0.2 in each, for 0.8 in (2.0 cm). Total height is 1.0 in + 4.45 in + 0.8 in = 6.25 in (15.9 cm).
Strap
Worked in rows from side fold A.
Row 1 (trim row): With RS facing, join yarn with a standing sc in st 35. Sc2tog over sts 36 and 1, then sc in st 2. Count: 2 sts worked 1 per stitch + 1 sc2tog worked over 2 sts = 3 sts. The sc2tog sits right on fold A, so the strap is centered.
Rows 2–60: Ch 1, turn, sc in each st across. (3 sts)
Checkpoint: The strap measures 12 in (30.5 cm).
Attach the strap: Bring the strap over the opening to fold B and check that it is not twisted. Line up the 3 strap sts over body sts 17–20 so that the middle strap st sits on the fold. Sl st through the first strap st and st 17. Then sl st through the middle strap st and sts 18 and 19 together. Finally, sl st through the last strap st and st 20. Fasten off.
Weave in all ends, including the base tail. Run each tail through solid stitches, not through the mesh.
Final Blocking
- Wet the pouch in cool water and press out the excess. Do not wring it.
- Roll it in a towel to remove more moisture.
- Slide a phone-sized piece of card, about 4 in (10.2 cm) wide, inside the pouch to square up the walls.
- Lay it flat with the folds at markers A and B as the side edges.
- Pin the mesh lightly so the chevron lines run in clean diagonals and the ch-1 spaces open evenly.
- Check the width, 4 in (10.2 cm), and the height, 6.25 in (15.9 cm).
- Pin the strap flat at 12 in (30.5 cm) without stretching it.
- Let it dry completely, then remove the card.
Final Quality-Control Checklist
- Every round from 1 to 19 has 36 sts.
- Each lace round has 18 units, 9 per face.
- The chevron points sit at the center of both the front and the back.
- The chevrons point down toward the base.
- The 4 solid dc in Rounds 10 and 15 line up with the side folds.
- The strap has 3 sts and 60 rows.
- The strap is centered on both folds and is not twisted.
- The pouch measures 4 in (10.2 cm) x 6.25 in (15.9 cm).
- All ends are woven securely into solid stitches.
Troubleshooting
The chevron is off-center. Round 1 probably did not start in the middle of a short end. Check marker A. Sts 1–18 must form one face.
A lace round has too many or too few stitches. You may have skipped a ch-1 sp or worked twice into the beginning chain. Count the units: there should be 9 per face.
The pouch flares at the top. Your dc tension is looser than your sc tension. Work Round 16 with a 3.75 mm hook.
The walls lean or twist. Joined rounds can drift. Join into the top of the beginning chain every time, never into the next stitch.
The strap stretches when the phone is in. Remake the strap with a 3.75 mm hook. You can also add a row of sl sts along each long edge to stiffen it.
The base corners pucker. You probably worked extra stitches into the row-ends. Use exactly 4 sts on each short end.
Care
Hand wash in cool water and lay flat to dry, reshaping it over card. Do not tumble dry, because cotton can shrink and the strap can distort.
Final Notes
Everything in this pattern depends on one number: 36 stitches. The 14 x 4 base gives 36 sts in Round 1. Each 18-stitch face measures 4 in (10.2 cm) at a gauge of 4.5 sts per inch. Those 36 stitches stay constant through the bottom band, the ten chevron rounds and the top band. The heights add up from 1 in (2.5 cm) of bottom band to 5.45 in (13.8 cm) after the lace, and to 6.25 in (15.9 cm) after the top band. A 3-stitch, 60-row strap adds 12 in (30.5 cm) for hanging. Check each measurement as you go and the holder will fit, hang straight and show a neat chevron on both faces.
Happy crocheting!