

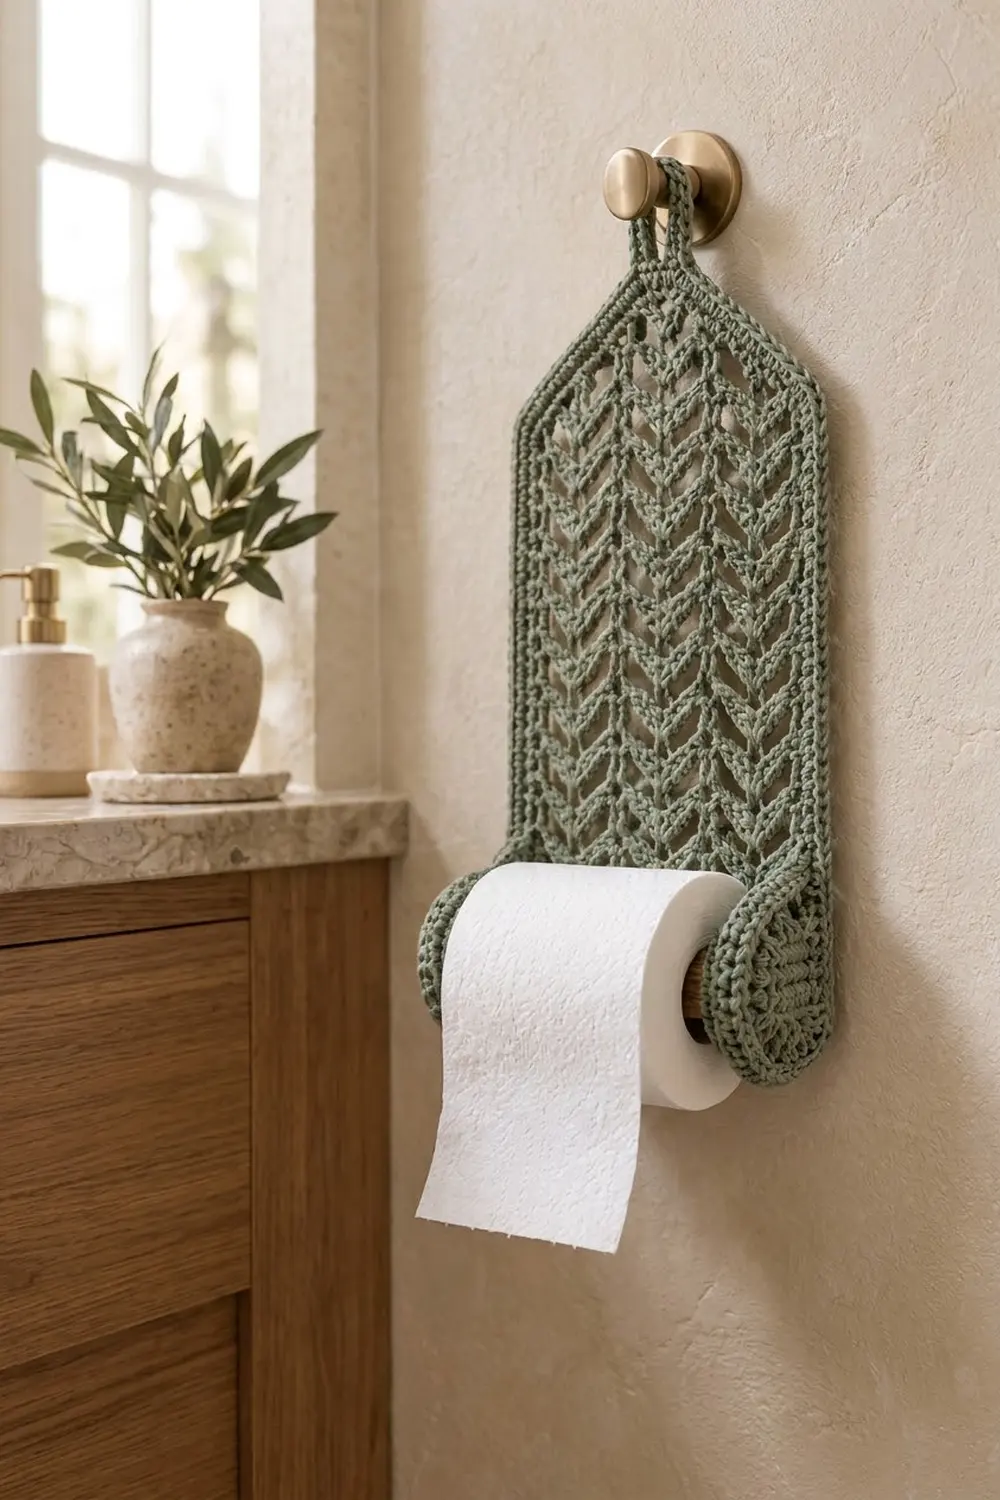
This wall-hanging toilet paper holder pairs a tall lace panel with a firm, removable roll bar. Stacked shells form soft chevron columns that run the full length of the panel. Slim double crochet lines and open eyelets separate the columns. Angled shoulders taper to a narrow top, and a sturdy loop hangs the piece from a single hook.
The sample uses one sage green cotton, which looks calm against wood, stone, and cream walls. A rope-like reverse single crochet edge outlines the panel and both side rings.
All instructions use US crochet terms. The finished panel measures 6 in (15.2 cm) wide by 14 in (35.6 cm) tall. The hanging loop adds 1 1/2 in (3.8 cm), for a total hanging length of about 15 1/2 in (39.4 cm).
You crochet the lace panel flat from the bottom up and shape the top with stepped rows. Then you add a three-round border and the loop. The roll bar is a closed tube worked over a wooden dowel. Two flat rings are sewn to the panel sides, and the bar slides through them.
Finished Size and Construction
- Finished panel size: 6 in (15.2 cm) x 14 in (35.6 cm), plus loop
- Skill level: Intermediate
- Terminology: US crochet terms
- Yarn weight: DK (#3) cotton
- Hook: 4.0 mm (G-6)
- Number of pieces: 4 (1 lace panel with integrated loop, 1 roll bar, 2 side rings)
- Layout: one vertical panel, with the bar held horizontally between two rings near the bottom
- Lace center before border: 5 in (12.7 cm) x 13 in (33.0 cm)
- Border depth: about 1/2 in (1.3 cm), 3 rounds
- Roll bar: about 7 1/4 in (18.4 cm) long, about 1 1/8 in (2.9 cm) in diameter
- Side rings: about 3 in (7.6 cm) outer diameter
Materials
Use a smooth, mercerized or combed DK cotton. Cotton holds its shape on the wall, resists stretching under a roll, and shows the chevrons clearly. Avoid fuzzy or very soft acrylics, which can sag over time.
Yarn (about 225 m per 100 g):
- Sage green: 100 g (225 m) total
- Panel, border, and loop: about 65 g (146 m)
- Roll bar: about 15 g (34 m)
- Two rings: about 10 g (23 m)
These quantities include a margin of about 10 g for gauge differences and swatching.
Tools:
- 4.0 mm (G-6) crochet hook
- Wooden dowel, 1 in (2.5 cm) in diameter, cut to 7 in (17.8 cm), with sanded ends
- Tapestry needle and scissors
- Stitch markers (at least 4)
- Measuring tape
- Blocking mat, rust-proof pins, and spray bottle
Abbreviations (US Terms)
- ch – chain
- sl st – slip stitch
- sc – single crochet
- dc – double crochet
- sc2tog – single crochet 2 together
- BLO – back loop only
- sp – space
- st(s) – stitch(es)
- sk – skip
- MR – magic ring
- RS / WS – right side / wrong side
- rev sc – reverse single crochet (crab stitch)
Special stitches:
- Shell: (2 dc, ch 1, 2 dc) in the same st or sp.
- Half shell: 2 dc in the same sp. At the start of a row, ch 3 counts as the first dc.
- Reverse sc: Work from left to right (if you crochet right-handed). Insert the hook in the next st to the right, yarn over, and pull up a loop. Yarn over again and pull through both loops.
Gauge and Checkpoints
Single crochet gauge: 20 sc and 22 rows = 4 in (10.2 cm).
Lace gauge: 1 pattern repeat (6 foundation sts) = 1.2 in (3.0 cm) wide. 10 lace rows = 4 in (10.2 cm) tall, so each row is 0.4 in (1.0 cm).
Test the first piece before you commit to it. Work the foundation and 10 lace rows of the panel, then measure. If the numbers match, this swatch simply becomes the start of your panel.
Checkpoints:
- Foundation (25 sc): 5 in (12.7 cm) wide.
- After Row 10: 4 in (10.2 cm) of lace above the foundation.
- After Row 29: 11.8 in (30.0 cm) total height.
- After Taper Row 3: 13 in (33.0 cm) total height.
- After the border: 6 in (15.2 cm) x 14 in (35.6 cm).
Too big? Go down one hook size. Too small? Go up one hook size. If only the height is off, check how you make your dc. A relaxed, even yarn over keeps each row at 0.4 in (1.0 cm).
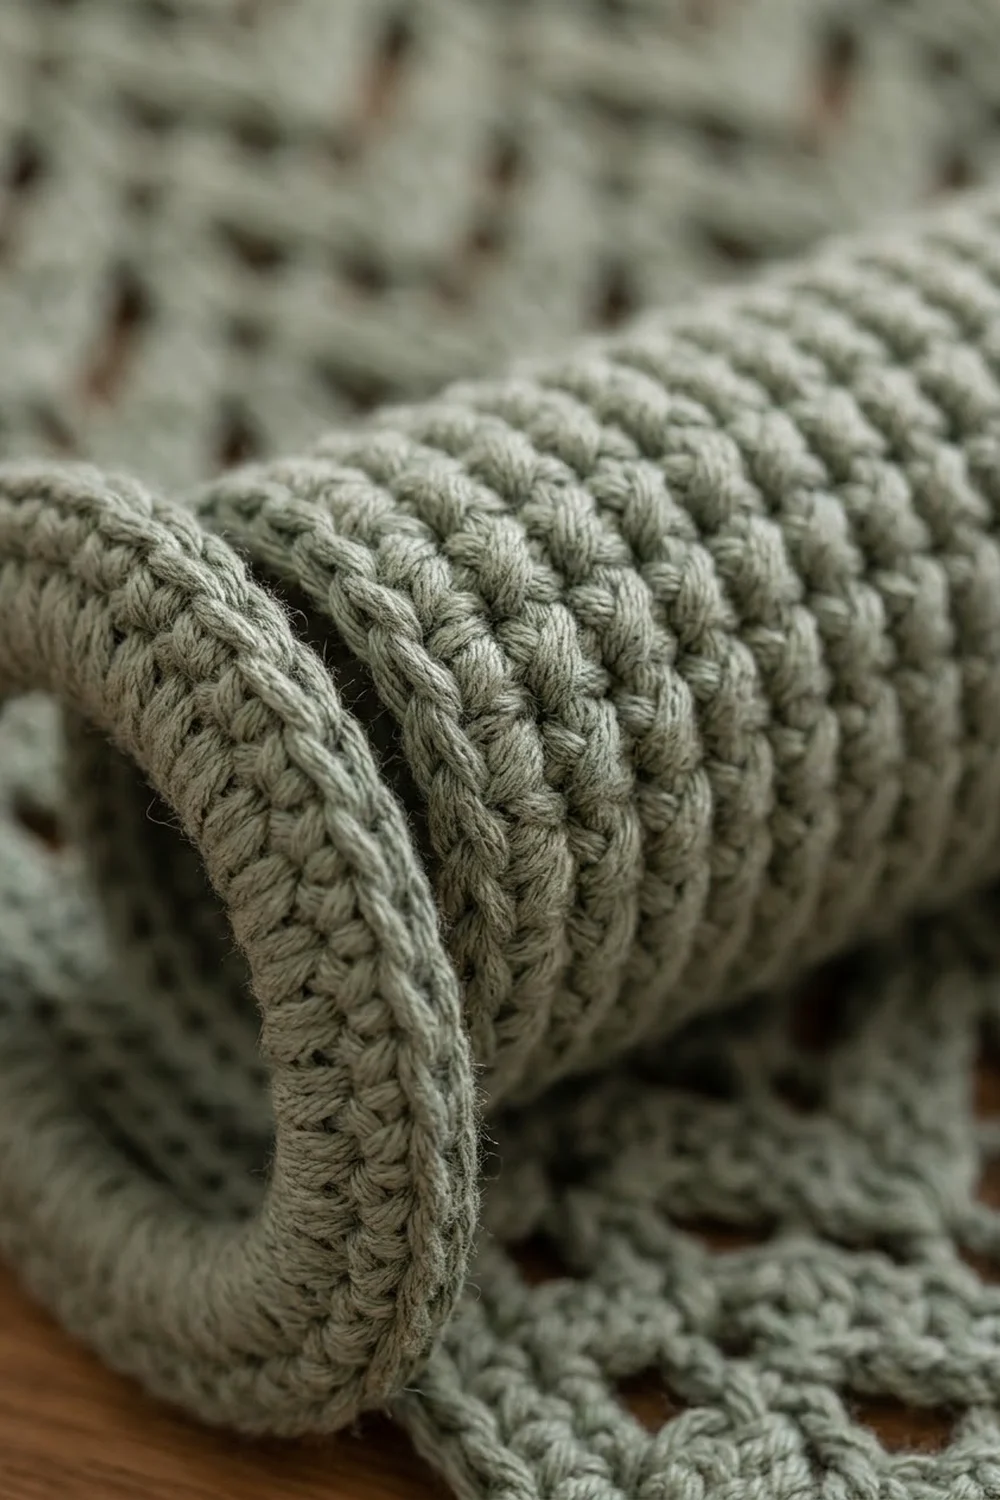
Lace Panel
Work the panel flat in rows, from bottom to top. The lace is a multiple of 6 sts + 1.
Foundation: Ch 26. Sc in 2nd ch from hook and in each ch across. (25 sc)
Row 1 (RS): Ch 4 (counts as dc + ch 1), sk next 2 sc, shell in next sc. *Ch 1, sk 2 sc, dc in next sc, ch 1, sk 2 sc, shell in next sc; rep from * 2 more times. Ch 1, sk 2 sc, dc in last sc. Turn.
Count: 4 shells, 5 single dc (including the turning ch), 8 ch-1 sps. The shells sit over foundation sts 4, 10, 16, and 22. The separator dc sit over sts 7, 13, and 19.
Row 2: Ch 4 (counts as dc + ch 1), shell in ch-1 sp of next shell. *Ch 1, dc in next separator dc, ch 1, shell in ch-1 sp of next shell; rep from * 2 more times. Ch 1, dc in 3rd ch of turning ch. Turn.
Count: 4 shells, 5 single dc, 8 ch-1 sps.
Rows 3–29: Repeat Row 2.
Each shell is worked into the shell below it. The dc pairs lean outward, so each stack of shells forms a vertical column of chevrons. The separator dc stack into thin lines with an eyelet on each side.
Checkpoint: 11.8 in (30.0 cm) tall and 5 in (12.7 cm) wide.
Top Taper
Each taper row steps in by half a repeat, 0.6 in (1.5 cm), on each side. This forms the angled shoulders.
Taper Row 1: Sl st in first ch-1 sp, sl st in each of next 2 dc, sl st in ch-1 sp of first shell. Ch 3 (counts as dc), dc in same sp (half shell). *Ch 1, dc in next dc, ch 1, shell in next shell sp; rep from * once more. Ch 1, dc in next dc, ch 1, 2 dc in ch-1 sp of last shell. Leave the remaining sts unworked. Turn.
Count: 2 half shells, 2 shells, 3 separator dc, 6 ch-1 sps.
Taper Row 2: Sl st in each of first 2 dc, sl st in next ch-1 sp, sl st in next dc. Ch 4 (counts as dc + ch 1), shell in next shell sp, ch 1, dc in next dc, ch 1, shell in next shell sp, ch 1, dc in next dc. Leave the remaining sts unworked. Turn.
Count: 2 shells, 3 dc, 4 ch-1 sps.
Taper Row 3: Sl st in first ch-1 sp, sl st in each of next 2 dc, sl st in shell sp. Ch 3 (counts as dc), dc in same sp, ch 1, dc in next dc, ch 1, 2 dc in next shell sp. Fasten off.
Count: 5 dc, 2 ch-1 sps (7 sts).
Checkpoint: 13 in (33.0 cm) tall, with a top edge about 1 1/2 in (3.8 cm) wide.
Roll Bar
The bar is a closed sc tube worked in continuous spiral rounds. Mark the first st of each round.
Round 1: 6 sc in MR. (6)
Round 2: 2 sc in each st around. (12)
Round 3: *Sc in next st, 2 sc in next st; rep from * around. (18)
Round 4: Sc in BLO of each st around. (18) This round turns the flat end into the tube wall.
Rounds 5–41: Sc in each st around. (18)
Checkpoint: Rounds 4–41 make 38 rounds, about 6.9 in (17.5 cm) long. The circumference is 18 sc, or 3.6 in (9.1 cm).
Slide the dowel into the tube. It should fit snugly against the closed end.
Round 42: Working in BLO, *sc in next st, sc2tog; rep from * around. (12)
Round 43: Sc2tog around. (6)
Fasten off. Weave the tail through the front loops of the last 6 sts, pull tight, and bury the end.
Side Rings (Make 2)
Round 1: Ch 18 and sl st in first ch to form a ring, without twisting. Ch 1, sc in each ch around, sl st to first sc. (18)
Rounds 2–5: Ch 1, *sc in next X sts, 2 sc in next st; rep from * around, sl st to first sc. In each round, X is the number of sc before the increase:
- Round 2: X = 2. (24)
- Round 3: X = 3. (30)
- Round 4: X = 4. (36)
- Round 5: X = 5. (42)
Round 6: Ch 1, rev sc in each st around, sl st to first st. (42) Fasten off, leaving a 12 in (30.5 cm) tail for sewing.
Checkpoint: each ring lies flat and measures about 3 in (7.6 cm) across. The center hole should match the bar’s 3.6 in (9.1 cm) circumference.
Make All Pieces
All pieces are sage green:
- Lace panel: 1
- Roll bar: 1
- Side rings: 2
Assembly layout (front view):
            [ loop ]
          /----------\
         /  chevron   \
        |  lace panel  |
        |  4 columns   |
        |              |
     (O)|==============|(O)   <- ring, bar, ring
        |              |
        +--------------+
The rings sit on the left and right edges of the panel, centered 3 in (7.6 cm) above the bottom edge.
Border
Finish the border before you attach anything. Work every round with the RS facing.
Border gauge: 5 sc per 1 in (2.5 cm) along the edge. 3 rounds make a border about 1/2 in (1.3 cm) deep.
How the counts work: The bottom count includes both bottom corner groups. The side, shoulder, and top counts cover the stitches along that edge only, so no stitch is counted twice.
Round 1: Join yarn in the first foundation st at the bottom right corner.
- Bottom: Ch 1, 3 sc in first st (corner), sc in next 23 sts, 3 sc in last st (corner). (29)
- Left side: 1 sc in the foundation row end, then 2 sc in each of the 29 lace row ends. (59)
- Left shoulder: Work 2 sc across the step at the top of Row 29 and 2 sc in the Taper Row 1 end. Work 2 sc across the next step and 2 sc in the Taper Row 2 end. Work 1 sc across the last step and 2 sc in the Taper Row 3 end. (11)
- Top: Sc in each dc and each ch-1 sp of Taper Row 3. (7)
- Right shoulder: Mirror the left shoulder in this order: 2, 1, 2, 2, 2, 2. (11)
- Right side: 2 sc in each of the 29 lace row ends, then 1 sc in the foundation row end. (59)
- Sl st to first sc.
Total: 29 + 59 + 11 + 7 + 11 + 59 = 176 sc.
Round 2: Ch 1 and sc in each st around, with these increases: work 3 sc in the center sc of each bottom corner group, and 2 sc in the first and last sc of each shoulder. Sl st to first sc.
Count: 176 sts worked 1-per-stitch + 8 extra sts (2 at each bottom corner and 1 at each of the 4 shoulder turns) = 184. By section: bottom 33, each side 59, each shoulder 13, top 7.
Round 3: Ch 1, rev sc in each st around, sl st to first st. (184) Fasten off.
Hanging loop: Join yarn in the 3rd st of the top section. Ch 18, sk next st, and sl st in the 5th st of the top section. Ch 1, work 22 sc into the ch-18 loop, then sl st in the 3rd st. Fasten off. The loop stands about 1 1/2 in (3.8 cm) tall.
Why the math works:
- Sides: Each side is 11.8 in (30.0 cm) tall. At 5 sc per inch, it needs 59 sc, which is exactly 1 + (2 x 29).
- Bottom: You work 1 sc into each of the 25 foundation sts, plus 2 extra at each corner for the turn.
- Shoulders: Each shoulder runs about 2.2 in (5.6 cm) on the diagonal, which fits 11 sc.
- Round 2: The extra stitches go only where the edge turns outward, so the border lies flat.
Joining
Sew the rings to the panel with whipstitch, using the long ring tails.
- Lay the panel RS up. On each side edge, count 15 border sts up from the bottom corner group and place a marker. The marker sits 3 in (7.6 cm) above the bottom edge.
- Hold a ring upright, perpendicular to the panel face, with its rim flush against the panel’s side edge.
- Match 6 sts of the ring’s Round 6 to 6 sts of the panel’s Round 3, centered on the marker (3 below, 3 above). Work 1 whipstitch through each matched pair, stitch to stitch.
- Whipstitch back over the same 6 sts in the opposite direction to make a stronger cross-stitch seam.
- Repeat on the other side at the same 15th-stitch position so the rings are level.
Tension: Make each stitch snug enough to close any gap, but not so tight that the panel edge puckers.
Size checkpoint: The inner faces of the rings should be 6 in (15.2 cm) apart. Push the bar through both rings; about 1/2 in (1.3 cm) should stick out past each ring. A standard roll, about 4 1/2 in (11.4 cm) wide, fits with room to spin.
Final Blocking
- Before you attach the rings, mist the panel until it is damp but not dripping.
- Pin it RS up on a blocking mat to 6 in (15.2 cm) x 14 in (35.6 cm).
- Pin along each separator line so the chevron columns run straight.
- Pin the two shoulders to matching angles, with the top about 2 1/2 in (6.4 cm) wide.
- Shape the loop into an even arch.
- Pin the rings flat and round at 3 in (7.6 cm) across.
- Let everything dry completely, 12 to 24 hours, before you assemble the holder.
Final Quality-Control Checklist
- The foundation has 25 sc, and every lace row has 4 shells and 5 single dc.
- All 4 chevron columns run straight.
- The shoulders mirror each other, and the top edge has 7 sts.
- Border Round 3 has 184 sts and lies flat.
- The panel measures 6 in (15.2 cm) x 14 in (35.6 cm), plus the loop.
- Both bar ends are closed, and the dowel doesn’t show.
- The rings are level, 3 in (7.6 cm) above the bottom edge.
- The bar slides out of a ring with a firm pull but doesn’t slip out on its own.
- All ends are woven in on the WS.
Troubleshooting
Chevrons drift sideways. A shell went into the wrong place. Work each shell into the center ch-1 sp of the shell below it.
Border ripples. You have too many sts along the row ends. In Round 1, work 2 sc in every other row end and 1 sc in the rest. Then recount Round 2 to match.
Border pulls in. Add 1 sc in every 5th row end along the sides in Round 1.
Bar is loose in the rings. Start the rings with ch 16 instead of ch 18.
Panel sags under the roll. Switch to a firmer cotton, or stitch clear plastic canvas behind the lower section.
Care
Slide out the bar and spot clean it, because the dowel is sealed inside. Hand wash the panel in cool water with mild soap, then dry it flat and reshape it to size.
Final Notes
Every measurement builds on the one before:
- 25 foundation sc make 5 in (12.7 cm) of width.
- 29 lace rows reach 11.8 in (30.0 cm).
- 3 taper rows bring the height to 13 in (33.0 cm).
- The 184-stitch border finishes the panel at 6 in (15.2 cm) x 14 in (35.6 cm).
- The 18-stitch bar matches the 18-chain rings, which sit 6 in (15.2 cm) apart.
Check each stage against these numbers and the holder will hang straight. Happy crocheting!