
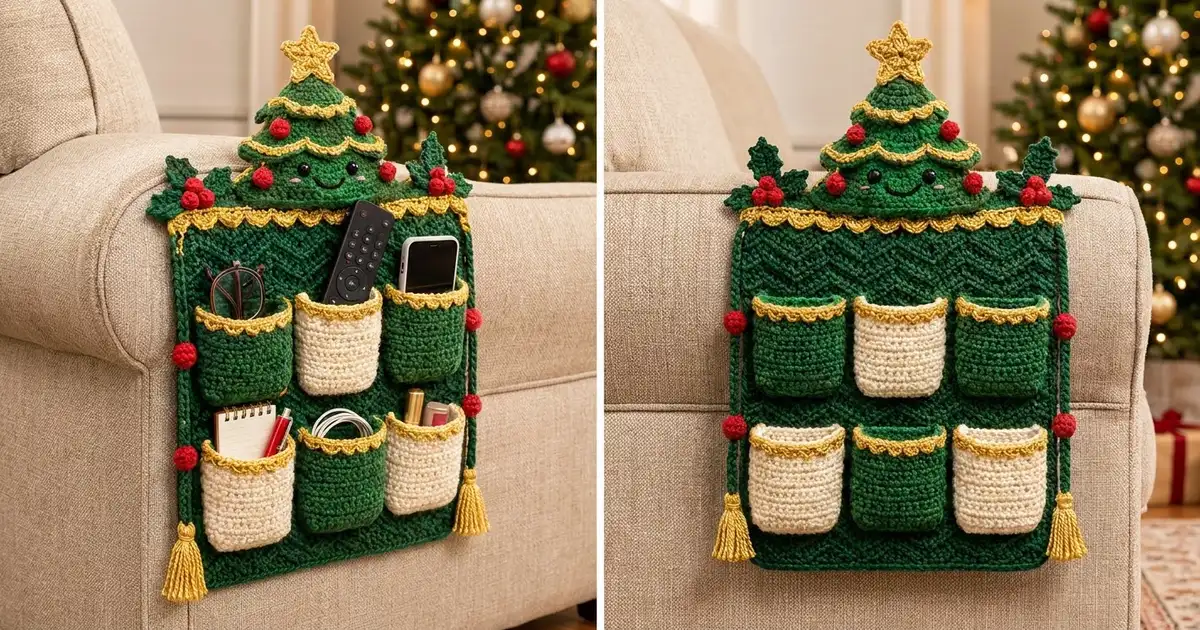
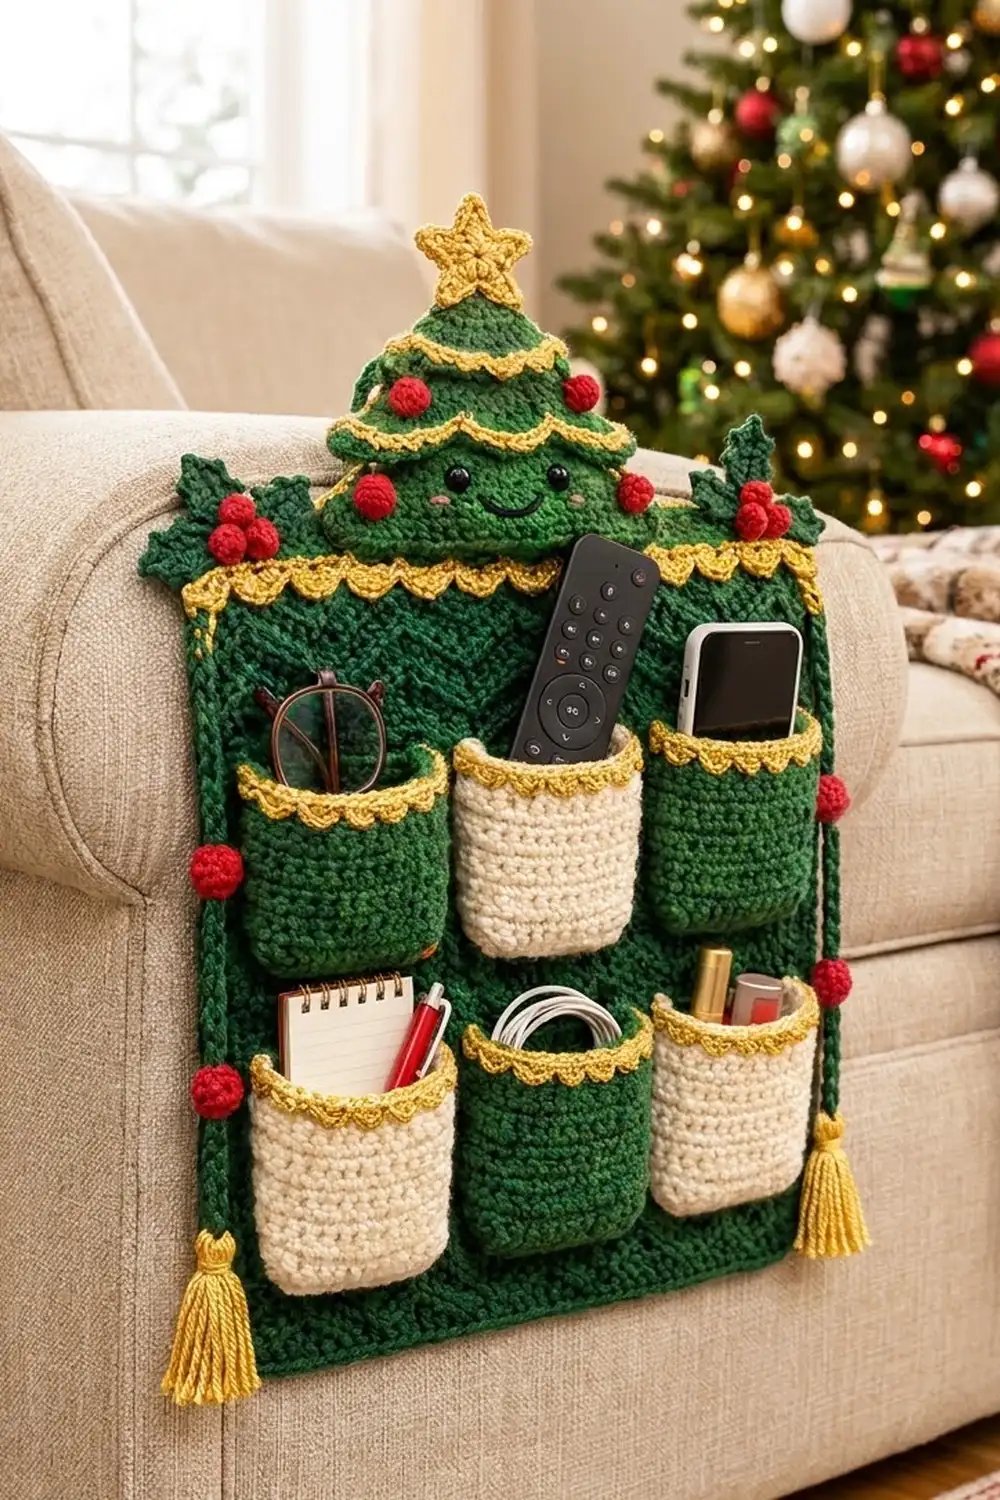
This cheerful armchair caddy keeps your remotes, phones, glasses and notepads in one tidy place and adds some holiday charm to the sofa. A deep green chevron panel holds six neat pockets, and a smiling Christmas tree with a gold star peeks over the top edge.
The colors are classic and cozy: forest green, warm cream, berry red and metallic gold. The pockets alternate green and cream in two rows of three, and each has a tiny gold scalloped edge. Holly sprigs sit at the top corners. Green side cords dotted with red berries end in gold tassels.
The pattern uses US crochet terms. The bordered panel measures 13.25 x 17 in (33.7 x 43.2 cm). With the tree in place, the caddy is about 21.25 in (54.0 cm) tall.
You’ll make a flat chevron panel, six flat pockets, a three-tier tree with a star, holly leaves, berries, two cords and two tassels. You sew the pockets on first, then add the border and gold trim, and stitch the decorations on last.
Finished Size and Construction
- Finished size: 13.25 x 17 in (33.7 x 43.2 cm) panel; about 21.25 in (54.0 cm) tall with the tree
- Skill level: Intermediate
- Terminology: US
- Yarn weight: Worsted (#4)
- Hook: 5.0 mm (H-8)
- Number of pieces: 1 panel, 6 pockets, 3 tree tiers, 1 star, 4 holly leaves, 16 berries, 2 cords, 2 tassels
- Layout: 3 pockets across x 2 rows on the lower half of the panel
- Pocket size: 3.25 x 4 in (8.3 x 10.2 cm) before the gold trim
- Size before border: 12.25 x 16 in (31.1 x 40.6 cm)
- Border depth: 0.5 in (1.3 cm) per side, plus a gold scallop trim across the top
Materials
Choose a smooth acrylic or cotton-acrylic worsted yarn. It shows the chevron texture crisply and holds up to daily handling. For the gold, a metallic-blend worsted gives shine without feeling scratchy.
- Forest green: 230 g (about 420 m)
- Cream: 40 g (about 73 m)
- Gold metallic blend: 20 g (about 37 m)
- Berry red: 10 g (about 18 m)
- Black: a short length for the smile
- Pink embroidery floss: a short length for the cheeks
These amounts include about a 10 percent margin for gauge swatches and sewing tails.
Tools:
– 5.0 mm (H-8) crochet hook
– Tapestry needle
– Stitch markers
– Two 9 mm black safety eyes (or embroidered eyes)
– 3 in (7.6 cm) piece of cardboard
– Rust-proof pins, a ruler and blocking mats
– Scissors
Abbreviations (US Terms)
- ch – chain
- sl st – slip stitch
- sc – single crochet
- hdc – half double crochet
- dc – double crochet
- sc2tog – single crochet 2 together
- st(s) – stitch(es)
- sp – space
- RS – right side
- rep – repeat
Special stitches:
- sc3tog: (Insert hook in next st, yo, pull up a loop) 3 times, yo, pull through all 4 loops on hook. Uses 3 sts and makes 1.
- Gold scallop edge: Sl st in first st, *3 hdc in next st, sl st in next st; rep from * across. Work it over an odd number of sts. You get 1 scallop for every 2 sts.
- Picot: Ch 3, sl st in 3rd ch from hook.
Gauge and Checkpoints
Plain sc gauge: 16 sts and 18 rows = 4 in (10.2 cm).
Chevron gauge: 16 sts and 16 rows = 4 in (10.2 cm), measured straight across and straight up one column.
Make one pocket first. Before the trim, it should measure 3.25 x 4 in (8.3 x 10.2 cm). If it’s too big, go down a hook size. If it’s too small, go up a size.
For a chevron swatch, ch 26 and work Rows 1–16 of the panel, working each * section once only (25 sts). It should measure 6.25 in (15.9 cm) wide and 4 in (10.2 cm) tall.
Checkpoints:
– Panel after Row 16: 4 in (10.2 cm) tall
– Panel after Row 64: 12.25 x 16 in (31.1 x 40.6 cm)
– After Border Rnd 1: 12.75 x 16.5 in (32.4 x 41.9 cm)
– After Border Rnd 2: 13.25 x 17 in (33.7 x 43.2 cm)
If the panel comes out too wide or too narrow, change your hook size. Don’t add or remove chevron repeats, because the pocket layout depends on 49 sts.
Main Pattern
Back Panel (Green)
This is a straight-edged chevron. Leveling rows at the bottom and top fill in the dips so all four edges stay straight.
Foundation: Ch 50.
Row 1 (leveling): Sc in 2nd ch from hook and in next ch, hdc in next 2 ch, dc in next 5 ch, hdc in next 2 ch, *sc in next 3 ch, hdc in next 2 ch, dc in next 5 ch, hdc in next 2 ch; rep from * 2 more times, sc in last 2 ch. Turn. (49 sts)
Row 2 (chevron): Ch 1, sc2tog, sc in next 4 sts, *3 sc in next st, sc in next 4 sts, sc3tog, sc in next 4 sts; rep from * 2 more times, 3 sc in next st, sc in next 4 sts, sc2tog. Turn. (49 sts)
Each 12-st repeat uses 12 sts and makes 12 sts, so the count never changes. The peaks fall on sts 7, 19, 31 and 43. The valleys fall on sts 1, 13, 25, 37 and 49.
Rows 3–63: Rep Row 2. (49 sts)
Row 64 (leveling): Ch 2 (does not count as a st), dc in first 2 sts, hdc in next 2 sts, sc in next 5 sts, hdc in next 2 sts, *dc in next 3 sts, hdc in next 2 sts, sc in next 5 sts, hdc in next 2 sts; rep from * 2 more times, dc in last 2 sts. (49 sts)
Fasten off. The panel should measure 12.25 x 16 in (31.1 x 40.6 cm).
Pockets (Make 3 Green, 3 Cream)
Foundation: Ch 12.
Row 1: Sc in 2nd ch from hook and in each ch across. Turn. (11 sts)
Row 2: Ch 1, 2 sc in first st, sc in next 9 sts, 2 sc in last st. Turn. (13 sts) These increases round off the bottom corners.
Rows 3–18: Ch 1, sc in each st across. Turn. (13 sts)
Fasten off. The pocket should measure 3.25 x 4 in (8.3 x 10.2 cm).
Row 19 (gold trim): With RS facing, join gold in the first st of Row 18. Sl st in first st, *3 hdc in next st, sl st in next st; rep from * 5 more times. (6 scallops) Fasten off.
Tree Tiers (Green)
Each tier is a trapezoid worked from the bottom up and then trimmed with gold along its foundation edge.
Bottom tier: Ch 26.
– Row 1: Sc in 2nd ch from hook and in each ch across. Turn. (25 sts)
– Row 2: Ch 1, sc across. Turn. (25 sts)
– Rows 3–10: Ch 1, sc2tog, sc to last 2 sts, sc2tog. Turn. (Row 3: 23 sts; Row 10: 9 sts)
Middle tier: Ch 20.
– Row 1: Sc in 2nd ch from hook and in each ch across. Turn. (19 sts)
– Rows 2–7: Ch 1, sc2tog, sc to last 2 sts, sc2tog. Turn. (Row 7: 7 sts)
Top tier: Ch 14.
– Row 1: Sc in 2nd ch from hook and in each ch across. Turn. (13 sts)
– Rows 2–6: Ch 1, sc2tog, sc to last 2 sts, sc2tog. Turn. (Row 6: 3 sts)
– Row 7: Ch 1, sc3tog. (1 st)
Gold tier trim: Join gold in the first foundation ch of each tier and work the Gold scallop edge along the foundation edge. You’ll get 12 scallops on the bottom tier (25 sts), 9 on the middle tier (19 sts) and 6 on the top tier (13 sts).
The tier widths are 6.25 in (15.9 cm), 4.75 in (12.1 cm) and 3.25 in (8.3 cm). The bottom tier is about 2.2 in (5.6 cm) tall, and the other two are about 1.6 in (4.1 cm) tall.
Star (Gold)
Rnd 1: Magic ring, 10 sc in ring, join with sl st to first sc. (10 sc)
Rnd 2: *Ch 4, sc in 2nd ch from hook, hdc in next ch, dc in next ch, skip next sc, sl st in next sc; rep from * 4 more times. (5 points)
The star is about 1.75 in (4.4 cm) across.
Holly Leaves (Green, Make 4)
Ch 9. Sl st in 2nd ch from hook, sc in next ch, hdc in next ch, dc in next ch, picot, dc in next ch, hdc in next ch, sc in next ch, (sc, picot, sc) in last ch. Now work along the other side of the chain: sc in next ch, hdc in next ch, dc in next ch, picot, dc in next ch, hdc in next ch, sc in next ch, sl st in last ch. Fasten off. Each leaf is about 2 in (5.1 cm) long.
Berries (Red, Make 16)
Rnd 1: Magic ring, 6 sc in ring. (6 sc)
Rnd 2: Sc2tog 3 times. (3 sts)
Fasten off. Pull the ring closed, then weave the tail through the last sts to round it into a ball.
Side Cords (Green, Make 2)
Ch 64. Sl st in the back bump of the 2nd ch from hook and of each ch across. (63 sl sts) The cord is about 16 in (40.6 cm) long. Fold the top 2 in (5.1 cm) into a loop and stitch the end to the cord. This leaves 14 in (35.6 cm) of straight cord.
Tassels (Gold, Make 2)
Wrap gold yarn 20 times around the 3 in (7.6 cm) card. Tie the loops together at the top and cut them at the bottom. Wrap the neck 0.25 in (0.6 cm) below the tie and trim the tassel to about 2.5 in (6.4 cm). Tie one tassel to the end of each cord.
Make All Pieces
- Green: 1 panel, 3 pockets, 3 tree tiers, 4 holly leaves, 2 cords
- Cream: 3 pockets
- Gold: pocket trims, tier trims, panel trim, 1 star, 2 tassels
- Red: 16 berries (6 for the tree, 6 for the holly, 4 for the cords)
Pocket layout (G = green, C = cream):
Upper row:  [ G ] [ C ] [ G ]
Lower row:  [ C ] [ G ] [ C ]
Joining
Use green yarn to whipstitch each pocket to the panel along its sides and bottom. Leave the gold-trimmed top open.
Column placement: Count the panel sts in Row 64. The pockets cover columns 3–15, 19–31 and 35–47. That leaves 2 columns at each outer edge and 3 columns between pockets: 2 + 13 + 3 + 13 + 3 + 13 + 2 = 49.
Row placement: The lower pockets cover panel Rows 3–18, which puts them 0.5 in (1.3 cm) above the bottom edge. The upper pockets cover Rows 22–37, leaving a 0.75 in (1.9 cm) gap between the two rows. Chevron rows zigzag, so use a ruler to pin each pocket along straight lines instead of following one row.
Matching stitches: Sew the 11 foundation loops of the pocket bottom to the 11 center columns of its spot. Pocket rows run 4.5 per inch and panel rows run 4 per inch, so sew 9 pocket row-ends to every 8 panel rows. That way, 18 pocket rows match 16 panel rows.
Tension: Keep the whipstitches snug but not tight. Each pocket should lie flat, with no ripples and no gaps.
Checkpoint: The panel should still measure 12.25 x 16 in (31.1 x 40.6 cm), and the top of the upper pockets should sit 9.25 in (23.5 cm) above the bottom edge.
Border
Border gauge: 16 sc = 4 in (10.2 cm) along every edge. The border counts come only from the panel edges, because the pockets don’t touch the border.
The corners are ch-1 spaces. They’re counted separately from the sc counts for each side.
Rnd 1 (green): With RS facing, join green in the first st of Row 64. Sc in each of the 49 sts across the top, ch 1. Sc in each of the 64 row-ends down the side, ch 1. Sc in each of the 49 foundation loops across the bottom, ch 1. Sc in each of the 64 row-ends up the other side, ch 1. Join. (Top 49, sides 64, bottom 49: 226 sc plus 4 ch-1 corners)
Rnd 2 (green): Ch 1, sc in each sc and work (sc, ch 1, sc) in each corner sp. Join. (Top 51, sides 66, bottom 51: 234 sc plus 4 ch-1 corners)
Why the math works: The chevron gauge is 16 sts and 16 rows per 4 in, so 1 sc per row-end matches 1 sc per stitch along the top. Each round adds 1 sc at each end of every side, and each corner adds about one stitch width. After Rnd 2, the top has 51 sc + 2 corners = 53 widths. At 4 per inch, that’s 13.25 in (33.7 cm). Each side has 66 + 2 = 68 widths, or 17 in (43.2 cm).
Rnd 3 (gold trim, top only): With RS facing, join gold in the top-right corner sp. Work across 53 spots (corner sp, 51 sc, corner sp): sl st in corner sp, *3 hdc in next st, sl st in next st; rep from * 25 more times. The last sl st lands in the opposite corner sp. (26 scallops) Fasten off.
Attach the Tree, Holly and Cords
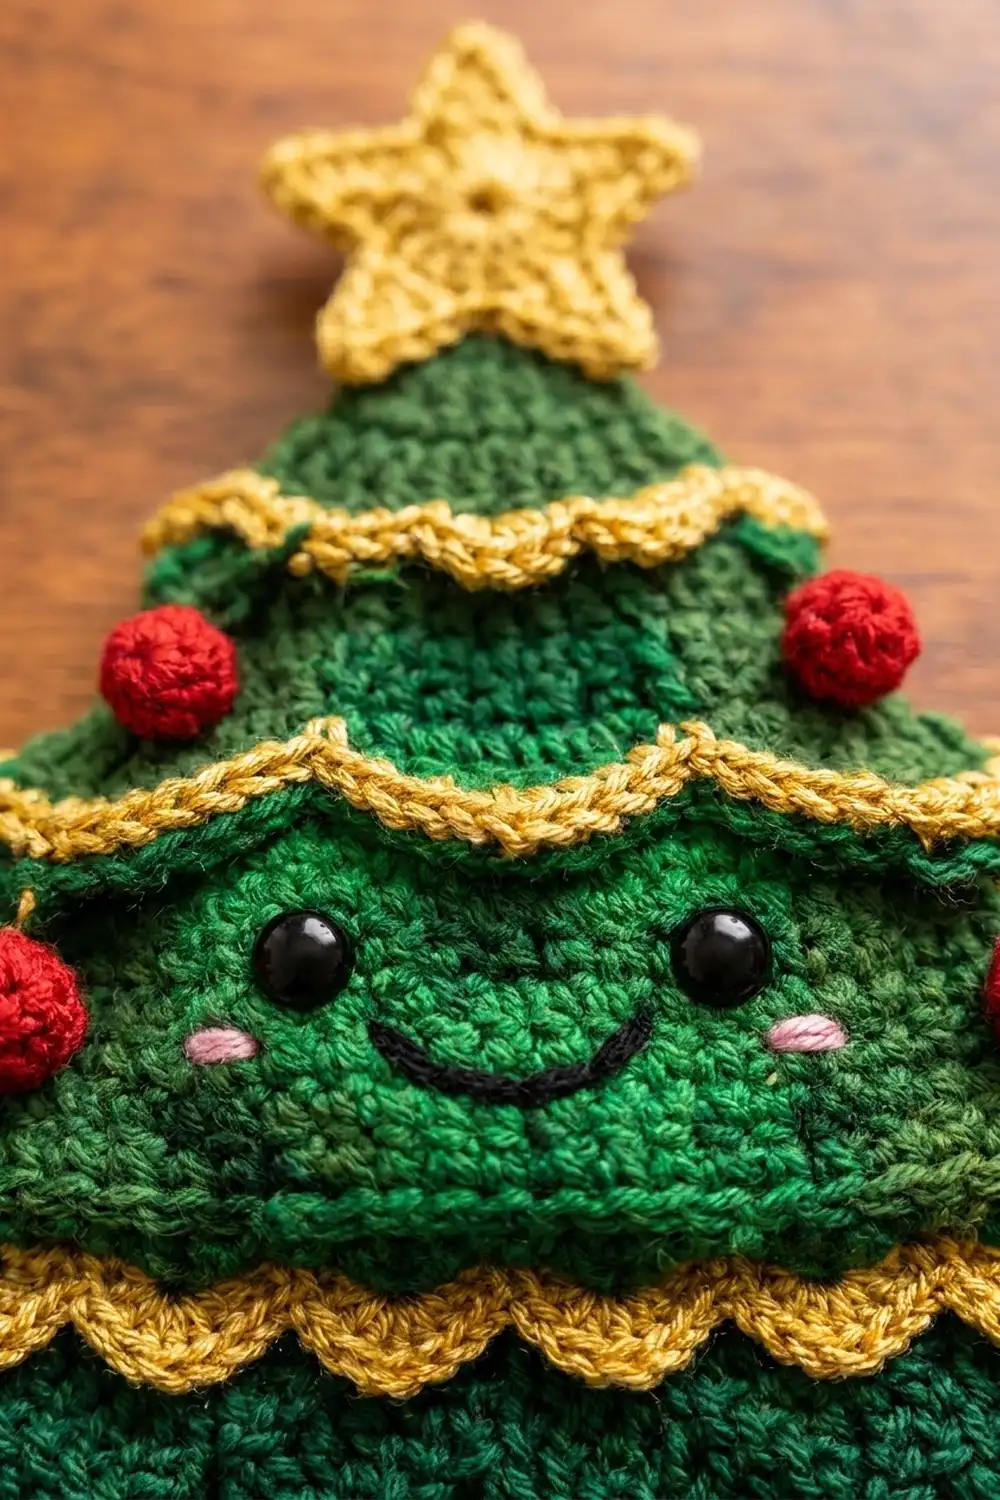
- Stack and center the tiers. Place the middle tier’s base 1.5 in (3.8 cm) above the bottom tier’s base, and the top tier’s base 2.5 in (6.4 cm) above it. Sew them in place.
- Add the safety eyes to the bottom tier, then embroider the smile and cheeks. Sew the star over the tip of the tree.
- Sew 2 berries to each tier, at the ends of the gold trim.
- Center the tree on the panel with its base 0.75 in (1.9 cm) below the top edge, covering the gold trim behind it. Sew around the edges.
- Sew 2 leaves and 3 berries at each top corner.
- Sew each cord down one side edge with its loop at the top corner. Add 2 berries to each cord, 6 in (15.2 cm) and 11 in (27.9 cm) below the top.
Final Blocking
- Mist the caddy lightly until it’s damp.
- Pin the panel to 13.25 x 17 in (33.7 x 43.2 cm).
- Pin each pocket square so its top edge runs straight.
- Spread the gold scallops evenly.
- Let it dry completely before unpinning. Don’t steam the metallic yarn.
Final Quality-Control Checklist
- Panel edges are straight, with no chevron dips.
- Panel measures 13.25 x 17 in (33.7 x 43.2 cm).
- Pocket colors alternate correctly, and the pockets line up in straight rows.
- Each pocket has 6 even scallops, and the top trim has 26.
- The tree is centered, and the eyes and star are secure.
- Cords hang straight, and the tassels are trimmed level.
- All tails are woven in.
Troubleshooting
Wavy panel edges: Check the leveling rows. The dc should sit in the valleys and the sc on the peaks.
Peaks drift: Count to 49 sts every few rows. One missed sc3tog shifts every peak after it.
Pockets gape: Pull the whipstitches a little tighter and check the 9-to-8 row matching.
Scallops ruffle: Use a smaller hook for the trim.
Tiers curl: Block them flat before sewing.
Cords twist: Dampen them, pin them straight and let them dry.
Care
Hand wash in cool water and lay flat to dry. Empty the pockets first, and reshape them while the caddy is still damp.
Final Notes
Each measurement builds on the last. A 3.25 x 4 in (8.3 x 10.2 cm) test pocket confirms your gauge, and the chevron panel comes to 12.25 x 16 in (31.1 x 40.6 cm). The six pockets fit a 49-column grid, and two border rounds bring the caddy to 13.25 x 17 in (33.7 x 43.2 cm). Check each measurement as you go, and the finished caddy will come together easily.
Happy crocheting!