

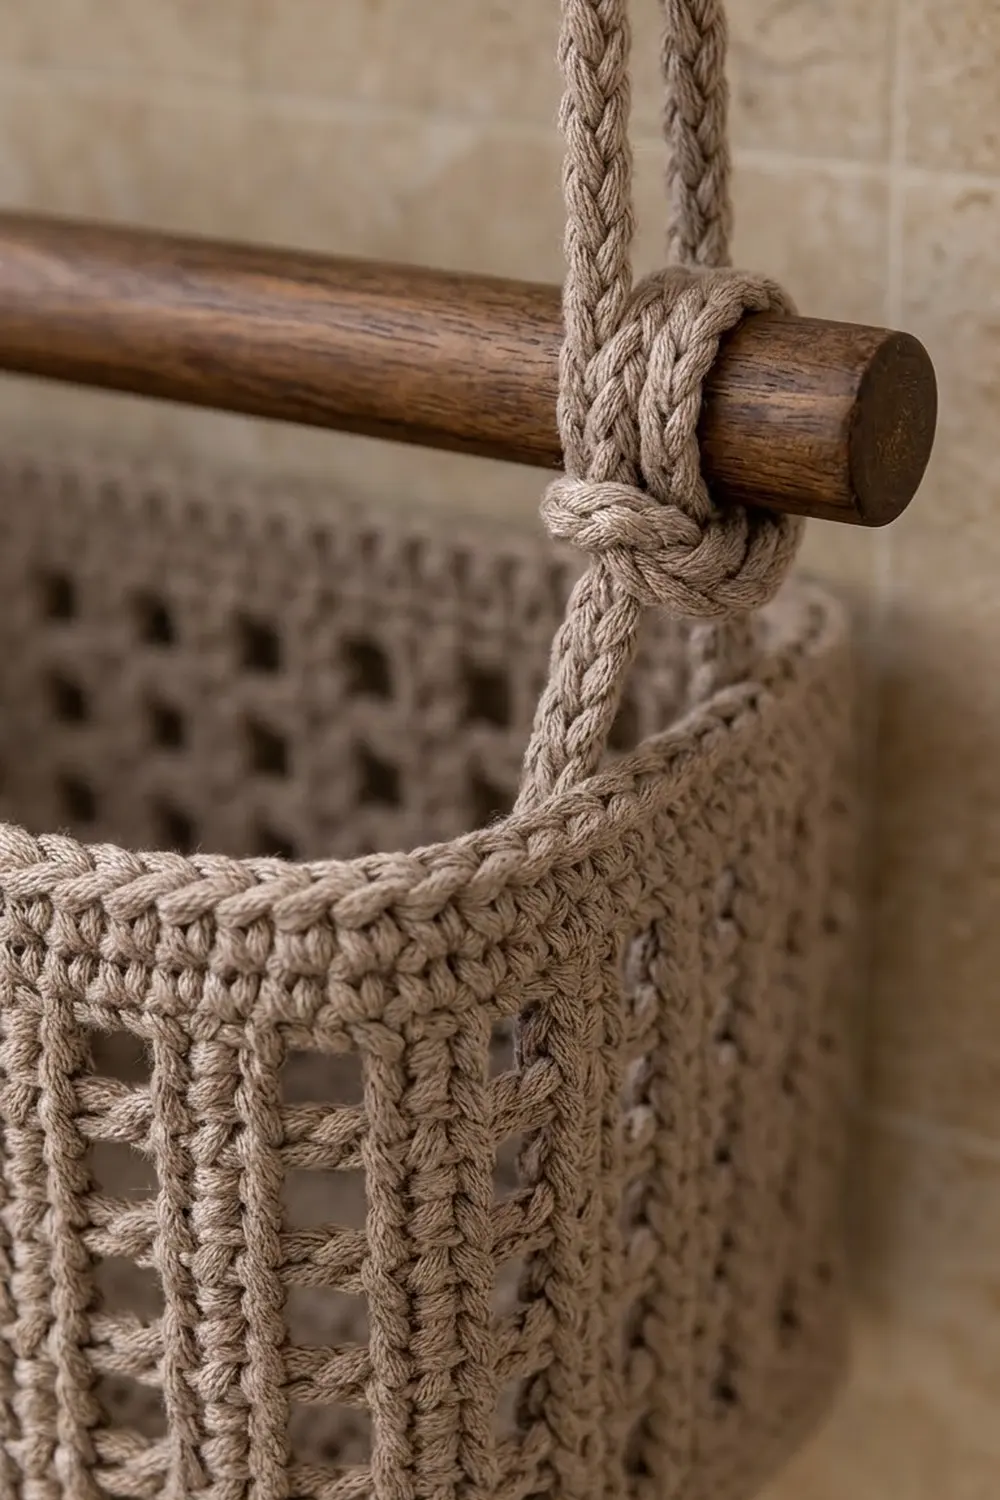
This two-tier hanging basket brings calm, natural texture to a bathroom wall. Two rectangular baskets with rounded corners hang one above the other from a wooden dowel. They hold soap pumps, brushes and spare toilet rolls, and they keep the counter clear.
The whole set is worked in a single taupe cotton, which matches stone tile, light wood and linen towels. Each basket has a firm solid base, a lattice wall of square openings and a solid rim with a rounded rope edge. The open grid keeps the baskets light and lets damp items dry.
This pattern uses US crochet terms. Each basket measures 11.5 in (29.2 cm) long, 5 in (12.7 cm) deep and 5 in (12.7 cm) tall. Hung up, the set is about 18 in (45.7 cm) from the dowel to the bottom of the lower basket.
You’ll work the base flat in rows, edge it with one round, then crochet the walls in joined rounds without turning. Short slip stitch cords join the baskets to each other and to the dowel. You make two identical baskets, so the first one also works as your gauge test.
Finished Size and Construction
- Basket size: 11.5 in (29.2 cm) long x 5 in (12.7 cm) deep x 5 in (12.7 cm) tall
- Hanging height: 18 in (45.7 cm) from dowel to bottom, plus the hanging loop
- Skill level: Easy
- Terminology: US crochet terms
- Yarn weight: Medium / worsted (#4) cotton
- Hook: 4.5 mm (US 7)
- Number of pieces: 2 baskets, 8 cords, 1 hanging loop
- Layout: 2 baskets stacked vertically, with a 3 in (7.6 cm) gap between them
- Base before edging: 11 in x 4.4 in (27.9 cm x 11.2 cm)
- Wall height before rim band: about 4.25 in (10.8 cm)
- Rim band depth: about 0.9 in (2.3 cm)
Materials
Yarn: Use a smooth worsted-weight cotton or cotton blend. Cotton holds its shape, copes with bathroom humidity and gives clear stitch definition in the lattice. Avoid very soft or fuzzy yarns, because the baskets will sag.
- Color A, Taupe: 150 g / 255 m (279 yd)
Each basket uses about 95 m (104 yd). The cords and loop use about 15 m (16 yd) in total. The amount above includes a margin of roughly 20% for your gauge test, tension differences and weaving in ends.
Tools:
- 4.5 mm (US 7) crochet hook
- 4 locking stitch markers
- Yarn needle
- Scissors
- Measuring tape
- Wooden dowel, 14 in (35.6 cm) long and 0.75 in (1.9 cm) across
- Wall hook rated for the weight of the filled baskets
- Spray bottle and two small boxes or rolled towels for blocking
Abbreviations (US Terms)
- ch – chain
- sl st – slip stitch
- sc – single crochet
- dc – double crochet
- BLO – back loop only
- sk – skip
- sp – space
- st(s) – stitch(es)
- rep – repeat
- rnd – round
Special stitch – reverse single crochet (rev sc, also called crab stitch): Work from left to right (right-handed). Insert the hook into the next stitch to the right, yarn over, pull up a loop, yarn over and pull through both loops on the hook. This gives the rounded, rope-like rim.
Slip stitch cord: Chain the stated number. Then sl st into the back bump of the 2nd ch from the hook and of each ch across. This makes a firm, round-looking cord that doesn’t stretch.
Gauge and Checkpoints
Gauge: 16 sc x 18 rows = 4 in (10.2 cm) in sc worked flat. 16 dc x 8 rows = 4 in (10.2 cm). Cords: 4 ch = 1 in (2.5 cm).
Work tightly. A firm fabric is what lets the baskets stand up on their own.
Test one piece first. Make the first base, then measure before you go on.
- After base Row 20: 11 in x 4.4 in (27.9 cm x 11.2 cm)
- After Rnd 1: the outer edge measures 32 in (81.3 cm) around
- After Rnd 4: wall height about 0.7 in (1.8 cm) above the ridge
- After Rnd 14: wall height about 4.25 in (10.8 cm)
- After Rnd 18: finished wall height 5 in (12.7 cm)
If the base is too big, go down one hook size or tighten your tension. If it’s too small, go up one hook size. Don’t change the stitch counts: the cords and dowel are sized to match a 128-stitch perimeter.
Basket (Make 2)
Base
Ch 45.
Row 1: Sc in 2nd ch from hook and in each ch across, turn. (44 sc)
Rows 2–20: Ch 1 (doesn’t count as a st), sc in each st across, turn. (44 sc)
Checkpoint: 11 in x 4.4 in (27.9 cm x 11.2 cm). Don’t fasten off.
Rnd 1 (edging, conversion round): Ch 1, turn.
– Long side 1: 3 sc in first st, sc in next 42 sts, 3 sc in last st.
– Short side 1: rotate the work and sc along the row ends: sc in next 4 row ends, sk 1 row end, rep from * 3 more times. (16 sc)
– Long side 2: working into the free loops of the foundation ch, 3 sc in first ch, sc in next 42 ch, 3 sc in last ch.
– Short side 2: rep the short-side sequence. (16 sc)
– Sl st to first sc.
Count: (88 sts worked 1-per-st along the long edges + 32 sc worked into row ends) + (8 extra corner sts) = 128 sc.
Place a marker in the center sc of each 3-sc corner group. Counting from corner marker to corner marker inclusive, each long side has 46 sts and each short side has 20 sts. Check: 2 x 46 + 2 x 20 – 4 shared corners = 128.
Walls
All wall rounds are joined with a sl st and worked without turning. Ch 1 at the start of sc rounds doesn’t count as a st. Move the corner markers up as you go. There are no increases, so the walls rise straight and the corners stay softly rounded.
Rnd 2 (turning ridge): Ch 1, sc BLO in each st around, sl st to first sc. (128 sc)
The unworked front loops make a crisp ridge, and the wall starts to turn upward.
Rnds 3–4: Ch 1, sc in each st around, sl st to first sc. (128 sc)
Checkpoint: about 0.7 in (1.8 cm) of solid wall.
Rnd 5 (lattice round): Ch 3 (counts as dc), dc in next st, ch 2, sk next 2 sts, dc in next 2 sts, ch 2, sk next 2 sts, rep from * 30 more times, sl st to top of beg ch-3.
Count: 64 dc + 32 ch-2 sps (32 repeats of 4 sts = 128 sts).
Rnd 6 (bar round, conversion round): Ch 1, sc in same st as join and in next dc, 2 sc in next ch-2 sp, sc in next 2 dc, 2 sc in next ch-2 sp, rep from * 30 more times, sl st to first sc.
Count: (64 sc worked 1-per-dc) + (64 sc worked 2-per-ch-2-sp) = 128 sc.
Rnds 7, 9, 11, 13: Rep Rnd 5. Start the ch-3 in the same st as the join, so each pair of dc sits directly over the pair below it. (64 dc + 32 ch-2 sps)
Rnds 8, 10, 12, 14: Rep Rnd 6. (128 sc)
That gives five rows of square openings, each about 0.5 in (1.3 cm) wide and tall. Each opening is framed by double dc posts and solid sc bars.
Checkpoint: wall height about 4.25 in (10.8 cm).
Make All Pieces
Make the following, all in Color A:
- Baskets: 2, worked as above
- Lower cords: 4. Ch 21, then work as a slip stitch cord (20 sl sts). Each one is about 5 in (12.7 cm) long.
- Upper cords: 4. Ch 37, then work as a slip stitch cord (36 sl sts). Each one is about 9 in (22.9 cm) long.
- Hanging loop: 1. Ch 33, then work as a slip stitch cord (32 sl sts). Each one is about 8 in (20.3 cm) long.
Leave a 10 in (25.4 cm) tail at both ends of every cord for sewing.
Layout grid (front view):
            [ wall hook ]
                 |
           (hanging loop)
  [========== dowel ==========]
   \ upper cords      upper cords /
    \  (2 per end)    (2 per end)/
   [      BASKET 1 (upper)      ]
     |                        |
     | lower cords (4)        |
     |                        |
   [      BASKET 2 (lower)      ]
Joining
Method: Whipstitch each cord end to the outside of a basket wall, right at a corner marker, using the cord’s own tail.
Lower cords (Basket 2 to Basket 1): Line up the corners of both baskets. Sew the bottom 1 in (2.5 cm) of one lower cord flat against the outside of Basket 2, over its rim band (Rnds 15–18) at one corner marker. Sew the top 1 in (2.5 cm) of the cord to the outside of Basket 1 at the matching corner, over Rnds 1–4. That leaves 3 in (7.6 cm) of cord showing between the baskets. Repeat at all four corners.
Stitch-to-stitch logic: Work one whipstitch through each sc round under the cord: 4 rounds = 4 stitches per attachment. Catch the corner-marked stitch in every round so the cord sits right on the corner.
Upper cords (Basket 1 to dowel): Sew the bottom 1 in (2.5 cm) of each upper cord to Basket 1 over Rnds 15–18 at a corner marker. On each short end, bring the front and back cords together in a V. Wrap both cords 3 in (7.6 cm) around the dowel, 1 in (2.5 cm) from its end, and tie them in a square knot. Sew the tails through the knot.
Tension: Keep the whipstitches snug but not tight. The cord should lie flat without puckering the wall. Before tying, check that all four lower cords show the same 3 in (7.6 cm) of length so the lower basket hangs level.
Hanging loop: Fold the loop in half. Tie both ends around the center of the dowel with a square knot and weave in the tails.
Size checkpoint: 5 in (12.7 cm) of cord rise + 5 in (12.7 cm) for Basket 1 + 3 in (7.6 cm) gap + 5 in (12.7 cm) for Basket 2 = 18 in (45.7 cm). (Work the rim band below before joining.)
Border
The border on this piece is the solid rim band at the top of each basket. Work it on both baskets before you join anything.
Border gauge: 16 sc = 4 in (10.2 cm). Four rounds make about 0.9 in (2.3 cm).
Rnds 15–17: Ch 1, sc in each st around, sl st to first sc. (128 sc: 46 per long side and 20 per short side, corners included)
Rnd 18 (rope edge): Ch 1, rev sc in each st around, sl st to first rev sc. (128 rev sc: 46 per long side and 20 per short side, corners included) Fasten off and weave in ends.
Why the math works: The base edging set the perimeter at 128 sts, which is 32 in (81.3 cm). Every wall and border round keeps exactly 128. The lattice rounds use a 4-st repeat (2 dc + ch 2), and 128 ÷ 4 = 32 repeats exactly, so the grid closes with no partial opening at the join. The bar rounds put back 1 sc per dc and 2 sc per ch-2 sp, which returns the count to 128 every time. With no increases or decreases, the rim matches the base and the walls stand straight.
Final Blocking
- Turn each basket right side out and push the corners into shape.
- Spray the basket evenly with water until it’s damp but not dripping.
- Slide a small box or tightly rolled towel inside, about 11.5 in x 5 in (29.2 cm x 12.7 cm).
- Pull each lattice column straight up so the openings line up vertically.
- Pinch the turning ridge and the rope edge into crisp lines.
- Leave to dry completely, which takes 24 hours or more.
- Take out the form, then do the joining.
Final Quality-Control Checklist
- Both baskets measure 11.5 in x 5 in x 5 in (29.2 cm x 12.7 cm x 12.7 cm).
- Each wall round has 128 sts.
- Each basket has five rows of openings, with columns lined up vertically.
- The turning ridge shows evenly all the way around.
- The rope edge is smooth, with no gaps at the join.
- All four lower cords show 3 in (7.6 cm).
- The dowel hangs level and both baskets hang level.
- All tails are woven in on the inside.
Troubleshooting
Walls flare outward: Your wall tension is looser than your base. Go down a hook size from Rnd 3.
Walls pull inward: You missed stitches. Count every bar round. It must be 128.
Lattice columns slant: Start each ch-3 in the same st as the join, not the next one.
Openings look tall and narrow: Your dc are too loose. Pull each loop snug before you yarn over.
Base corners curl up: Re-block flat under a light weight. The 3-sc corner groups need room to lie flat.
Lower basket tilts: Retie the upper cords so the front and back lengths match.
Basket sags when full: Stuff it with dense cotton or cut a plastic canvas insert for the base.
Care
Remove the dowel and cords if you like, then hand wash the baskets in cool water with mild soap. Reshape over a form and dry flat.

Final Notes
The measurement chain is simple. A 44-st base of 20 rows gives 11 in x 4.4 in (27.9 cm x 11.2 cm). One edging round sets 128 sts, or 32 in (81.3 cm), and every round after that keeps that count. Ten lattice-and-bar rounds bring the wall to about 4.25 in (10.8 cm), and the rim band finishes each basket at 5 in (12.7 cm). The cords add a 3 in (7.6 cm) gap and a 5 in (12.7 cm) rise, for an 18 in (45.7 cm) hanging set. Check each of those numbers as you go and both tiers will match.
Happy crocheting!