

This holder hangs from the headrest posts on the back of a car seat. It keeps a stack of tissues where back-seat passengers can reach them. Bands of open diamond mesh alternate with bands of firm single crochet, so it looks like a woven market bag in miniature. An envelope flap with neatly angled corners covers the tissue slot. You pull a tissue from under the flap, and the next one stays tucked in place.
The holder is worked in one color, a warm sand beige, so the texture does the decorative work. A natural or oatmeal cotton matches most car interiors, but any solid color works.
All instructions use US crochet terms. The finished holder measures 9.25 in wide × 10 in tall (23.5 × 25.4 cm), plus two straps 10 in (25.4 cm) long.
Here is how it’s built. You crochet a full back panel, a shorter lower front panel, and an upper front panel that is worked top-down and shaped into a flap. You stack the three panels and join them with the first round of the border, then add a second border round. Finally you sew two straps to the back.
Finished Size and Construction
- Finished size: 9.25 in × 10 in (23.5 × 25.4 cm)
- Skill level: Intermediate (simple mesh, layering, edge counting)
- Terminology: US crochet terms
- Yarn weight: Worsted (#4) cotton
- Hook: 5.0 mm (H-8)
- Number of pieces: 5 (back, lower front, upper front with flap, 2 straps)
- Layout: Three panels stacked, with the flap overlapping the lower front by 1.75 in (4.4 cm)
- Panel size: 33 stitches wide = 8.25 in (21.0 cm); back panel is 9 in (22.9 cm) tall
- Size before border: 8.25 in × 9 in (21.0 × 22.9 cm)
- Border depth: 2 rounds = 0.5 in (1.3 cm) on every side
Materials
Yarn: Use a smooth worsted-weight cotton or cotton blend. Cotton keeps the mesh crisp and holds up to being handled every day. Avoid fuzzy acrylics, which blur the lattice.
- Sand beige: about 150 g / 270 m (295 yd)
This quantity includes a margin of about 20% for your gauge swatch and any small differences in tension.
Tools:
- 5.0 mm (H-8) crochet hook
- Tapestry needle
- 4 locking stitch markers
- Measuring tape
- Rust-proof pins and a blocking mat
- Scissors
Abbreviations (US Terms)
- ch – chain
- sc – single crochet
- sc2tog – single crochet 2 together (a decrease)
- dc – double crochet
- sl st – slip stitch
- sk – skip
- sp – space
- st(s) – stitch(es)
- RS / WS – right side / wrong side
Special stitch – Mesh Band (worked over 33 sc):
- Mesh Row A: Ch 1, turn. Sc in the first sc. Ch 5, sk 3 sc, sc in the next sc; repeat from * 7 more times. You now have 9 sc and 8 ch-5 loops.
- Mesh Row B: Ch 5, turn (counts as dc + ch 2). Sc in the first ch-5 loop. Ch 5, sc in the next ch-5 loop; repeat from * 6 more times. Ch 2, dc in the last sc. You now have 8 sc, 7 ch-5 loops, and a half loop at each end.
- Mesh Row C: Ch 1, turn. Sc in the first dc. Ch 5, sc in the next ch-5 loop; repeat from * 6 more times. Ch 5, sc in the 3rd ch of the turning ch. You now have 9 sc and 8 ch-5 loops.
- Conversion Row: Ch 1, turn. Sc in the first sc. 3 sc in the next ch-5 loop, sc in the next sc; repeat from * 7 more times. Count: 9 sc (1 in each existing sc) + 24 sc (3 in each of the 8 loops) = 33 sc.
Each sc of Row B sits in a loop of Row A, and each sc of Row C sits in a loop of Row B. That offset is what forms the diamond lattice.
Gauge and Checkpoints
Gauge: 16 sc × 16 rows = 4 in (10.2 cm). Each sc row is 0.25 in (0.6 cm) tall. Each mesh row is 0.5 in (1.3 cm) tall. One full Mesh Band (Rows A–C plus the Conversion Row) is 1.75 in (4.4 cm).
Test one piece first. Make the back panel before anything else, because every other piece is measured against it. Lay it flat without stretching it and check:
- After Row 2: 8.25 in wide × 0.5 in tall (21.0 × 1.3 cm)
- After Row 6: 2.25 in (5.7 cm) tall
- After Row 11: 3.5 in (8.9 cm)
- After Row 15: 5.25 in (13.3 cm)
- After Row 20: 6.5 in (16.5 cm)
- After Row 24: 8.25 in (21.0 cm)
- After Row 27: 9 in (22.9 cm)
Too big: Go down to a 4.5 mm hook. Tighten the ch-5 loops by pulling each chain snug.
Too small: Go up to a 5.5 mm hook.
Width matters most. If the panel is wider than 8.25 in (21.0 cm), the border’s per-side counts will pucker it.
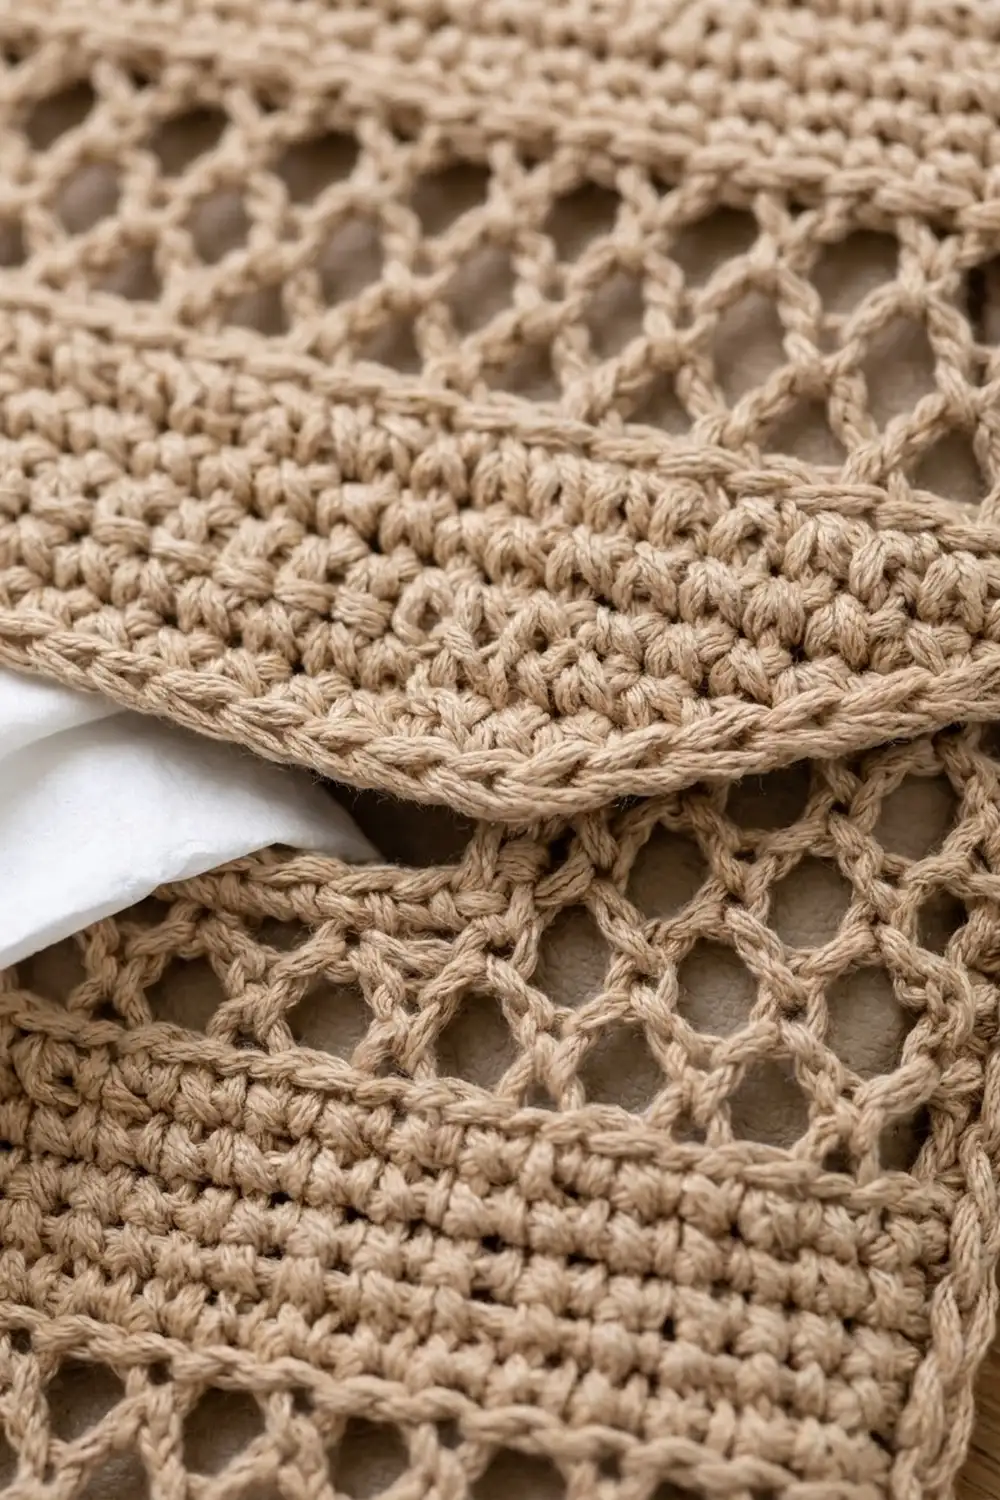
Back Panel
Ch 34.
Row 1 (RS): Sc in the 2nd ch from the hook and in each ch across. (33 sc)
Row 2: Ch 1, turn, sc in each st across. (33 sc)
Rows 3–5: Work Mesh Rows A, B, C.
Row 6: Work the Conversion Row. (33 sc)
Rows 7–11: Ch 1, turn, sc in each st across. (33 sc each row)
Rows 12–14: Work Mesh Rows A, B, C.
Row 15: Work the Conversion Row. (33 sc)
Rows 16–20: Ch 1, turn, sc in each st across. (33 sc)
Rows 21–23: Work Mesh Rows A, B, C.
Row 24: Work the Conversion Row. (33 sc)
Rows 25–27: Ch 1, turn, sc in each st across. (33 sc)
Fasten off. The panel measures 8.25 in × 9 in (21.0 × 22.9 cm).
Edge units: Each side edge has 15 sc row ends + 3 Conversion Row ends + 9 mesh row ends. Counting each sc or Conversion row end as 1 unit and each mesh row end as 2 units gives 15 + 3 + 18 = 36 units. At 4 sc per inch, 36 units = 9 in (22.9 cm).
Lower Front Panel
This panel matches the first 17 rows of the back exactly, so the bands line up.
Ch 34.
Rows 1–17: Work exactly as Back Panel Rows 1–17. (33 sc after Row 17)
Fasten off. The panel measures 8.25 in × 5.75 in (21.0 × 14.6 cm). Each side edge has 23 units (2 + 6 + 1 + 5 + 6 + 1 + 2). The top edge of Row 17 becomes the bottom lip of the tissue slot.
Upper Front Panel with Flap
This panel is worked from the top edge downward, so its foundation chain becomes the top of the holder.
Ch 34.
Row 1 (RS): Sc in the 2nd ch from the hook and in each ch across. (33 sc)
Rows 2–3: Ch 1, turn, sc in each st across. (33 sc)
Rows 4–6: Work Mesh Rows A, B, C.
Row 7: Work the Conversion Row. (33 sc)
Rows 8–12: Ch 1, turn, sc in each st across. (33 sc)
Checkpoint: 3.75 in (9.5 cm) from the foundation edge. Each side edge has 15 units (3 + 6 + 1 + 5). Place a marker in the row end of Row 12 on both sides.
Flap shaping. These rows create the angled corners:
Row 13: Ch 1, turn, sc2tog, sc in the next 29 sts, sc2tog. (31 sc)
Row 14: Ch 1, turn, sc2tog, sc in the next 27 sts, sc2tog. (29 sc)
Row 15: Ch 1, turn, sc2tog, sc in the next 25 sts, sc2tog. (27 sc)
Row 16: Ch 1, turn, sc2tog, sc in the next 23 sts, sc2tog. (25 sc)
Fasten off. Row 16 measures 6.25 in (15.9 cm) across.
Flap Edging (one pass, RS facing):
- Join the yarn at the marked row end of Row 12 on the right-hand side.
- Work 4 sc evenly down the angled edge, 1 in each row end of Rows 13–16.
- Work 2 sc in the first st of Row 16, then sc in the next 23 sts, then 2 sc in the last st.
- Work 4 sc up the second angled edge, ending at the other marker.
Count: 25 sc (1 in each existing st) + 2 extra sc (at the bottom corners) + 8 sc (in the row ends) = 35 sc. Fasten off.
The finished upper front measures 5 in (12.7 cm) from the top edge to the flap edge. Its sides are joined only along Rows 1–12. The angled flap corners stay free.
Straps (Make 2)
Ch 41.
Row 1: Sc in the 2nd ch from the hook and in each ch across. (40 sc)
Rows 2–3: Ch 1, turn, sc in each st across. (40 sc)
Fasten off and leave a 12 in (30.5 cm) tail for sewing. Each strap measures 10 in × 0.75 in (25.4 × 1.9 cm).
Make All Pieces
Before joining, you should have:
- Sand beige: 1 back panel (33 sc × 27 rows)
- Sand beige: 1 lower front panel (33 sc × 17 rows)
- Sand beige: 1 upper front panel with flap (33 sc × 16 rows + edging)
- Sand beige: 2 straps (40 sc × 3 rows)
Layer layout, seen from the front (heights measured from the bottom edge, before the border):
9.0 in  +-------------------------+   top: upper front Row 1 + back Row 27
        |   UPPER FRONT (Rows 1-12)|
5.25 in |-------------------------|   upper front side seams end here
        | \     FLAP (13-16)     / |
5.75 in |..lower front top edge...|   tissue slot hidden under flap
4.0 in  |   \___________________/  |   flap edge
        |   LOWER FRONT (Rows 1-17)|
0 in    +-------------------------+   bottom: both foundation chains
              BACK behind all
Joining
Method: You join the layers with a single crochet seam that is also Border Round 1. Work through all the layers at once.
Stack the pieces. Lay the back panel RS down. Place the lower front on top of it, RS up, matching the foundation edges. Place the upper front on top, RS up, with its foundation chain matching back Row 27. Pin the layers together. The flap now overlaps the lower front from 4.0 in to 5.75 in (10.2 to 14.6 cm), a 1.75 in (4.4 cm) overlap.
Stitch-to-stitch logic:
- Top edge: Back Row 27 meets upper front Row 1, stitch for stitch. That gives 33 sc worked through both layers.
- Bottom edge: The two foundation chains meet, 33 to 33. That gives 33 sc.
- Each side: Work 36 sc, at a rate of 1 sc per sc or Conversion row end and 2 sc per mesh row end.
- Units 1–21: through the back and the lower front
- Units 22–23: through all three layers
- Units 24–36: through the back and the upper front
- Total per side: 21 + 2 + 13 = 36
Tension: Insert the hook fully through every layer and keep the seam stitches as loose as your body stitches. A tight seam shortens the sides and makes the mesh ripple.
Checkpoint: After Round 1, the holder measures 8.75 in × 9.5 in (22.2 × 24.1 cm).
Border
Border gauge: 4 sc per inch along the edges. Each round adds 0.25 in (0.6 cm) per side.
Round 1 (joining round): With the front facing you, join the yarn at the top right corner.
- Sc 33 across the top edge.
- Ch 1 at the corner.
- Sc 36 down the left side.
- Ch 1 at the corner.
- Sc 33 across the bottom.
- Ch 1 at the corner.
- Sc 36 up the right side.
- Ch 1 at the corner.
- Sl st to the first sc.
Count: top 33, left side 36, bottom 33, right side 36 = 138 sc + 4 ch-1 corner sps. The corners are chain spaces, so no stitch is counted on two sides.
Round 2: Ch 1. Sc in each sc around. Work (sc, ch 1, sc) in each corner ch-1 sp. Sl st to the first sc.
Count: 138 sc (1 in each existing st) + 8 sc (2 in each of the 4 corner sps) = 146 sc + 4 ch-1 sps. That is 35 sc across the top and the bottom, and 38 sc on each side. Fasten off.
Why the math works:
- The top and bottom match the 33-stitch panel width at the same 4 sts per inch, so they don’t flare or pull in.
- The 36 side stitches match the measured 9 in (22.9 cm) height exactly.
- Two rounds add 0.5 in (1.3 cm) per side. The finished size is 8.25 + 1 = 9.25 in (23.5 cm) wide by 9 + 1 = 10 in (25.4 cm) tall.
Attach the Straps
- Fold the top 2 in (5.1 cm) of each strap back on itself. Sew down only the last 0.75 in (1.9 cm) of the fold. This leaves an open loop that slips over a headrest post.
- Pin the other end of each strap to the back panel only. Each strap should overlap the back by 1 in (2.5 cm) and sit 1.5 in (3.8 cm) in from its side edge.
- Whipstitch the strap end in place without catching the front.
Each strap hangs 7 in (17.8 cm) above the holder.
Final Blocking
- Weave in all ends, working along the solid bands so no tails show through the mesh.
- Mist the holder with water until it is damp, or soak it briefly and roll it in a towel.
- Pin it to 9.25 in × 10 in (23.5 × 25.4 cm) and check that the corners are square.
- Open each mesh diamond gently with your fingertips so the lattice is even.
- Shape the flap’s angled corners so they lie flat against the lower front.
- Block the straps straight at 10 in (25.4 cm).
- Let everything dry completely before unpinning.
Final Quality-Control Checklist
- Back panel is 8.25 in × 9 in (21.0 × 22.9 cm) before the border.
- All three Mesh Bands line up across the back and the lower front.
- The flap overlaps the slot by 1.75 in (4.4 cm).
- Round 1 has 138 sc and Round 2 has 146 sc.
- Each side has 36 sc in Round 1 and 38 sc in Round 2.
- The finished size is 9.25 in × 10 in (23.5 × 25.4 cm).
- The strap loops slide over the headrest posts easily.
- A tissue packet slides in through the slot without stretching the edges.
Troubleshooting
Mesh rows lean or the diamonds look uneven. Check that every Row B and Row C sc goes into a loop, not into a stitch. Count 8 loops after Rows A and C.
Conversion Row is short. You probably put 2 sc in a loop instead of 3. Recount: 9 + 24 = 33.
Sides ripple. The side seam is too loose, or there are too many stitches. Recount 36 per side and check the 2-per-mesh-row rate.
Sides pull in. The side seam is too tight. Redo Round 1 with a hook one size larger.
Flap curls up. Steam block the flap and pin it flat. Make sure the edging used 2 sc at each bottom corner.
Tissues fall out. Add one more sc row to the lower front (Row 18), so it overlaps the flap by 2 in (5.1 cm).
Care
Hand wash in cool water and lay flat to dry, reshaping it to 9.25 in × 10 in (23.5 × 25.4 cm). Do not tumble dry, because heat can shrink cotton and distort the mesh.
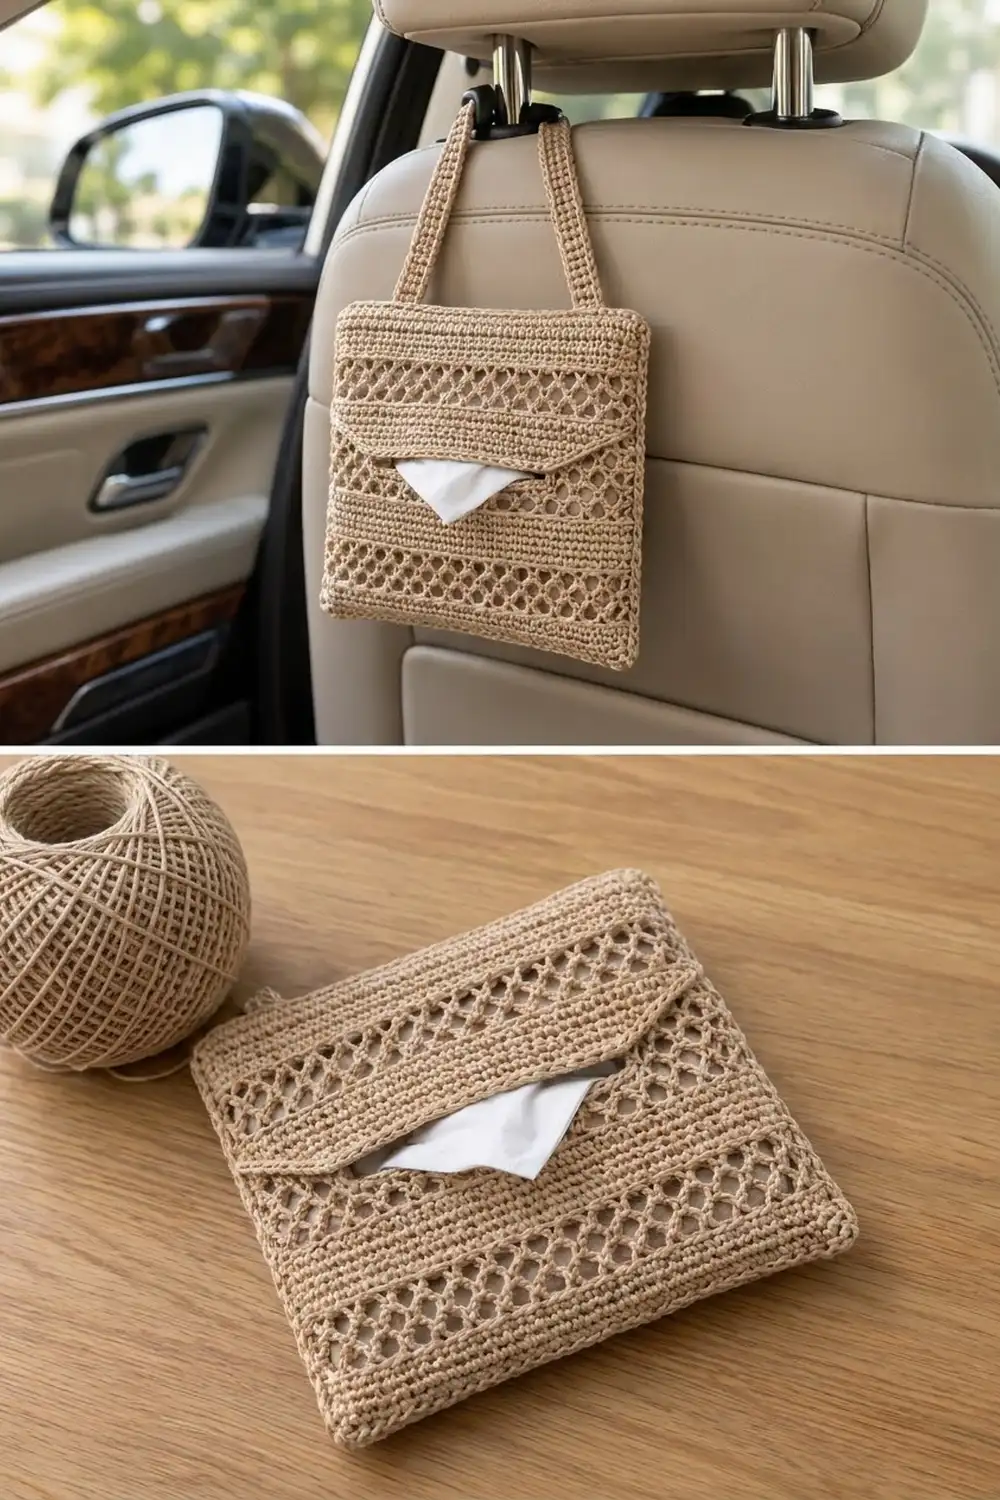
Final Notes
Each measurement depends on the one before it. A gauge of 16 sc = 4 in (10.2 cm) gives 33 stitches = 8.25 in (21.0 cm). The back panel’s 36 edge units = 9 in (22.9 cm). The lower front’s 5.75 in (14.6 cm) and the upper front’s 5 in (12.7 cm) give a 1.75 in (4.4 cm) flap overlap. Border Round 1 has 138 sc and Round 2 has 146 sc, which adds 0.5 in (1.3 cm) per side for a finished size of 9.25 in × 10 in (23.5 × 25.4 cm). Check each step against these numbers and the holder will hang square.
Happy crocheting!