

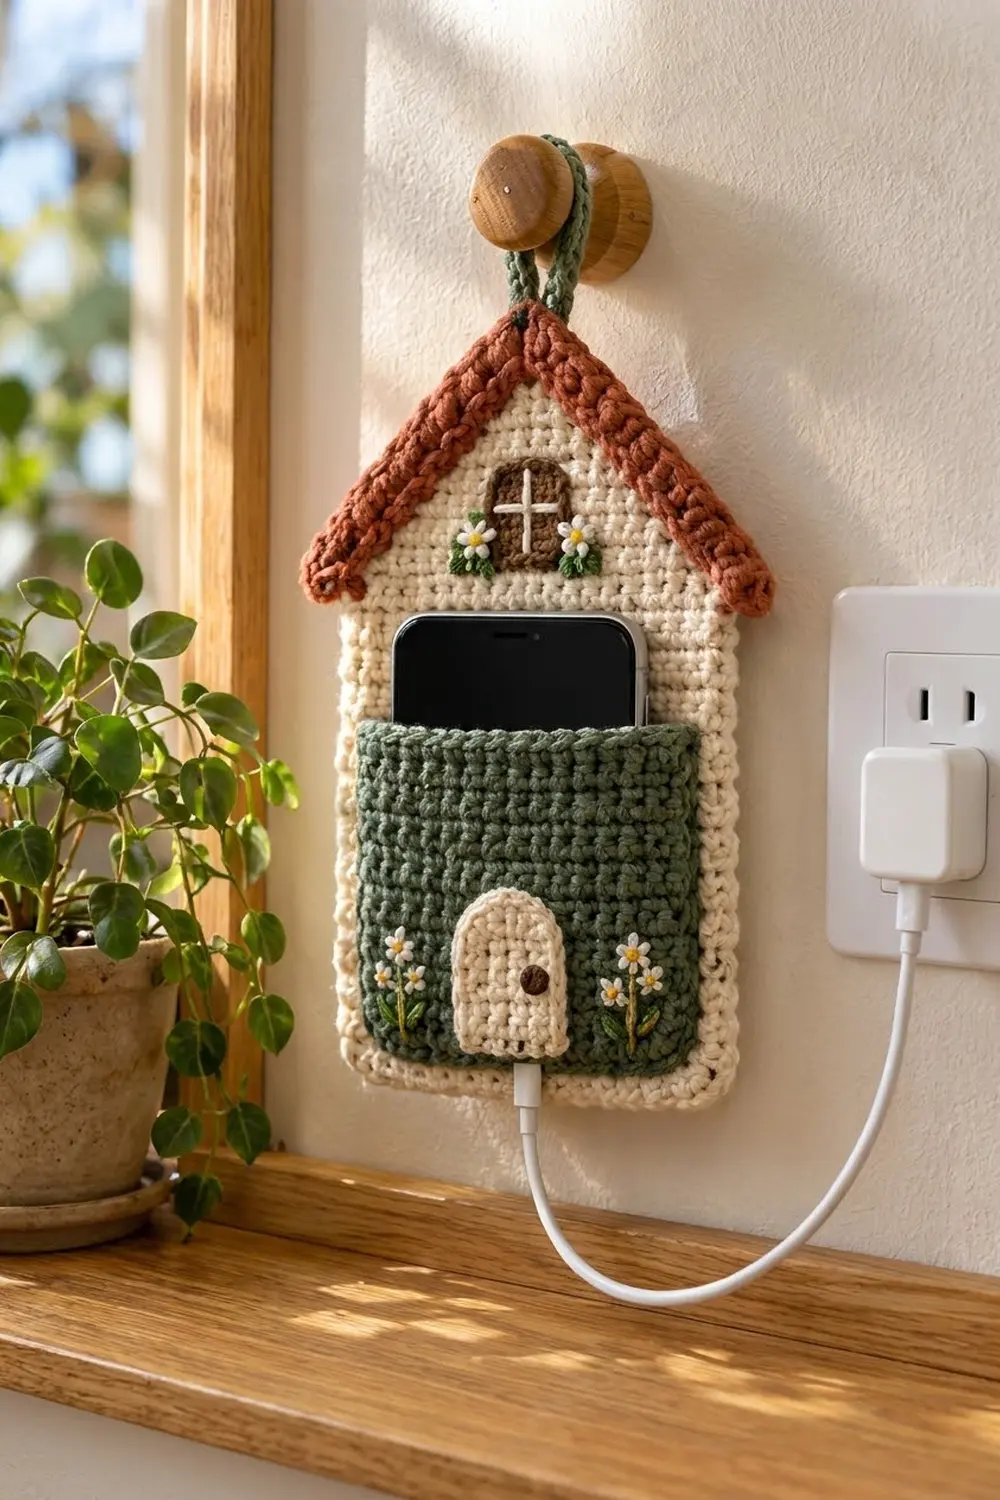
This little cottage hangs on the wall and keeps your phone upright while it charges. The cream house has a chunky rust roof, a tiny brown window under the peak and a sage green pocket across the lower half. A cream arched door and a few embroidered daisies make the pocket look like a front garden.
The colors are warm and earthy: cream, sage green, rust and chocolate brown, with small touches of soft yellow and leaf green in the embroidery. The style is cozy and handmade. Firm single crochet keeps the fabric dense enough to hold a phone without sagging.
The pattern uses US crochet terms. The finished holder measures 6 in (15.2 cm) wide across the walls, about 7 in (17.8 cm) across the eaves, and 10 in (25.4 cm) tall to the roof peak, not counting the hanging loop.
Construction is simple. You work the back panel in rows from the bottom up and decrease to a peak, then add a two-round cream border and a three-row rust roof trim. You make the pocket, door and window as separate flat pieces, embroider them, and sew them on. Last, you sew a sage cord loop to the back of the peak.
Finished Size and Construction
- Finished size: 6 in (15.2 cm) wide x 10 in (25.4 cm) tall, plus a loop of about 2.5 in (6.4 cm)
- Skill level: Easy-intermediate
- Terminology: US
- Yarn weight: Worsted (#4) cotton
- Hook: 4.0 mm (G-6)
- Number of pieces: 1 finished holder, made from 1 back panel, 1 pocket, 1 door, 1 window and 1 loop
- Layout: Single house shape, with the pocket over the lower half
- Back panel before border: 5 in (12.7 cm) wide x about 8 1/4 in (21.0 cm) tall
- Back panel after border: 6 in (15.2 cm) wide x about 9 1/4 in (23.5 cm) tall
- Border depth: about 1/2 in (1.3 cm), plus a rust roof trim of about 3/4 in (1.9 cm)
Materials
Use a smooth worsted-weight cotton or cotton blend of about 190 m per 100 g. Cotton holds its shape, stays crisp around the pocket opening, and doesn’t stretch out from the phone’s weight the way acrylic can.
- Cream (back panel, border, door, embroidery): 35 g / 67 m
- Sage green (pocket, loop): 20 g / 38 m
- Rust/terracotta (roof trim): 10 g / 19 m
- Chocolate brown (window, door knob): 3 g / 6 m
- Soft yellow (flower centers): 2 g / 4 m
- Leaf green (stems and leaves on the pocket): 2 g / 4 m
All quantities include a small safety margin.
Tools:
- 4.0 mm (G-6) crochet hook
- Tapestry needle and a sharp embroidery needle
- Stitch markers (at least 4)
- Pins or clips
- Ruler or tape measure
- Blocking mat and rustproof pins
- Optional: a 3/8 in (1.0 cm) brown button for the door knob, in place of a French knot
Abbreviations (US Terms)
- ch – chain
- sc – single crochet
- hdc – half double crochet
- sl st – slip stitch
- st(s) – stitch(es)
- rnd – round
- RS – right side
Special stitch: sc2tog (single crochet 2 together). Insert the hook in the next st, yarn over and pull up a loop. Insert the hook in the following st, yarn over and pull up a loop. Yarn over and pull through all 3 loops on the hook. This decreases 1 st.
The ch 1 at the start of a row or round does not count as a stitch.
Gauge and Checkpoints
Gauge: 16 sc and 18 rows = 4 in (10.2 cm) in sc worked in rows. That works out to 4 sts and 4.5 rows per inch.
The back panel is your gauge swatch. Make the first 10 rows, then measure. The panel should be 5 in (12.7 cm) wide.
Checkpoints:
- After Row 27 (walls): 5 in (12.7 cm) wide x 6 in (15.2 cm) tall.
- After Row 37 (peak): about 8 1/4 in (21.0 cm) tall.
- After the border: 6 in (15.2 cm) wide x about 9 1/4 in (23.5 cm) tall.
- After the roof trim: 10 in (25.4 cm) tall, about 7 in (17.8 cm) across the eaves.
- Pocket after edging: 5.5 in (14.0 cm) x about 4.5 in (11.4 cm).
If your panel is too wide, go down one hook size. If it is too narrow, go up one hook size. Don’t change the stitch counts, because every later piece is sized to fit this panel. Tight, dense fabric is fine here and even helps.
Back Panel (Cream)
Walls:
Ch 21.
Row 1 (RS): Sc in 2nd ch from hook and in each ch across, turn. (20 sts)
Rows 2–27: Ch 1, sc in each st across, turn. (20 sts)
Check: 5 in (12.7 cm) x 6 in (15.2 cm). Place a marker at each end of Row 27 to mark the eave line.
Roof:
Row 28: Ch 1, sc2tog, sc in each st to last 2 sts, sc2tog, turn. (18 sts)
Rows 29–36: Repeat Row 28. Each row has 2 fewer sts than the row before.
- Row 29: 16 sts
- Row 30: 14 sts
- Row 31: 12 sts
- Row 32: 10 sts
- Row 33: 8 sts
- Row 34: 6 sts
- Row 35: 4 sts
- Row 36: 2 sts
Row 37: Ch 1, sc2tog. (1 st) This single st is the peak. Do not fasten off.
Decreasing 1 st at each end of every row gives a roof slope of about 45 degrees. The roof is 10 rows tall, about 2 1/4 in (5.7 cm), and each slope edge is about 3 1/4 in (8.3 cm) long.
Border (Cream)
Border gauge: The border keeps the panel gauge of 4 sts per inch along every edge. Along the walls, the row ends are packed tighter (4.5 rows per inch), so you skip some row ends to keep the edge flat.
Rnd 1: Continue from the peak. Ch 1 and work 3 sc in the peak st. Then work down and around the panel:
- Right slope: Work 13 sc across the 10 row ends. Work 1 sc in each row end, and 2 sc in the 3rd, 6th and 9th row ends. (13 sts)
- Right wall: Work (sc in next 8 row ends, skip 1 row end) 3 times. (24 sts)
- Bottom: Working into the foundation ch loops, work 3 sc in the first st, sc in the next 18 sts, 3 sc in the last st. (24 sts, including both corner groups)
- Left wall: Work 24 sc as for the right wall. (24 sts)
- Left slope: Work 13 sc as for the right slope. (13 sts)
Sl st to the first sc to join.
Rnd 1 total: 3 + 13 + 24 + 24 + 24 + 13 = 101 sts.
Rnd 2: Ch 1. Work sc in each st around, but work 3 sc in the center st of each 3-sc group (the 2 bottom corners and the peak). Sl st to join.
Rnd 2 total: 101 worked 1 per st + 6 extra = 107 sts.
Counts per section in Rnd 2:
- Bottom: 28 sts, including both corner groups
- Each wall: 24 sts
- Each slope: 13 sts
- Peak group: 5 sts
Check: 28 + 24 + 24 + 13 + 13 + 5 = 107.
Why the math works:
- The walls have 24 sts over 6 in (15.2 cm), which is exactly 4 sts per inch.
- The slopes have 13 sts over about 3 1/4 in (8.3 cm), which is also about 4 sts per inch.
- The corner increases add 2 sts per corner per round. That is the amount a turned corner needs to lie flat.
Fasten off.
Roof Trim (Rust)
This trim is worked into Rnd 2 along the roof only. Rnd 2 has 31 sts there: 13 on the left slope, 5 in the peak group and 13 on the right slope.
Row 1 (RS): Join rust in the first st of the left slope, right after the 24 left wall sts. Ch 1 and work:
- sc in the 13 slope sts
- sc in the next 2 sts
- 3 sc in the peak center st
- sc in the next 2 sts
- sc in the 13 right slope sts
Turn. (31 worked 1 per st + 2 extra = 33 sts)
Row 2: Ch 1, 2 hdc in the first st, hdc in the next 15 sts, 3 hdc in the next st (the center of the peak), hdc in the next 15 sts, 2 hdc in the last st, turn. (33 worked 1 per st + 4 extra = 37 sts)
Row 3: Ch 1, 2 sc in the first st, sc in the next 17 sts, 3 sc in the next st (the peak center), sc in the next 17 sts, 2 sc in the last st. (37 worked 1 per st + 4 extra = 41 sts)
Fasten off.
The extra stitches at each end make the eaves flare about 1/2 in (1.3 cm) past each wall. That gives the overhanging roof line in the photo. The extra stitches at the peak keep the point sharp.
Check: the piece is 10 in (25.4 cm) tall and about 7 in (17.8 cm) across the eaves.
Window (Brown)
Ch 5.
Row 1: Sc in 2nd ch from hook and across, turn. (4 sts)
Rows 2–5: Ch 1, sc across, turn. (4 sts)
Row 6: Ch 1, sc2tog twice. (2 sts) Do not turn.
Edging Rnd: Ch 1, then work:
- 2 sc in each of the 2 top sts (4 sts)
- 1 sc in each of the 6 row ends down the side (6 sts)
- along the foundation: 2 sc in the first st, sc in the next 2 sts, 2 sc in the last st (6 sts)
- 1 sc in each of the 6 row ends up the other side (6 sts)
Sl st to join. (22 sts)
The Row 6 decreases round off the top, and the edging smooths them into an arch. The window measures 1.5 in (3.8 cm) wide x about 1 3/4 in (4.4 cm) tall. Leave a long tail for sewing.
Cross: With cream, embroider one long straight stitch from the top of the arch to the bottom center, and a second straight stitch across the middle. Couch each one down with tiny stitches.
Door (Cream)
Ch 7.
Row 1: Sc in 2nd ch from hook and across, turn. (6 sts)
Rows 2–7: Ch 1, sc across, turn. (6 sts)
Row 8: Ch 1, sc2tog, sc in next 2 sts, sc2tog. (4 sts) Do not turn.
Edging Rnd: Ch 1, then work:
- top: 2 sc in the first st, sc in the next 2 sts, 2 sc in the last st (6 sts)
- 8 sc down the 8 row ends (8 sts)
- along the foundation: 2 sc in the first st, sc in the next 4 sts, 2 sc in the last st (8 sts)
- 8 sc up the other side (8 sts)
Sl st to join. (30 sts)
The door measures 2 in (5.1 cm) wide x about 2 1/4 in (5.7 cm) tall, with an arched top and a flat bottom.
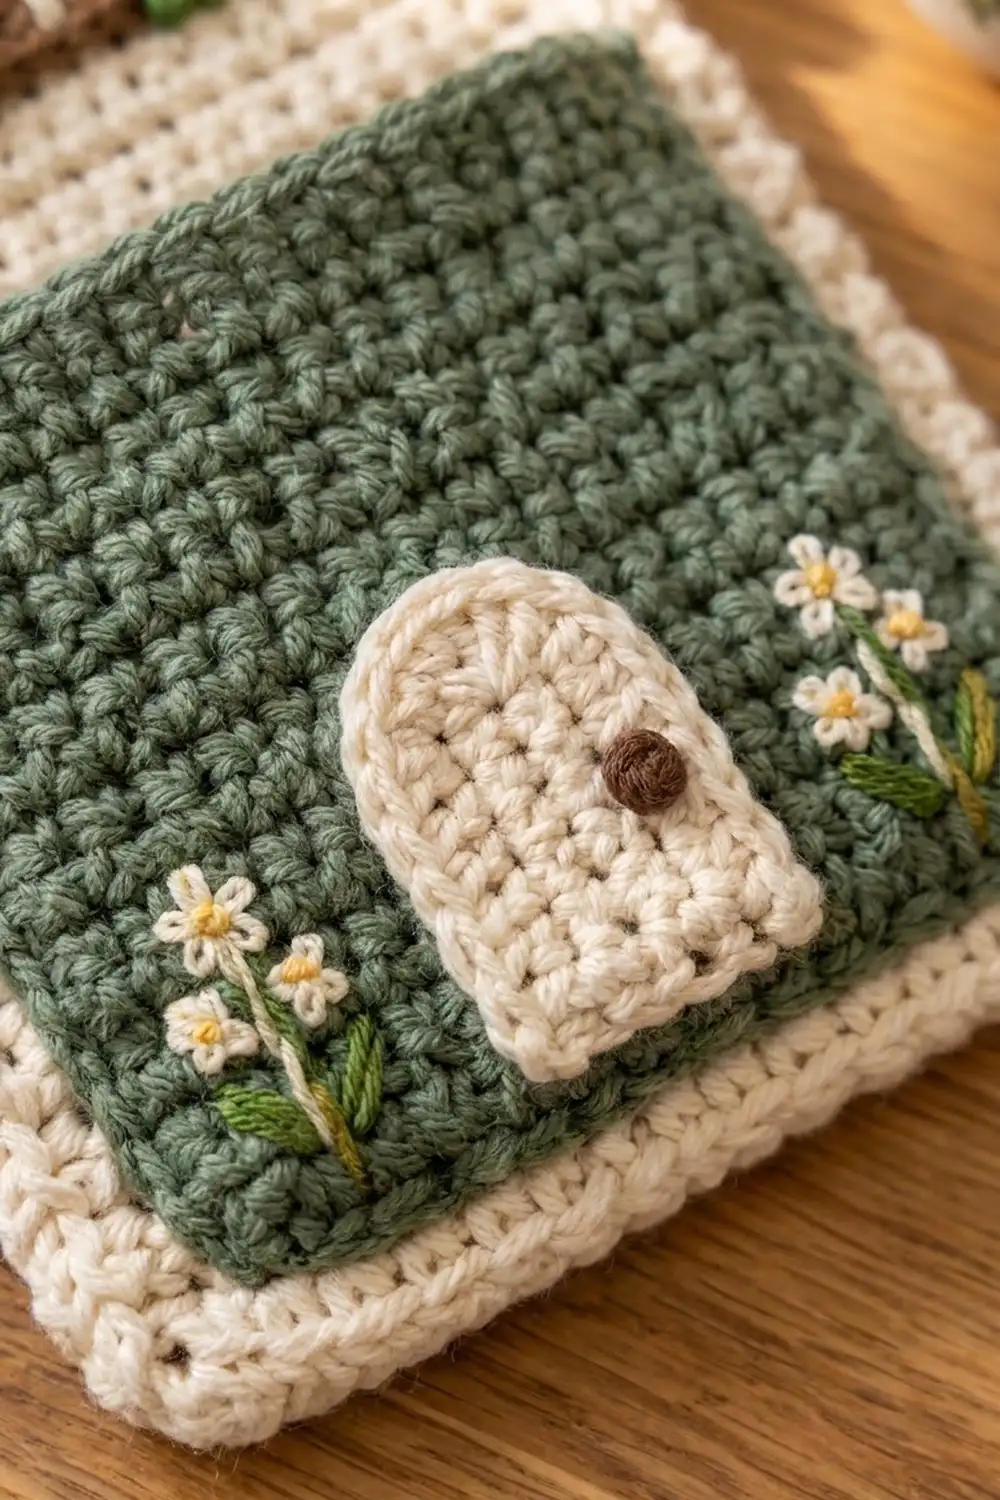
Knob: With brown, work a French knot wrapped 3 times on the right side of the door, at mid-height and 2 sts in from the edge. You can sew on the 3/8 in (1.0 cm) button instead.
Pocket (Sage Green)
Ch 21.
Row 1: Sc in 2nd ch from hook and across, turn. (20 sts)
Rows 2–18: Ch 1, sc across, turn. (20 sts)
Check: 5 in (12.7 cm) x 4 in (10.2 cm).
Edging Rnd: Ch 1, then work:
- Top: 3 sc in the first st, sc in the next 18 sts, 3 sc in the last st. (24 sts)
- Side: Work (sc in next 8 row ends, skip 1 row end) 2 times. (16 sts)
- Bottom: 3 sc in the first foundation st, sc in the next 18 sts, 3 sc in the last st. (24 sts)
- Other side: Work 16 sts as for the first side.
Sl st to join. Total: 80 sts.
Check: 5.5 in (14.0 cm) wide x about 4.5 in (11.4 cm) tall. Fasten off and leave a long tail.
Embroidery and Assembly
1. Pocket front. Do this before the pocket is attached so your stitches go through the pocket only.
- Center the door with its bottom edge on the pocket’s bottom edging round. Whipstitch it in place with cream through the pocket only.
- About 3/4 in (1.9 cm) to each side of the door, embroider a stem cluster:
- a leaf-green stem stitch line about 1 in (2.5 cm) tall
- 2 leaf-green lazy-daisy leaves
- 2 cream lazy-daisy flowers with 5 petals each, at the top of the stem
- a yellow French knot in the center of each flower
2. Window. Center the window on the back panel with its bottom edge on Row 24, 3 rows below the eave line. Whipstitch it in place with brown. At each lower corner of the window, embroider:
- one cream lazy-daisy flower with a yellow French knot center
- 2 sage green lazy-daisy leaves
3. Attach the pocket. Pin the pocket to the lower panel:
- Line up the pocket’s side edges with border Rnd 1, so Rnd 2 shows as a 1/4 in (0.6 cm) cream margin.
- Line up the pocket’s bottom edge with the inner edge of Rnd 2.
Whipstitch the two sides and the bottom with sage, matching 1 pocket edging st to 1 panel st. Leave the center 6 bottom sts open, 1.5 in (3.8 cm) directly under the door, so the charging cable can pass through. Leave the top edge open.
4. Loop. With sage, ch 25. Sc in 2nd ch from hook and across. (24 sts, about 6 in / 15.2 cm)
Fold the cord in half. Sew both ends to the back of the panel, overlapping the peak by 1/2 in (1.3 cm). Sew through the cream back only so the stitches don’t show on the rust trim. The loop should stand about 2.5 in (6.4 cm) above the peak.
Final Blocking
- Weave in all ends on the back. Run them along stitches of the same color.
- Lightly mist the holder, or hold a steam iron just above it. Never press directly on the fabric.
- Pin it flat, right side up, at 6 in (15.2 cm) across the walls and 10 in (25.4 cm) to the peak.
- Pin the eaves out so they flare evenly, about 7 in (17.8 cm) from tip to tip.
- Use your fingers to smooth the arches of the door and window into round curves.
- Slip a piece of card into the pocket so it dries open and flat.
- Let it dry completely before you unpin it.
Final Quality-Control Checklist
- Panel is 6 in (15.2 cm) wide and 10 in (25.4 cm) tall.
- Both walls are straight and the same length, and the eaves flare equally.
- Border Rnd 2 has 107 sts and roof trim Row 3 has 41 sts.
- The pocket is centered, with an even 1/4 in (0.6 cm) cream margin on both sides.
- The 6-st cable gap is open and lines up with the bottom of the door.
- The window cross is centered and the flowers are mirrored on both sides.
- The loop is firmly anchored and is not visible from the front.
- A phone slides into the pocket easily and does not tip forward.
Troubleshooting
Walls ripple along the border: You worked into too many row ends. Make sure you skip every 9th row end.
Walls pull in or cup: Your border tension is tight. Go up a hook size for the border only.
Peak is blunt: Check that you worked 3 sts into the center st in every border round and trim row.
Eaves curl upward: Steam-block them flat. If they still curl, work Row 3 of the trim in sl st instead of sc.
Phone feels tight: If your phone is wider than 3 1/4 in (8.3 cm), add 2 sts to the pocket and to the back panel foundation.
Embroidery puckers: Keep your stitches loose and lay the fabric flat while you embroider.
Care
Hand wash in cool water with mild soap, press out the water in a towel, and dry flat, reshaping it to its blocked measurements. Don’t tumble dry.
Final Notes
The measurement chain is simple:
- 20 sts = 5 in (12.7 cm)
- 27 rows = 6 in (15.2 cm) of wall
- 10 roof rows reach the peak at about 8 1/4 in (21.0 cm)
- 2 border rounds bring it to 6 in (15.2 cm) x 9 1/4 in (23.5 cm)
- 3 rust trim rows bring it to the final 10 in (25.4 cm)
The 5.5 in (14.0 cm) pocket fits inside the border with a 1/4 in (0.6 cm) margin on each side. If your gauge matches at the first checkpoint, everything else falls into place.
Happy crocheting!