

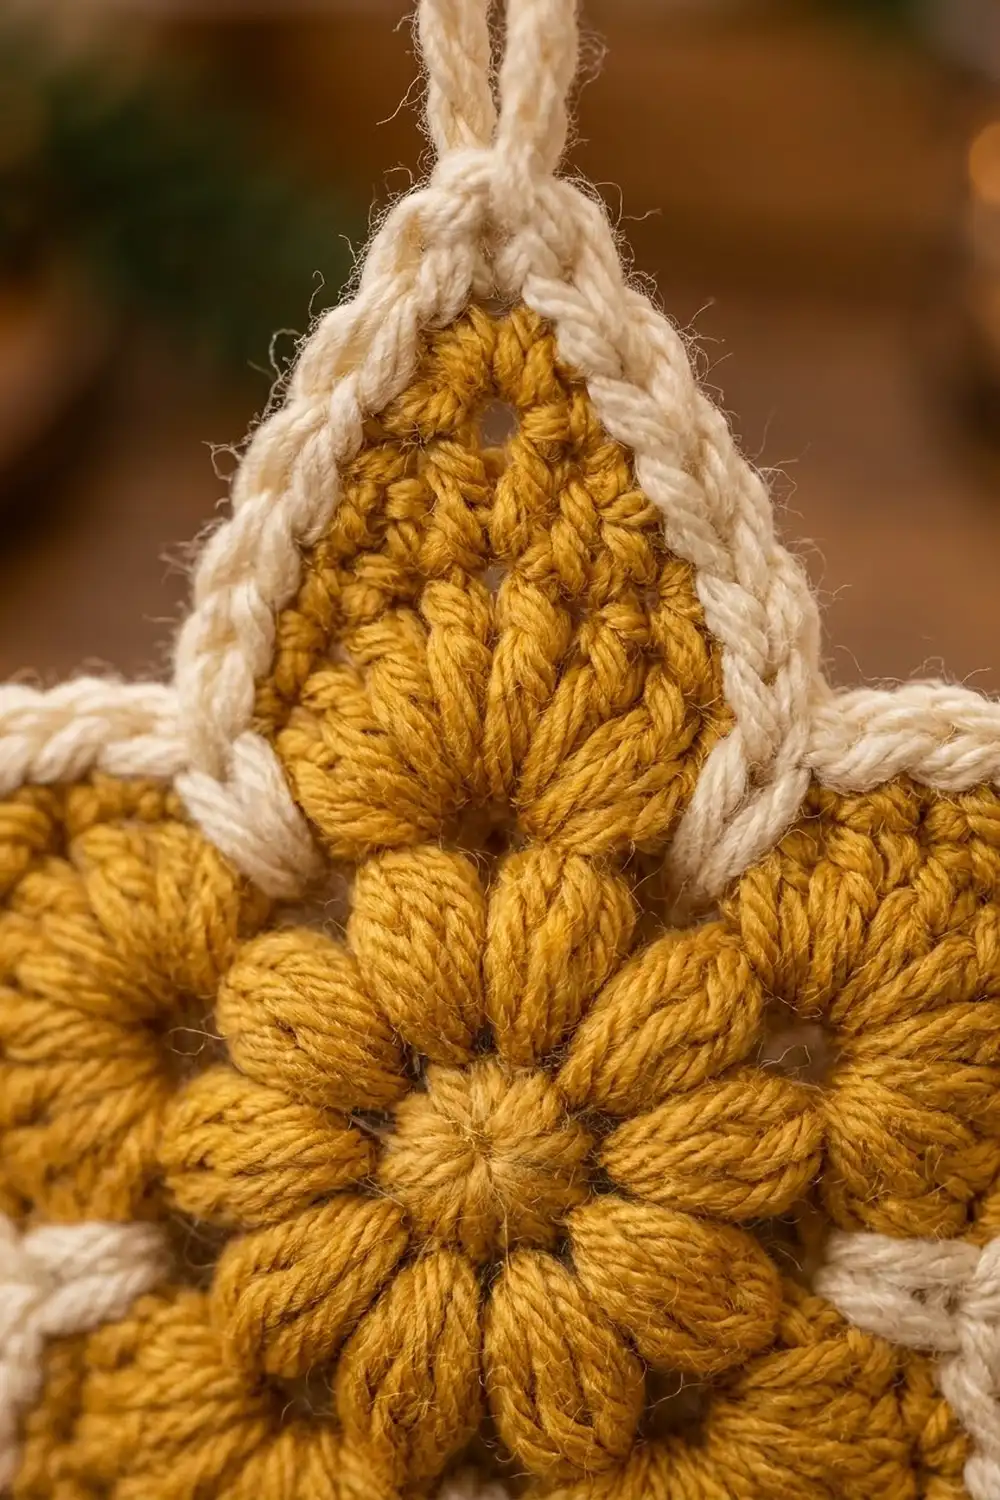
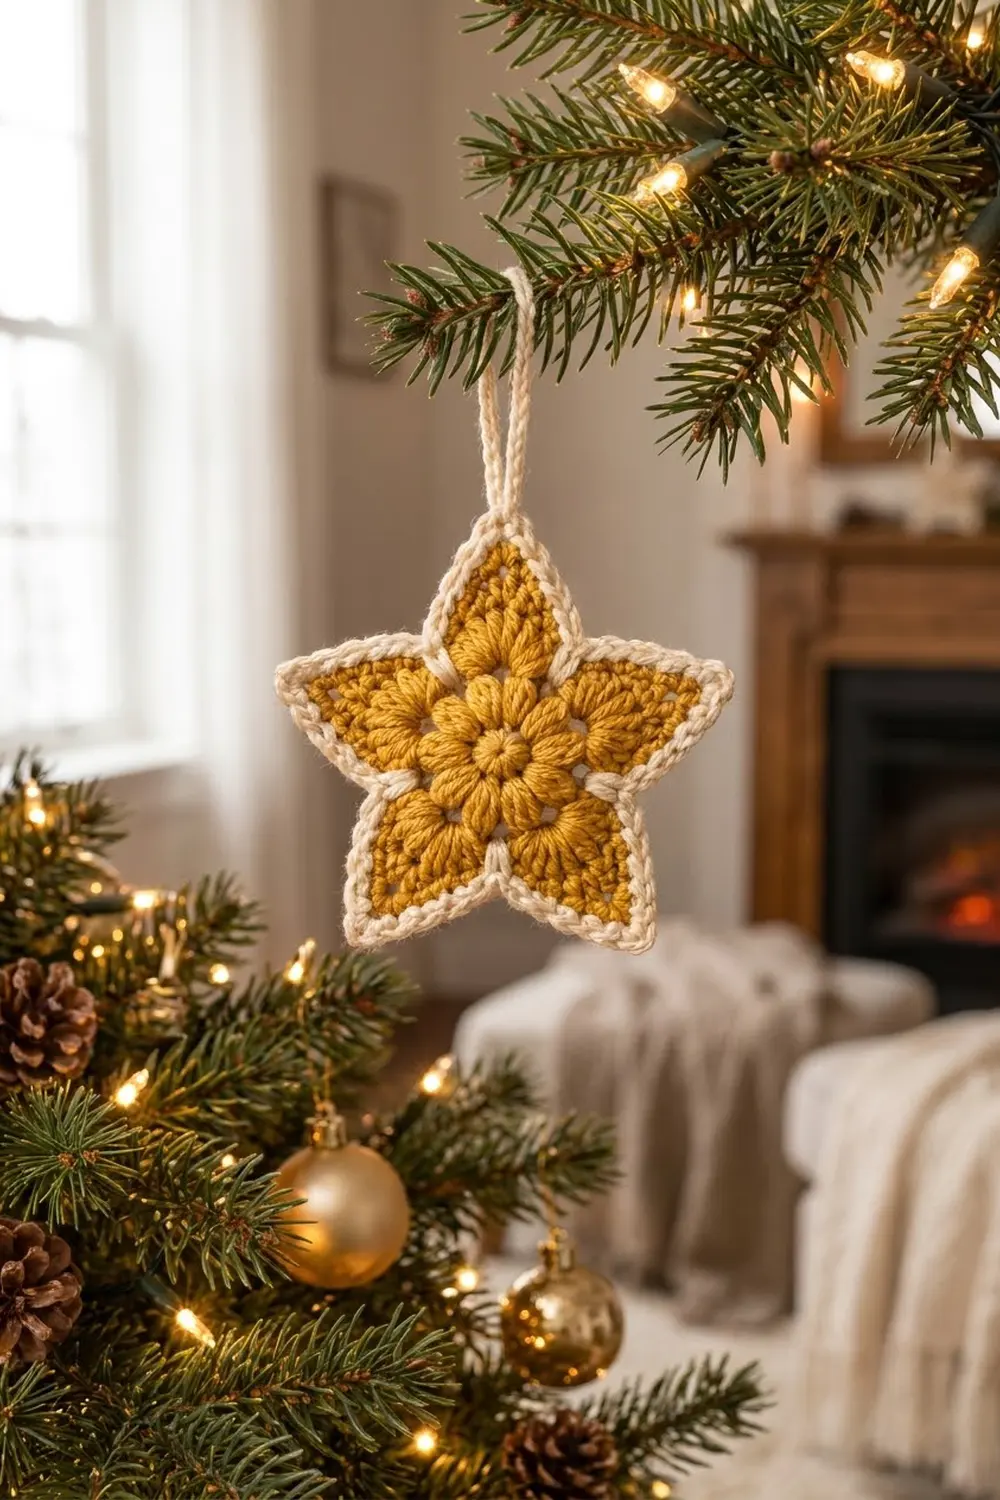
The Golden Glow Star is a small Christmas ornament made in one piece. The body is warm mustard gold and the outline is crisp cream. In the middle, a ring of ten puff stitches forms a flower, and five solid double crochet points grow out from it. Two rounds of cream single crochet trace the whole outline, and a cream chain loop at the top lets it hang from a branch.
The colors are kept simple on purpose: one golden yellow and one natural cream. Against green branches and warm fairy lights, the gold looks like a softly glowing star, and the cream edge keeps the shape sharp from across the room.
This pattern uses US crochet terms. The finished star is about 4.5 in (11.4 cm) across, tip to tip, including the border. The hanging loop adds about 2 in (5.1 cm).
The star works up quickly. First you crochet a puff-stitch flower in the round and turn it into a ring of 30 stitches. Then you work five points in short rows without cutting the yarn. A two-round cream border sharpens the tips and valleys, and you chain the hanging loop at the end of the border. It is all one piece, with no sewing and only four ends to weave in.
Finished Size and Construction
- Finished size: about 4.5 in (11.4 cm) across, tip to tip
- Skill level: Easy / advanced beginner
- Terminology: US crochet terms
- Yarn weight: worsted (#4, medium)
- Hook: 4.0 mm (US G-6)
- Number of pieces: 1
- Layout: one five-pointed star, worked from the center out
- Piece size: 4.5 in (11.4 cm) with border
- Size before border: 3.75 in (9.5 cm) tip to tip
- Border depth: about 3/8 in (1.0 cm) on every edge
Materials
Choose a smooth worsted-weight yarn so the puff stitches stay clear. Acrylic is light and holds up well on a tree. Cotton or a cotton blend gives crisper points and a slightly matte finish. Avoid fuzzy or loosely plied yarn, because the puff petals will lose their shape.
- Color A, mustard gold: 10 g, about 20 m (22 yd)
- Color B, cream: 5 g, about 10 m (11 yd)
These amounts are for one star. They include extra for the gauge test, yarn tails, and small differences in tension. One standard skein of each color makes enough stars for a whole tree.
Tools:
- 4.0 mm (US G-6) crochet hook
- Tapestry needle
- Scissors
- 2 locking stitch markers
- Ruler or tape measure
- Pins, a foam blocking mat, and a spray bottle
Abbreviations (US Terms)
- ch – chain
- sl st – slip stitch
- sc – single crochet
- sc2tog – single crochet 2 together
- sc3tog – single crochet 3 together
- dc – double crochet
- dc2tog – double crochet 2 together
- sp – space
- st(s) – stitch(es)
- RS – right side
Special stitch – Puff stitch (puff): (Yarn over, insert hook in the stitch, yarn over and pull up a loop about 1/2 in [1.3 cm] tall) 3 times. Yarn over and pull through all 7 loops on the hook. Ch 1 tightly to close the puff. This closing ch 1 is part of the puff and is not counted separately.
Note: The ch 2 at the start of each dc row in the points does not count as a stitch. This keeps the edges of the points straight and makes the counts easy to check.
Gauge and Checkpoints
Gauge: 16 sc and 18 rows = 4 in (10.2 cm) in Color A with a 4.0 mm hook.
Before you make a batch, test one star body: Rounds 1–3 plus one point. Measure each stage against these checkpoints:
- After Round 1: 0.75 in (1.9 cm) across
- After Round 2: 1.25 in (3.2 cm) across
- After Round 3: 1.75 in (4.4 cm) across
- Each point: 1 in (2.5 cm) tall, measured from the edge of Round 3 to the tip
- Before border: 3.75 in (9.5 cm) tip to tip
- After border: 4.5 in (11.4 cm) tip to tip
If your circle after Round 3 is wider than 1.75 in (4.4 cm), switch to a 3.75 mm hook. If it is smaller, switch to a 4.5 mm hook. Being 1/8 in (0.3 cm) off at Round 3 makes the finished star about 1/4 in (0.6 cm) off, so fix it early.
If the circle cups, your puffs are too tight, so pull the loops a little taller. If it ruffles, the sc in Round 3 are too loose, so work them more firmly.
Star Center (Color A)
Round 1: With Color A, make a magic ring. Ch 1 and work 10 sc into the ring. Pull the ring closed and sl st to the first sc. (10 sc)
Round 2: Ch 1, puff in the same st as the join, ch 1. Puff in next sc, ch 1; repeat from * 8 more times. Sl st to the top of the first puff. (10 puffs + 10 ch-1 sps = 20 sts)
This round makes the ten-petal flower. Gently push each puff outward with your finger so the petals sit evenly.
Round 3: Ch 1. Sc in the top of the next puff, 2 sc in the next ch-1 sp; repeat from * 9 more times. Sl st to the first sc. (10 sc worked into puffs + 20 sc worked into ch-1 sps = 30 sc)
Each puff gets 1 sc and each ch-1 sp gets 2 sc. The circle should lie flat and measure 1.75 in (4.4 cm). Do not fasten off.
Star Points (Color A)
You work the five points in short rows directly on top of Round 3. Each point uses 6 sts of Round 3 (30 ÷ 5 = 6), so it sits neatly above two petals of the flower. When a point is finished, you slip stitch down its side and start the next point, so you never cut the yarn.
Put a marker in the first sc of Round 3, where Point 1 starts. Put a second marker in the 7th sc as a check. If Point 1 ends right before that marker, your spacing is correct.
Point 1
Row 1 (RS): Ch 2 (does not count as a st). Dc in the same st as the join and in each of the next 5 sts. Turn. (6 dc)
Row 2: Ch 2, dc2tog, dc in next 2 sts, dc2tog. Turn. (4 sts)
Row 3: Ch 2, dc2tog twice. Turn. (2 sts)
Row 4: Ch 1, sc2tog. (1 st) Do not turn.
This sc2tog is the tip of the point.
Slip down: Work 3 sl sts evenly down the left side of the point: 1 in the side of Row 3, 1 in the side of Row 2, and 1 in the side of Row 1. You are now at the base of the point, next to the 6th st of the group.
Points 2–5
Ch 2, then dc in the next unworked st of Round 3 and in each of the next 5 sts. Turn. (6 dc) Repeat Rows 2–4 and the slip-down exactly as for Point 1.
After the slip-down of Point 5, sl st into the base of the first dc of Point 1. Fasten off Color A and weave in the tail on the wrong side.
Point check: You should have 5 points, each worked over exactly 6 sts, with no Round 3 sts skipped or left over (5 × 6 = 30). Each point is 1 in (2.5 cm) tall, and the star measures 3.75 in (9.5 cm) tip to tip.
Lay the star flat and push each point into a clean triangle before starting the border. The border is easier to place when you can clearly see the valleys between the points.
Border (Color B)
Border gauge: Two rounds of sc in Color B add about 3/8 in (1.0 cm) to every edge. That takes the star from 3.75 in (9.5 cm) to 4.5 in (11.4 cm) tip to tip (3.75 + 0.375 + 0.375 = 4.5 in).
Work 2 sc into the side of each dc row on a point, because a dc row is about as tall as two sc rows. The sc2tog at the top of Row 4 is the tip, and you work the tip stitches into it.
Round 1: With the RS facing, join Color B with a sl st in the sc2tog at the tip of Point 1. Ch 1 and work (sc, ch 2, sc) in the same st. Then work down the left side of Point 1:
- 5 sc down: 2 sc in the side of Row 3, 2 sc in the side of Row 2, and 1 sc in the side of Row 1. Work these over the sl sts so they are hidden.
- Valley sc: Insert the hook through the side of Row 1 of this point and the side of Row 1 of the next point together. Work 1 sc through both. (1 sc)
- 5 sc up the next point: 1 sc in the side of Row 1, 2 sc in the side of Row 2, and 2 sc in the side of Row 3.
- Tip: (sc, ch 2, sc) in the sc2tog tip.
Repeat these four steps (5 sc down, valley sc, 5 sc up, tip) around the star. Stop after the last 5 sc up the right side of Point 1, without working its tip again, and sl st to the first sc.
Count per point: 1 tip sc + 5 sc down + 1 valley sc + 5 sc up + 1 tip sc = 13 sc, plus 1 ch-2 sp.
Round 1 total: 13 × 5 = 65 sc and 5 ch-2 sps.
Round 2: Sl st into the first ch-2 sp. Ch 1 and work (sc, ch 2, sc) in the same sp. Then:
- Sc in the next 5 sts (the Round 1 tip sc and 4 side sc).
- Sc3tog over the next 3 sts: the last side sc, the valley sc, and the first side sc of the next point.
- Sc in the next 5 sts (4 side sc and the Round 1 tip sc).
- (sc, ch 2, sc) in the next ch-2 sp.
Repeat around. Stop after the last 5 sc on the right side of Point 1, without working its tip again, and sl st to the first sc.
Count per point: 2 tip sc + 5 sc + 1 sc3tog + 5 sc = 13 sts, plus 1 ch-2 sp.
Round 2 total: 13 × 5 = 65 sts and 5 ch-2 sps.
Why the math works: The count stays at 65 because each point gains 2 sts at its tip and loses 2 sts at its valley. The sc3tog turns 3 sts into 1, which removes 2. The (sc, ch 2, sc) adds 2 new sc where Round 1 had none, which adds 2. Because these balance, the straight edges stay flat. The extra stitches push the tips outward, and the decreases pull the valleys inward. This gives the sharp, even cream outline you see on the finished star.
Hanging Loop: After the final sl st of Round 2, sl st into the ch-2 sp at the tip of Point 1. Ch 20, then sl st into the same ch-2 sp. Fasten off, leaving a 6 in (15.2 cm) tail.
The chain folds into a loop about 2 in (5.1 cm) tall. Run the tail back through the base of the loop once to make it stronger, then weave it in along the cream border.
Weave in all remaining ends. There are 4 in total: the magic ring tail, the Color A end, the Color B starting tail, and the loop tail.
Final Blocking
- Mist the star lightly with water until it is damp but not wet. If it is acrylic, you can steam it instead: hold the iron 1 in (2.5 cm) above the yarn and never let it touch.
- Lay the star RS up on a foam mat.
- Pin the center of the puff flower so it stays in place.
- Pin each tip through its ch-2 sp. Stretch gently until the star measures 4.5 in (11.4 cm) tip to tip.
- Check that all five points are the same length, measured from the center of the flower to each tip.
- Pin each valley, pressing it slightly toward the center.
- Pin the loop so it points straight up from Point 1.
- Let the star dry completely, at least 4 hours, before removing the pins.
Final Quality-Control Checklist
- Round 3 has exactly 30 sc and lies flat at 1.75 in (4.4 cm).
- All 10 puffs are even and point outward.
- Each point uses 6 sts and ends in a single sc2tog tip.
- There are no gaps at the valleys where the points meet.
- Border Rounds 1 and 2 each have 65 sts and 5 ch-2 sps.
- The cream outline is the same width all the way around.
- The tips are sharp, the valleys are crisp, and the star measures 4.5 in (11.4 cm).
- The hanging loop is secure and about 2 in (5.1 cm) tall.
- All 4 ends are woven in on the wrong side.
Troubleshooting
The center cups or bowls. Your puffs are too short. Pull up longer loops, or go up half a hook size for Round 2 only.
The center ruffles. Round 3 is too loose. Work the sc more firmly, or use a 3.75 mm hook for Round 3.
One point is shorter than the others. Count Row 1 of that point. It must have 6 dc. If a point starts in the wrong stitch, the next one will be off too, so check your spacing against the markers.
Points lean to one side. This is normal for points worked in short rows. Blocking fixes it: pin each tip straight out from the center.
Gaps at the valleys. Make sure the valley sc goes through both Row 1 edges at once, and pull it snug.
Border ripples along the points. You are adding too many sc. Check that each side of every point has exactly 5 sc in Round 1.
Tips look rounded. Work the ch 2 at each tip tightly, and pin firmly through the ch-2 sp when blocking.
Care
Hand wash in cool water with mild soap. Press the water out in a towel and dry flat, reshaping the points. Store the star flat between seasons so the tips and loop keep their shape.
Final Notes
Here is the full measurement chain for this star. Round 1 is 0.75 in (1.9 cm), Round 2 is 1.25 in (3.2 cm), and Round 3 is 1.75 in (4.4 cm) with 30 sc. Five points of 6 sts each, 1 in (2.5 cm) tall, bring the star to 3.75 in (9.5 cm). Two border rounds of 65 sts add 3/8 in (1.0 cm) to each edge, for a final size of 4.5 in (11.4 cm), plus a 2 in (5.1 cm) loop.
If you hit the Round 3 checkpoint, the rest of the star almost takes care of itself. Make one star, check it, and then fill a whole tree with golden stars.
Happy crocheting!