
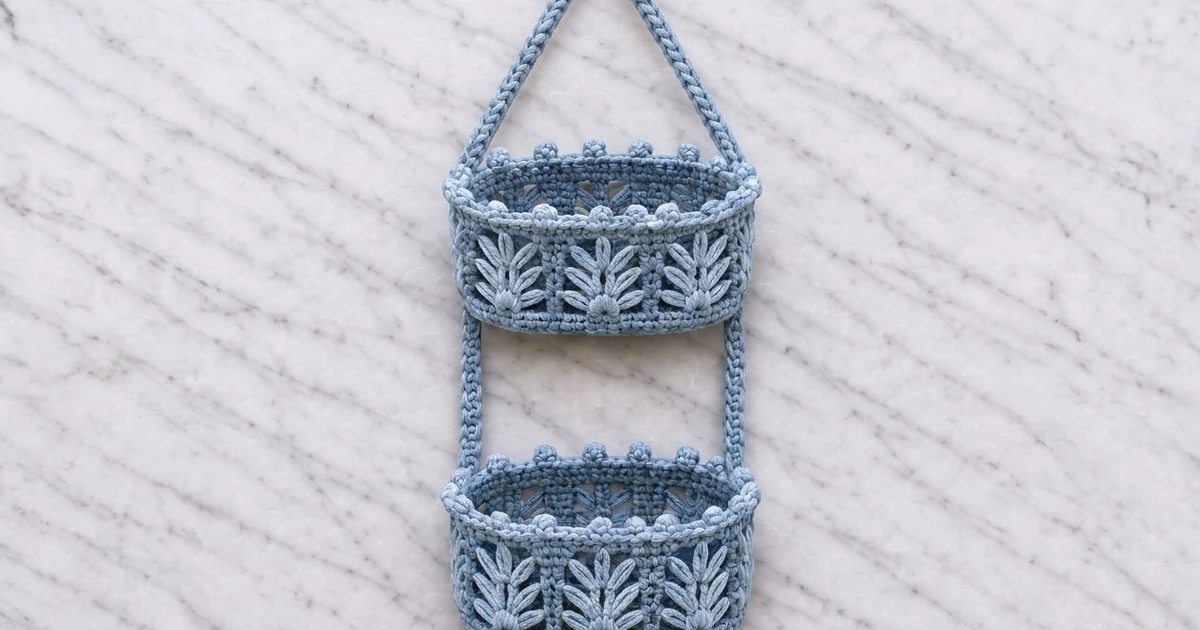
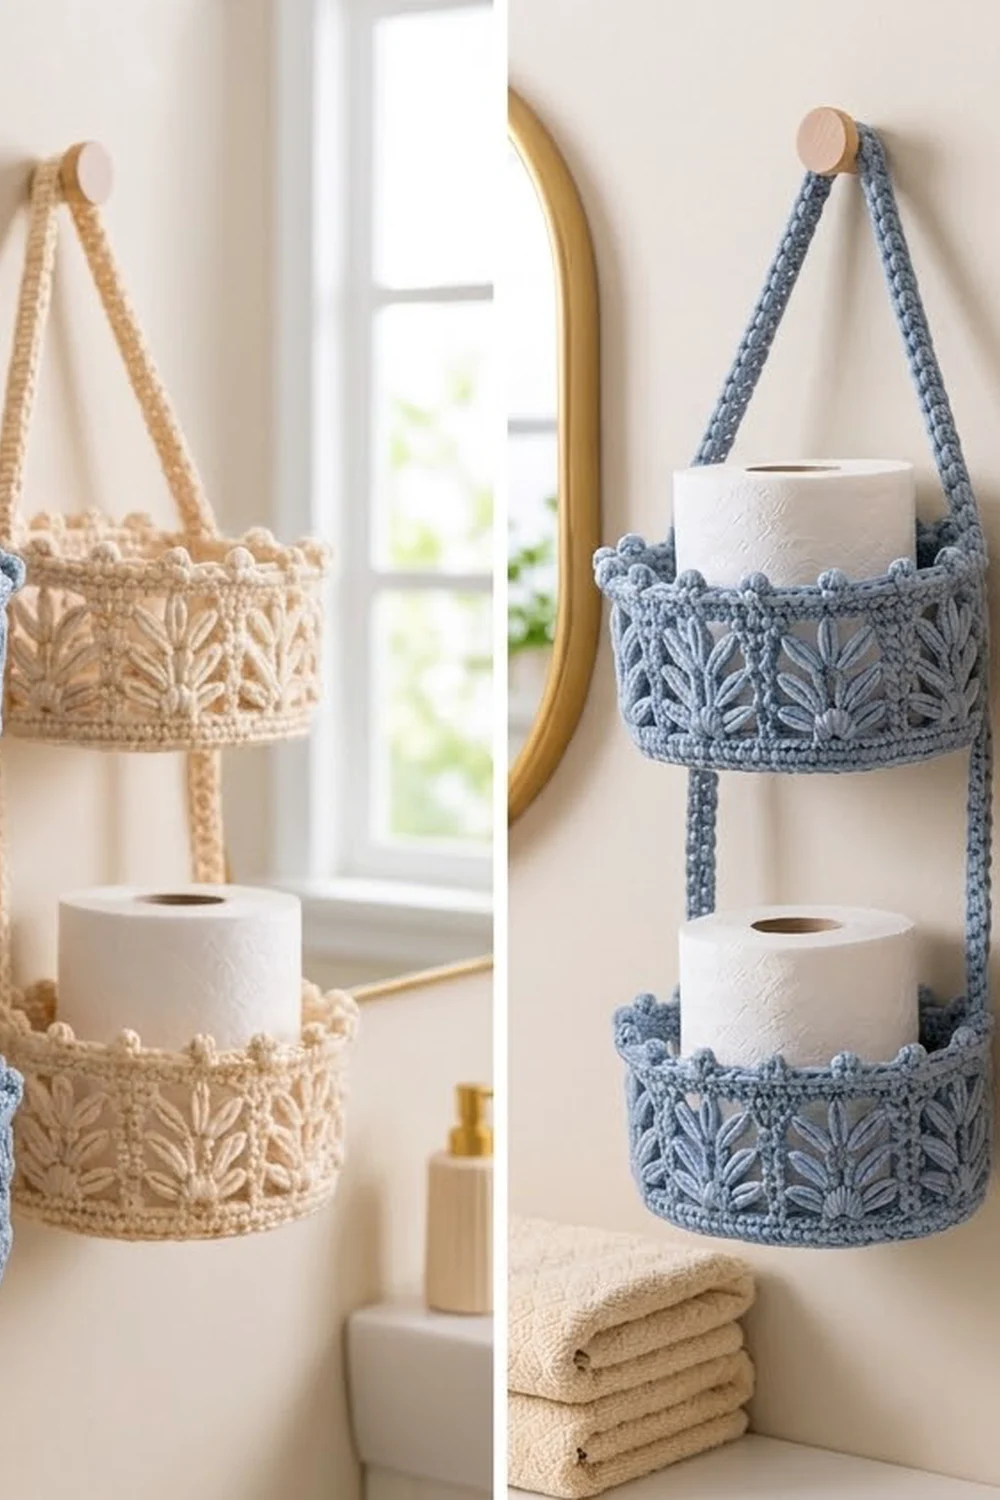
This two-tier hanging basket keeps spare toilet rolls, washcloths, or small bathroom supplies off the counter. Two oval baskets hang one above the other on a pair of sturdy crocheted straps that meet in a neat triangle at the top.
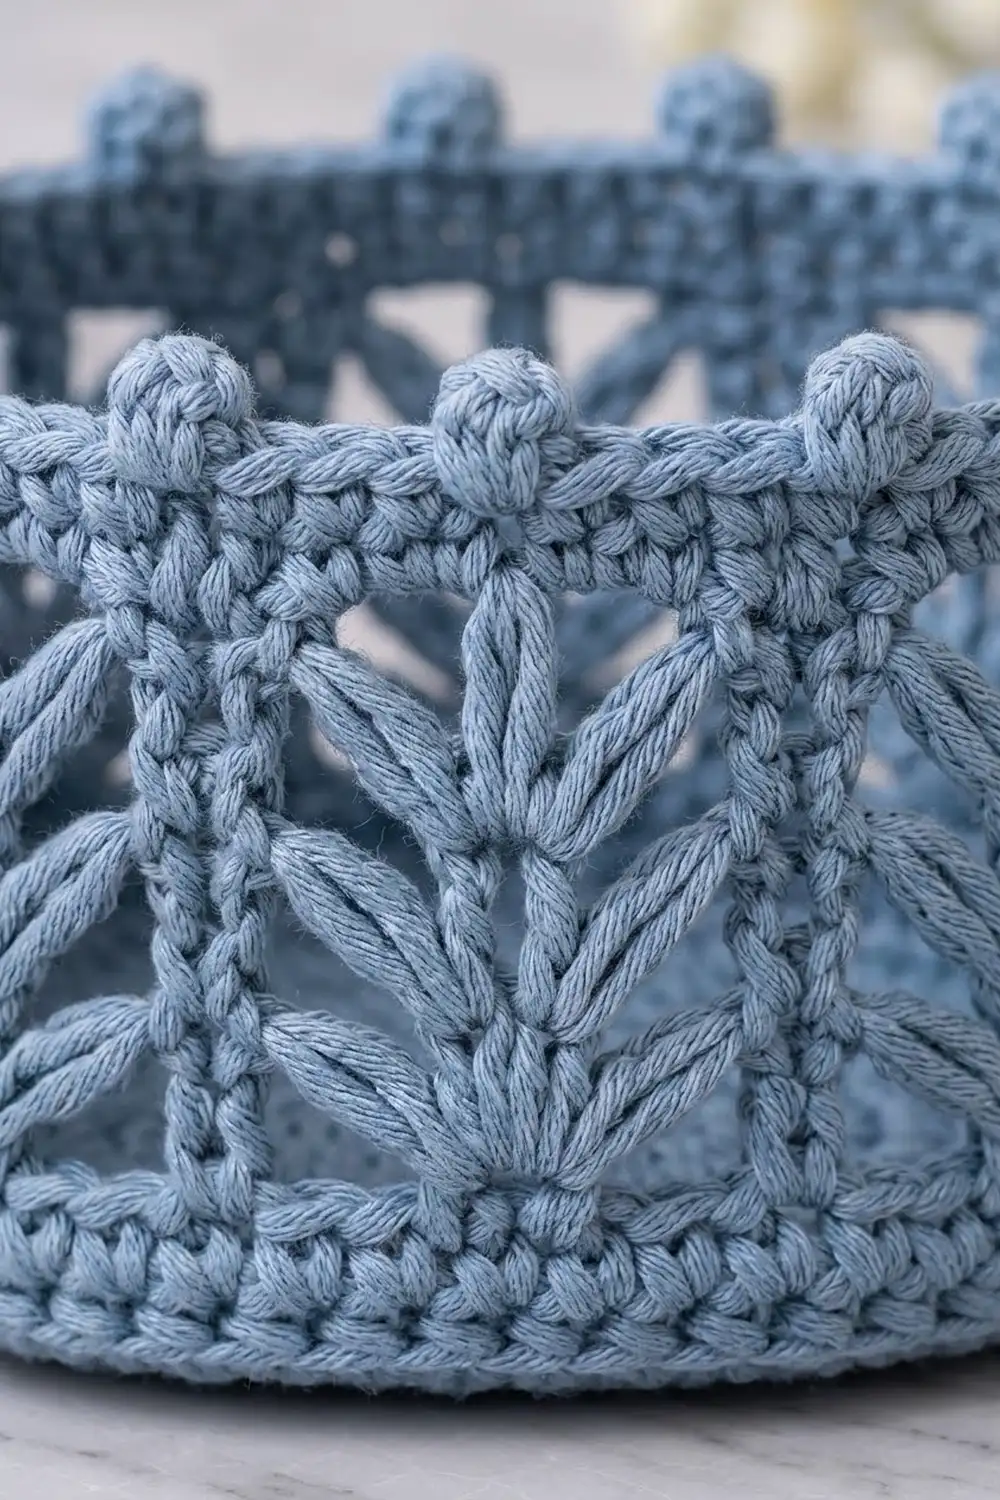
The sample is worked in a soft dusty blue cotton. Each basket wall has raised leaf fans made of puff stitches, separated by front-post columns. Above them is an open V-stitch band and a little row of bobbles along the rim. A cream version is just as pretty if you want a matching pair.
The pattern uses US crochet terms. The finished organizer measures about 7 in (17.8 cm) wide and about 20 in (50.8 cm) tall, including the hanging loop. Each basket is about 4.75 in (12.1 cm) wide, 7 in (17.8 cm) long, and 3.5 in (8.9 cm) tall.
Construction is simple. Crochet an oval base in joined rounds, turn the wall up with a back-loop round, work the textured wall, and finish with a bobble rim. Make two baskets, crochet two flat straps, and sew everything together.
Finished Size and Construction
- Finished organizer: about 7 in (17.8 cm) wide x 20 in (50.8 cm) tall, including loop
- Skill level: Intermediate
- Terminology: US crochet terms
- Yarn weight: Worsted (#4) cotton
- Hook: 4.0 mm (G-6)
- Number of pieces: 4 (2 baskets, 2 straps), plus a hanging loop worked at the top point
- Layout: 2 baskets stacked vertically with a 4.5 in (11.4 cm) gap
- Basket base: 4.75 in (12.1 cm) x 7 in (17.8 cm)
- Wall height before border: 3 in (7.6 cm)
- Border depth: 0.5 in (1.3 cm), for a total wall height of 3.5 in (8.9 cm)
- Strap: 20 in (50.8 cm) long x 0.5 in (1.3 cm) wide
Materials
Choose a smooth, firm worsted-weight cotton or cotton blend. Cotton keeps the walls upright and holds the puff texture well. Avoid fuzzy or very stretchy acrylics, because the baskets will sag under weight.
- Dusty blue: 180 g (about 306 m)
- Optional second organizer in cream: another 180 g (about 306 m)
Tools:
- 4.0 mm (G-6) crochet hook
- Tapestry needle
- 6 stitch markers
- Scissors
- Measuring tape
- Spray bottle and two small boxes or rolled towels for blocking
Quantities include a margin of about 10% for gauge checks and sewing tails.
Abbreviations (US Terms)
- ch: chain
- sl st: slip stitch
- sc: single crochet
- dc: double crochet
- BLO: back loop only
- FPdc: front post double crochet
- sp: space
- st(s): stitch(es)
- yo: yarn over
Special stitches
- Puff: (Yo, insert hook in st or sp, yo, pull up a loop to about 0.5 in (1.3 cm)) 3 times, yo, pull through all 7 loops, ch 1 to lock. The locking ch is the top of the puff and isn’t counted separately.
- V-st: (dc, ch 1, dc) in the same st or sp.
- Bobble picot (bp): Ch 3, (yo, insert hook in 3rd ch from hook, yo, pull up a loop, yo, pull through 2 loops) 4 times, yo, pull through all 5 loops, sl st in the sc just made. A bp doesn’t count as a stitch.
Gauge and Checkpoints
Gauge is 16 sc and 18 rounds = 4 in (10.2 cm) in sc. The basket fabric should feel firm, with no gaps between stitches.
Make one full basket first and check it before starting the second. These checkpoints keep everything on track:
- After Rnd 1: base is about 3 in (7.6 cm) long.
- After Rnd 6: base is about 2.5 in (6.4 cm) x 4.75 in (12.1 cm).
- After Rnd 11: base is about 4.75 in (12.1 cm) x 7 in (17.8 cm).
- After Rnd 16: wall is about 1.75 in (4.4 cm) tall.
- After Rnd 19: wall is about 3 in (7.6 cm) tall.
- After Rnd 21: wall is about 3.5 in (8.9 cm) tall.
If your base is too big, go down 0.5 mm in hook size. If it’s too small, go up 0.5 mm. If the base ruffles even though your gauge is right, your tension is loose on the curved ends, so work those stitches more tightly.
Basket (Make 2)
Base
Join every round with a sl st to the first st. The ch 1 at the start of sc rounds doesn’t count as a stitch.
Rnd 1: Ch 12. Work 3 sc in 2nd ch from hook (end B), sc in next 9 ch, 3 sc in last ch (end A). Working along the opposite side of the foundation chain, sc in next 9 ch. Join. (24 sts)
Each round now begins with end B, followed by a straight side of 9 sts, end A, and the second straight side of 9 sts. The straight sides stay at 9 sts; all increases happen on the curved ends.
Rnd 2: Ch 1, [2 sc in each of next 3 sts, sc in next 9] twice. Join. (30 sts)
Rnd 3: Ch 1, [(sc in next st, 2 sc in next st) 3 times, sc in next 9] twice. Join. (36 sts)
Rnds 4–11: For round number n, work: ch 1, [(sc in next n−2 sts, 2 sc in next st) 3 times, sc in next 9] twice. Join. For example, Rnd 4 uses (sc in next 2, 2 sc in next).
Stitch counts for each round:
- Rnd 4: 42 sts
- Rnd 5: 48 sts
- Rnd 6: 54 sts
- Rnd 7: 60 sts
- Rnd 8: 66 sts
- Rnd 9: 72 sts
- Rnd 10: 78 sts
- Rnd 11: 84 sts
In Rnd 11, each curved end has 33 sts and each straight side has 9 sts: 33 + 9 + 33 + 9 = 84.
Wall
Rnd 12: Ch 1, sc in BLO of each st around. Join. (84 sts) This makes a crisp ridge where the wall turns up.
Rnd 13: Ch 1, sc in each st around. Join. (84 sts) Sl st in next 14 sts. The next unworked st (st 16) is where Rnd 14 begins. This shift puts a post column at the center of each curved end (old sts 16–18 and 58–60), where the straps will sit later. From here on, old st 16 counts as st 1 of the round.
Rnd 14: Ch 2 (doesn’t count), [FPdc around each of next 3 sts, skip 5 sts, (puff, ch 1) 4 times and puff in next st, skip 5 sts] 6 times. Join to first FPdc. (18 FPdc, 30 puffs, 24 ch-1 sps)
Each repeat uses exactly 14 sts: 3 + 5 + 1 + 5 = 14, so 6 repeats use all 84 sts. The 5 puffs fan out from a single stitch to form the base of each leaf fan.
Rnd 15: Ch 2, [FPdc around each of next 3 FPdc, puff in top of next puff, (ch 1, skip ch-1 sp, puff in top of next puff) 4 times] 6 times. Join. (18 FPdc, 30 puffs, 24 ch-1 sps)
Stacking each puff on the one below makes the long leaf shapes.
Rnd 16 (conversion round): Ch 1, [sc in each of next 3 FPdc, sc in next puff, 2 sc in next ch-1 sp, (sc in next puff, sc in next ch-1 sp) twice, sc in next puff, 2 sc in next ch-1 sp, sc in next puff] 6 times. Join. (84 sts)
Per repeat: 12 sts worked one into each existing st or sp (3 + 5 + 4), plus 2 extra, for 14. Around: 72 + 12 = 84.
Rnd 17: Ch 2, [FPdc around each of the 3 FPdc 2 rounds below (Rnd 15), skipping the 3 sc behind them, (skip 2 sc, V-st in next sc) 3 times, skip 2 sc] 6 times. Join. (18 FPdc, 18 V-sts)
Each repeat uses 3 + 11 = 14 sts. The center V-st sits directly above the center of each leaf fan.
Rnd 18: Ch 2, [FPdc around each of next 3 FPdc, V-st in ch-1 sp of each of next 3 V-sts] 6 times. Join. (18 FPdc, 18 V-sts)
Rnd 19 (conversion round): Ch 1, [sc in each of next 3 FPdc, (sc in next dc, 2 sc in ch-1 sp, sc in next dc), (sc in next dc, sc in ch-1 sp, sc in next dc), (sc in next dc, 2 sc in ch-1 sp, sc in next dc)] 6 times. Join. (84 sts)
Per repeat: 12 sts worked one into each existing st or sp (3 + 9), plus 2 extra, for 14. Around: 72 + 12 = 84. Check the wall height here: 3 in (7.6 cm).
Border
The border is the bobble rim at the top of each basket. Its gauge matches the base gauge: 4 sc per 1 in (2.5 cm).
For counting, divide the rim into two sides of 42 sts each, measured from the column at one end to the column at the other. Each side is about 10.5 in (26.7 cm), so the rim measures about 21 in (53.3 cm) around.
Rnd 20: Ch 1, sc in each st around. Join. (84 sts: 42 per side)
Rnd 21: Ch 1, sc in first 2 sts, [sc in next 6, sc in next st and work bp] 5 times, sc in next 7, [sc in next 6, sc in next st and work bp] 5 times, sc in last 5. Join and fasten off. (84 sc and 10 bp: 42 sc and 5 bp per side)
Count check: 2 + 35 + 7 + 35 + 5 = 84.
Why the math works: The wall is 6 repeats of 14 sts, so the 84 sts divide evenly into 12 sections of 7. A bobble every 7 sts lands over each leaf center and each side column. There are no bobbles over the 2 end columns (sts 2 and 44) because the straps cover those spots. That leaves 12 − 2 = 10 bobbles.
Weave in all ends. Make a second basket the same way.
Strap (Make 2)
Row 1: Ch 81. Sc in 2nd ch from hook and in each ch across. (80 sts)
Row 2: Ch 1, turn, sc in each st across. (80 sts) Fasten off, leaving a 24 in (61.0 cm) tail.
Each strap measures 20 in (50.8 cm) x 0.5 in (1.3 cm). Mark the strap sections from the bottom end:
- Sts 1–14: sewn to the lower basket, 3.5 in (8.9 cm)
- Sts 15–32: free gap, 4.5 in (11.4 cm)
- Sts 33–46: sewn to the upper basket, 3.5 in (8.9 cm)
- Sts 47–80: free side of the top triangle, 8.5 in (21.6 cm)
Check: 14 + 18 + 14 + 34 = 80.
Make All Pieces
For the sample, all pieces are dusty blue:
- Baskets: 2
- Straps: 2
Layout (front view):
              loop
               ^
         strap   strap
     [  upper basket  ]
     |  4.5 in gap    |
     [  lower basket  ]
Joining
Sew one strap onto each curved end of both baskets, centered on the end column (wall sts 1–3 on one end, sts 43–45 on the other).
Stitch-to-stitch logic: Each sc-height round of the wall matches 1 strap st, and each dc-height round matches 2 strap sts. The wall has 6 sc-height rounds (12, 13, 16, 19, 20, 21) and 4 dc-height rounds (14, 15, 17, 18): 6 + (4 x 2) = 14 strap sts per basket.
- Place strap st 1 at the BLO ridge of the lower basket and strap st 14 at the rim.
- Whipstitch both long edges of the strap to the column, one stitch per strap st.
- Leave sts 15–32 free, then sew sts 33–46 to the upper basket the same way.
- Repeat on the other end with the second strap.
- Bring both strap tops together, overlap the last 2 sts of each strap, and sew them flat through both layers.
Hanging loop: Join yarn at the top point, ch 10, and sl st back into the same spot. Work 14 sc into the loop, sl st to join, and fasten off.
Tension: Sew snugly, but don’t pull the column inward. The strap should lie flat with no puckering.
Size checkpoint: Hang the organizer. The gap between the lower rim and the upper base should be 4.5 in (11.4 cm). Overall height should be about 20 in (50.8 cm).
Final Blocking
- Lightly spray each basket until it’s damp but not soaked.
- Fill each basket with a small box or rolled towel so the oval shape holds and the walls stand straight.
- Pinch each puff leaf and bobble into shape with your fingers.
- Lay the straps flat and smooth them straight.
- Let everything dry completely, for at least 24 hours, before loading.
Final Quality-Control Checklist
- Both bases measure 4.75 in (12.1 cm) x 7 in (17.8 cm).
- Both walls are 3.5 in (8.9 cm) tall.
- Each basket has 6 leaf fans and 6 columns.
- Each rim has 10 bobble picots, 5 per side.
- The straps are centered on the end columns.
- The gap between baskets is 4.5 in (11.4 cm).
- The baskets hang level, with no twisting.
- All ends are woven in securely.
Troubleshooting
- Base cups before the wall: Your tension is too tight at the ends. Loosen up, or go up a hook size for the base.
- Base ruffles: Check that the straight sides stay at 9 sts every round.
- Fans look flat: Pull up taller puff loops, about 0.5 in (1.3 cm).
- Columns drift sideways: Recheck the sl st shift after Rnd 13. The columns must start at old st 16.
- Basket tilts: One strap is sewn higher than the other. Re-sew it using the 14-stitch count.
- Rim flares: Work Rnds 20–21 with a hook 0.5 mm smaller.
Care
Hand wash in cool water and lay flat to dry, reshaping the baskets around a box. Don’t tumble dry, because heat can shrink cotton unevenly.
Final Notes
Each stage sets up the next. The base is 4.75 in (12.1 cm) x 7 in (17.8 cm) with 84 sts. The wall is 3 in (7.6 cm) before the border, and the 0.5 in (1.3 cm) bobble rim brings it to 3.5 in (8.9 cm). Two 20 in (50.8 cm) straps set a 4.5 in (11.4 cm) gap between the baskets. Check each stage before moving on, and your organizer will hang straight and strong.
Happy crocheting!