

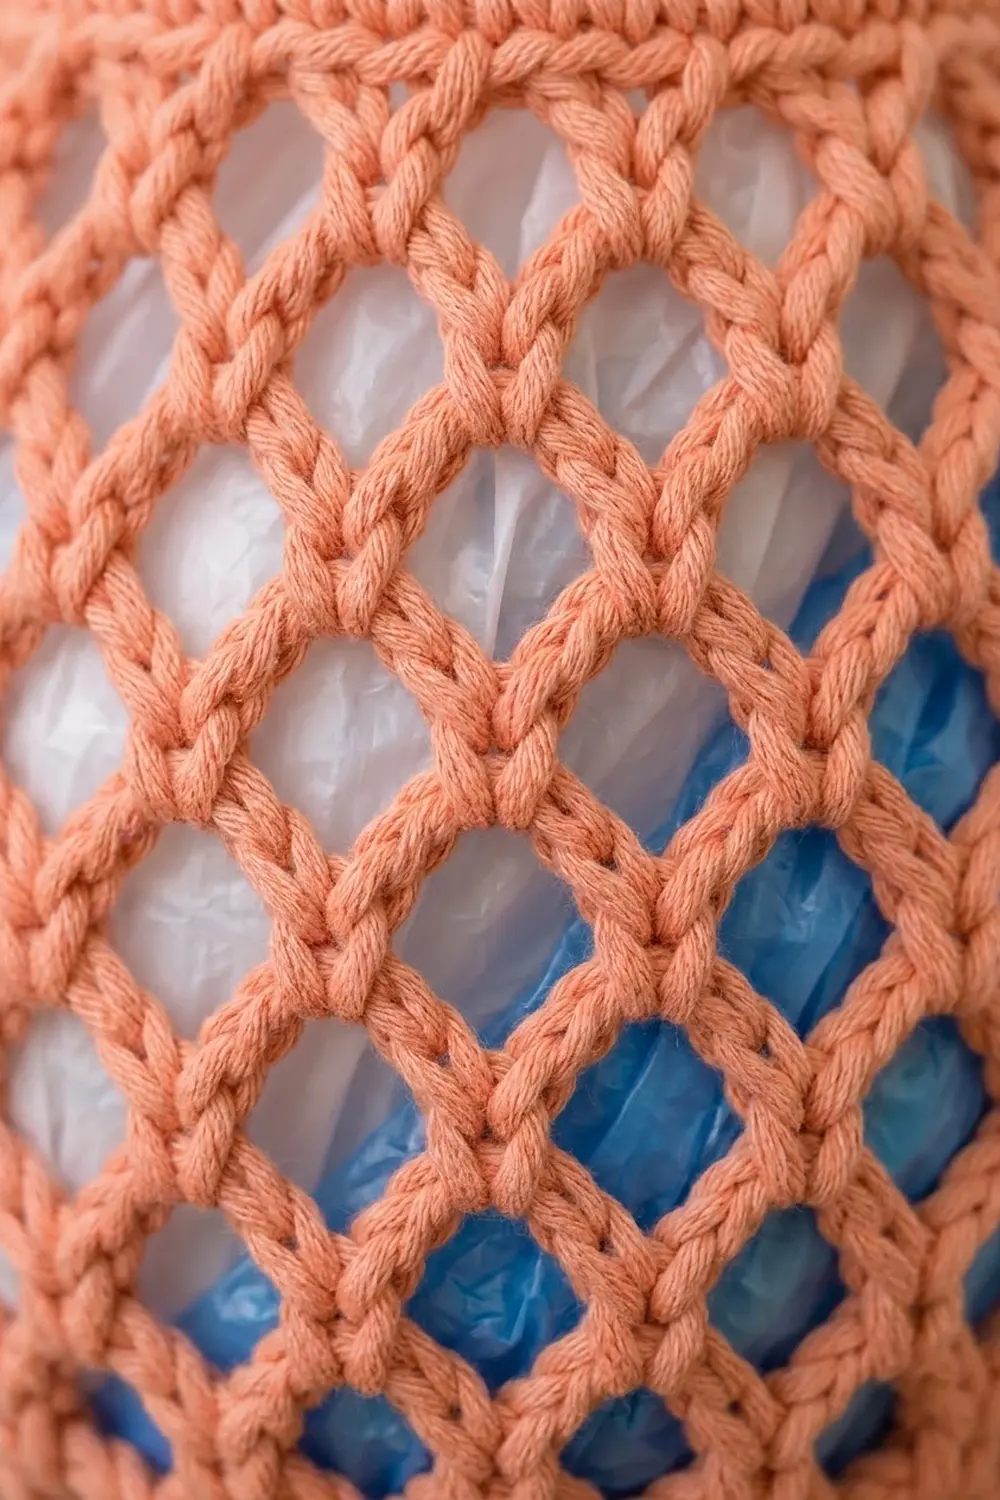
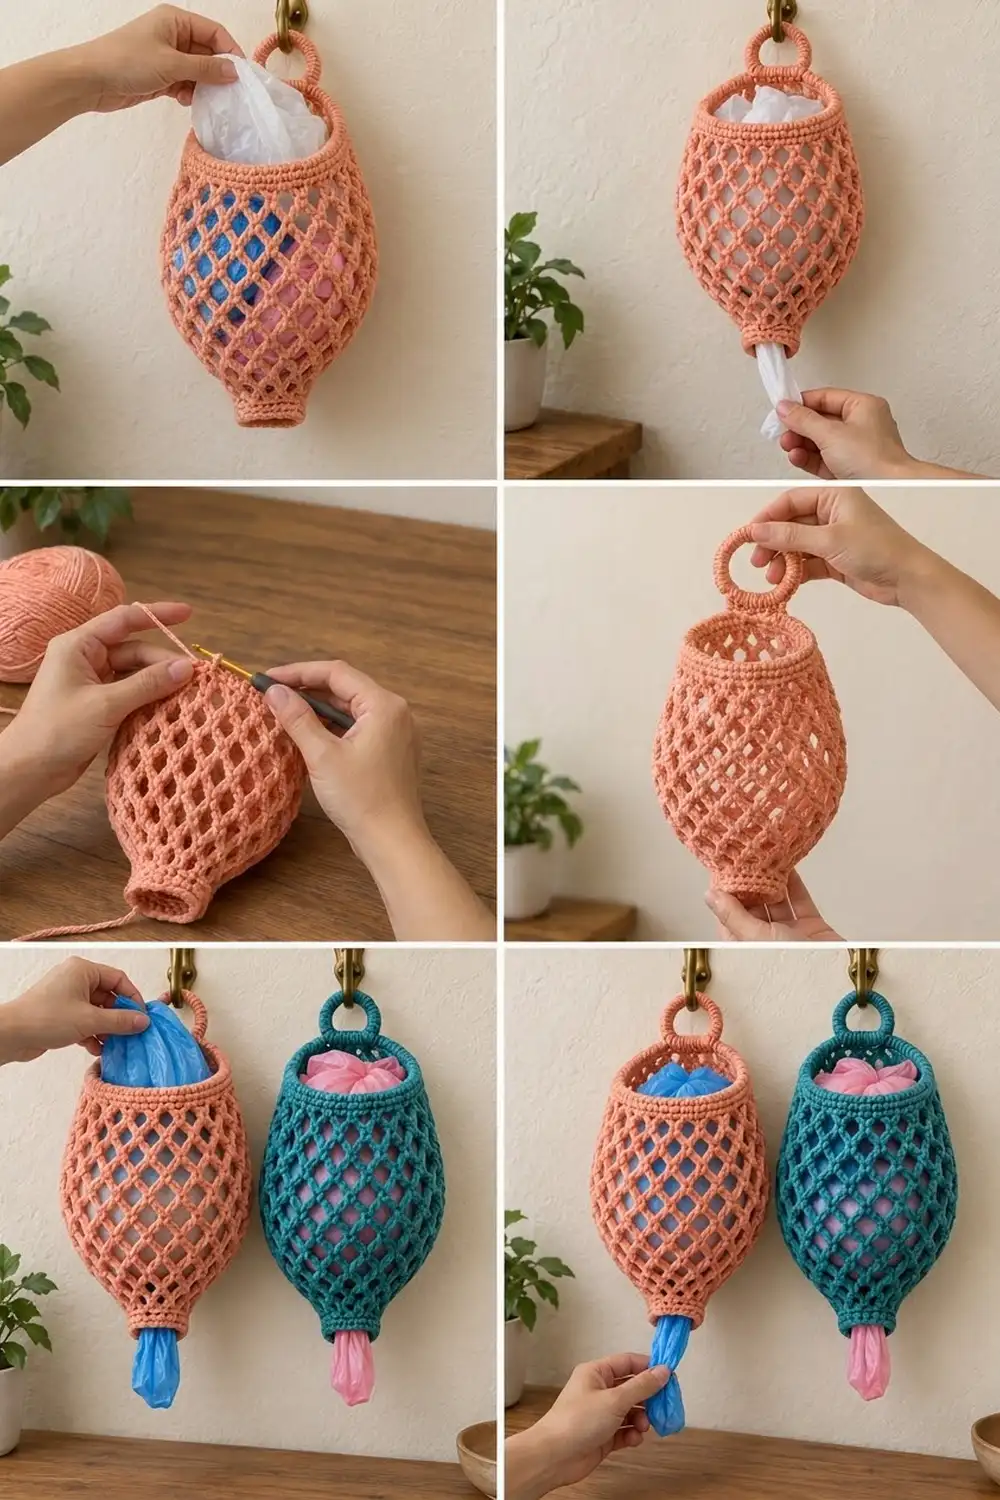
The Coral Net Plastic Bag Holder is a practical, pretty way to tame that drawer full of grocery bags. You stuff bags in through the wide top opening, and you pull them out one at a time through the narrow tube at the bottom. The open diamond mesh lets you see at a glance when you’re running low.
The sample is in a warm coral cotton, and the same pattern works well in teal or any solid color. The look is relaxed and modern, with crisp solid bands at the top and bottom framing a stretchy net body. This pattern uses US crochet terms throughout.
The finished holder is about 13 in (33.0 cm) tall without the hanger, and about 16 in (40.6 cm) tall with the ring. It measures about 8 in (20.3 cm) across at the widest point when filled.
You’ll work the body in one piece from the bottom up. You start with a small solid tube, open into mesh rounds that grow by adding loops and lengthening chains, then narrow back toward the top by shortening the chains. A solid single crochet band finishes the rim. Last, you cover a ring in single crochet, work a short tab from it, and sew the tab to the back of the rim.
Finished Size and Construction
- Finished size: about 13 in (33.0 cm) tall without the hanger, 16 in (40.6 cm) with the hanger; about 8 in (20.3 cm) across at the widest point
- Skill level: Easy (confident beginner)
- Terminology: US crochet terms
- Yarn weight: worsted / aran (#4) cotton
- Hook: 5.0 mm (H-8)
- Number of pieces: 1 body plus 1 ring hanger, which gets sewn on
- Layout: single hanging holder, worked in joined rounds from the bottom up
- Bottom tube: 6 in (15.2 cm) around, about 1.9 in (4.8 cm) wide
- Size before top band: about 12 in (30.5 cm) tall
- Top band depth: about 1.3 in (3.3 cm)
Materials
Yarn: Use a smooth worsted-weight cotton or cotton blend. Cotton holds its shape when the holder is stuffed full and doesn’t stretch out over time. Avoid very fuzzy yarns, because they catch on plastic.
- Main color (coral): 60 g / 100 m (about 109 yd)
- Optional second holder (teal): another 60 g / 100 m (about 109 yd)
These quantities include a margin of about 25% for your gauge swatch and tails. One standard 100 g skein makes one holder with yarn to spare.
Tools:
- 5.0 mm (H-8) crochet hook
- 1 plastic or metal ring, 2 in (5.1 cm) inner diameter
- Stitch marker
- Tapestry needle
- Scissors
- Measuring tape
- A 5 in (12.7 cm) round object for blocking, such as a small bowl, ball or balloon
Abbreviations (US Terms)
- ch – chain
- sc – single crochet
- sc2tog – single crochet 2 together
- sl st – slip stitch
- sk – skip
- st(s) – stitch(es)
- rnd(s) – round(s)
- ch-N loop – the loop made by N chains in the previous round
Special stitch – loop increase: Work (sc, ch N, sc, ch N) all in the same ch-loop. This turns 1 loop into 2.
Mesh round structure: Every mesh round starts with sl st into the first ch-loop, ch 1, and sc in that same loop. It ends by joining with sl st to the first sc. The ch 1 does not count as a stitch. Because each sc sits in a loop of the round below, the loops stack into diamonds.
Gauge and Checkpoints
Gauge: 16 sc and 18 rnds = 4 in (10.2 cm) in sc worked in the round.
Make the bottom tube (Rnds 1–6) first and treat it as your swatch. Lay it flat; it should measure 3 in (7.6 cm) across, which is half of the 6 in (15.2 cm) circumference.
Checkpoints (measured hanging, with light downward stretch):
- After Rnd 6: tube is 1.3 in (3.3 cm) tall and 6 in (15.2 cm) around.
- After Rnd 9: total height about 3.5 in (8.9 cm).
- After Rnd 15: total height about 9.5 in (24.1 cm). The body is about 25 in (63.5 cm) around at its widest.
- After Rnd 18: total height about 12 in (30.5 cm).
- After Rnd 24: total height about 13 in (33.0 cm). The rim is 18 in (45.7 cm) around, about 5.7 in (14.5 cm) across.
If your tube is too big: go down one hook size, to 4.5 mm. A loose tube lets bags fall out.
If your tube is too small: go up one hook size, to 5.5 mm. A tight tube makes bags hard to pull through.
Once the tube gauge is right, the mesh will fall into place. Mesh is forgiving, so focus on the solid sections.
Bottom Tube
Leave a 6 in (15.2 cm) tail.
Foundation: Ch 24. Join with sl st to the first ch to form a ring, taking care not to twist the chain.
Rnd 1: Ch 1, sc in each ch around. Join with sl st to the first sc. (24 sc)
Rnds 2–6: Ch 1, sc in each st around. Join. (24 sc each round)
Checkpoint: the tube is 6 in (15.2 cm) around and 1.3 in (3.3 cm) tall. This is the dispensing opening, so bags should squeeze through it but not drop out on their own.
Mesh Body
The mesh opens out over Rnds 7–9, stays at full width for Rnds 10–15, and then narrows over Rnds 16–18 as the chains get shorter. The loop count stays at 20 from Rnd 9 onward. Only the chain length changes the width.
Rnd 7 (first mesh round): Ch 1, sc in next st, ch 3, sk next st. Repeat from * 11 more times. Join with sl st to the first sc.
(12 sc and 12 ch-3 loops)
This uses all 24 tube stitches: 12 repeats × 2 sts = 24.
Rnd 8 (increase): Sl st into the first ch-3 loop, ch 1. (Sc in next loop, ch 4) twice, then (sc, ch 4, sc, ch 4) in the next loop. Repeat from * 3 more times. Join with sl st to the first sc.
(16 ch-4 loops)
Each repeat uses 3 old loops and makes 4 new ones: 4 repeats × 4 = 16.
Rnd 9 (increase): Sl st into the first loop, ch 1. (Sc in next loop, ch 5) 3 times, then (sc, ch 5, sc, ch 5) in the next loop. Repeat from * 3 more times. Join.
(20 ch-5 loops)
Each repeat uses 4 old loops and makes 5 new ones: 4 repeats × 5 = 20.
Checkpoint: total height about 3.5 in (8.9 cm).
Rnds 10–15 (widest section): Sl st into the first loop, ch 1. Sc in next loop, ch 6. Repeat from * 19 more times. Join.
(20 ch-6 loops each round)
Each sc plus its ch-6 spans about 1.25 in (3.2 cm) when the mesh opens into diamonds. That gives 20 × 1.25 = 25 in (63.5 cm) around, or about 8 in (20.3 cm) across when filled.
Checkpoint after Rnd 15: total height about 9.5 in (24.1 cm).
Rnds 16–17 (begin narrowing): Sl st into the first loop, ch 1. Sc in next loop, ch 5. Repeat from * 19 more times. Join.
(20 ch-5 loops each round)
Rnd 18: Sl st into the first loop, ch 1. Sc in next loop, ch 4. Repeat from * 19 more times. Join with sl st to the first sc.
(20 ch-4 loops)
Checkpoint: total height about 12 in (30.5 cm). This is your size before the top band.
Top Band (Border)
Band gauge: The same as the tube, 16 sc = 4 in (10.2 cm). Every 4 sc gives 1 in (2.5 cm) of rim.
Rnd 19 (conversion round): Ch 1, sc in the same sc as the join, then 3 sc in the next ch-4 loop. Sc in next sc, 3 sc in next ch-4 loop. Repeat from * 18 more times. Join.
(80 sc = 20 sc worked 1-per-existing sc + 60 sc worked into the 20 loops)
Rnd 20 (decrease): Ch 1. Sc in next 8 sts, sc2tog. Repeat from * 7 more times. Join.
(72 sc = 8 repeats × 9 sts)
Rnds 21–23: Ch 1, sc in each st around. Join.
(72 sc each round)
Rnd 24: Ch 1, sl st loosely in each st around. Join to the first sl st.
(72 sl sts)
Fasten off and weave in the end.
Why the math works: Rnd 19 has to cover the 20 ch-4 loops without ruffling or cupping. Three sc per ch-4 loop plus 1 sc per sc fills each 5-stitch section with 4 stitches. That stays slightly snug, so the mesh doesn’t flare. Rnd 20 then trims 8 stitches (80 − 72 = 8), and 72 ÷ 16 × 4 gives 18 in (45.7 cm) around, or 5.7 in (14.5 cm) across. That pull-in gives the gently gathered opening you see in the photo. Rnd 24 adds a firm slip-stitch edge so the rim doesn’t stretch out when you push bags in.
The band is 6 rounds deep (Rnds 19–24). At 4.5 rounds per inch, that’s about 1.3 in (3.3 cm).
Ring Hanger
Ring Rnd: Make a slip knot on your hook. Insert the hook through the ring, yarn over and pull up a loop, then complete a sc over the ring. Work 39 more sc over the ring, packing them tightly so no ring shows. Join with sl st to the first sc.
(40 sc)
Push the stitches around the ring so they’re even. Turn the joined edge to the outside of the ring if you like; this is the edge the tab will grow from.
Tab Row 1: Ch 1, sc in the same st as the join and in the next 5 sts. Turn.
(6 sc)
Tab Rows 2–8: Ch 1, sc in each st across. Turn.
(6 sc each row)
The tab is about 1.5 in (3.8 cm) wide and 1.8 in (4.6 cm) long. Fasten off, leaving a 12 in (30.5 cm) tail for sewing.
Attach: Choose the back of the holder, which is the side with the round joins. Lay the last 1 in (2.5 cm) of the tab inside the rim, centered over 6 band stitches, with the ring standing above the edge. Whipstitch all around the tab’s edges through Rnds 21–24, keeping the stitches out of sight from the front. Go over the top edge twice for strength. Weave in the end.
Final Blocking
- Weave in all remaining tails, including the foundation tail at the tube.
- Soak the holder in cool water for 10 minutes, then gently press out the water. Don’t wring it.
- Roll it in a towel to remove more moisture.
- Fill the body loosely with plastic bags or a balloon blown up to about 8 in (20.3 cm) across.
- Ease the mesh open so each loop forms a clear diamond, and line the diamonds up in vertical columns.
- Pinch the bottom tube into a neat round cylinder. Shape the top band so the opening is round and about 5.7 in (14.5 cm) across.
- Hang it to dry fully on a hook by the ring, away from direct heat.
- Once dry, check the height: about 13 in (33.0 cm) from the tube to the rim, and 16 in (40.6 cm) including the ring.
Final Quality-Control Checklist
- The tube has 24 sc and is 6 in (15.2 cm) around.
- Rnd 7 has 12 loops, Rnd 8 has 16, and Rnds 9–18 have 20.
- Chain lengths step 3–4–5–6 going up and 6–5–4 coming back in.
- Rnd 19 has 80 sc, and Rnds 20–23 have 72 sc.
- The rim is 18 in (45.7 cm) around and lies round without ruffles.
- Ring stitches are packed tightly and no ring shows.
- The tab is sewn inside the rim, centered, and secure.
- All tails are woven in and trimmed.
Troubleshooting
The mesh twists in a spiral. Make sure every round starts with sl st into the first loop and ends by joining to the first sc. Skipping either step shifts the round.
The rim ruffles. You probably worked 4 sc into some loops in Rnd 19. Recount to 80 sc. If the count is right, go down a hook size for Rnds 19–24.
The rim cups inward too much. Leave out the Rnd 20 decreases and keep 80 sc. The rim will then be 20 in (50.8 cm) around.
Bags fall out of the bottom. Your tube is too loose. Redo it with a 4.5 mm hook, or add a round of sl sts around the bottom edge to firm it up.
Bags won’t pull through. Redo the tube with a 5.5 mm hook, or start with 28 ch. If you do, Rnd 7 gives 14 loops; work Rnd 8 as (sc in next loop, ch 4) 5 times, (sc, ch 4) twice in next loop twice, then (sc in next loop, ch 4) twice, for 16 loops.
The ring hanger leans to one side. Re-sew the tab centered over the round joins, and check that it’s sewn flat rather than at an angle.
Care
Hand wash in cool water with mild soap, reshape, and hang to dry by the ring. If your cotton is machine-safe, you can wash it on a gentle cycle in a mesh laundry bag.
Final Notes
Each section of this holder builds on the measurement before it:
- A 24-stitch tube sets the 6 in (15.2 cm) opening at the bottom.
- The mesh grows from 12 to 20 loops and widens to about 25 in (63.5 cm) around, which is about 8 in (20.3 cm) across.
- Shortening the chains narrows the mesh back to 12 in (30.5 cm) of total height.
- A conversion round of 80 sc, trimmed to 72 sc, gives an 18 in (45.7 cm) rim and brings the holder to 13 in (33.0 cm) tall.
- A covered 2 in (5.1 cm) ring finishes it at 16 in (40.6 cm) overall.
Check the tube first and the rest will follow. Make one in coral, one in teal, and give every room its own bag stash.
Happy crocheting!