

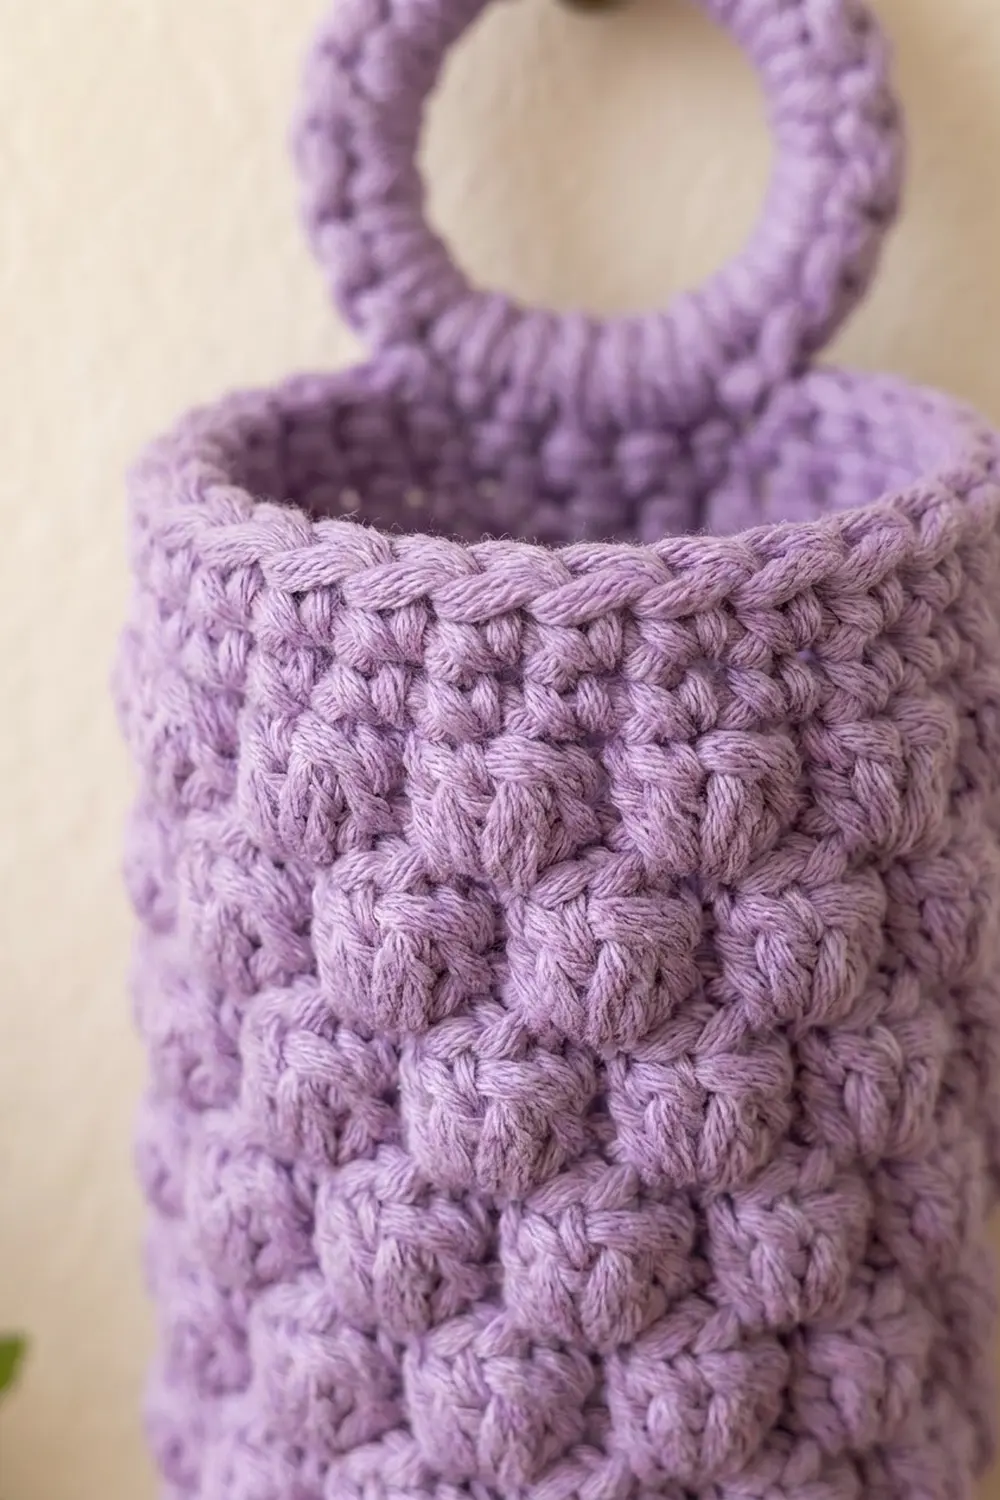
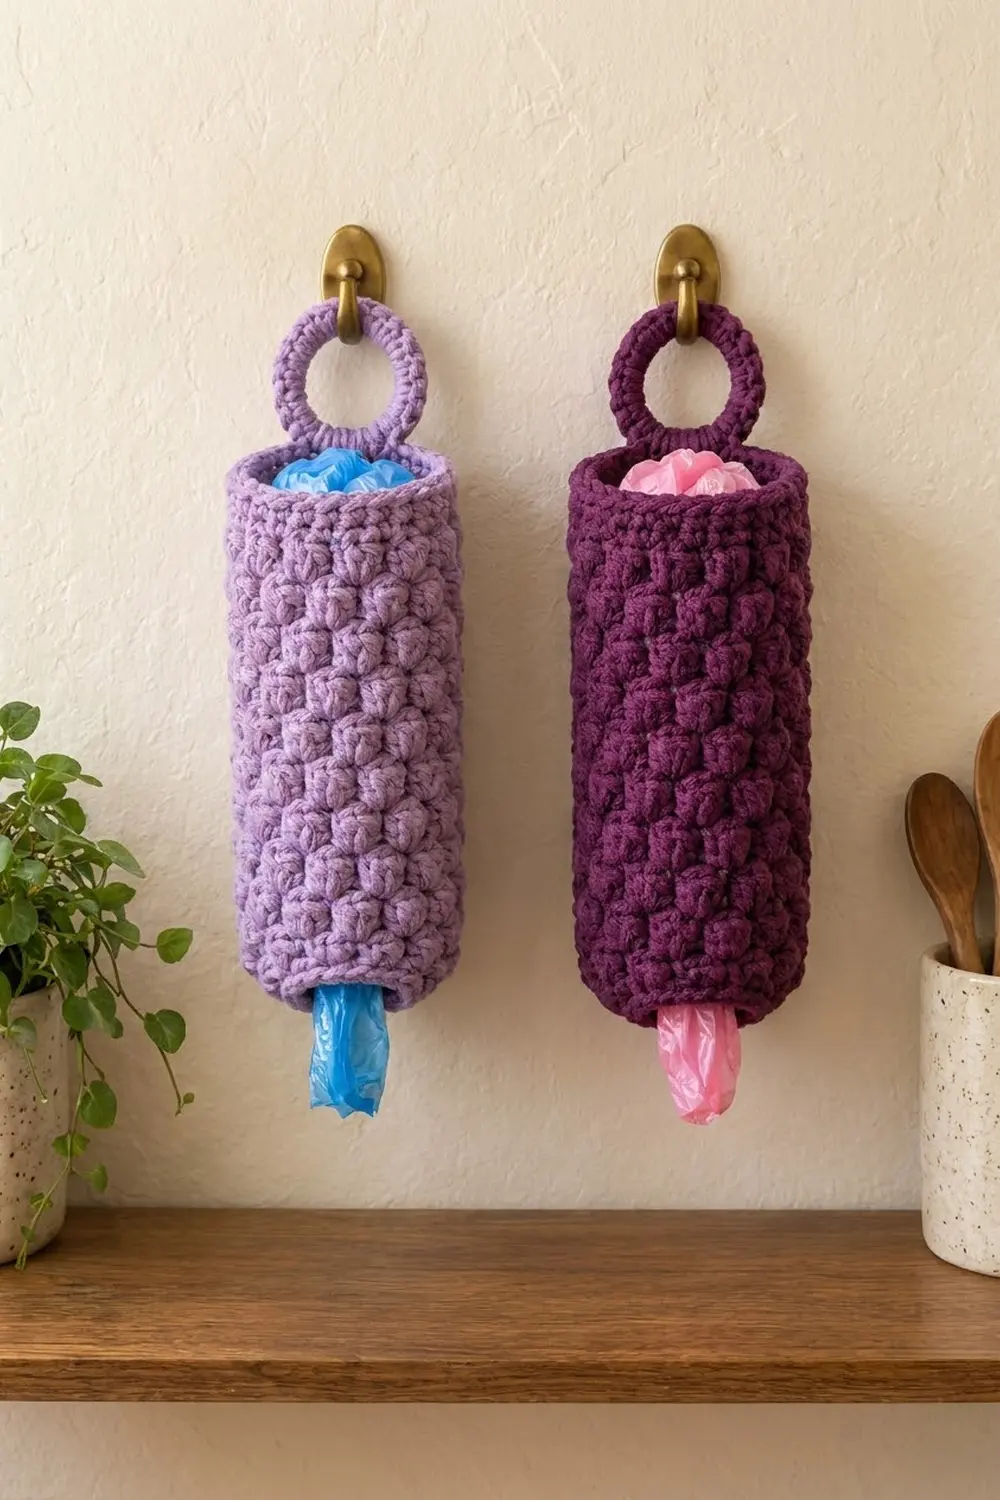
This holder turns a messy pile of plastic bags into a tidy tube you hang on the wall. You stuff bags in the top and pull them out one at a time from the narrower bottom. The body is covered in staggered puff stitches that look like rows of little bubbles, with a plain band of single crochet at each end.
The sample is in soft lavender, and the pattern looks just as good in deep plum or any solid shade. A covered ring on a short strap lets it hang from a hook, a cabinet knob, or the back of a door.
The pattern uses US crochet terms. The finished body measures 13.3 in (33.8 cm) around, about 4.2 in (10.7 cm) across when filled, and 13 in (33.0 cm) tall. The total hanging length, ring included, is about 17 in (43.2 cm).
You work the body bottom-up in joined rounds, so there are no seams. You start at the narrow bottom opening, increase to full width, work the puff section, and finish with a single crochet band. A thin slip stitch edge goes around each opening. Last, you work the strap from the back of the top rim and wrap it around a covered ring.
Finished Size and Construction
- Finished size: 13.3 in (33.8 cm) circumference; 6.7 in (17.0 cm) wide laid flat; 13 in (33.0 cm) tall body; 17 in (43.2 cm) total hanging length
- Skill level: Easy-Intermediate
- Terminology: US crochet terms
- Yarn weight: Worsted (#4)
- Hook: 5.0 mm (H-8)
- Number of pieces: 1 body, worked as one piece, with a crochet-covered ring attached to it
- Layout: One vertical tube; strap and ring centered at the back of the top rim
- Body size: 40 stitches around × 30 rounds
- Size before border: 13 in (33.0 cm) tall; top opening 13.3 in (33.8 cm) around; bottom opening 8 in (20.3 cm) around
- Border depth: one slip stitch round on each opening, adding less than 0.25 in (0.6 cm)
Materials
Yarn: Use a worsted-weight cotton or cotton blend. Cotton gives firm, well-defined puffs and holds the tube’s shape without sagging. Acrylic also works, but the puffs will look softer.
- Lavender (main color): 120 g, about 205 m (224 yd)
- Optional second holder in plum: another 120 g, about 205 m (224 yd)
These amounts include a margin of about 15%. Puff stitches use more yarn than you might expect.
Tools:
– 5.0 mm (H-8) crochet hook
– One 2 in (5.1 cm) plastic or metal ring
– Stitch marker
– Tapestry needle
– Scissors
– Measuring tape
– A rolled towel or a tall can, for blocking
Abbreviations (US Terms)
- ch: chain
- sl st: slip stitch
- sc: single crochet
- hdc: half double crochet
- sc inc: 2 sc in the same stitch
- FL / BL: front loop / back loop
- st(s): stitch(es)
- Rnd: round
Special stitch – Puff stitch (puff): Yarn over, insert the hook in the stitch, yarn over and pull up a loop to about hdc height. Repeat this 2 more times in the same stitch (7 loops on the hook). Yarn over and pull through all 7 loops, then ch 1 to close.
The closing ch 1 does not count as a stitch. In the next round, work into the top of the puff, not into the closing chain.
Gauge and Checkpoints
Gauge:
– Single crochet: 12 sts and 16 rnds = 4 in (10.2 cm)
– Puff pattern: 12 sts and 8 rnds = 4 in (10.2 cm)
In both cases there are 3 stitches per inch. Single crochet rounds stack 4 to the inch, and puff rounds stack 2 to the inch.
Test first: You don’t need a separate swatch. Treat the first 12 rounds as your test piece and check it at each stage below.
- After Rnd 4: Lay the tube flat. It should be 6.7 in (17.0 cm) wide and 1 in (2.5 cm) tall.
- After Rnd 12 (8 puff rounds): The puff section should be 4 in (10.2 cm) tall, and the width should still be 6.7 in (17.0 cm).
- After Rnd 26: The puff section should be 11 in (27.9 cm) tall.
- After Rnd 30: The body should be 13 in (33.0 cm) tall.
If your piece is too wide: Go down one hook size, to 4.5 mm.
If it’s too narrow: Go up to 5.5 mm. Don’t add stitches, because the puff pattern needs an even stitch count.
If the puff rounds are too short: Pull each puff loop up a little taller, to full hdc height.
Body Pattern
Bottom Band
Rnd 1: Ch 24 and join with a sl st to the first ch. Be careful not to twist the chain. Ch 1, then sc in each ch around. Join with a sl st to the first sc. (24 sts)
Rnd 2 (growth): Ch 1. Sc in next 2 sts, sc inc in next st; repeat from * 8 times total. Join. (32 sts)
Rnd 3 (growth): Ch 1. Sc in next 3 sts, sc inc in next st; repeat from * 8 times total. Join. (40 sts)
Rnd 4: Ch 1, sc in each st around. Join. (40 sts)
Place a marker at the join. This marks the back of the holder, and the strap will sit directly above it.
Checkpoint: The tube should be 6.7 in (17.0 cm) wide laid flat and 1 in (2.5 cm) tall. The bottom edge pulls in to 8 in (20.3 cm) around, which is what holds the bags in.
Puff Section
Rnd 5 (conversion round): Ch 2 (does not count as a stitch). Puff in next st, hdc in next st; repeat from * 20 times total. Join with a sl st to the top of the first puff.
Count: 40 sts worked one into each existing stitch, plus 0 extra = 40 sts (20 puffs, 20 hdc).
Rnd 6: Ch 2 (does not count). Hdc in the top of the next puff, puff in the next hdc; repeat from * 20 times total. Join to the first hdc. (40 sts: 20 puffs, 20 hdc)
Each puff now sits above an hdc from the round below. This half-step offset creates the staggered pattern.
Rnds 7–26: Repeat Rnds 5 and 6 another 10 times, which is 20 more rounds. On every odd round, work puffs into the hdc of the round below. On every even round, work hdc into the tops of the puffs. (40 sts each round)
Don’t turn your work. Every round is worked with the right side facing, so the puffs always bulge outward.
Checkpoint: There are 22 puff rounds in total. The puff section should be 11 in (27.9 cm) tall, and the whole body 12 in (30.5 cm) tall.
Top Band
Rnd 27 (conversion round): Ch 1. Sc in each stitch around, working one sc into the top of each puff and one into each hdc. Join.
Count: 40 sts worked one into each existing stitch, plus 0 extra = 40 sts.
Rnds 28–30: Ch 1, sc in each st around. Join. (40 sts)
Don’t fasten off yet.
Checkpoint: The body should be 13 in (33.0 cm) tall and 6.7 in (17.0 cm) wide laid flat. Each 1 in (2.5 cm) sc band should look the same.
Border
The border is one slip stitch edge around each opening. Slip stitch gauge matches the body exactly, at 3 sts per inch.
Top border, Rnd 31: Ch 1. Working in the front loops only, sl st loosely in each of the 40 sts of Rnd 30. Join to the first sl st and fasten off. (40 sl sts)
The back loops of Rnd 30 are left free. You’ll work the strap into them.
Bottom border: Turn the tube upside down. Join yarn at the marker, in a remaining loop of the foundation chain. Sl st loosely in each of the 24 foundation loops. Join and fasten off. (24 sl sts)
Why the math works: Each border round uses exactly one slip stitch per existing stitch, with nothing added or skipped. The top edge stays 40 sts around (13.3 in / 33.8 cm), and the bottom stays 24 sts around (8 in / 20.3 cm). The edges won’t ruffle or pucker. The border adds no width and only a thin line of height.
Strap and Ring
Strap: With the top opening facing you, find the marker at the back. Count 3 sts to the right of the marker. Join yarn in the BL of that stitch.
Row 1: Ch 1. Sc in the BL of the next 6 sts, so the 6 sts are centered on the marker. Turn. (6 sts)
Rows 2–8: Ch 1, sc in each st across, turn. (6 sts)
Fasten off, leaving a 12 in (30.5 cm) tail. The strap is 2 in (5.1 cm) wide and 2 in (5.1 cm) long.
Ring: Join yarn to the 2 in (5.1 cm) ring. Work 32 sc over the ring, pushing the stitches together so the ring is fully covered. Join with a sl st to the first sc and fasten off. Weave in the ends. (32 sc)
The covered ring measures about 3 in (7.6 cm) across, with a 1.5 in (3.8 cm) opening.
Attach: Slide the ring onto the strap. Fold Rows 5–8 over the bottom of the ring and down the inside of the holder. Use the tail to whipstitch Row 8 to Row 4 across all 6 sts. The visible strap is 1 in (2.5 cm) long.
Checkpoint: The total hanging length is about 17 in (43.2 cm): 13 in (33.0 cm) body, 1 in (2.5 cm) strap, and 3 in (7.6 cm) ring.
Final Blocking
- Weave in all ends on the inside of the tube.
- Slide a rolled towel or a tall can about 4.2 in (10.7 cm) across inside the body.
- Mist lightly with water, or hold a steam iron 1 in (2.5 cm) above the surface. Never press the iron onto the puffs.
- Gently pat the body to 13 in (33.0 cm) tall. Straighten any rounds that lean.
- Pinch each sc band so it lies flat and even.
- Let it dry completely on the form, then remove it.
Final Quality-Control Checklist
- 40 sts in every round from Rnd 3 to Rnd 30
- 20 puffs in every puff round, each one offset from the puffs below
- Body is 13 in (33.0 cm) tall and 6.7 in (17.0 cm) wide flat
- Bottom opening is 8 in (20.3 cm) around and lets one bag through at a time
- Both slip stitch edges lie flat, with no ruffling
- Strap is centered over the join seam
- Ring is completely covered and firmly stitched into the strap fold
- All ends are woven in on the inside
Troubleshooting
The puffs are flat or sloppy: Pull every loop up to the same height before you close the puff, and keep the closing ch 1 snug.
The tube twists around: The seams naturally drift a little. Hold the joins in a straight line and keep the ch 2 at the start of each round loose.
The tube widens with each round: You’re probably working into the closing ch 1 of a puff. Work only into the top of the puff itself.
The top edge flares: Your slip stitches are too loose. Redo the round with your tension slightly tighter, or with a 4.5 mm hook.
Bags fall out of the bottom: Work one more round at the bottom of the body: sc in next 2 sts, sc2tog around (18 sts).
The strap sags under weight: Whipstitch through both layers twice, and use cotton, which stretches less.
Care
Hand wash in cool water, press out excess water gently, and dry the holder flat or upright on a form. Shake out loose crumbs between washes.
Final Notes
Everything depends on the gauge of 3 stitches per inch. The 40-stitch rounds give a circumference of 13.3 in (33.8 cm). The 1 in (2.5 cm) bottom band, the 11 in (27.9 cm) puff section, and the 1 in (2.5 cm) top band add up to 13 in (33.0 cm). The strap and ring bring the total to 17 in (43.2 cm). If your checkpoints match at Rnd 4 and Rnd 12, the rest of the holder will come out the right size.
Happy crocheting!