

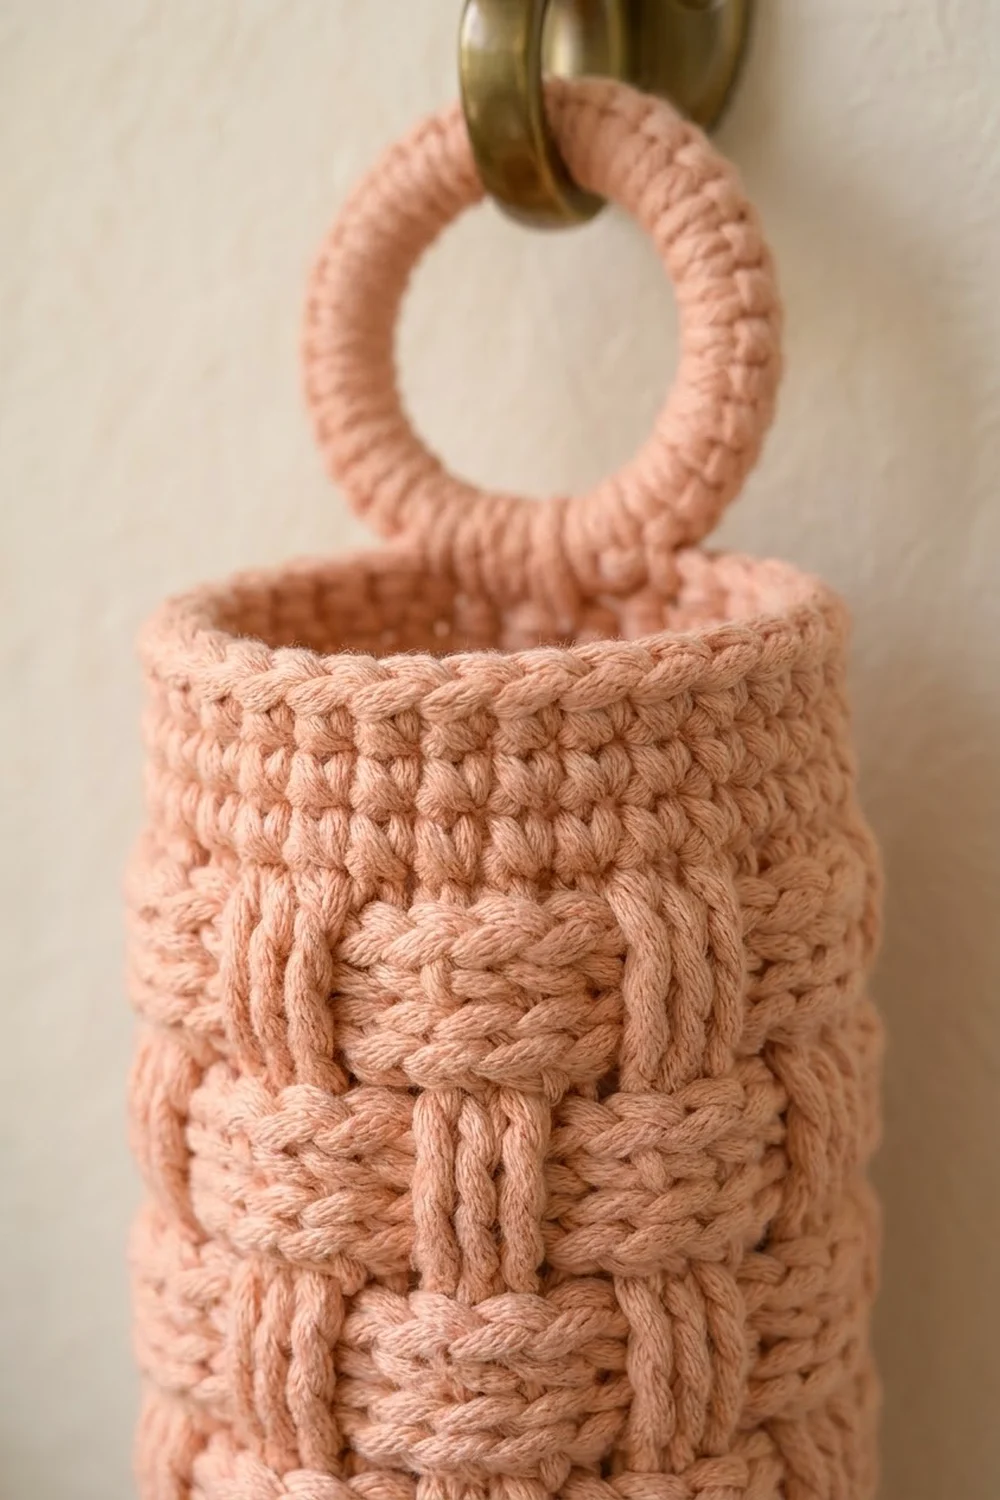
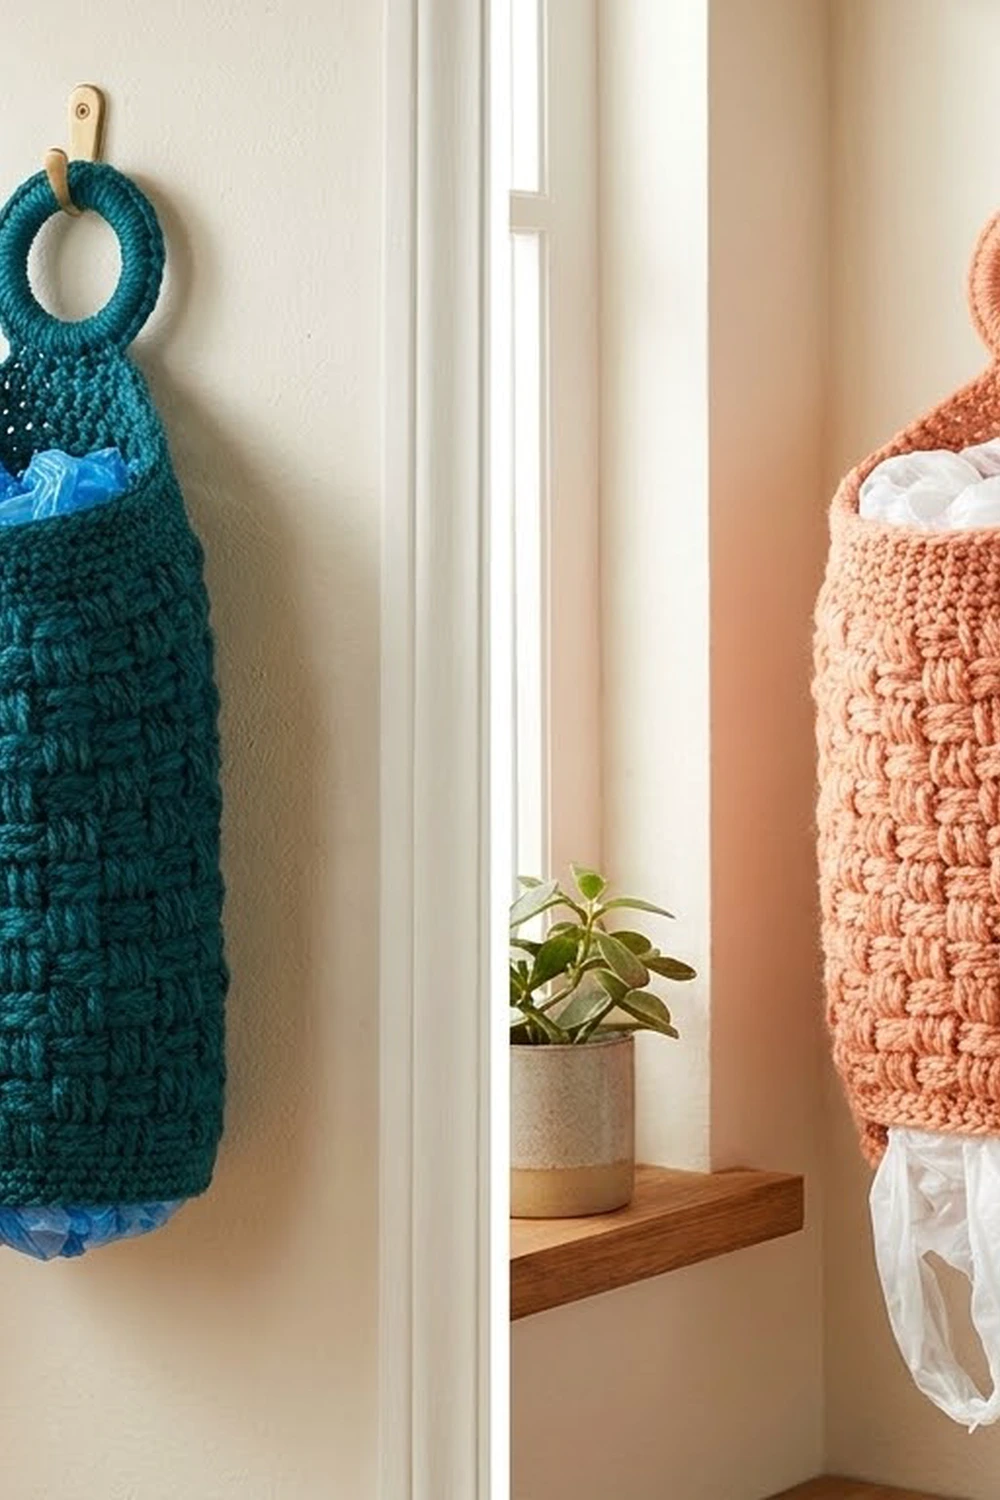
This grocery bag holder is a tall, soft tube with a chunky basketweave texture. It has a neat single crochet rim at the top, a slightly narrowed opening at the bottom, and a covered ring for hanging it on a hook. Stuff plastic bags in the top and pull them out one at a time from the bottom.
The sample is peach, and the same design also works well in deep teal. Use one solid color per holder so the woven blocks stay crisp and easy to see. It has a relaxed, homey look that suits a spot by the kitchen door or in a pantry.
The pattern uses US crochet terms. The finished tube is 16 in (40.6 cm) around, 8 in (20.3 cm) wide when flattened, and 13.5 in (34.3 cm) tall. With the ring attached, the holder hangs 16 in (40.6 cm) from the top of the ring to the bottom edge.
Construction is simple. Work the tube in joined rounds from the bottom up, making the basketweave blocks with front post and back post double crochet. Finish the top with a single crochet rim and add one decrease round along the bottom edge. Then cover a ring with single crochet and sew it to the back of the top rim.
Finished Size and Construction
- Finished size: 16 in (40.6 cm) around, 8 in (20.3 cm) flat width, 13.5 in (34.3 cm) tall
- Hanging length with ring: 16 in (40.6 cm)
- Skill level: Intermediate (post stitches worked in the round)
- Terminology: US crochet terms
- Yarn weight: Bulky (#5)
- Hook: 6 mm (US J-10)
- Number of pieces: 2 parts (tube and covered ring) that make 1 holder
- Layout: One vertical tube, with the ring centered at the back of the top rim
- Tube size before rims: 16 in (40.6 cm) around x 12.25 in (31.1 cm) tall
- Rim depth: top rim 1 in (2.5 cm); bottom trim 0.25 in (0.6 cm)
- Basketweave block: 4 sts x 2 rounds, about 1.3 in (3.3 cm) wide x 1.1 in (2.8 cm) tall
Materials
Choose a smooth, plied bulky yarn with good stitch definition. Acrylic or a cotton-acrylic blend works best: it holds its shape, doesn’t stretch much under the weight of the bags, and washes easily. Avoid fuzzy or brushed yarns, because they blur the basketweave.
- Main color (peach or teal): 250 g, about 300 m
This amount covers the tube, the ring cover, and the gauge swatch. Post stitches use more yarn than plain double crochet, so the amount includes a margin of about 15 percent. Buy all your yarn from the same dye lot.
Tools:
- 6 mm (US J-10) crochet hook
- 1 plastic or wooden ring, 2.5 in (6.4 cm) outer diameter
- Stitch marker
- Tapestry needle
- Scissors
- Measuring tape
- Rust-proof pins and a spray bottle for blocking
Abbreviations (US Terms)
- ch – chain
- sl st – slip stitch
- sc – single crochet
- dc – double crochet
- sc2tog – single crochet 2 together
- FPdc – front post double crochet
- BPdc – back post double crochet
- st(s) – stitch(es)
- rnd(s) – round(s)
Special stitches:
- FPdc: Yarn over and insert the hook from front to back to front around the post of the stitch below. Yarn over and pull up a loop, then (yarn over, pull through 2 loops) twice. The post sits on the front of the fabric.
- BPdc: Yarn over and insert the hook from back to front to back around the post of the stitch below. Yarn over and pull up a loop, then (yarn over, pull through 2 loops) twice. The post sits on the back and leaves a horizontal bar on the front.
Round notes: The ch 2 at the start of a dc or post round does not count as a stitch. The ch 1 at the start of a sc round does not count as a stitch. Join every round with a sl st to the first stitch, not to the starting chain. Do not turn.
Gauge and Checkpoints
Gauge in basketweave: 12 sts and 7 rnds = 4 in (10.2 cm).
Gauge in sc: 12 sts and 16 rnds = 4 in (10.2 cm).
Test first: Make a small swatch tube before you start the holder. Ch 24 and join with a sl st without twisting. Work Rnd 1 and Rnd 2 as written below on 24 sts. Then work the basketweave pattern with 3 repeats instead of 6 until you have 7 dc-height rounds, counting Rnd 2. Flattened, the swatch should be 4 in (10.2 cm) wide, which is 8 in (20.3 cm) around. The 7 dc-height rounds should be 4 in (10.2 cm) tall.
Checkpoints on the holder:
- After Rnd 2: flat width 8 in (20.3 cm)
- After Rnd 8: height 4.25 in (10.8 cm)
- After Rnd 15: height 8.25 in (21.0 cm)
- After Rnd 22: height 12.25 in (31.1 cm)
- After Rnd 26: height 13.25 in (33.7 cm)
- After Rnd 27: height 13.5 in (34.3 cm)
If your swatch is too big: go down one hook size. If it is too small: go up one hook size. If only the height is off, keep the same stitch count and add or remove one pair of basketweave rounds. Post stitches tend to pull in, so measure gently without stretching.
Tube Body
Foundation: Ch 48 and join with a sl st to the first ch. Make sure the chain isn’t twisted. Place a marker to mark the start of the round.
Rnd 1: Ch 1, sc in each ch around, join. (48 sts)
Rnd 2: Ch 2, dc in each st around, join. (48 sts)
This round of plain dc gives the post stitches a firm base. Check the flat width now: it should be 8 in (20.3 cm).
Rnd 3: Ch 2, FPdc in each of the next 4 sts, BPdc in each of the next 4 sts; repeat from * 5 more times, join. (48 sts: 24 FPdc + 24 BPdc)*
Rnd 4: Ch 2, FPdc in each of the next 4 sts, BPdc in each of the next 4 sts; repeat from * 5 more times, join. (48 sts)*
Rounds 3 and 4 make the first band of blocks. The FPdc blocks show raised vertical posts, and the BPdc blocks show horizontal bars.
Rnd 5: Ch 2, BPdc in each of the next 4 sts, FPdc in each of the next 4 sts; repeat from * 5 more times, join. (48 sts)*
Rnd 6: Ch 2, BPdc in each of the next 4 sts, FPdc in each of the next 4 sts; repeat from * 5 more times, join. (48 sts)*
Rounds 5 and 6 shift the blocks so that each vertical block sits above a horizontal block. This checkerboard shift creates the woven look.
Rnds 7–8: Repeat Rnds 3–4. (48 sts)
Checkpoint: the tube is 4.25 in (10.8 cm) tall.
Rnds 9–10: Repeat Rnds 5–6. (48 sts)
Rnds 11–12: Repeat Rnds 3–4. (48 sts)
Rnds 13–14: Repeat Rnds 5–6. (48 sts)
Rnds 15–16: Repeat Rnds 3–4. (48 sts)
Checkpoint after Rnd 15: the tube is 8.25 in (21.0 cm) tall.
Rnds 17–18: Repeat Rnds 5–6. (48 sts)
Rnds 19–20: Repeat Rnds 3–4. (48 sts)
Rnds 21–22: Repeat Rnds 5–6. (48 sts)
You now have 10 bands of blocks, with 6 repeats around. Rnd 2 plus Rnds 3–22 make 21 dc-height rounds, which is 12 in (30.5 cm) at gauge. Add the 0.25 in (0.6 cm) from Rnd 1, and the tube is 12.25 in (31.1 cm) tall.
Rims (Border)
Rim gauge: 12 sc = 4 in (10.2 cm) across; 4 sc rnds = 1 in (2.5 cm) tall.
The body has 48 sts at 12 sts per 4 in (10.2 cm), so it is 16 in (40.6 cm) around. The rim has the same stitch gauge, so 48 sc also measure 16 in (40.6 cm). The rim doesn’t flare or pull in, and you don’t need to add any stitches.
Top Rim
Rnd 23 (conversion round): Ch 1, sc in each st around, working into the top loops of the post stitches, join. (48 sts = 48 worked 1-per-stitch + 0 added)
Rnds 24–26: Ch 1, sc in each st around, join. (48 sts each round)
Fasten off and weave in the end. The top rim is 4 rounds deep, or 1 in (2.5 cm), and the tube is now 13.25 in (33.7 cm) tall.
Bottom Trim
Turn the tube upside down. This round narrows the bottom opening a little, so bags feed out one at a time instead of falling out.
Rnd 27 (decrease trim round): Join yarn in any unused loop of the foundation chain. Ch 1, sc in each of the next 2 loops, sc2tog over the next 2 loops; repeat from * 11 more times, join. (36 sts = 24 sc worked 1-per-stitch + 12 sc2tog)*
Fasten off and weave in the end. This round adds 0.25 in (0.6 cm), so the tube is now 13.5 in (34.3 cm) tall.
Why the math works: At 12 sts per 4 in (10.2 cm), 36 sts make an opening 12 in (30.5 cm) around. That is about 3.8 in (9.7 cm) across, or 6 in (15.2 cm) when flattened. The opening is wide enough to pull a bag through easily but 4 in (10.2 cm) smaller around than the body, so the bags stay inside.
Covered Ring
Ring: Join yarn with a sl st around the 2.5 in (6.4 cm) ring. Ch 1 and work 36 sc tightly around the ring, pushing the stitches together so none of the ring shows. Join to the first sc. (36 sts)
If you can still see the ring, add sc in pairs until it’s fully covered. Fasten off, leaving a 12 in (30.5 cm) tail. The covered ring is about 3 in (7.6 cm) across.
Assembly
Flatten the tube so the start-of-round seam sits at the center back. Place the ring at the center back so it overlaps the inside of the top rim by 0.5 in (1.3 cm). The ring will stick up 2.5 in (6.4 cm) above the rim.
Use the long tail to whipstitch 6 sts of the ring to the inside of the top rim, catching all 4 rim rounds. This seam carries the full weight, so stitch over the same spots twice. Weave in the end.
Total hanging length: 13.5 in (34.3 cm) tube + 3 in (7.6 cm) ring − 0.5 in (1.3 cm) overlap = 16 in (40.6 cm).
Final Blocking
- Lightly mist the whole holder with water so it’s damp, not soaked.
- Stuff the tube loosely with a rolled towel to make an even cylinder.
- Shape the tube to 16 in (40.6 cm) around and 13.5 in (34.3 cm) tall.
- Straighten the basketweave columns so each block sits directly above the matching block two bands below.
- Smooth the top rim so it is flat and round, and ease the bottom trim into an even circle.
- Let it dry completely, then remove the towel.
- Don’t use heavy steam on acrylic yarn, because it can flatten the raised blocks for good.
Final Quality-Control Checklist
- Every dc and post round has 48 sts.
- The top rim has 4 rounds of 48 sc.
- The bottom trim has 36 sts.
- The blocks alternate cleanly in 10 bands, with 6 repeats around.
- The start-of-round seam runs straight up the center back.
- The flat width is 8 in (20.3 cm) and the tube height is 13.5 in (34.3 cm).
- The ring is fully covered and sewn securely at the center back.
- All ends are woven in and hidden on the inside.
Troubleshooting
The tube leans or spirals. You may be joining into the ch 2 instead of the first stitch. Always join to the first real stitch.
The blocks don’t line up. Count each round in groups of 4. One missed or extra post stitch shifts every block after it.
The tube is narrower than 8 in (20.3 cm). The post stitches are pulling in. Loosen your yarn overs or go up a hook size.
The top rim ripples. Your sc tension is looser than your post stitch tension. Work the rim with a hook one size smaller.
Bags fall out of the bottom. Work a second trim round: sc in next st, sc2tog; repeat from * around. (24 sts = 12 sc worked 1-per-stitch + 12 sc2tog)*
The ring pulls the rim out of shape. Sew the ring across more rim stitches, up to 8 sts, to spread the weight.
Care
Machine wash cold on a gentle cycle in a mesh bag, or hand wash if you used a cotton blend. Reshape it while damp, then lay it flat or hang it to dry.
Final Notes
The measurements build on each other. Your swatch confirms 12 sts and 7 rounds per 4 in (10.2 cm). At that gauge, 48 sts make 16 in (40.6 cm) around and 21 dc-height rounds make 12 in (30.5 cm). Rnd 1 and the top rim add 1.25 in (3.2 cm), and the bottom trim adds 0.25 in (0.6 cm), for a 13.5 in (34.3 cm) tube. The ring brings the hanging length to 16 in (40.6 cm).
Check your measurements at each checkpoint and the holder will come out the right size.
Happy crocheting!