

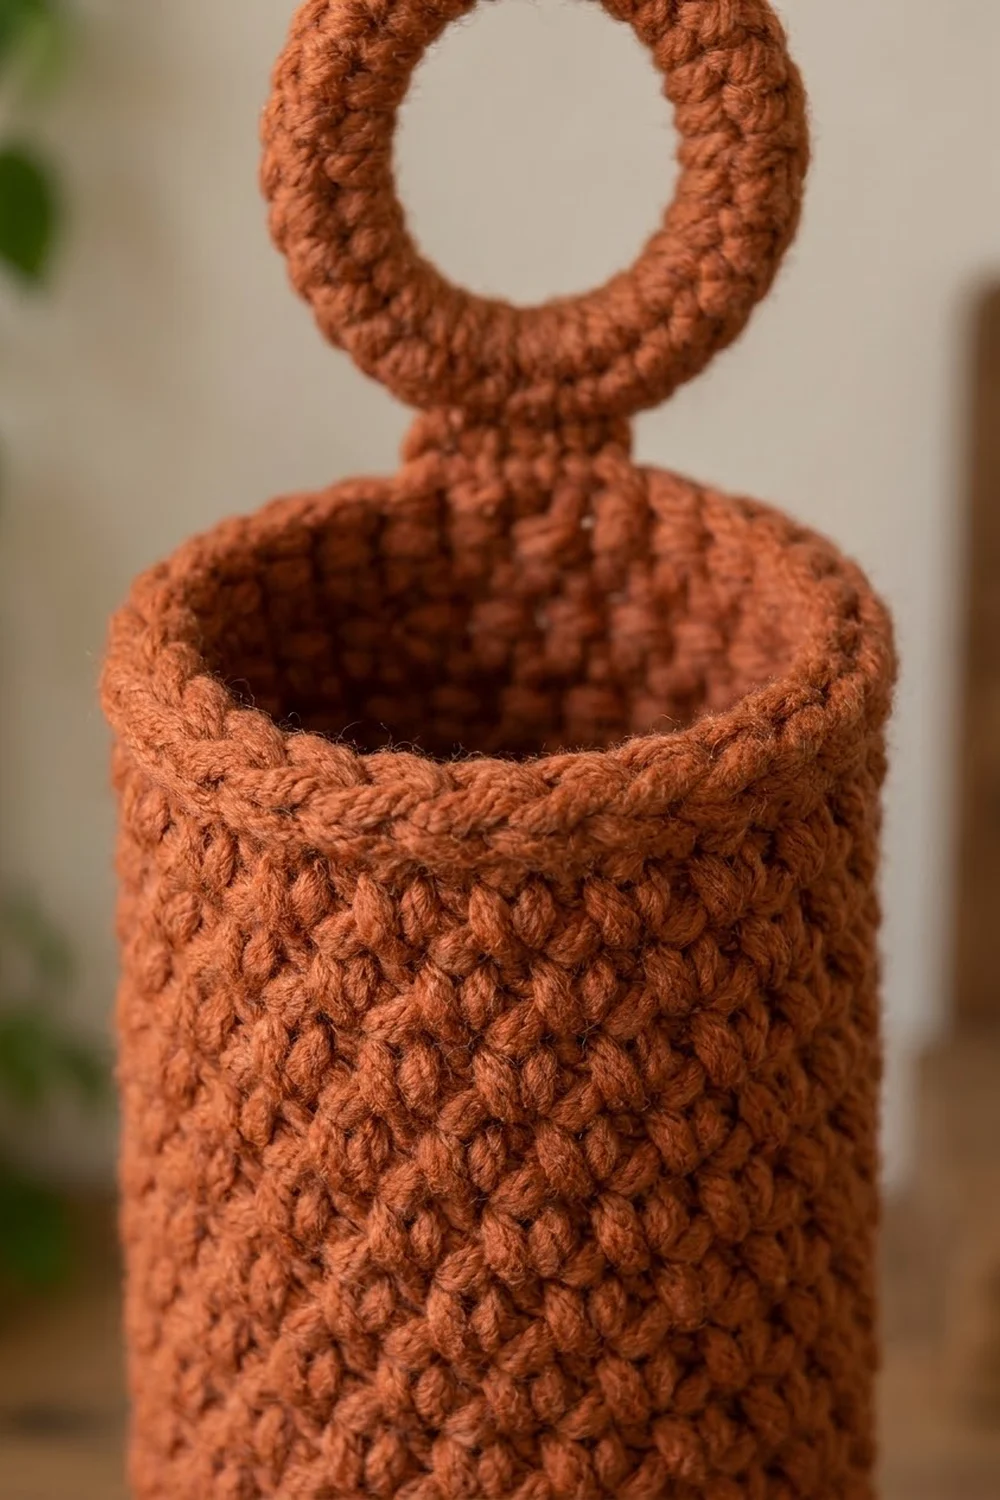
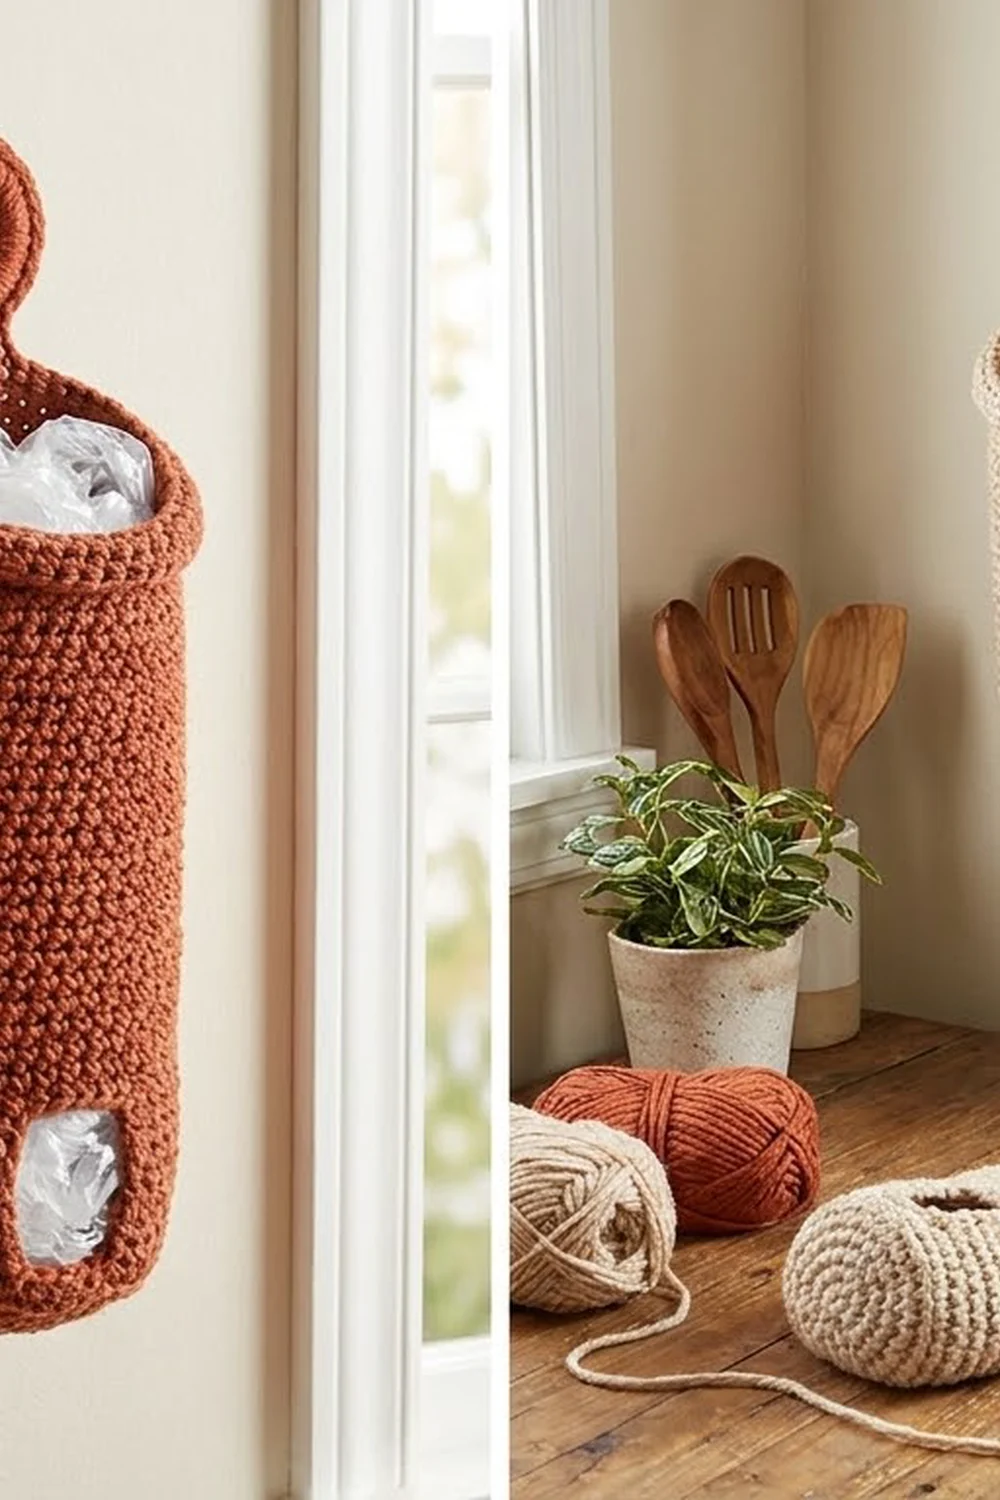
The Hearth Loop Bag Holder is a tall, chunky single crochet tube that hangs from a wall hook and keeps plastic grocery bags tidy. You push bags in through the wide top opening and pull them out one at a time through the narrower bottom opening. A round, fully covered hanging ring sits on top of the back rim, so the holder hangs straight and looks finished from every angle.
The sample is in a warm oatmeal beige, and a second holder is shown in rust terracotta. Both use a dense, pebbly single crochet fabric that keeps its shape without a lining or stiffener. The style is simple and modern, and it suits a kitchen, pantry, or laundry wall.
This pattern uses US crochet terms. The finished holder is 15 in (38.1 cm) tall, 6 in (15.2 cm) wide when flat, and about 3.8 in (9.7 cm) across when filled. The hanging ring adds about 3.25 in (8.3 cm) above the rim.
The holder is one single piece. You start at the bottom opening with a chain ring, work two straight rounds, and widen to full size over three rounds. Then you work straight up the body in joined rounds. A three-round top rim and a slip-stitch edge finish the opening. The hanging ring is chained and covered directly from the last round, so there is no sewing.
Finished Size and Construction
- Finished size: 15 in (38.1 cm) tall x 6 in (15.2 cm) flat width
- Hanging length with ring: about 18.25 in (46.4 cm)
- Skill level: Easy
- Terminology: US crochet terms
- Yarn weight: Bulky (#5)
- Hook: 6.0 mm (US J-10)
- Number of pieces: 1 (the tube and ring are worked continuously)
- Layout: upright tube, ring centered at the back of the top rim
- Piece size: 12 in (30.5 cm) around the body; 8 in (20.3 cm) around the bottom opening
- Size before border: 14 in (35.6 cm) tall after Rnd 42
- Border depth: the top rim adds 1 in (2.5 cm); the bottom slip-stitch edge adds no measurable height
Materials
Choose a bulky (#5) yarn that shows stitches clearly. Cotton blends, acrylic, and wool-acrylic blends all work. A smooth, tightly twisted yarn gives the clear pebbled texture seen in the sample. Avoid very fuzzy or loosely spun yarn, because plastic bags will catch on it.
Yarn (per holder):
- Oatmeal beige: 160 g, about 190 m (208 yd)
- Optional second holder in rust terracotta: 160 g, about 190 m (208 yd)
Each holder uses only one color. These amounts include about 15% extra for your gauge check and any ripping back.
Tools:
- 6.0 mm (US J-10) crochet hook
- Stitch marker (1)
- Tapestry needle
- Scissors
- Measuring tape
- Rust-proof pins and a rolled towel for blocking
Abbreviations (US Terms)
- ch: chain
- sl st: slip stitch
- sc: single crochet
- inc: 2 sc in the same stitch
- BLO: back loop only
- st(s): stitch(es)
- Rnd: round
- ( ) x6: repeat the steps in parentheses 6 times in total
Special technique: joined round. At the end of every round, sl st in the first sc of the round. Ch 1 (this does not count as a stitch), then work the first sc of the next round in the same stitch as the join. Joined rounds keep the seam straight, which matters on a tall tube. Keep the seam at the back of the holder.
Gauge and Checkpoints
Gauge: 12 sc and 12 rnds = 4 in (10.2 cm) in sc worked in joined rounds.
Check gauge on the holder itself. Work Rnds 1–5, then measure before you go further. This is the easiest place to fix your tension.
Checkpoints:
- After Rnd 2: 4 in (10.2 cm) wide flat; 8 in (20.3 cm) around
- After Rnd 5: 6 in (15.2 cm) wide flat; about 1.7 in (4.3 cm) tall
- After Rnd 24: 8 in (20.3 cm) tall
- After Rnd 42: 14 in (35.6 cm) tall
- After Rnd 45: 15 in (38.1 cm) tall
If your piece is too big: switch to a 5.5 mm (US I-9) hook and start again. A loose tube lets bags slip out of the bottom on their own.
If your piece is too small: switch to a 6.5 mm (US K-10.5) hook. A tight tube makes bags hard to pull out.
If only the height per round is off, keep your hook. Add or remove body rounds in Rnds 6–42 until the piece reaches 14 in (35.6 cm) before the rim.
Pattern
Bottom Band
The bottom band forms the narrow opening the bags come out of. It is worked straight so the edge stays firm.
Foundation: Ch 24 and sl st in the first ch to form a ring. Don’t twist the chain.
Rnd 1: Ch 1, sc in each ch around, join. (24 sts)
Rnd 2: Ch 1, sc in each st around, join. (24 sts)
Checkpoint: the opening is 8 in (20.3 cm) around, or about 2.6 in (6.6 cm) across.
Shaping
These three rounds widen the tube from the bottom band to full body width. This makes the slight taper you see at the base.
Rnd 3 (growth): Ch 1, (sc in next 3 sts, inc in next st) x6, join. (30 sts)
Rnd 4: Ch 1, sc in each st around, join. (30 sts)
Rnd 5 (growth): Ch 1, (sc in next 4 sts, inc in next st) x6, join. (36 sts)
Checkpoint: 6 in (15.2 cm) wide flat. The plain Rnd 4 between the two growth rounds spreads out the increases, so the taper looks smooth instead of stepped.
Body
Rnds 6–42: Ch 1, sc in each st around, join. (36 sts in each round; 37 rounds total)
Keep the seam in a straight line at the back. If the join is hard to see, put your marker in the first sc of each round.
Hold your tension steady through this section. It is long, and small drifts add up. Measure the flat width every 10 rounds or so. It should stay at 6 in (15.2 cm) the whole way up.
Checkpoint after Rnd 24: 8 in (20.3 cm) tall. Checkpoint after Rnd 42: 14 in (35.6 cm) tall and still 6 in (15.2 cm) wide flat.
Border (Top Rim and Bottom Edge)
On this piece, the border is a rounded top rim plus a firming edge at the bottom. Border gauge is the same as the body: 3 sc and 3 rnds per 1 in (2.5 cm).
Top Rim
Rnd 43: Ch 1, sc in the BLO of each st around, join. (36 sts)
The unused front loops make a faint ridge that marks where the rim starts.
Rnd 44: Ch 1, sc in each st around, join. (36 sts)
Rnd 45: Ch 1, sc in each st around, join. (36 sts)
Rnd 46 (trim round): Sl st loosely in each st around. (36 sl sts = 36 worked into the 36 existing sts + 0 added)
Don’t fasten off. Your hook is now at the back seam, where the hanging ring goes.
Why the math works: every rim round has exactly 36 sts, the same as the body. At 3 sc per inch, 36 sts make a 12 in (30.5 cm) circle, so the rim neither flares out nor pulls in. The slip-stitch round adds no stitches. It just firms up the edge so it stays round when you push bags in. Three sc rounds at 3 rnds per inch add 1 in (2.5 cm), taking the holder from 14 in (35.6 cm) to 15 in (38.1 cm).
Hanging Ring
The ring is worked straight from the rim, so the holder stays one single piece.
Step 1: Ch 20, then sl st in the 18th ch from the hook. This makes a loop of 18 ch, joined to the rim by a 2-ch stem.
Step 2: Work 30 sc around the chain loop, inserting the hook through the center of the loop rather than into the chains. Pack the stitches closely so the chain is completely hidden. Sl st in the first sc. (30 sts)
Step 3: Sc in each of the 2 stem ch, working back toward the rim. (2 sts) Sl st in the same rim st you started from, then sl st in the next rim st to anchor the stem.
Fasten off, leaving a 6 in (15.2 cm) tail.
Checkpoint: the ring is about 2.75 in (7.0 cm) across on the outside and about 1.5 in (3.8 cm) across on the inside, with a stem of about 0.5 in (1.3 cm).
Bottom Edge
Turn the tube upside down and join the yarn at the back seam of the foundation chain.
Bottom edge round: Sl st loosely in each free loop of the foundation chain all the way around. (24 sl sts = 24 worked into the 24 existing ch + 0 added) Join to the first sl st and fasten off.
Why the math works: 24 sl sts match the 24 sts of Rnd 1, so the opening stays 8 in (20.3 cm) around. The slip-stitch edge keeps the chain from stretching with daily use.
Weave in all ends along the back seam, working through the inside of the fabric so nothing catches on the bags.
Final Blocking
- Lightly dampen the holder with a spray bottle, or soak it if your yarn can take it.
- Roll a hand towel tightly and slide it into the tube so the tube fills out round.
- Ease the tube to 15 in (38.1 cm) tall and about 3.8 in (9.7 cm) across.
- Check that the back seam runs straight up and down. Nudge it into place if needed.
- Stand the ring straight up above the rim and pin it so it measures 2.75 in (7.0 cm) across.
- Let the holder dry completely before you take out the towel.
- For acrylic, hold a steam iron just above the fabric instead of wetting it. Never press the iron onto the stitches.
Final Quality-Control Checklist
- The holder is 15 in (38.1 cm) tall from the bottom edge to the top of the rim.
- It is 6 in (15.2 cm) wide flat along the whole body.
- The bottom opening is 8 in (20.3 cm) around.
- Each rim round has 36 sts and the rim does not ruffle.
- The slip-stitch rounds at the top and bottom are even and not tight.
- The hanging ring is centered over the back seam and completely covers its chain.
- All ends are woven in on the inside.
- The holder hangs straight on a hook without twisting.
Troubleshooting
The tube twists into a spiral. The joins are drifting. Work the first sc of each round into the same st as the join, not the next one.
Bags fall out of the bottom. The bottom opening is too loose. Work the bottom edge round more firmly, or add a second sl st round on top of it.
Bags are hard to pull out. The opening is too tight. Redo the bottom edge round more loosely, or use a hook one size larger for that round.
The top rim flares. You are working the rim more loosely than the body. Redo Rnds 44–46 with a hook one size smaller.
The ring tips forward. Work a few extra sl sts along the rim on each side of the stem to stiffen the anchor.
The chain shows through the ring. Add 2–4 more sc in Step 2 until the chain is completely hidden.
The body narrows partway up. Your tension tightened as you worked. Rip back to the last good checkpoint and loosen your grip, or go up half a hook size for the rest of the body.
Care
Hand wash in cool water and dry it over a rolled towel. Shake out the crumbs and dust that old bags leave behind now and then, and reshape before hanging.
Final Notes
All the measurements come from your gauge. At 12 sc and 12 rnds per 4 in (10.2 cm), the 24-st bottom band makes an 8 in (20.3 cm) opening. The shaping rounds bring the tube to 36 sts, which is 12 in (30.5 cm) around and 6 in (15.2 cm) wide flat. Forty-two rounds bring the holder to 14 in (35.6 cm), and the rim adds 1 in (2.5 cm) for a finished height of 15 in (38.1 cm). The ring adds about 3.25 in (8.3 cm) above that.
Check your work at each of these points and the holder should come out right the first time. Try one in a neutral and one in a bold color like rust, and hang them side by side.
Happy crocheting!