

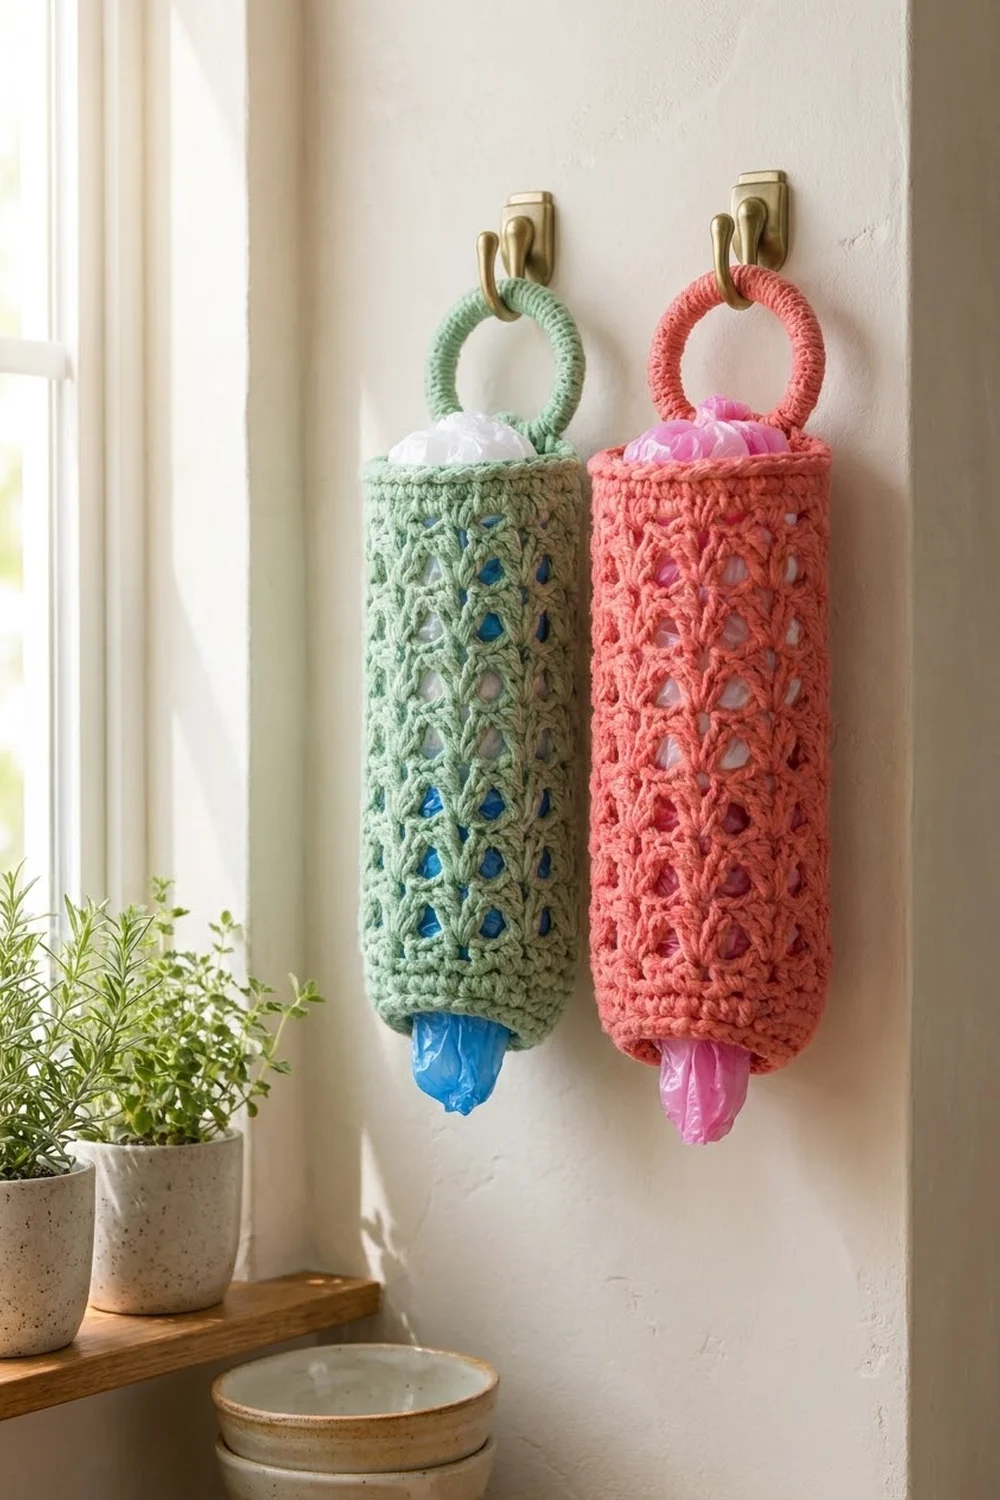
The Sage Lattice Plastic Bag Holder is a tall, open tube that hangs from a hook and keeps grocery bags in one tidy place. You push bags in at the top and pull them out at the bottom. The body is an offset V-stitch lattice, so the diamond-shaped openings let you see how many bags are left.
The sample is worked in soft sage green cotton. A coral version uses exactly the same pattern, and the two look great hanging side by side in a kitchen or laundry room. Solid bands at the top and bottom keep the openings firm, and a yarn-covered ring at the top makes it easy to hang.
This pattern uses US crochet terms. The finished tube measures 6 in (15.2 cm) wide laid flat and 14 in (35.6 cm) long, not counting the ring. The covered ring is 3 in (7.6 cm) across.
Construction is simple. You make the tube in one piece, working in joined rounds from the bottom up: a solid single crochet band, 20 rounds of lattice, then a solid top band. Next you cover a ring with single crochet, work two short straps from the ring, and sew the straps to the back of the top band.
Finished Size and Construction
- Finished size: 6 in (15.2 cm) wide flat x 14 in (35.6 cm) long; 12 in (30.5 cm) around
- Ring: 3 in (7.6 cm) across, plus 1.25 in (3.2 cm) straps
- Skill level: Easy / advanced beginner
- Terminology: US
- Yarn weight: Worsted (#4), cotton or cotton blend
- Hook: 5.0 mm (H-8)
- Number of pieces: One holder: a tube worked in one piece in the round, plus a covered ring sewn on
- Layout: One upright tube, open at the top and bottom, with the ring centered over the back of the top opening
- Tube circumference: 48 stitches (24 per flat side)
- Size before top band: 6 in (15.2 cm) x 13 in (33.0 cm)
- Band depth: 1 in (2.5 cm) at the top and 1 in (2.5 cm) at the bottom
Materials
Pick a worsted-weight cotton or cotton blend. Cotton holds its shape when the holder is full and is easy to wash. Acrylic also works, but it stretches more over time, so the tube can get longer with use.
Yarn (one holder uses one color):
- Sage green (sample): 90 g / 162 m
- Coral (optional second holder): 90 g / 162 m
These amounts include a margin of about 20% for your gauge check and for weaving in ends. One holder usually uses 70–75 g.
Tools:
- 5.0 mm (H-8) crochet hook
- One 3 in (7.6 cm) ring (plastic, wooden, or metal)
- Stitch markers
- Tapestry needle
- Scissors
- Measuring tape
- Rust-proof pins and a towel or blocking mat
- Optional: a rolled towel or cardboard form about 6 in (15.2 cm) wide when flattened, for blocking
Abbreviations (US Terms)
- ch – chain
- sl st – slip stitch
- sc – single crochet
- dc – double crochet
- sk – skip
- sp – space
- st(s) – stitch(es)
- rnd – round
Special stitch – V-stitch (V-st): (dc, ch 1, dc) worked into the same stitch or space.
Gap: The space between two neighboring V-sts, at the point where they meet.
Gauge and Checkpoints
Single crochet gauge: 16 sc and 16 rnds = 4 in (10.2 cm).
Lattice gauge: 4 V-sts = 2 in (5.1 cm) across; 5 rnds = 3 in (7.6 cm) tall.
This holder is one piece, so the first part of the tube is your test piece. Work Rnds 1–9, then stop and measure before you go on.
Checkpoints:
- After you join the foundation chain: the ring lies flat at 6 in (15.2 cm) wide.
- After Rnd 4: the band is 1 in (2.5 cm) tall and still 6 in (15.2 cm) wide flat.
- After Rnd 9: the tube is 4 in (10.2 cm) tall.
- After Rnd 14: the tube is 7 in (17.8 cm) tall.
- After Rnd 24: the tube is 13 in (33.0 cm) tall.
- After Rnd 28: the tube is 14 in (35.6 cm) tall.
If your tube is too wide (over 6.5 in / 16.5 cm flat), change to a 4.5 mm hook. If it is too narrow (under 5.5 in / 14.0 cm flat), change to a 5.5 mm hook. Don’t change the stitch count. The lattice repeat only lines up with 48 stitches around.
If the width is right but your lattice rounds are short, add 1 or 2 lattice rounds. If they are tall, work 1 or 2 fewer. Every lattice round still has 24 V-sts, so the stitch counts stay the same.
Tube
Work in joined rounds with the right side facing you. Do not turn.
Bottom Band
Foundation: Ch 48. Sl st to the first ch to form a ring. Make sure the chain is not twisted.
Rnd 1: Ch 1, sc in the same ch as the join and in each ch around; join with sl st to first sc. (48 sc)
Rnds 2–4: Ch 1, sc in each st around; join. (48 sc)
Place a marker in the first sc of Rnd 4. The band should measure 1 in (2.5 cm) tall.
Lattice Body
Rnd 5 (conversion round): Ch 4 (counts as dc + ch 1), dc in the same st as the join (first V-st made). Sk next sc, V-st in next sc; repeat from * 22 more times; sk the last sc. Join with sl st to the 3rd ch of the beginning ch-4.
Count: the 48 sc become 24 V-sts. Each V-st takes up 2 sc of the band, one worked into and one skipped (24 x 2 = 48). That makes 48 dc and 24 ch-1 sps. (24 V-sts)
Rnd 6: Sl st in the next ch-1 sp, then sl st in the next gap (between the first and second V-sts). Ch 4 (counts as dc + ch 1), dc in the same gap. Work a V-st in each remaining gap around, including the gap between the last V-st and the first V-st. Join with sl st to the 3rd ch of the beginning ch-4. (24 V-sts)
24 V-sts always leave 24 gaps. Each new V-st sits between two V-sts of the round below. This half-step offset creates the diamond lattice.
Rnds 7–24: Repeat Rnd 6. (24 V-sts in each round)
That gives 20 lattice rounds (Rnds 5–24). Each round starts half a V-st farther along, so the join slowly spirals around the tube. This is normal, and the lattice hides it.
The tube should measure 4 in (10.2 cm) tall at Rnd 9, 7 in (17.8 cm) at Rnd 14, and 13 in (33.0 cm) at Rnd 24. The flat width should stay at 6 in (15.2 cm) the whole way up.
Do not fasten off. Go straight to the top band in the Border section.
Covered Ring and Straps
Ring
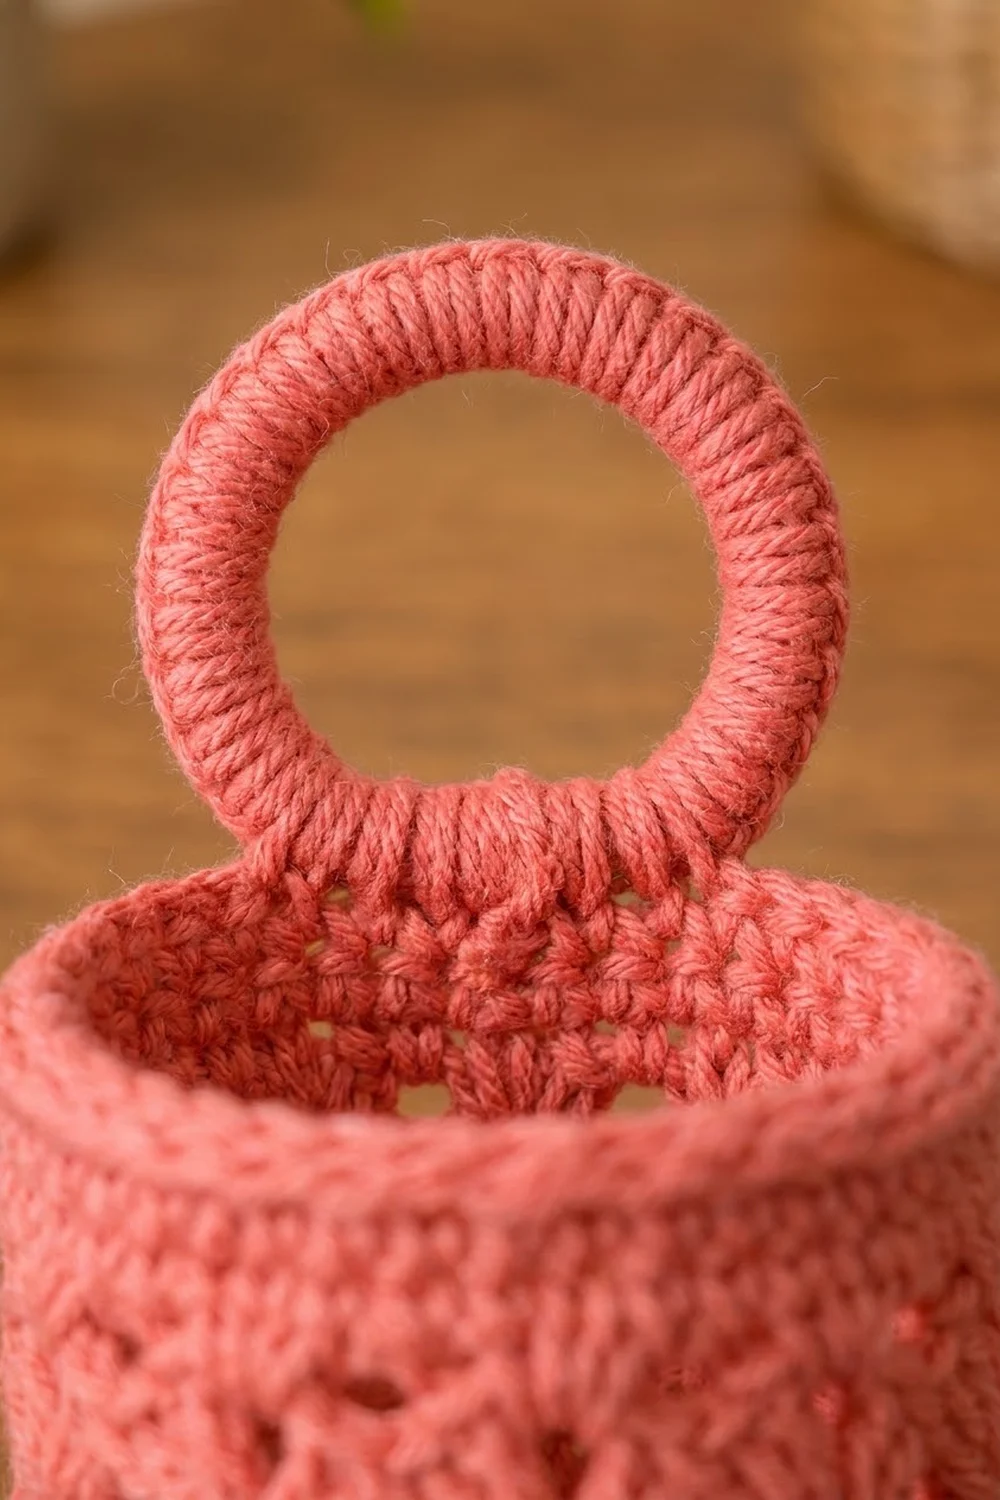
Make a slipknot on your hook. Hold the yarn tail along the ring. Insert the hook through the ring, yarn over, and pull up a loop. Yarn over and pull through both loops (first sc made). Keep working sc over the ring until it is fully covered, about 44 sc. Push the stitches together as you go so no ring shows through. Join with sl st to the first sc.
Rings vary in thickness, so add or remove a few sc as needed. Keep the total even so the straps stay centered.
Straps
Hold the ring with the join at the top. Find the 6 sc centered at the bottom of the ring. The 4 sc just to the left of those 6, and the 4 sc just to the right, are where the two straps go.
Strap (make 2):
Row 1: Join yarn to the first sc of one 4-sc group. Ch 1, sc in the same st and in the next 3 sc. (4 sc)
Rows 2–5: Ch 1, turn, sc in each st across. (4 sc)
Fasten off, leaving a 10 in (25.4 cm) tail for sewing. Each strap should be 1.25 in (3.2 cm) long and 1 in (2.5 cm) wide.
Border
The border has two parts: the top band, which you work straight from the lattice, and one finishing round on the bottom edge.
Border gauge: 4 sc = 1 in (2.5 cm) across; 4 rnds = 1 in (2.5 cm) tall.
Top Band
Rnd 25 (conversion round): Ch 1. Sc in each dc around, skipping every ch-1 sp; join with sl st to first sc.
Count: 48 dc, each worked once, + 0 extra stitches = 48 sc.
Rnds 26–28: Ch 1, sc in each st around; join. (48 sc)
These 4 band rounds equal 1 in (2.5 cm). Fasten off and weave in the end.
Bottom Edge Round
Turn the tube upside down. With the right side facing you, join the yarn in a free loop of the foundation chain.
Bottom edge rnd: Ch 1, sl st loosely in each free loop of the foundation chain around; join to first sl st. (48 sl st)
This round firms up the bottom edge so it matches the top. Keep the slip stitches loose. If they are tight, the opening pulls in and bags are hard to pull out.
Why the Math Works
The lattice has 24 V-sts, and each V-st takes up 2 stitches, so the lattice is 48 stitches around. Both bands are also 48 sc. At 4 sc per inch, 48 sc equals 12 in (30.5 cm) around. Laid flat, that is 24 stitches per side, or 6 in (15.2 cm).
No stitches are added or lost where the bands change to lattice or back to band, so the tube stays straight. A tube has no corners, so there are no corner stitches to count.
Attaching the Ring
Fold the tube flat so the spiral of round joins is on the back. Mark the center of the back half of the top band. Count 4 sc out from the center on each side. The next 4 sc on each side are where the straps go. That leaves 8 sc, or 2 in (5.1 cm), between the straps.
Lap the last row of each strap 0.5 in (1.3 cm) over the inside of the top band, over its 4 marked sc. Whipstitch it along the inside and along the top edge. This keeps the front of the opening clear, so bags are easy to push in.
Final Blocking
- Weave in all ends, but don’t trim them yet.
- Soak the holder in cool water for 10 minutes. Gently press out the water, then roll it in a towel to remove more.
- Slide the holder over a rolled towel or cardboard form that is about 6 in (15.2 cm) wide when flattened.
- Gently stretch the tube lengthwise to 14 in (35.6 cm). Use your fingers to open each diamond evenly.
- Check that the top and bottom bands are straight and level.
- Pin the ring so it dries round, with both straps lying straight.
- Let it dry completely, then trim the ends.
Final Quality-Control Checklist
- The tube is 6 in (15.2 cm) wide flat and 14 in (35.6 cm) long.
- The bottom and top bands each have 48 sc and are 1 in (2.5 cm) tall.
- Every lattice round has 24 V-sts.
- The diamonds are evenly offset, with no stacked columns.
- No part of the ring shows through the sc covering.
- Both straps are 4 sc wide and 5 rows long, sewn to the back half with 8 sc between them.
- The holder hangs straight without twisting.
- All ends are securely woven in.
Troubleshooting
The V-sts stack in columns instead of offsetting. You are working into the ch-1 sps instead of the gaps. Each V-st goes between two V-sts of the round below.
My count drifts to 23 or 25 V-sts. You skipped or doubled the gap next to the join. Mark the first V-st of each round and count before you join.
The tube flares at the top. Your Rnd 25 sc are too loose. Use a hook one size smaller for the top band only.
The bottom edge is too tight. Pull out the slip stitch round and work it again more loosely, or use a hook one size larger.
The holder tilts forward. Move both straps closer to the back center and make sure they are the same length.
The ring twists or shows through. Add a few sc so the stitches pack tightly around it.
Care
Hand wash, or machine wash on a gentle cycle inside a laundry bag. Reshape it and dry it flat, and avoid a hot dryer, which can shrink cotton and shorten the tube.
Final Notes
The whole design follows one measurement chain. At 16 sc = 4 in (10.2 cm), 48 sc = 12 in (30.5 cm) around, or 6 in (15.2 cm) flat. Those 48 sc become 24 V-sts. The lattice keeps 24 V-sts for 20 rounds, adding 12 in (30.5 cm) of length, then changes back to 48 sc for the top band. Two 1 in (2.5 cm) bands plus 12 in (30.5 cm) of lattice make 14 in (35.6 cm). The 3 in (7.6 cm) covered ring sits on top.
Check your width after Rnd 4 and your height at Rnds 9, 14, and 24, and the holder will come out right. Make one in sage and one in coral to keep your bags sorted.
Happy crocheting!