

The Rosette Lattice Bag Holder is a tall lace tube that hangs from a covered ring. It holds a big bundle of plastic grocery bags: stuff them in at the top and pull them out one at a time through the narrower bottom opening. The front shows a column of three round medallions, each framed by an open diamond lattice, so you can see the bags through the lace.
The sample is worked in oatmeal beige cotton for a natural, farmhouse look. A raspberry rose version looks just as good, and making two side by side helps keep bag colors sorted. The pattern uses US crochet terms throughout.
The finished holder measures 16 in (40.6 cm) around and 14.25 in (36.2 cm) tall. With the hanging ring, the total height is about 17 in (43.2 cm).
You make twelve circle-in-square motifs and join them as you go into a tube 4 motifs around and 3 motifs tall. Then you add a solid top band, a decreasing bottom band, a covered ring and a hanging tab.
Finished Size and Construction
- Finished size: 16 in (40.6 cm) circumference, 8 in (20.3 cm) wide when flat, 14.25 in (36.2 cm) tall without the ring
- Height with ring: about 17 in (43.2 cm)
- Skill level: Intermediate (join-as-you-go)
- Terminology: US
- Yarn weight: #4 worsted, cotton or cotton blend
- Hooks: H-8 (5 mm) for the motifs, G-6 (4 mm) for the bands, ring and tab
- Number of pieces: 12 motifs, plus 1 ring cover with tab
- Layout: 4 motifs around × 3 motifs tall
- Motif size: 4 in (10.2 cm) square
- Size before bands: 16 in (40.6 cm) around × 12 in (30.5 cm) tall
- Band depth: top 1.25 in (3.2 cm), bottom 1 in (2.5 cm)
Materials
Choose a smooth, matte worsted cotton or cotton blend. Cotton holds the tube shape and doesn’t stretch out under the weight of a full load of bags. Avoid fuzzy yarns, which hide the lattice and snag on plastic.
- Oatmeal beige (main color): 130 g, about 220 m
- Optional second holder in raspberry rose: another 130 g, about 220 m
Tools:
- H-8 (5 mm) and G-6 (4 mm) crochet hooks
- One 2 in (5.1 cm) plastic or metal ring
- Tapestry needle
- 4 stitch markers
- Scissors
- Blocking mat, rust-proof pins and a rolled towel
The yarn amounts include roughly a 20% margin for your gauge swatch and weaving in ends.
Abbreviations (US Terms)
- ch – chain
- sl st – slip stitch
- sc – single crochet
- hdc – half double crochet
- dc – double crochet
- tr – treble crochet
- sc2tog – single crochet 2 together
- sk – skip
- sp – space
- rnd – round
Special stitch – JAYG join (join-as-you-go): In place of a ch-3, work ch 1, sl st into the matching ch-3 sp of the neighboring motif, then ch 1.
Gauge and Checkpoints
Make one complete motif before anything else, and measure it after each round:
- Rnd 1: 1 in (2.5 cm) across
- Rnd 2: 1.75 in (4.4 cm)
- Rnd 3: 2.25 in (5.7 cm)
- Rnd 4: 3 in (7.6 cm) solid circle
- Rnd 5: 3.5 in (8.9 cm)
- Rnd 6: 4 in (10.2 cm) square, measured edge to edge when pinned flat
Band gauge (G-6 hook): 17 sc and 16 rnds = 4 in (10.2 cm).
If the motif is larger than 4 in (10.2 cm), go down a hook size. If it’s smaller, go up a size. A difference of only 0.25 in (0.6 cm) per motif adds up to 1 in (2.5 cm) around the tube, so match the gauge before you continue.
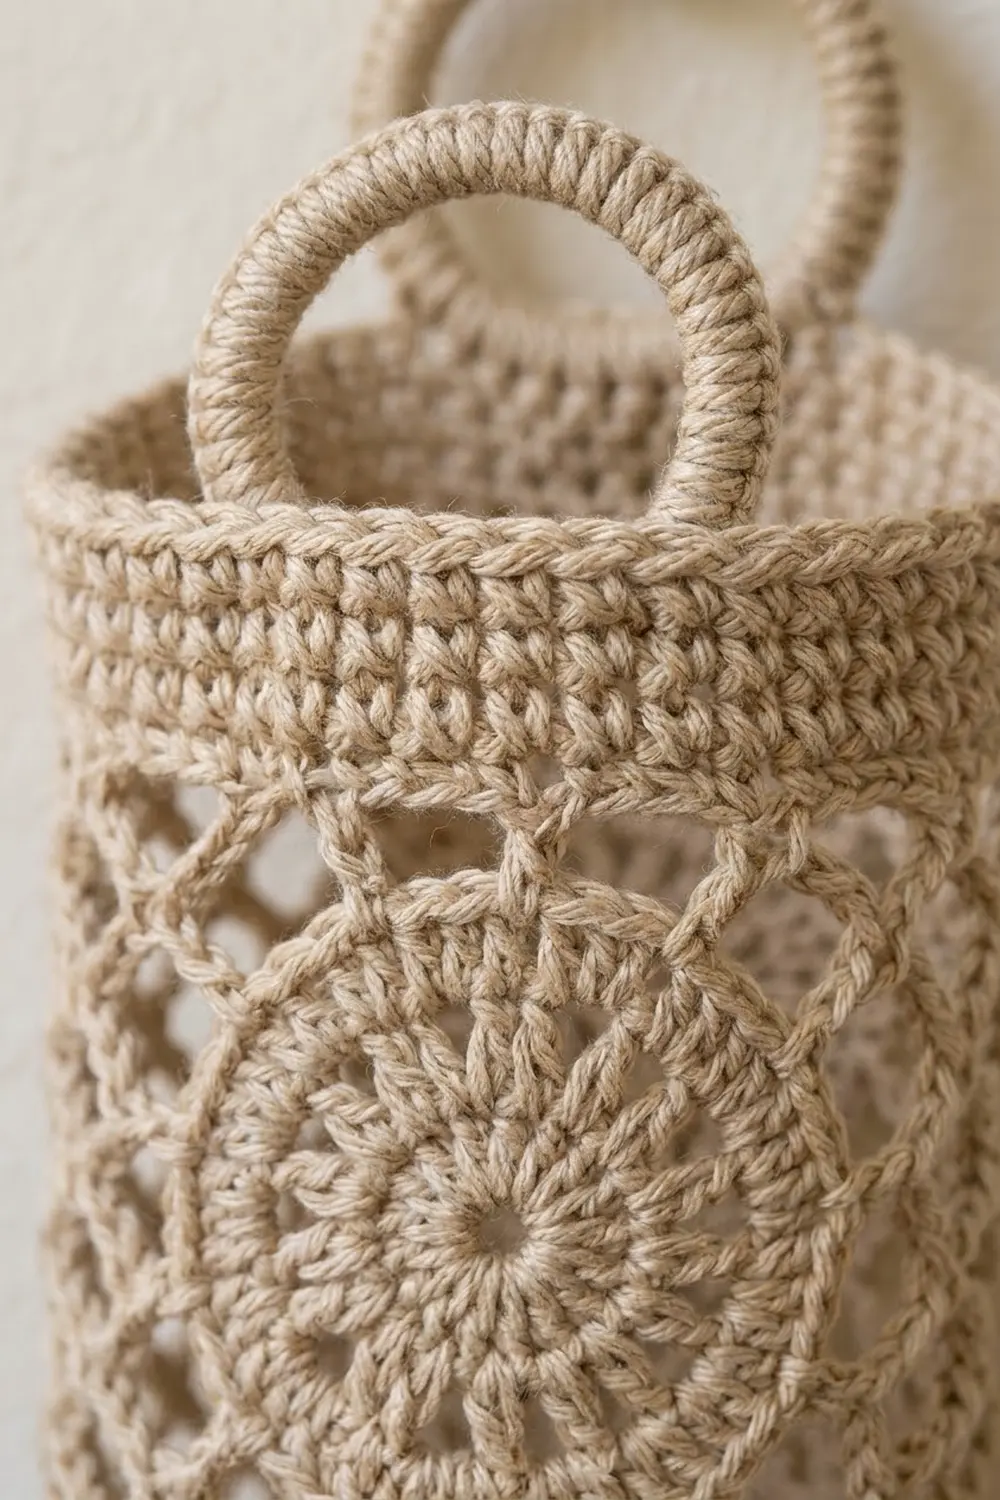
Motif (Make 12)
Use the H-8 (5 mm) hook.
Rnd 1: Make a magic ring. Ch 3 (counts as dc), work 11 dc into the ring. Join with a sl st to the top of the ch-3. (12 dc)
Rnd 2: Ch 3, dc in the same st, then work 2 dc in each st around. Join. (24 dc)
Rnd 3: Ch 3, dc in the next st, ch 2. Dc in each of the next 2 sts, ch 2; repeat from * 10 more times. Join. (24 dc, 12 ch-2 sps)* This is the open spoke round.
Rnd 4 (conversion round): Ch 2 (doesn’t count as a stitch). Work hdc in each dc and 2 hdc in each ch-2 sp around. Join to the first hdc. (24 hdc worked 1 per dc + 24 hdc worked into the spaces = 48 hdc) This round makes the solid outer ring of the medallion.
Rnd 5: Ch 1, sc in the same st. Ch 4, sk 2 sts, sc in the next st; repeat from * 14 more times. Ch 4, sk 2, join to the first sc. (16 sc, 16 ch-4 loops)*
Rnd 6 (squaring round): Sl st into the first ch-4 loop. This loop is a corner loop, and every 4th loop after it is also a corner loop.
- Ch 4 (counts as tr), ch 3, tr in the same loop.
- *Ch 3, dc in the next loop, ch 3, sc in the next loop, ch 3, dc in the next loop, ch 3.
- In the next corner loop work (tr, ch 3, tr).
- Repeat from * 2 more times.
- Ch 3, dc in the next loop, ch 3, sc in the next loop, ch 3, dc in the next loop, ch 3. Join to the top of the beginning ch-4.
Stitch count: 20 sts (8 tr, 8 dc, 4 sc) and 20 ch-3 sps (16 side sps and 4 corner sps).
Count per side: 5 sts (tr, dc, sc, dc, tr, including the 2 corner tr) and 4 side ch-3 sps. The corner ch-3 sp is shared between two sides.
The taller tr at the corners and the shorter sc at the middle of each side turn the circle into a square. The chain loops form the diamond lattice.
Fasten off the first motif. Make the other 11 with the JAYG join on Rnd 6 (see Joining).
Make All Pieces
- Oatmeal beige: 12 motifs
- Oatmeal beige: 1 ring cover with tab (made after the bands)
Layout around the tube. Column A is the front and column C is the back. Column D joins back to column A to close the tube.
         Col A    Col B    Col C    Col D
Row 1:  [ M1 ]   [ M2 ]   [ M3 ]   [ M4 ]  -> M4 also joins M1
Row 2:  [ M5 ]   [ M6 ]   [ M7 ]   [ M8 ]  -> M8 also joins M5
Row 3:  [ M9 ]   [ M10]   [ M11]   [ M12]  -> M12 also joins M9
Row 1 is the top of the holder.
Joining
Method: Join as you go on Rnd 6. Work the new motif’s Rnd 6 as usual until you reach the side that will touch a finished motif. Along that side, replace each ch-3 with the JAYG join.
Stitch-to-stitch logic for each joined side:
- At the first corner, work tr, then JAYG into the neighbor’s corner ch-3 sp, then tr.
- JAYG into the neighbor’s 1st side sp, then dc.
- JAYG into the 2nd side sp, then sc.
- JAYG into the 3rd side sp, then dc.
- JAYG into the 4th side sp.
- At the next corner, work tr, then JAYG into the corner sp, then tr.
Every joined side has 6 joins: 2 corners and 4 side spaces. Because each JAYG join replaces a ch-3 with ch 1, sl st, ch 1, the motif’s own stitch counts stay the same.
Where four corners meet: Sl st into the same sl st that already joins the other corners, so all four corners meet at one point.
Order:
- Join M2 to M1 along one side, and M3 to M2.
- Join M4 to M3 on its left side and to M1 on its right side. This closes the first ring.
- For each later row, join the new motif to the motif above it, and to the motif beside it once there is one.
- Join the last motif in each row on three sides: above, left and right.
Tension: Keep the sl st joins relaxed. If they’re tight, the seams pucker and the tube narrows.
Checkpoint: The joined tube should measure 16 in (40.6 cm) around and 12 in (30.5 cm) tall, or 8 in (20.3 cm) wide when flattened.
Border (Top and Bottom Bands)
Use the G-6 (4 mm) hook. Band gauge: 17 sc = 4 in (10.2 cm).
Top Band
Join yarn at the top edge of M1, in its first corner tr after the seam. Place a marker at each of the 4 seams.
Rnd 1 (conversion round): Ch 1. Across each motif’s top edge, work sc in each of the 5 sts and 3 sc in each of the 4 side ch-3 sps. Skip the joined corner sps at the seams. Join to the first sc.
- Per motif: 5 sc (1 per st) + 12 sc (3 per sp) = 17 sc
- Round total: 4 motifs × 17 = 68 sc
No stitches are added at the seams. The two corner tr on either side of each seam are already included in the 5 sts of their own motifs.
Rnds 2–5: Ch 1, sc in each st around. Join. (68 sc each round)
Fasten off. The top band measures 1.25 in (3.2 cm) deep.
Why the math works: 68 sc divided by 4.25 sc per inch is 16 in (40.6 cm). That matches the motif tube exactly, so the band won’t flare or pull in.
Bottom Band
Join yarn at the bottom edge of M9, at the same position as the top band.
Rnd 1: Work it the same way as top band Rnd 1. (68 sc)
Rnd 2: Ch 1. Sc in each of the next 2 sts, sc2tog; repeat from * 16 more times. Join. (17 repeats × 3 = 51 sc)*
Rnds 3–4: Ch 1, sc in each st around. Join. (51 sc each round)
Fasten off. The bottom band measures 1 in (2.5 cm) deep. The opening is 12 in (30.5 cm) around, or about 3.8 in (9.7 cm) across. The band curves inward, which keeps the bags from falling out but still lets one pull through easily.
Ring Cover and Hanging Tab
Ring cover: With the G-6 hook, work about 40 sc over the 2 in (5.1 cm) ring, or as many as it takes to cover it snugly with no gaps. Join and fasten off, leaving a long tail.
Tab: Find the middle of column C (the back) on top band Rnd 5. Join yarn 3 sts to the right of the center.
- Row 1: Ch 1, sc in the next 6 sts. Turn. (6 sc)
- Rows 2–8: Ch 1, sc in each st across. Turn. (6 sc each row)
The tab measures about 1.5 in (3.8 cm) wide and 2 in (5.1 cm) long.
Pass the tab through the covered ring from front to back. Fold it down onto the inside of the band and whipstitch Row 8 to top band Rnd 3. About 0.75 in (1.9 cm) of the folded tab shows above the band.
Final Blocking
- Weave in all ends along the sc rounds or through the solid medallion rings.
- Wet the holder thoroughly and gently squeeze out the water. Don’t wring it.
- Roll a towel to about 5 in (12.7 cm) across and slide it inside the tube.
- Line up the medallions in column A so they’re centered on the front.
- Pin the top band and bottom band level, checking for 16 in (40.6 cm) around.
- Pat each lattice diamond open with your fingertips.
- Let it dry completely, then remove the towel.
Final Quality-Control Checklist
- [ ] All 12 motifs are 4 in (10.2 cm) square.
- [ ] All four-corner meeting points share one sl st.
- [ ] Rnd 1 of each band has exactly 68 sc.
- [ ] The bottom band ends with 51 sc.
- [ ] The tube is 16 in (40.6 cm) around and 14.25 in (36.2 cm) tall.
- [ ] The tab is centered on the back, directly opposite the front medallion column.
- [ ] The ring is fully covered and doesn’t show through.
- [ ] All ends are secure and don’t show through the lace.
Troubleshooting
- Motif cups: Rnd 4 is too tight. Go up a hook size for Rnds 4–6.
- Motif ruffles: Your chains are too loose. Go down a hook size or tighten your chains.
- Corners are rounded: Work the corner tr tall, and pin the corners out to a point while blocking.
- Seams pucker: The JAYG sl sts are too tight. Rework them more loosely.
- Top band flares: Check that you skipped the joined corner sps and worked only 17 sc per motif.
- Tube twists: Join every row in the same direction, and keep column A lined up as you go.
- Bottom opening too tight: Skip the sc2tog round and work 3 rounds of 68 sc.
Care
Hand wash in cool water and lay flat over a rolled towel to dry. Wipe off dust now and then so the cotton stays bright.
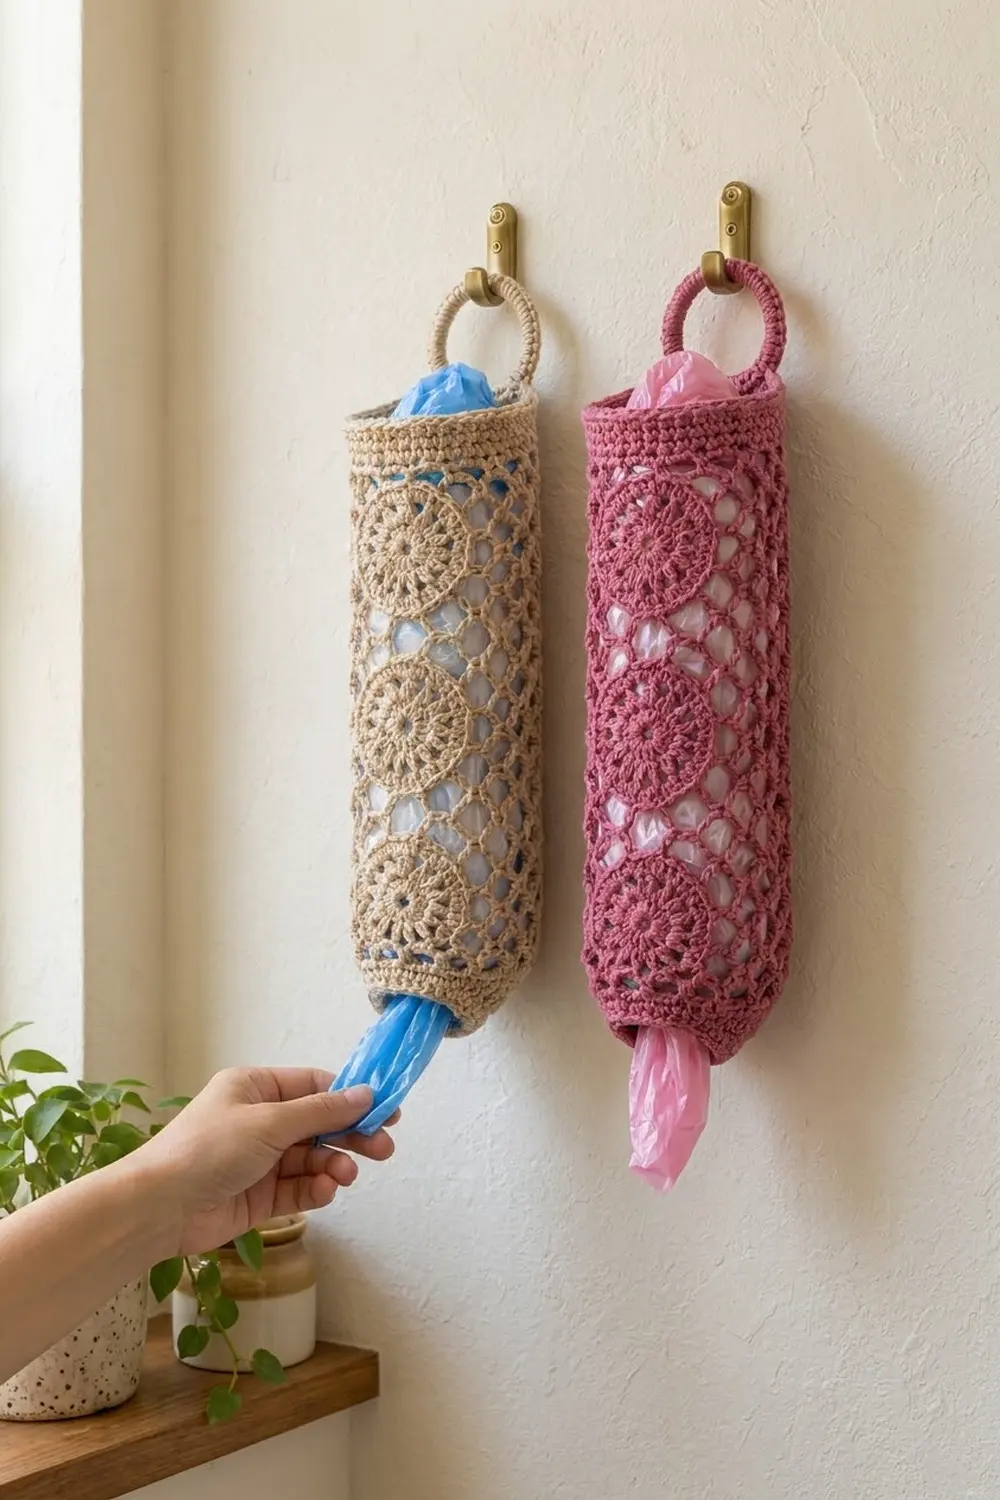
Final Notes
Every measurement depends on the one before it. The 4 in (10.2 cm) motif makes a 16 in (40.6 cm) by 12 in (30.5 cm) tube, and 68 band stitches (17 per motif) keep that circumference. The bands add 1.25 in (3.2 cm) at the top and 1 in (2.5 cm) at the bottom, for a total height of 14.25 in (36.2 cm). If your first motif matches the gauge, everything else will fit.
Happy crocheting!