

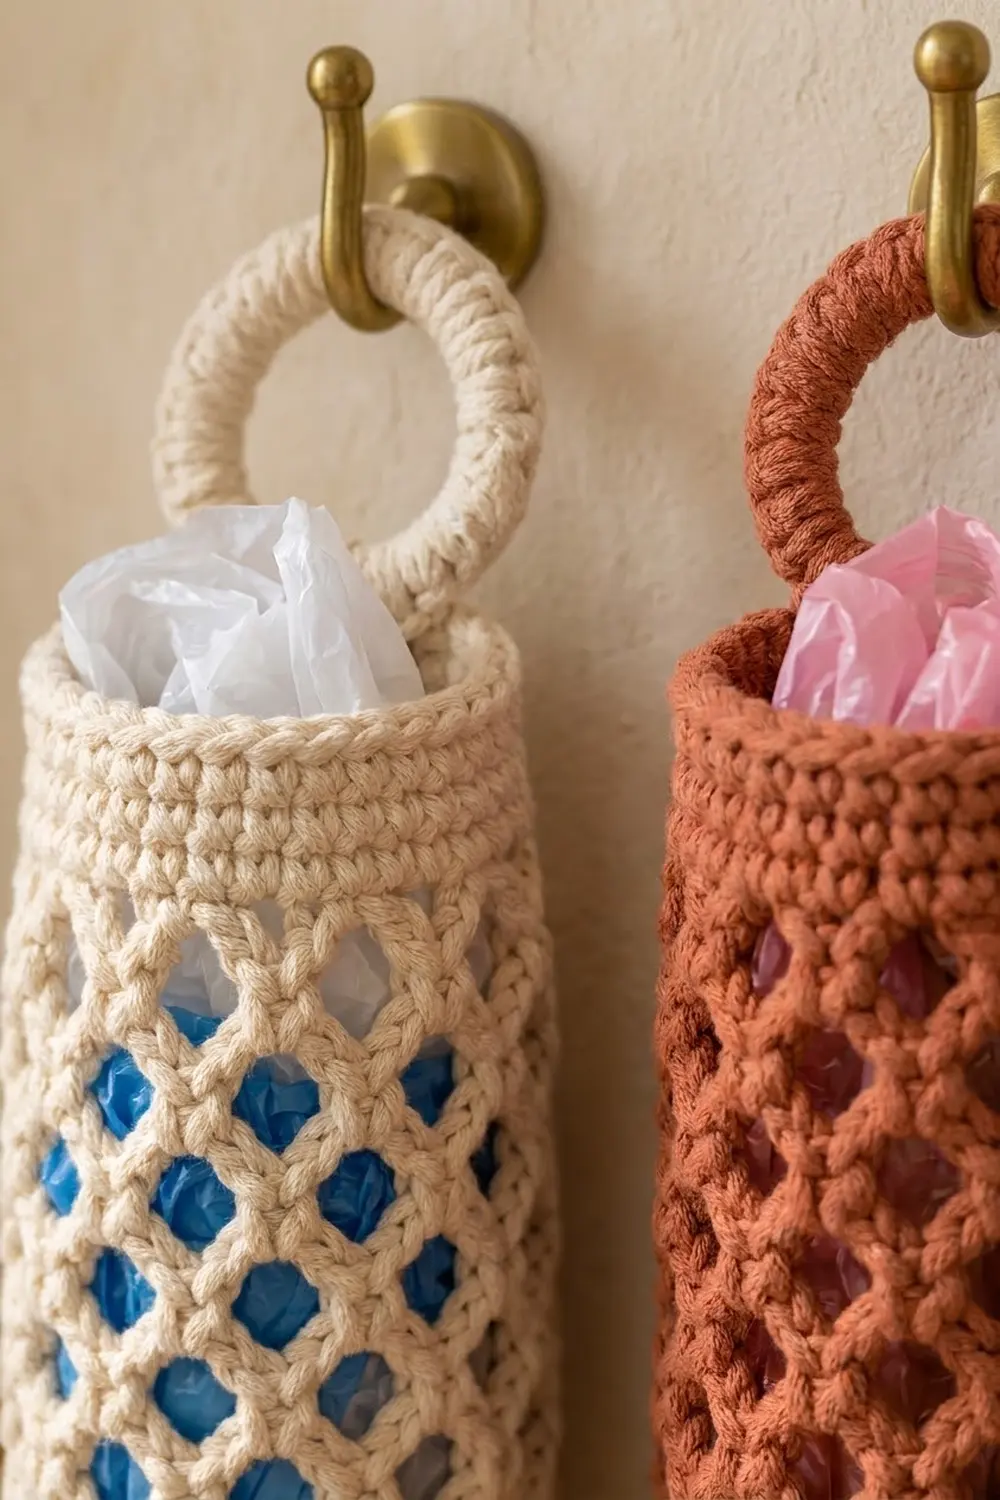
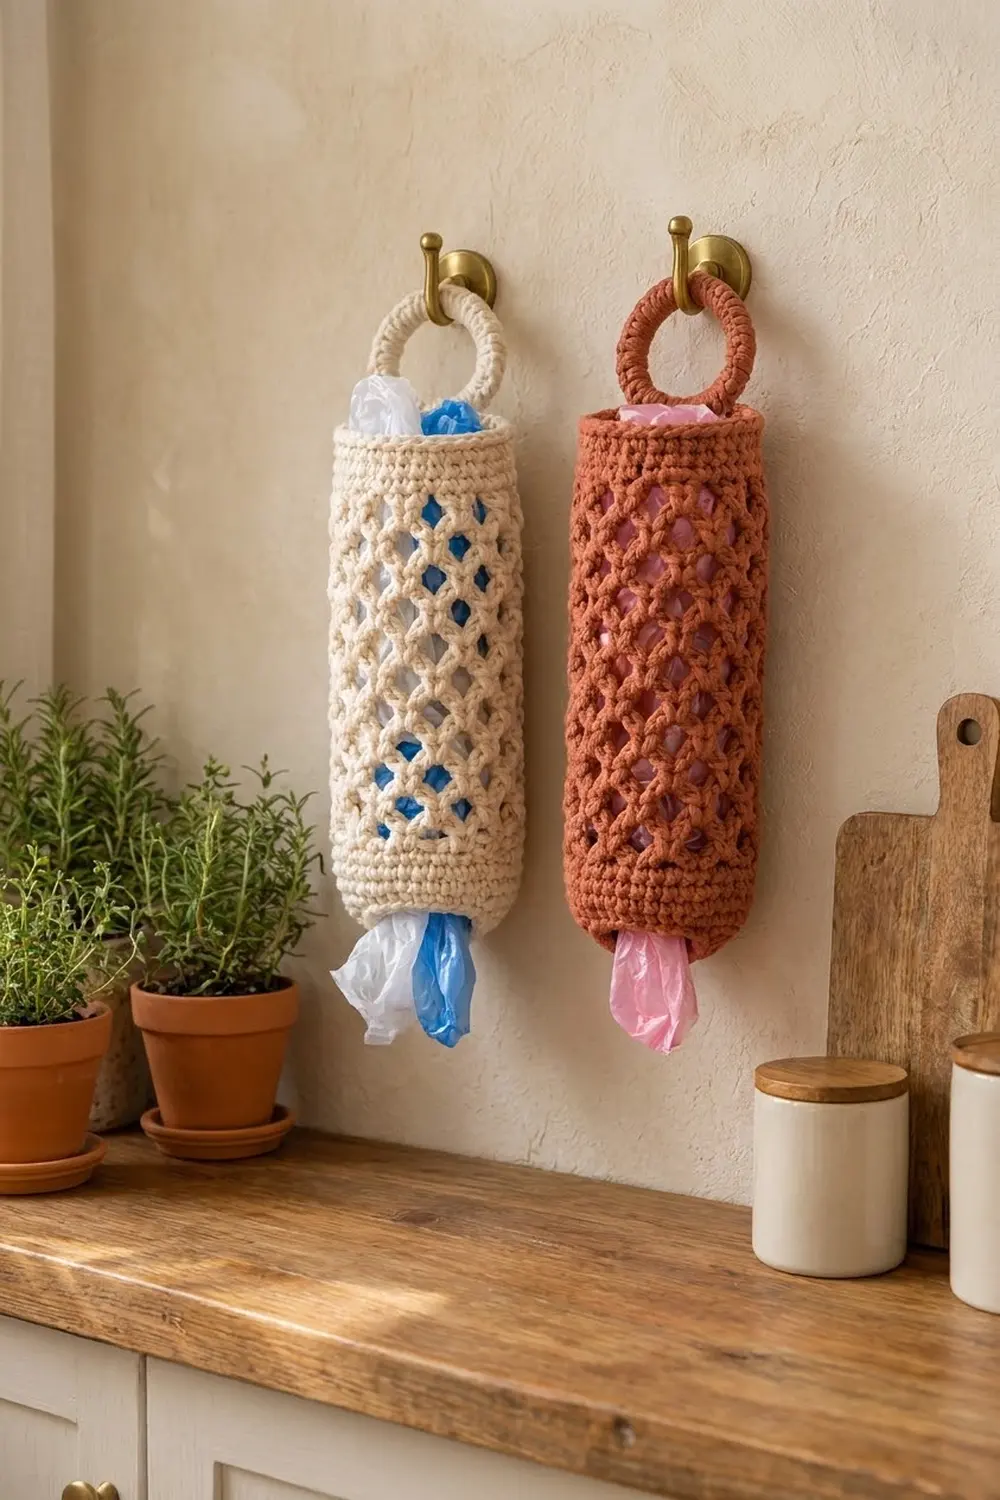
This chunky bag holder looks like a strip of rope netting rolled into a tube. A diamond lattice runs down the body, a solid band frames the top and bottom, and a covered ring at the back lets it hang from a hook or a cabinet knob. You stuff bags in through the wide top and pull them out one at a time through the narrower bottom opening.
The sample uses creamy natural cotton cord, which gives it a soft, macramé-style farmhouse look. It also works well in a warm terracotta for a bolder kitchen accent. The lattice shows best in a smooth, round cord or chunky cotton in a single solid color.
All instructions use US crochet terms. The finished holder measures 6 in (15.2 cm) wide laid flat (12 in / 30.5 cm around) and 16 in (40.6 cm) tall, not counting the ring. With the ring it hangs about 19.5 in (49.5 cm) long. The bottom opening lies 4 in (10.2 cm) wide flat.
You work the holder from the bottom up in joined rounds, all in one piece. You start at the narrow bottom opening and increase to full width. Then you work a trellis mesh for the body, close it with a solid top band, and crochet the ring on as you finish the last round. No sewing or seaming is needed.
Finished Size and Construction
- Finished size: 6 in (15.2 cm) wide flat x 16 in (40.6 cm) tall; about 19.5 in (49.5 cm) with the ring
- Skill level: Easy
- Terminology: US crochet terms
- Yarn weight: Bulky (#5) cotton cord or chunky cotton
- Hook: 6 mm (US J-10)
- Number of pieces: 1 (the tube and ring are worked as one continuous piece)
- Layout: One vertical tube with a hanging ring centered at the back of the top edge
- Piece size: 12 in (30.5 cm) around, 36 stitches around in the solid bands
- Size before top band: 14 in (35.6 cm) tall (bottom band plus mesh)
- Top band (border) depth: 2 in (5.1 cm), 6 rounds
Materials
Choose a smooth, firm cotton or cotton-blend cord in bulky weight. Cotton holds its shape when the holder is stuffed full, and a round, plied cord shows the lattice clearly. Avoid fuzzy or very stretchy yarn, because the mesh will sag over time.
- Main color (Cream or Natural): 150 g, about 150 m (164 yd)
- Optional second colorway (Terracotta): 150 g, about 150 m (164 yd) for a second holder
These quantities include a margin of about 20 percent for gauge differences and swatching.
Tools:
- 6 mm (US J-10) crochet hook
- One 3 in (7.6 cm) wooden or metal ring
- Stitch marker
- Tapestry needle
- Scissors
- Measuring tape
- Spray bottle and blocking pins
Abbreviations (US Terms)
- ch – chain
- sl st – slip stitch
- sc – single crochet
- sk – skip
- sp – space
- st(s) – stitch(es)
- rnd(s) – round(s)
Special stitch – Trellis loop: ch 5, then sc into the center of the next ch-5 loop from the round below. Repeated around, these arched loops shift by half a loop each round and form the diamond lattice.
Gauge and Checkpoints
Solid sc gauge: 12 sts and 12 rnds = 4 in (10.2 cm) in sc worked in the round.
Mesh gauge: 1 trellis rnd = 0.75 in (1.9 cm) tall; 9 loops around = 12 in (30.5 cm).
Because this is a single piece, the first few rounds are your test piece. Work Rnds 1–6 and measure before you continue.
Checkpoints:
- After Rnd 1: the bottom opening lies 4 in (10.2 cm) wide flat.
- After Rnd 3: the tube lies 6 in (15.2 cm) wide flat.
- After Rnd 6: the bottom band is 2 in (5.1 cm) tall.
- After Rnd 14: total height is 8 in (20.3 cm).
- After Rnd 22: total height is 14 in (35.6 cm).
- After Rnd 28: total height is 16 in (40.6 cm).
If your piece is too big: go down to a 5.5 mm hook and restart. If the band is the right width but the mesh is too long, work one fewer trellis round.
If your piece is too small: go up to a 6.5 mm hook. If only the mesh is short, add one trellis round; each round adds 0.75 in (1.9 cm).
Bottom Band
The bottom band forms the opening you pull bags from and widens the tube to full size. Join each round with a sl st to the first sc and do not turn. Place a marker in the first st of each round.
Foundation: Ch 24. Join with a sl st to the first ch to form a ring, taking care not to twist the chain.
Rnd 1: Ch 1 (does not count as a st), sc in each ch around, join. (24 sts)
Rnd 2: Ch 1, sc in next 3 sts, 2 sc in next st; repeat from * 5 more times, join. (30 sts)*
Rnd 3: Ch 1, sc in next 4 sts, 2 sc in next st; repeat from * 5 more times, join. (36 sts)*
Rnds 4–6: Ch 1, sc in each st around, join. (36 sts)
The band is now 2 in (5.1 cm) tall and 6 in (15.2 cm) wide flat. The opening at Rnd 1 is 8 in (20.3 cm) around. That is snug enough to hold bags in but wide enough to pull one out easily.
Diamond Lattice Body
The body uses trellis loops. Each loop arches over the one below, and the offset between rounds creates the diamond openings. Keep your chains even, because their length is what keeps the diamonds the same size.
Rnd 7 (set-up): Ch 1, sc in first st, ch 5, sk next 3 sts, sc in next st; repeat from * 7 more times, ch 5, sk last 3 sts, join with sl st to first sc. (9 sc, 9 ch-5 loops)*
Check the math: each repeat uses 4 sts (1 sc + 3 skipped). 9 repeats x 4 sts = 36 sts, so the round fits the band exactly.
Rnd 8: Sl st in each of the first 3 ch of the next ch-5 loop to reach its center. Ch 1, sc in same loop, ch 5, sc in next ch-5 loop; repeat from * 7 more times, ch 5, join with sl st to first sc. (9 sc, 9 ch-5 loops)*
Rnds 9–22: Repeat Rnd 8. (9 sc, 9 ch-5 loops in each round)
That gives 16 mesh rounds in total (Rnds 7–22). At 0.75 in (1.9 cm) per round, the mesh is 12 in (30.5 cm) tall. The total height is now 14 in (35.6 cm).
Every few rounds, give the tube a gentle downward tug to settle the loops. The chain arches should form even diamonds, with about 4.5 visible across the front when the holder is laid flat.
Top Band and Hanging Ring (Border)
On a tube, the “border” is the solid top band that frames the opening, plus the ring crocheted into it. To count stitches, think of the flattened tube as two sides: 18 sts on the front and 18 sts on the back, 36 in total.
Border gauge: the same as the bottom band, 12 sc = 4 in (10.2 cm). At 3 sts per inch, 36 sts equals 12 in (30.5 cm), so the top band matches the bottom band and the mesh exactly.
Rnd 23 (conversion round): Ch 1. Work 4 sc in each ch-5 loop around; do not work into the sc between loops. Join. (0 sts worked 1-per-existing-stitch + 36 sts worked into loops = 36 sts: 9 loops x 4 sc)
Count by side: 4.5 loops across each flattened side x 4 sc = 18 sts per side, front and back.
Rnds 24–27: Ch 1, sc in each st around, join. (36 sts; 18 front, 18 back)
Before the last round, lay the tube flat and find the center back. Mark the 4 sts at the center back (sts 8–11 of the back 18). You will attach the ring through these.
Rnd 28 (ring round): Ch 1, sc in each st to the first marked st. Hold the 3 in (7.6 cm) ring just above the back edge. For each of the 4 marked sts, insert the hook into the st, bring the yarn up and over the ring, and complete the sc. Each of these stitches wraps around both the ring and the edge. Sc in each remaining st, join. (36 sts; 18 front, 18 back, 4 of which enclose the ring) Fasten off.
The top band is now 6 rnds deep, 2 in (5.1 cm), and the holder is 16 in (40.6 cm) tall.
Covering the ring: Join yarn on the ring just beside the 4 attached sts. Work sc around the ring only, packing the sts tightly side by side: 32 sc, until you reach the other side of the attached sts. (32 sc + 4 attached sts = 36 sts covering the ring) Sl st to the first attached st and fasten off. If the ring still shows, add 1–2 sc; if the sts bunch up, remove 1–2. The covered ring is about 3.5 in (8.9 cm) across.
Bottom edge finish: Join yarn at the foundation ch. Sl st loosely in each free loop of the chain around. (24 sl sts) This firms up the opening so it doesn’t stretch out as bags are pulled through. Fasten off.
Why the math works: Every solid round from Rnd 3 on has 36 sts. Every mesh round has 9 loops of 4 sts each (9 x 4 = 36), and the conversion round puts exactly 4 sc back into each loop (9 x 4 = 36). So the circumference stays at 12 in (30.5 cm) from Rnd 3 to Rnd 28 without flaring or pulling in.
Final Blocking
- Weave in all ends along the inside of the solid bands, where they won’t show.
- Lightly mist the whole holder with water until it is damp but not soaked.
- Roll a towel to fit inside the tube, or slide in a cardboard tube about 4 in (10.2 cm) wide.
- Gently stretch the mesh lengthwise to 12 in (30.5 cm) and pat each diamond into an even shape.
- Smooth the top and bottom bands so they lie straight, at 2 in (5.1 cm) each.
- Shape the covered ring into a smooth circle centered over the back.
- Let it dry completely before removing the form.
Final Quality-Control Checklist
- Width flat is 6 in (15.2 cm) at the bands and through the mesh.
- Total height is 16 in (40.6 cm) without the ring.
- Every mesh round has 9 trellis loops.
- Rnd 23 has exactly 4 sc in each loop, 36 sts total.
- The ring sits centered at the back with 4 secure attached sts.
- No part of the ring shows through the sc covering.
- The bottom opening is 4 in (10.2 cm) wide flat and edged with sl sts.
- All ends are woven in securely.
Troubleshooting
The tube twisted. Usually the foundation chain was twisted when it was joined. Rip back to the foundation and rejoin carefully.
The mesh flares wider than the bands. Your chains are too loose. Work ch 4 instead of ch 5, or go down a hook size for the mesh only.
The mesh pulls narrower than the bands. Your chains are too tight. Loosen your tension or try ch 6.
The diamonds look lopsided. At the start of every round, sl st to the center of the loop (3 ch) so the joins stack neatly.
The ring flops forward. Tighten the 4 attached sts, or add a few hidden whipstitches through the back band.
Bags fall out of the bottom. Make the opening smaller. Ch 20 for the foundation, and work Rnd 1 as 20 sc. Add one extra round of (sc 4, 2 sc in next) x4 = 24 sts, then continue from Rnd 2 as written. The bottom band becomes 7 rounds.
Care
Hand wash in cool water with mild soap, press out excess water, and lay flat or hang to dry. Reshape the diamonds while damp.
Final Notes
Here is how the measurements add up. The bottom band starts at 24 sts, 8 in (20.3 cm) around, and increases to 36 sts, 12 in (30.5 cm) around, over 2 in (5.1 cm) of height. Sixteen trellis rounds of 9 loops add 12 in (30.5 cm), bringing the height to 14 in (35.6 cm). The top band returns to 36 sts and adds 2 in (5.1 cm), for a total of 16 in (40.6 cm). The covered ring brings the hanging length to about 19.5 in (49.5 cm). If every checkpoint matches, your holder will be neat, sturdy and ready to tidy up the bags under your sink.
Happy crocheting!