

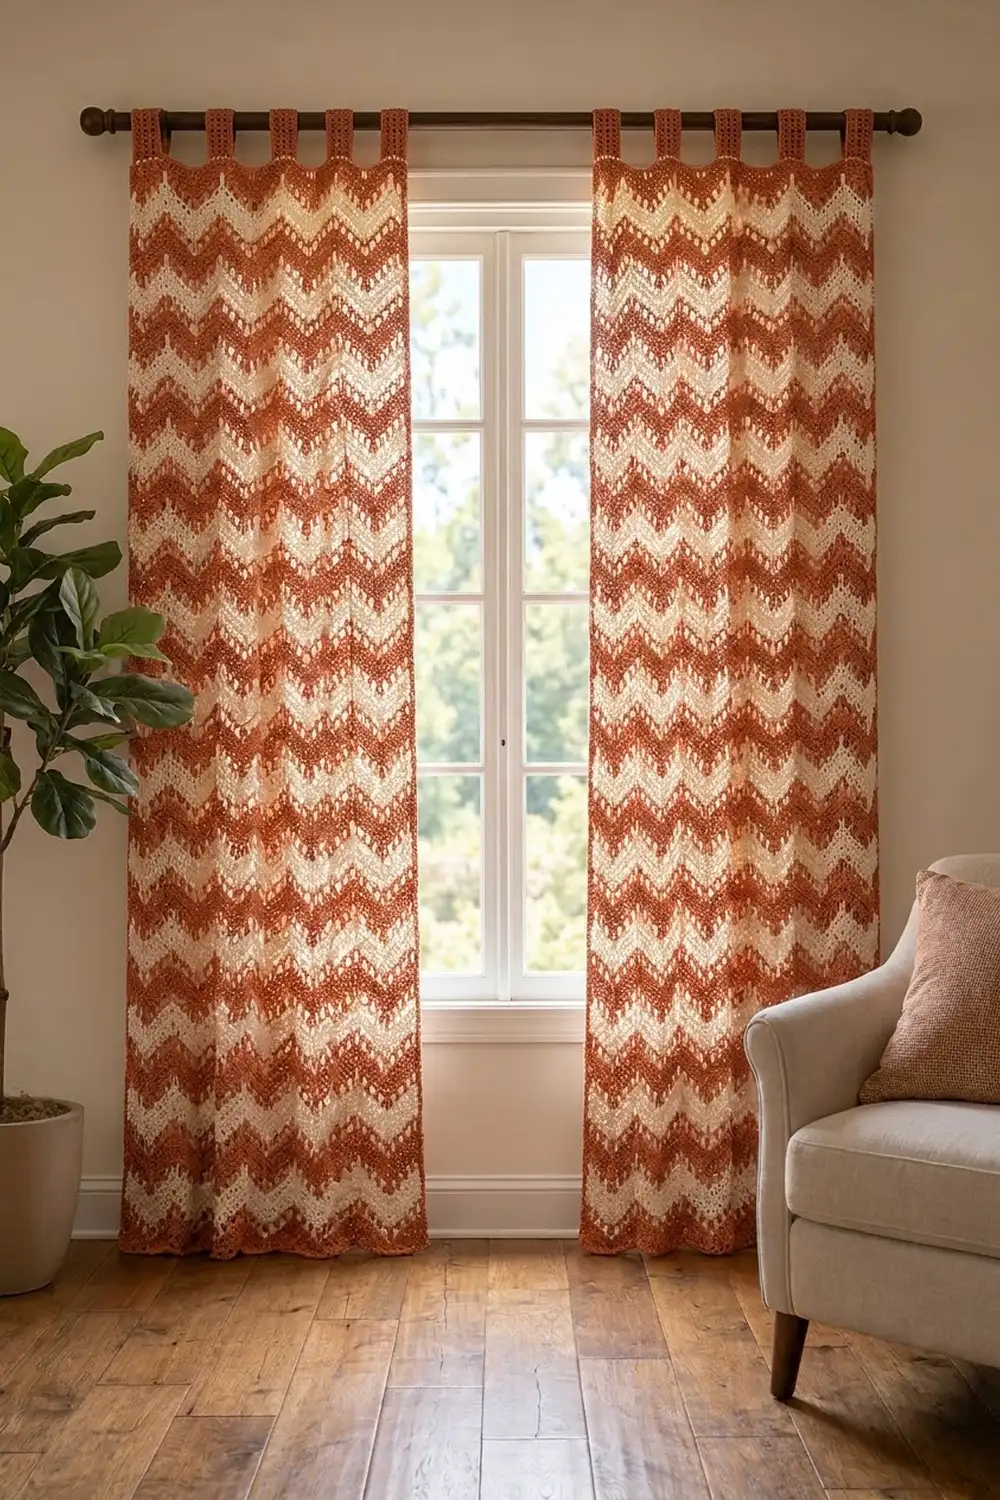
This curtain panel uses a classic ripple with an airy twist. Terracotta and cream stripes zigzag across the fabric, and each stripe has a row of eyelets that lets daylight through in neat diagonal dashes. Hung against a bright window, the panel glows without becoming see-through.
The style is warm, earthy and a little vintage. Two colors alternate the whole way up. The top is leveled into a straight edge, given a single round of terracotta edging and finished with five solid tabs that slide onto a standard curtain rod.
This pattern uses US crochet terms. One finished panel measures 32.25 in (81.9 cm) wide by 61.5 in (156.2 cm) long, not counting the tabs. With the tab loops it hangs about 64.5 in (163.8 cm) from the top of the loops to the hem points.
The panel is a single piece worked flat in rows from the bottom up. You work 120 ripple rows, then a leveling row and a single crochet row. Next comes one round of single crochet border, and the five tabs are worked last. For a pair, make two identical panels. They are not joined.
Finished Size and Construction
- Finished size (one panel): 32.25 in x 61.5 in (81.9 cm x 156.2 cm), plus 3 in (7.6 cm) tab loops
- Skill level: Intermediate
- Terminology: US
- Yarn weight: Worsted (#4), cotton or cotton blend
- Hook: 5.0 mm (H-8)
- Number of pieces: 1 panel with 5 built-in tabs (make 2 panels for a pair)
- Layout: Single rectangle, horizontal stripes
- Panel size before border: 31.75 in x 61 in (80.6 cm x 154.9 cm)
- Border depth: 0.25 in (0.6 cm) on each edge
- Tabs: 2.75 in (7.0 cm) wide, folded to 3 in (7.6 cm) loops
Materials
Choose a smooth worsted-weight cotton or cotton-linen blend. Cotton drapes straight, holds a crisp chevron, and handles sunlight and washing well. Avoid fuzzy or very stretchy yarns. They blur the eyelets and let a long panel stretch.
Yarn (about 170 m per 100 g):
- Color A, terracotta: 800 g (1,360 m) per panel; 1,600 g (2,720 m) for a pair
- Color B, cream: 700 g (1,190 m) per panel; 1,400 g (2,380 m) for a pair
Quantities include a margin of about 10–15% for your gauge swatch and small gauge differences. Buy all the yarn for each color from one dye lot.
Tools:
- 5.0 mm (H-8) crochet hook
- Tapestry needle
- Scissors
- Stitch markers (at least 10)
- Measuring tape
- Rust-proof pins and blocking mats or a large towel-covered surface
- Spray bottle
Abbreviations (US Terms)
- ch – chain
- sl st – slip stitch
- sc – single crochet
- hdc – half double crochet
- dc – double crochet
- tr – treble crochet
- sk – skip
- sp – space
- st(s) – stitch(es)
- yo – yarn over
- RS / WS – right side / wrong side
- dc2tog – double crochet 2 together: (yo, insert in next st, pull up a loop, yo, pull through 2 loops) twice, yo, pull through all 3 loops.
- dc3tog – double crochet 3 together: worked like dc2tog but over 3 sts; finish with yo, pull through all 4 loops.
Special stitch: eyelet slope. Dc in next st, ch 1, sk 1 st, dc in next st, ch 1, sk 1 st, dc in next st. This uses 5 sts and makes 5 sts: 3 dc plus 2 ch-1 sps. In the next row, each ch-1 sp counts as a stitch.
Gauge and Checkpoints
Gauge: 16 sts and 8 rows = 4 in (10.2 cm) in ripple pattern, measured straight across and blocked. One 14-st ripple repeat = 3.5 in (8.9 cm) wide. One 4-row stripe repeat = 2 in (5.1 cm) tall.
Make a test piece first. With Color A, ch 45. Work Rows 1–8 of the ripple pattern below, but with 3 repeats: in each row, repeat from * 1 more time instead of 7. You’ll have 43 sts. Block it. It should measure 10.75 in (27.3 cm) wide and 4 in (10.2 cm) tall from valley to valley.
Checkpoints on the panel (measure flat, at a valley line, without stretching):
- After Row 1: 127 sts, about 31.75 in (80.6 cm) wide
- After Row 20: 10 in (25.4 cm) tall
- After Row 40: 20 in (50.8 cm) tall
- After Row 80: 40 in (101.6 cm) tall
- After Row 120: 60 in (152.4 cm) tall
- After Row 122: 61 in (154.9 cm) tall, 31.75 in (80.6 cm) wide
- After the border: 32.25 in x 61.5 in (81.9 cm x 156.2 cm)
Too big? If your swatch is wider than 10.75 in (27.3 cm), go down a hook size. Too small? Go up a hook size. If the width is right and only the row height is off, keep the hook. Instead, change the row count in 4-row steps; each step changes the length by 2 in (5.1 cm). Write down the new total and change the side count in the border to match (see Border).
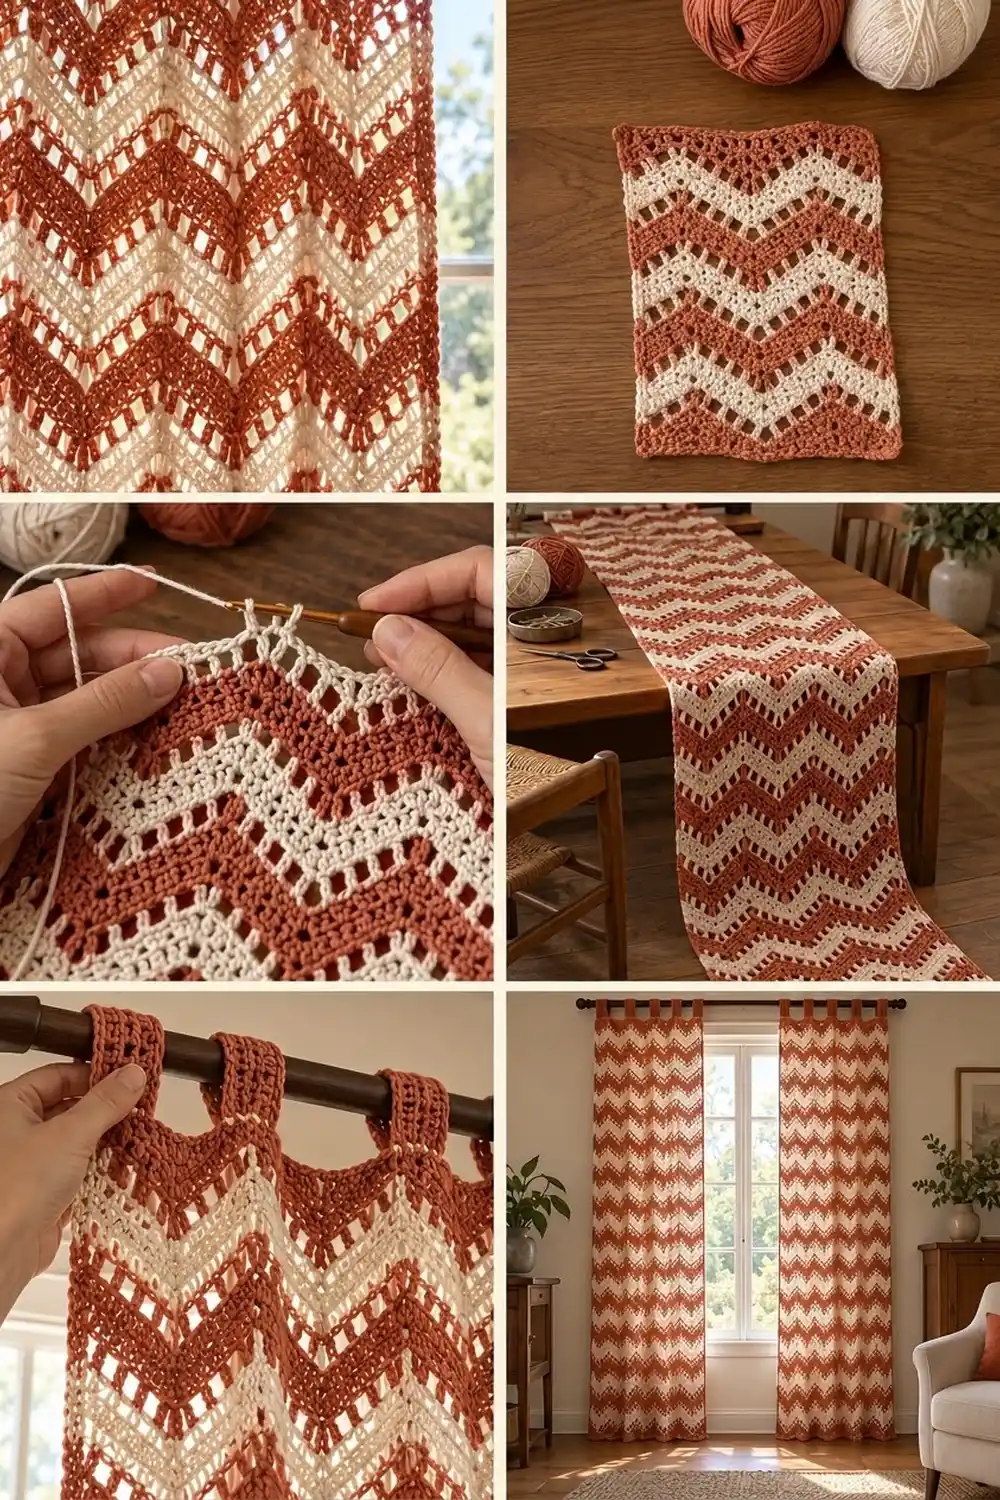
Ripple Pattern Structure
Every ripple row has 127 sts arranged like this:
1 half-valley st + 9 blocks of [5 rising, 3 peak, 5 falling, 1 valley]
In the last block, the valley is the half-valley st at the far edge. That gives 1 + (9 x 14) = 127.
Panel Body
Ripple rows always begin and end with a dc2tog half valley. The ch 2 at the start of a row does not count as a stitch.
Foundation: With Color A, ch 129.
Row 1 (RS, Color A): Dc2tog over 3rd and 4th ch from hook (skipped 2 ch do not count). Dc in next 5 ch, 3 dc in next ch, dc in next 5 ch, dc3tog over next 3 ch. Repeat from * 7 more times. Dc in next 5 ch, 3 dc in next ch, dc in next 5 ch, dc2tog over last 2 ch. Turn. (127 sts)
Check: the row uses 2 + (8 x 14) + 13 = 127 ch and makes 1 + (8 x 14) + 14 = 127 sts.
Row 2 (Color A, eyelet row): Ch 2, dc2tog over first 2 sts. Eyelet slope, 3 dc in next st (center peak st), eyelet slope, dc3tog over next 3 sts (centered on the valley). Repeat from * 7 more times. Eyelet slope, 3 dc in next st, eyelet slope, dc2tog over last 2 sts. Change to Color B in the last yo. Turn. (127 sts, including 36 ch-1 sps)
Row 3 (Color B, solid row): Ch 2, dc2tog over first 2 sts. Dc in next 5 sts, 3 dc in next st, dc in next 5 sts, dc3tog over next 3 sts. Repeat from * 7 more times. Dc in next 5 sts, 3 dc in next st, dc in next 5 sts, dc2tog over last 2 sts. Turn. (127 sts)
Work each ch-1 sp as a stitch, inserting under the chain. The peak increase always lands in the center dc of the 3 peak sts, and each dc3tog is centered on the valley st.
Row 4 (Color B, eyelet row): Work as Row 2. Change to Color A in the last yo. Turn. (127 sts)
Row 5 (Color A, solid row): Work as Row 3. (127 sts)
Rows 6–120: Keep repeating the 4-row stripe sequence (solid A, eyelet A, solid B, eyelet B) until you have 30 stripe repeats. Row 120 is a Color B eyelet row. Each row = 127 sts.
Carry the unused color loosely up the side edge, catching it under the edge st every second row. The border will cover it.
Leveling the Top Edge
This row turns the zigzag into a straight line. Short stitches go over the peaks and tall stitches fill the valleys. It’s a conversion row worked 1 per existing stitch: 127 sts worked + 0 added = 127 sts.
Row 121 (RS, Color A): Ch 4 (counts as tr) for the half valley. Tr in next 2 sts, dc in next 2 sts, hdc in next st, sc in next 3 sts (peak), hdc in next st, dc in next 2 sts, tr in next 2 sts, tr in next st (valley). Repeat from * 8 more times. The final tr of the last repeat goes in the last st. Turn. (1 + 9 x 14 = 127 sts)
Row 122 (WS, Color A): Ch 1, sc in each st across. Turn. (127 sc)
Checkpoint: the top should now be straight, the panel 31.75 in (80.6 cm) wide and 61 in (154.9 cm) tall. Don’t fasten off.
Border
Border gauge: 4 sc = 1 in (2.5 cm) along every edge. That matches the body gauge, so the border lies flat without rippling or pulling in.
Round 1 (RS, Color A): With the RS facing, ch 1.
- Top edge: 3 sc in first st (corner), sc in next 125 sts, 3 sc in last st (corner). (131 sc, both corner groups included)
- First long side: Work into row ends. 1 sc in the end of Row 122, 3 sc in the end of Row 121, then 2 sc in the end of each of Rows 120–1. (1 + 3 + 240 = 244 sc)
- Bottom edge: Work into the free loops of the foundation ch. 3 sc in first ch (corner), sc in next 125 ch, 3 sc in last ch (corner). (131 sc, both corner groups included)
- Second long side: 2 sc in the end of each of Rows 1–120, 3 sc in the end of Row 121, 1 sc in the end of Row 122. (244 sc)
Join with sl st to the first sc. (Round total: 131 + 244 + 131 + 244 = 750 sc)
Why the math works: The top and bottom each use the panel’s 127 sts once, plus 2 extra sc at each corner: 127 + 4 = 131. The long sides are counted between the corner groups, so no corner stitch is counted twice. Each dc row is 0.5 in (1.3 cm) tall and gets 2 sc. The tr row is 0.75 in (1.9 cm) and gets 3 sc. The sc row is 0.25 in (0.6 cm) and gets 1 sc. So 244 sc / 4 = 61 in (154.9 cm), which matches the body height exactly. Along the bottom, the sc follow the waves, so the hem keeps its zigzag.
Fasten off.
Tabs
The top border edge has 131 sc. Mark them as follows: Tab 1 on sts 1–11, Tab 2 on sts 31–41, Tab 3 on sts 61–71, Tab 4 on sts 91–101 and Tab 5 on sts 121–131. Each gap between tabs is 19 sts (4.75 in / 12.1 cm). Check: 5 x 11 + 4 x 19 = 131. Tab 3 sits exactly in the center.
Each tab (Color A):
Row 1 (RS): Join A in the first marked st. Ch 3 (counts as dc), dc in next 10 sts. Turn. (11 sts)
Rows 2–12: Ch 3 (counts as dc), dc in next 10 sts. Turn. (11 sts)
The tab now measures 2.75 in (7.0 cm) wide and 6 in (15.2 cm) long. Fasten off and leave a 12 in (30.5 cm) tail.
Fold the tab to the WS. Whipstitch Row 12 to the WS of the panel along Row 122, stitch for stitch over its 11 sts. This makes a 3 in (7.6 cm) loop. Repeat for all 5 tabs.
Final Blocking
- Weave in all ends along same-color stripes, working into the solid rows so they don’t show through the eyelets.
- Lay the panel flat on mats or towels, RS up.
- Pin the top edge straight at 32.25 in (81.9 cm).
- Pin each long side straight down to 61.5 in (156.2 cm). Measure from the top edge to the lowest hem point.
- Pin each wave point along the hem so the waves are even.
- Open each eyelet slightly with your fingertips.
- Spray until damp but not soaked. Let it dry completely before you unpin.
- Steam the tab loops lightly so they hold their fold.
Final Quality-Control Checklist
- Every ripple row has 127 sts.
- Stripes alternate in this order: solid A, eyelet A, solid B, eyelet B, for 30 repeats.
- Peaks and valleys stack in straight vertical lines.
- The top edge is straight after Rows 121–122.
- The border round has 750 sc, with 131 on the top and bottom and 244 on each long side.
- Five tabs of 11 sts, with 19 sts between them, and the center tab centered.
- Blocked size: 32.25 in x 61.5 in (81.9 cm x 156.2 cm).
- Both panels of a pair match within 0.5 in (1.3 cm).
Troubleshooting
Peaks drift sideways: You likely missed or added a st on a slope. Count 5 sts between each peak and valley every row.
Edges slant or wave: Check the dc2tog half valleys at both ends. Remember the ch 2 is not a stitch.
Eyelets closing up: Work the next row under the ch-1 sp, not into the chain itself.
Top edge still wavy: Check the order in Row 121. Tall sts go in the valleys and sc go on the peaks.
Side border ruffles: You’re working too many sc per row end. Go back to exactly 2 per dc row.
Panel growing longer when hung: Cotton can relax. Re-block, or remove one 4-row stripe repeat in a future panel, which takes 2 in (5.1 cm) off the length.
Care
Hand wash, or machine wash cold on a gentle cycle in a mesh bag. Lay flat to dry and reshape the waves while damp. Don’t hang it wet, because the weight will stretch the panel.
Final Notes
The measurement chain is simple. Each 14-st repeat is 3.5 in (8.9 cm), and 9 repeats plus 1 edge st give 127 sts, or 31.75 in (80.6 cm). There are 120 ripple rows at 0.5 in (1.3 cm) each, which is 60 in (152.4 cm). The leveling and sc rows bring that to 61 in (154.9 cm). The border adds 0.25 in (0.6 cm) on every edge, for 32.25 in x 61.5 in (81.9 cm x 156.2 cm). The tabs add 3 in (7.6 cm) loops. If you check your swatch and those checkpoints, both panels will hang straight and match.
Happy crocheting!