

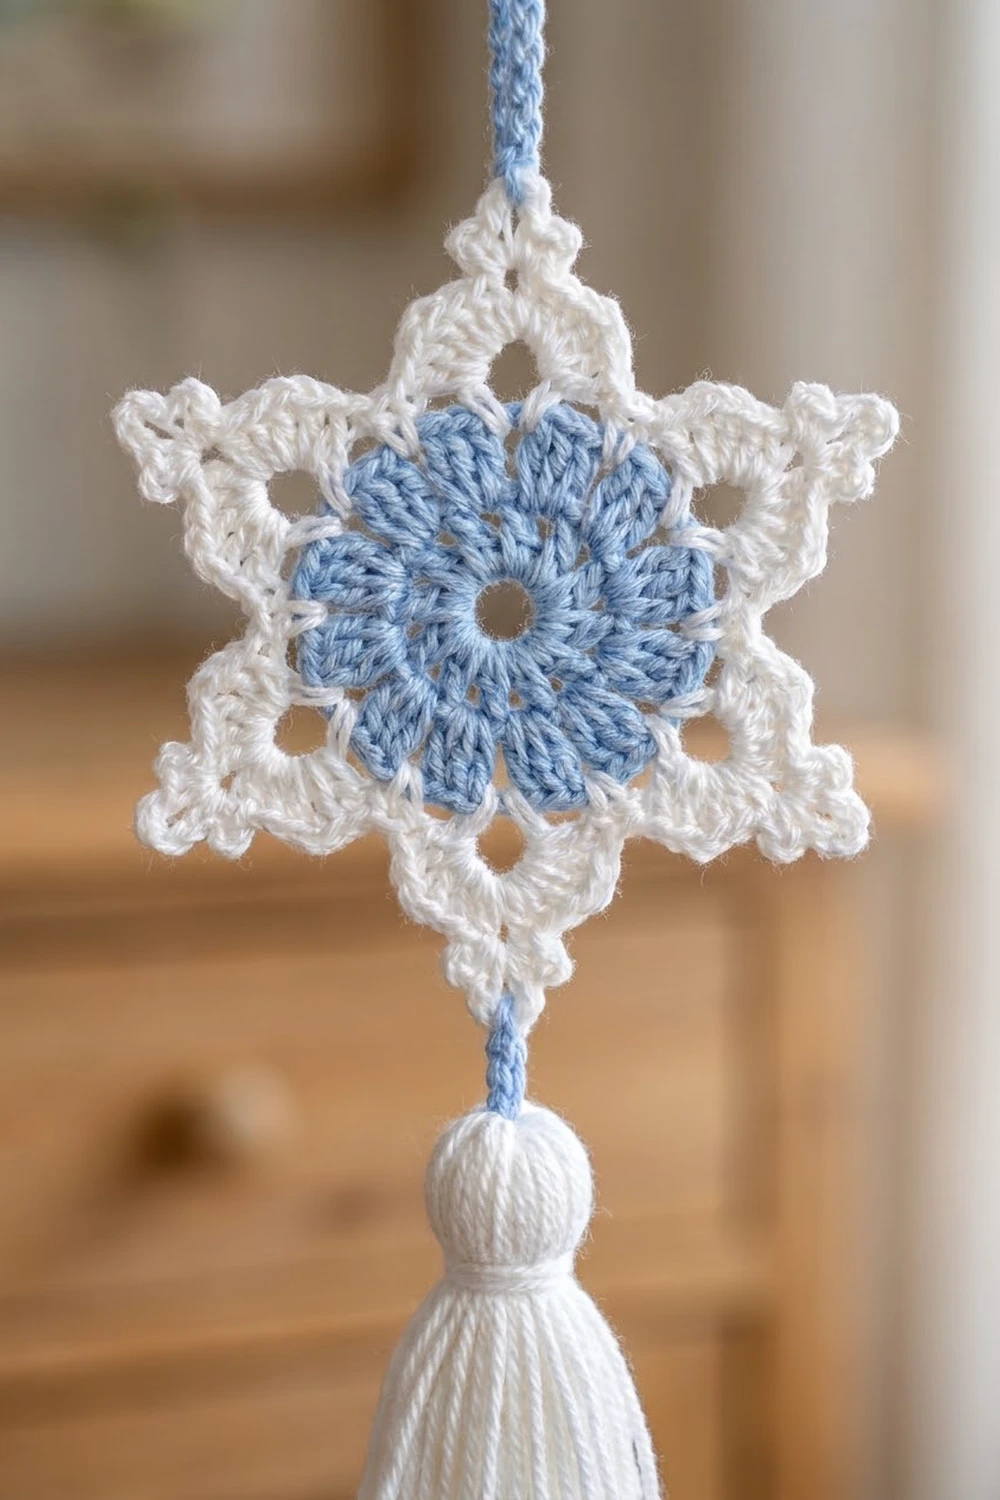
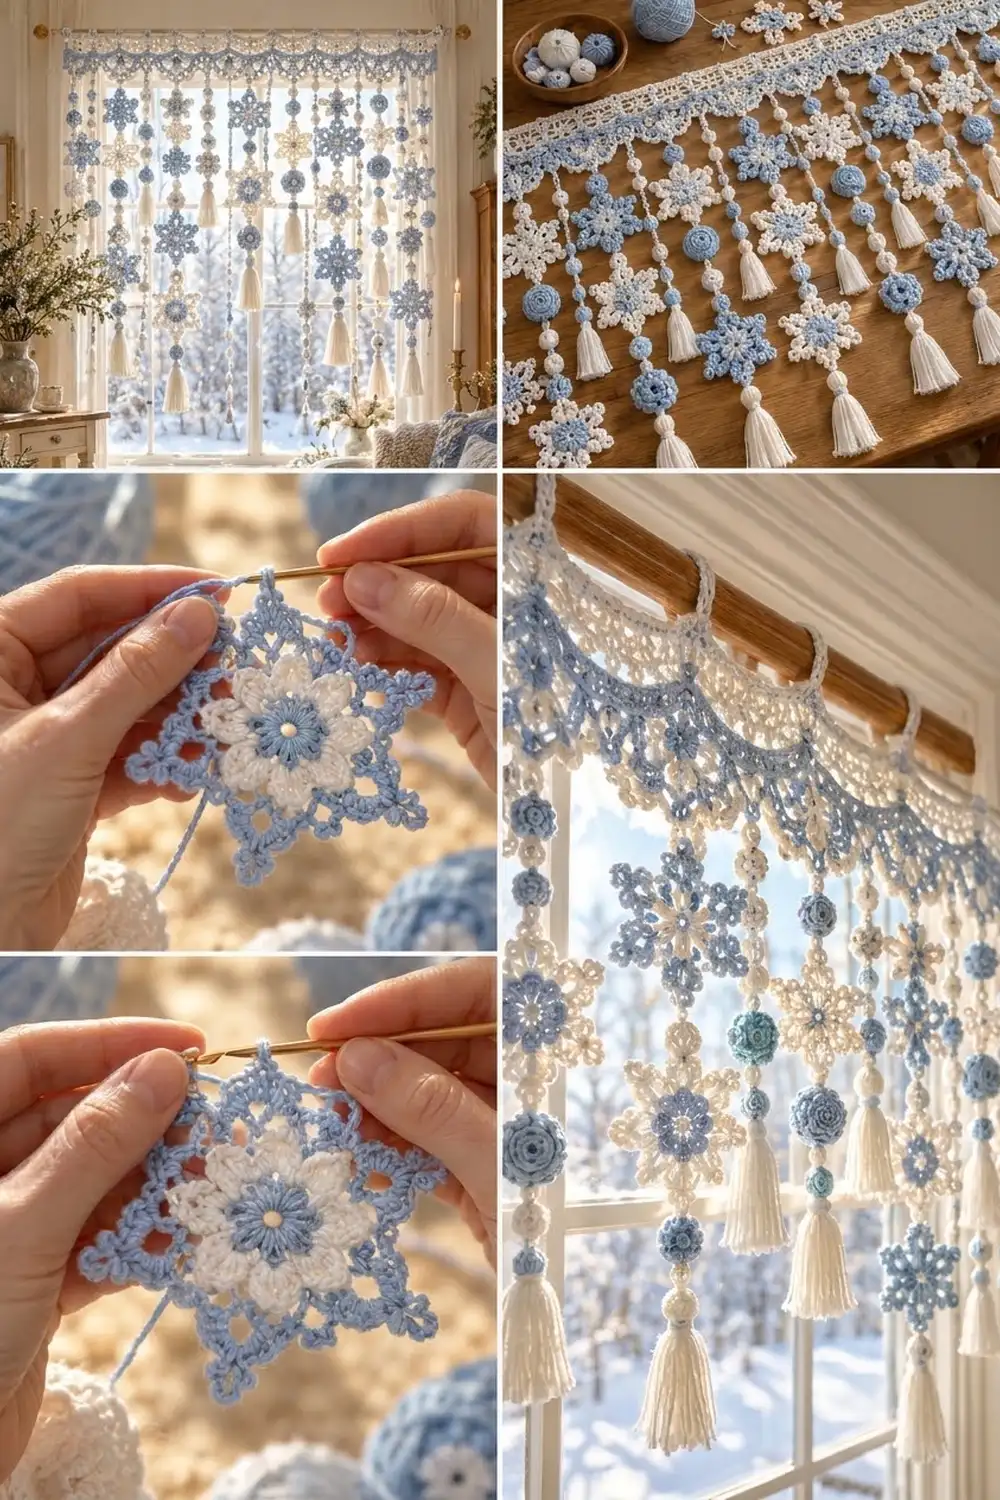
This valance turns a plain window into a quiet winter scene. A lacy header band sits on the curtain rod, and strands of snowflakes, crochet balls and white tassels hang from it at three staggered lengths, like snow drifting past the glass.
The palette is two colors: soft white and pale frosty blue. The snowflakes come in two colorways. Each strand mixes small white and blue balls, larger ridged blue balls and a white tassel at the bottom. The look is light, airy and cozy without being busy.
This pattern uses US crochet terms. The finished valance measures 36.2 in (91.9 cm) wide. The header with its border is 3.0 in (7.6 cm) deep, and the longest strand adds 20.0 in (50.8 cm), so the overall drop is 23.0 in (58.4 cm).
Construction overview: first you crochet the header flat in rows, with a scalloped lower edge. Next you add a top border with hanging loops. Then you make all the small pieces (snowflakes, balls and tassels) and join them into 15 strands with short chain links, one strand at the center of each scallop.
Finished Size and Construction
- Finished size: 36.2 in (91.9 cm) wide × 23.0 in (58.4 cm) at the longest strand
- Skill level: Intermediate
- Terminology: US
- Yarn weight: DK (#3) cotton
- Hook: 3.5 mm (E-4)
- Number of pieces: 1 header, 20 snowflakes, 35 small balls, 15 large balls, 15 tassels
- Layout: 15 strands, one per scallop, in a repeating A–B–C sequence
- Piece sizes: snowflake 3.5 in (8.9 cm) point to point; small ball 0.75 in (1.9 cm); large ball 1.25 in (3.2 cm); tassel 2.5 in (6.4 cm)
- Header size before border: 36.2 × 2.75 in (91.9 × 7.0 cm)
- Border depth: 0.25 in (0.6 cm), plus hanging loops about 2.25 in (5.7 cm) tall
Materials
Use a smooth, mercerized DK cotton. It gives crisp stitch definition, lets the snowflake points block sharply, and does not stretch much when the strands hang. Avoid fuzzy yarns, which blur the lace.
- White: 200 g, about 440 m (481 yd)
- Light blue: 150 g, about 330 m (361 yd)
Tools:
– 3.5 mm (E-4) crochet hook
– Tapestry needle
– Scissors
– Polyester fiberfill, about 30 g
– Stitch markers
– 3 in (7.6 cm) piece of stiff cardboard for tassels
– Blocking mat and rust-proof pins
– Spray bottle; spray starch (optional)
All yarn quantities include a margin of about 15% for swatching and joining.
Abbreviations (US Terms)
- ch – chain
- sl st – slip stitch
- sc – single crochet
- hdc – half double crochet
- dc – double crochet
- sc2tog – single crochet 2 together
- BLO – back loop only
- MR – magic ring
- st(s) / sp(s) – stitch(es) / space(s)
- sk – skip
Special stitches
– Picot: ch 3, sl st in 3rd ch from hook.
– Point: ch 7, sl st in 4th ch from hook (first loop), ch 4, sl st in same ch (second loop), ch 4, sl st in same ch (third loop), then sl st in each of the remaining 3 stem ch. This makes a three-loop trefoil tip on a short stem.
Gauge and Checkpoints
- Gauge: 20 sc = 4 in (10.2 cm). Chain gauge: 5 ch = 1 in (2.5 cm).
Make one snowflake before anything else. Check it at each round:
| After round | Diameter |
|---|---|
| Round 1 | 0.5 in (1.3 cm) |
| Round 2 | 1.25 in (3.2 cm) |
| Round 3 | 2.25 in (5.7 cm) tip to tip |
| Round 4 | 2.75 in (7.0 cm) |
| Round 5 | 3.5 in (8.9 cm) point to point, after blocking |
- If your piece is too big: go down to a 3.25 mm hook.
- If your piece is too small: go up to a 3.75 mm hook.
Your header must match the sc gauge, because its width depends on it. Your chain links must match the chain gauge, because the strand lengths depend on it.
Header Band
Worked flat in rows. Turn at the end of each row.
Row 1 (white): Ch 182. Sc in 2nd ch from hook and in each ch across. (181 sc)
– Checkpoint: width 36.2 in (91.9 cm).
Row 2 (white): Ch 3 (counts as dc), dc in each st across. (181 dc)
– Checkpoint: height 0.75 in (1.9 cm).
Row 3 (blue, mesh): Join blue. Ch 4 (counts as dc + ch 1), sk next st, dc in next st. Ch 1, sk next st, dc in next st; repeat from * across. (91 dc + 90 ch-1 sps = 181 sts)
– Because 181 is odd, the last dc lands exactly in the last stitch.
Row 4 (white): Ch 1. Sc in each dc and in each ch-1 sp across, with the last sc in the 3rd ch of the turning ch. (181 sc)
– Checkpoint: height 1.5 in (3.8 cm).
Row 5 (blue, scallops): Ch 1, sc in first st. Sk 5 sts, 9 dc in next st, sk 5 sts, sc in next st; repeat from * 15 times in total. (15 shells: 135 dc + 16 sc = 151 sts)
– Each repeat uses 12 stitches, and 12 × 15 + 1 = 181. The last sc falls in the last stitch.
– Each scallop is 2.4 in (6.1 cm) wide.
Row 6 (white, edging): Ch 1, sl st in first sc. Sc in next 4 dc, (sc, ch 3, sc) in 5th dc, sc in next 4 dc, sl st in next sc; repeat from * across. (150 sc + 16 sl st + 15 ch-3 anchor picots)
– The ch-3 at the center of each scallop is the anchor point for one strand.
– Checkpoint: header 36.2 × 2.75 in (91.9 × 7.0 cm).
Snowflake Motif (make 20)
Colorway A (make 10): Round 1 blue, Rounds 2–3 white, Rounds 4–5 blue.
Colorway B (make 10): Rounds 1–2 blue, Rounds 3–5 white.
Round 1: MR, ch 1, 12 sc in ring. Join with sl st to first sc. (12 sc)
Round 2: Ch 3 (counts as dc), dc in same st, 2 dc in each st around. Join. (24 dc)
Round 3 (petals): Ch 1. Sc in next st, (hdc, dc) in next st, (dc, ch 2, dc) in next st, (dc, hdc) in next st; repeat from * 6 times. Join to first sc. (6 petals of 7 sts each = 42 sts + 6 ch-2 tips)
Round 4: Join yarn in any ch-2 tip. Ch 1. (Sc, ch 3, sc) in ch-2 tip, ch 4, sc in the sc between petals, ch 4; repeat from * 6 times. Join. (18 sc, 6 ch-3 sps, 12 ch-4 sps)
Round 5: Sl st into first ch-3 sp. Ch 1. (Sc, Point, sc) in ch-3 sp; (2 sc, picot, 2 sc) in next ch-4 sp; sl st in valley sc; (2 sc, picot, 2 sc) in next ch-4 sp; repeat from * 6 times. Join and fasten off. (60 sc, 6 Points, 12 picots, 6 sl st)
Balls
Small ball (make 20 white, 15 blue): 0.75 in (1.9 cm)
– Round 1: 6 sc in MR. (6)
– Round 2: 2 sc in each st. (12)
– Round 3: Sc around. (12)
– Round 4: Sc2tog around. (6) Stuff firmly.
– Round 5: Sc2tog 3 times. (3) Fasten off and cinch closed.
Large ridged ball (make 15, blue): 1.25 in (3.2 cm)
– Round 1: 6 sc in MR. (6)
– Round 2: 2 sc in each st. (12)
– Round 3: Sc in next st, 2 sc in next st around. (18)
– Rounds 4–6: Sc in BLO around. (18) The BLO rounds make the ridged texture.
– Round 7: Sc in next st, sc2tog around. (12) Stuff firmly.
– Round 8: Sc2tog around. (6) Fasten off and cinch closed.
Tassels (make 15, white)
- Wrap yarn 25 times around the 3 in (7.6 cm) card.
- Tie the top of the bundle with a 10 in (25.4 cm) strand, and leave the ends long for attaching.
- Cut the bottom loops.
- Wrap the neck 0.5 in (1.3 cm) below the top and secure it.
- Trim the tassel to 2.5 in (6.4 cm).
Make All Pieces
| Piece | Color | Quantity |
|---|---|---|
| Snowflake A | blue/white | 10 |
| Snowflake B | blue/white | 10 |
| Small ball | white | 20 |
| Small ball | blue | 15 |
| Large ridged ball | blue | 15 |
| Tassel | white | 15 |
Strand sequences (top to bottom). In these lists, “link” means a chain cord in white.
Strand A, 20.0 in (50.8 cm):
1. Ch-10 link, 2 in (5.1 cm)
2. Small white ball
3. Ch-5 link
4. Snowflake A
5. Ch-5 link
6. Large ball
7. Ch-5 link
8. Small blue ball
9. Ch-5 link
10. Snowflake B
11. Ch-5 link
12. Small white ball
13. Tassel
Strand B, 15.5 in (39.4 cm):
1. Ch-10 link
2. Small blue ball
3. Ch-5 link
4. Snowflake B
5. Ch-5 link
6. Small white ball
7. Ch-5 link
8. Large ball
9. Ch-5 link
10. Small white ball
11. Tassel
Strand C, 12.0 in (30.5 cm):
1. Ch-10 link
2. Large ball
3. Ch-5 link
4. Snowflake A
5. Ch-5 link
6. Small blue ball
7. Tassel
Each ch-5 link is 1 in (2.5 cm).
Layout across the header (scallops 1–15):
Scallop: 1  2  3  4  5  6  7  8  9  10 11 12 13 14 15
Strand:  A  B  C  A  B  C  A  B  C  A  B  C  A  B  C
This layout uses each strand type 5 times. The piece totals in the table above match this count exactly.
Joining
Method: separate white chain links, each joined with a sl st and fastened off.
Link 1:
1. Join white with a sl st in the ch-3 anchor picot of a scallop.
2. Ch 10.
3. Sl st into the top of the first element.
4. Fasten off.
Every following link:
1. Join white at the bottom of the element just attached.
2. Ch 5.
3. Sl st into the top of the next element.
4. Fasten off.
Where to join on each element:
– Ball: the top is the magic-ring center and the bottom is the cinched closing point. Insert your hook under 2 strands at that point.
– Snowflake: the top and bottom are the middle loops of two opposite Points (Points 1 and 4).
Attaching the tassel: thread the tassel’s tie ends through the bottom of the last ball, knot them securely, and bury the ends inside the ball.
Tension: chain loosely and evenly at 5 ch per 1 in (2.5 cm). Tight links shorten a strand and twist it. Lay each link against a ruler before joining.
Size checkpoint: hang the header and measure each strand from its picot to the tassel tip.
– Strand A: 20.0 in (50.8 cm)
– Strand B: 15.5 in (39.4 cm)
– Strand C: 12.0 in (30.5 cm)
Rework any link that is off by more than 0.25 in (0.6 cm).
Border: Top Edge and Hanging Loops
The border goes along the top of the header, into the opposite side of the foundation chain. It uses the same gauge as the header: 20 sc = 4 in (10.2 cm).
Row A (blue): Sc in each foundation ch across. (181 sc)
– This is a 1-to-1 match with Row 1, so the width stays at 36.2 in (91.9 cm).
Row B (white): Ch 1. Sl st in each st across. In sts 1, 31, 61, 91, 121, 151 and 181, work (sl st, ch 24, sl st) instead. (181 + 7 = 188 sl st, plus 7 ch-24 loops)
Row C (blue): Join blue in each loop and work 30 sc around the ch-24. Fasten off. (7 loops × 30 sc = 210 sc)
– The ch-24 loop is about 4.8 in (12.2 cm) around, so it fits a rod up to 1.25 in (3.2 cm) across.
Why the math works:
– The loops sit at 1 + 30k for k = 0 to 6. The first loop lands on stitch 1 and the last on stitch 181.
– That gives 6 equal gaps of 30 sts, which is 6 in (15.2 cm) each.
– Row A adds no stitches, so the border fits the header exactly without ruffling.
Final Blocking
- Mist each snowflake. Pin it to a 3.5 in (8.9 cm) circle, with one pin in each Point’s middle loop and in each side picot.
- Starch the snowflakes lightly if you want stiffer points. Let them dry fully.
- Pin the header flat to 36.2 × 2.75 in (91.9 × 7.0 cm). Pin each scallop center down so the scallop edge is even.
- Mist the header and let it dry.
- Hang the finished valance. Mist the chain links lightly so they straighten under the weight of the strands.
- Comb out the tassels, then trim them evenly to 2.5 in (6.4 cm).
Final Quality-Control Checklist
- [ ] The header has 181 sts across and measures 36.2 in (91.9 cm).
- [ ] There are 15 equal scallops, and each one has a centered anchor picot.
- [ ] There are 7 hanging loops, spaced 6 in (15.2 cm) apart.
- [ ] Each snowflake measures 3.5 in (8.9 cm) and has 6 trefoil Points.
- [ ] The balls are firmly stuffed and the closures are tight.
- [ ] The strands follow the A–B–C order at the correct lengths.
- [ ] All ends are woven in or buried inside the balls.
Troubleshooting
- The header ruffles: your dc rows are looser than your sc rows. Go down a hook size for Rows 2–3.
- The scallops are uneven: count the 5 skipped stitches on each side of every shell.
- The snowflake cups: Round 4’s ch-4 spaces are too short. Work them as ch 5.
- The Points flop: starch them, or tighten the stem sl sts.
- The strands twist: check that the links are not too tight, then re-block them while hanging.
- Stuffing shows through the balls: go down to a 3.25 mm hook for the balls.
Care
Hand wash cool and roll the valance in a towel. Reblock the snowflakes flat, and let the valance dry hanging so the strands stay straight.
Final Notes
The whole design works as one measurement chain:
– The sc gauge sets the 181-stitch header at 36.2 in (91.9 cm).
– The 12-stitch scallops place 15 anchors 2.4 in (6.1 cm) apart.
– The 30-stitch loop spacing fits the same 181 stitches exactly.
– The chain gauge sets the strand lengths at 20.0, 15.5 and 12.0 in (50.8, 39.4 and 30.5 cm).
Check each link in the chain as you go, and the valance will hang straight and even.
Happy crocheting!