

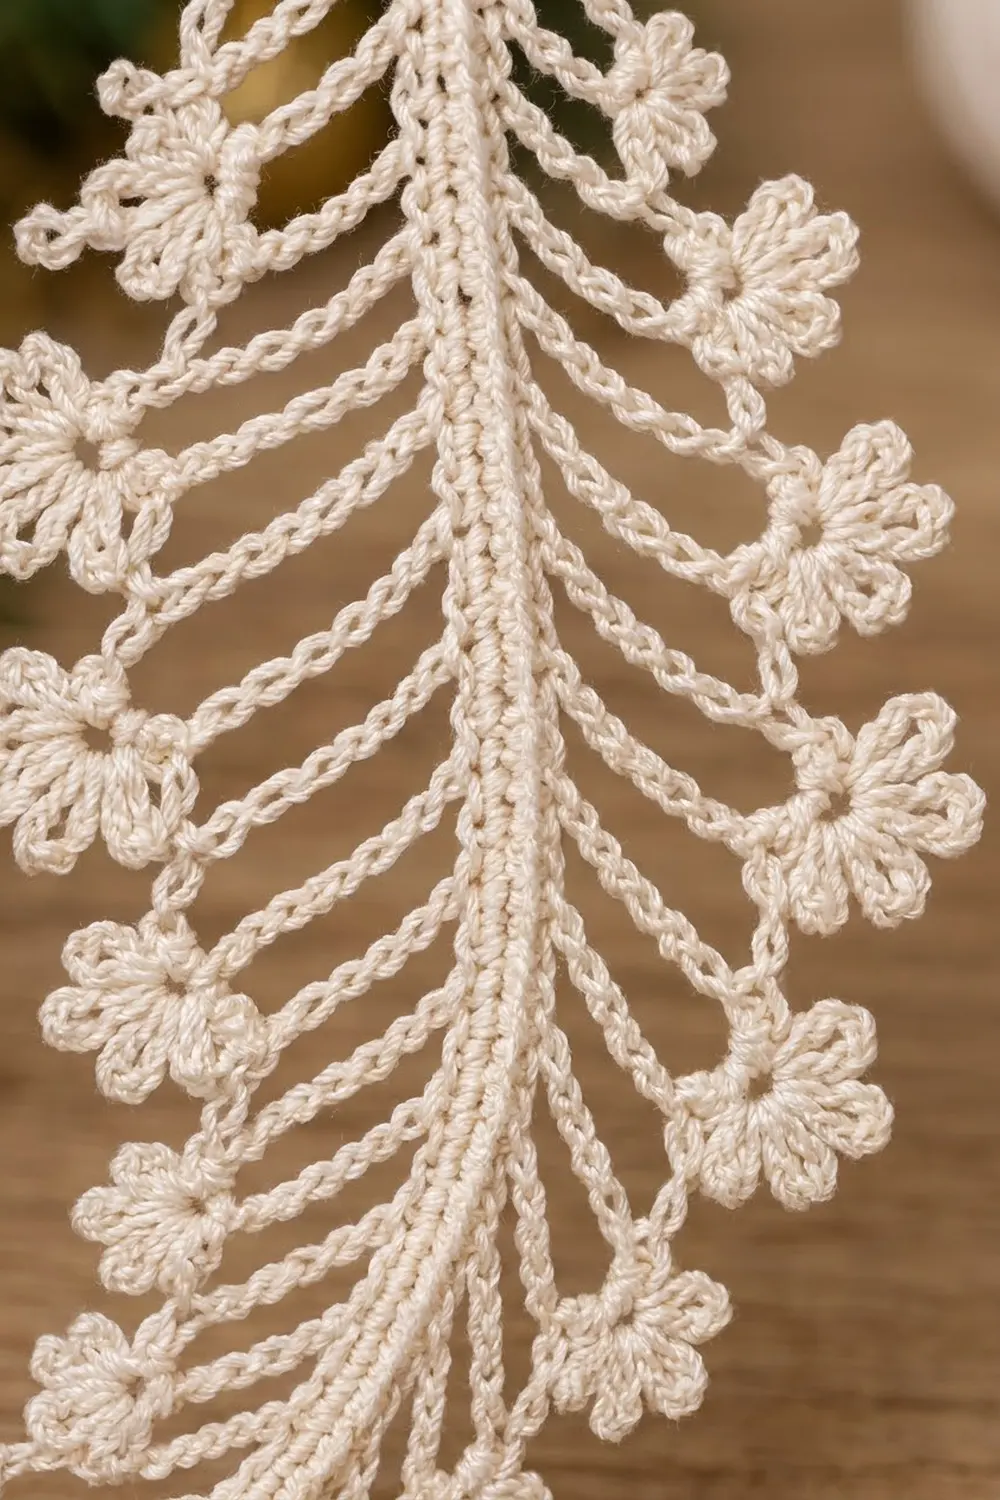
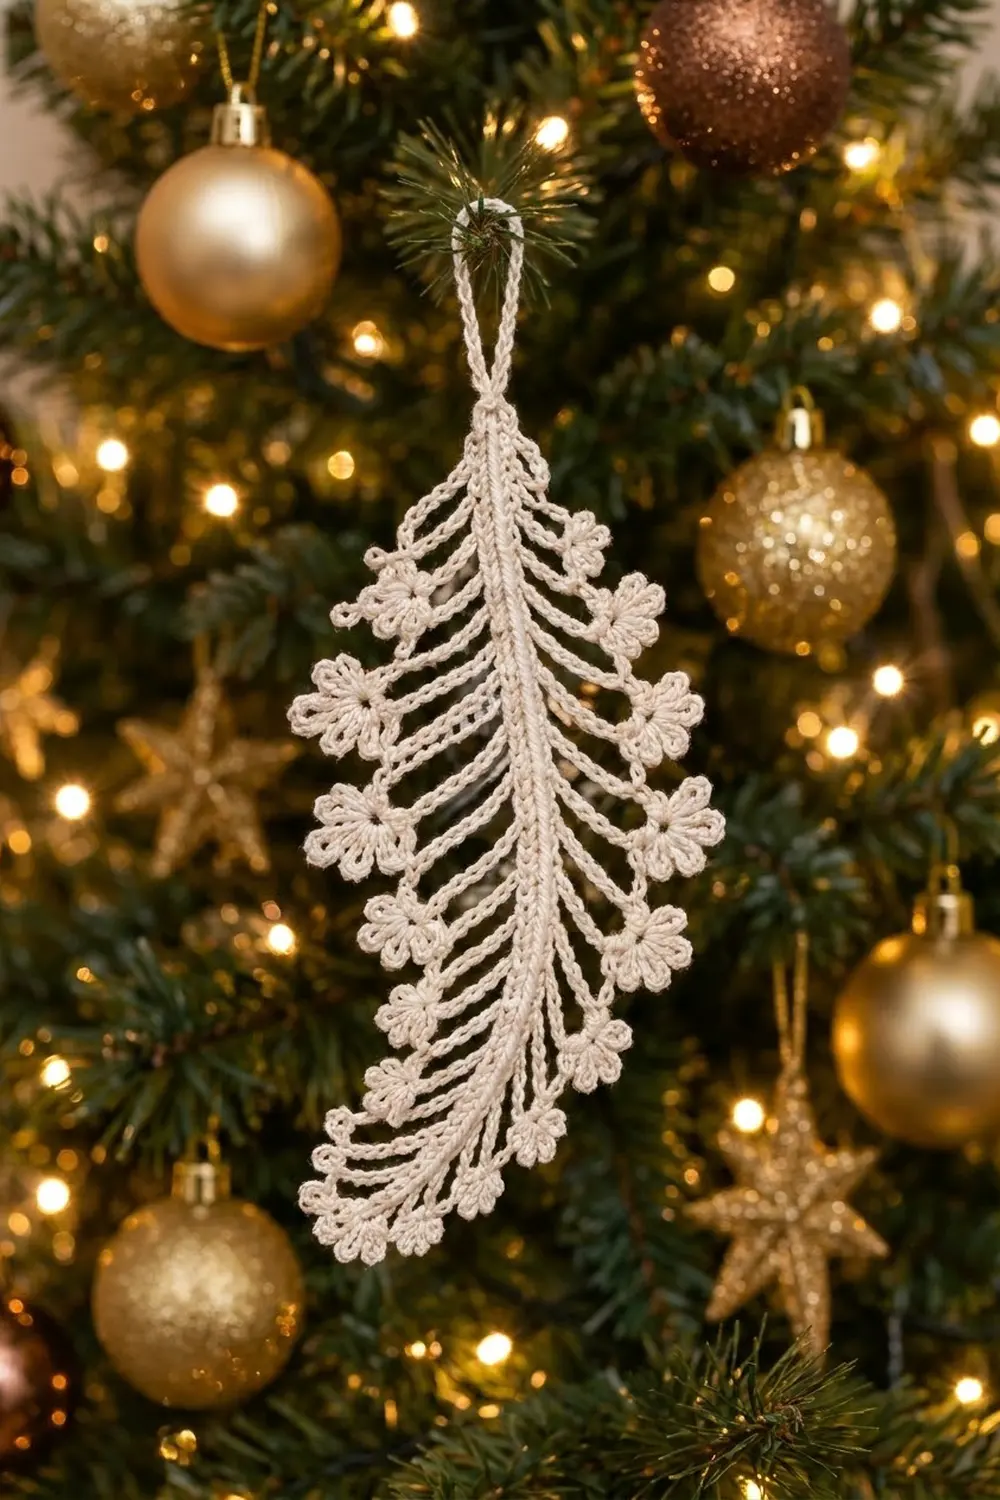
The Frosted Plume is a delicate lace feather made in fine cream cotton thread. A firm center spine holds open chain ribs that fan out to both sides, and each rib ends in a tiny five-petal flower. A fine chain outline links the flowers into a soft, scalloped edge.
It is worked in a single color, so it looks quietly elegant on a tree with gold baubles and warm lights. It also works as a gift tag, a bookmark charm, or a package topper. The style is vintage thread lace with a light, airy finish.
This pattern uses US crochet terms. The finished feather measures about 3 in (7.6 cm) wide and 6.5 in (16.5 cm) long, plus a 1.25 in (3.2 cm) hanging loop. That makes 7.75 in (19.7 cm) in total.
Construction is simple. You chain the spine and single crochet along it, add a hanging loop, then work down one side making ribs. Next you turn around the tip and work up the other side into the free loops of the foundation chain. Two border rounds add the outline. The whole feather is one piece with only two ends to weave in.
Finished Size and Construction
- Finished size: 3 in (7.6 cm) wide x 6.5 in (16.5 cm) long, plus a 1.25 in (3.2 cm) loop
- Skill level: Intermediate (fine thread, long chains)
- Terminology: US crochet terms
- Yarn weight: Size 10 crochet thread (Lace, weight 0)
- Hook: 1.5 mm (US steel 8)
- Number of pieces: 1
- Layout: Single feather, center spine with 9 ribs on each side
- Piece size: Spine 6 in (15.2 cm) long
- Size before border: 2.75 in (7.0 cm) wide
- Border depth: about 0.125 in (0.3 cm) on each side
Materials
Use a mercerized cotton thread in size 10. Mercerized cotton has a soft sheen, shows the picots clearly, and takes starch well. Avoid fuzzy or acrylic thread, because it hides the lace and will not hold a crisp shape.
- Cream (one color only): 6 g, about 30 m (33 yd) per feather
That is enough for one feather. Plan on 6 g per extra feather if you are making a set for your tree. The quantity includes a margin of about 25 percent for your gauge swatch and weaving in ends.
Tools:
- 1.5 mm (US steel 8) crochet hook
- Fine tapestry needle
- Small sharp scissors
- Blocking board or foam mat with rustproof pins
- Fabric stiffener, liquid starch, or a sugar-water mix
- Plastic wrap to protect the board
- Ruler or tape measure in inches and cm
Abbreviations (US Terms)
- ch = chain
- sc = single crochet
- sl st = slip stitch
- st(s) = stitch(es)
- PF = Picot Flower (see below)
- Rib(n) = rib with n chains each way (see below)
Special stitch: Picot Flower (PF). Ch 5, sl st in the 5th ch from hook to form a tiny ring. (Ch 3, sl st in ring) 5 times. That makes 5 ch-3 petals, numbered 1 to 5 in the order made. Petal 3 sits farthest from where you entered the ring, so it points outward.
Special stitch: Rib(n). Ch n, work 1 PF, ch n, sl st in the sc you just made at the base of the rib. This gives a double strand of chain with a flower at the tip.
Gauge and Checkpoints
Gauge: 20 sc = 2 in (5.1 cm), and 12 ch = 1 in (2.5 cm), using size 10 thread and a 1.5 mm hook.
Make one full test feather before planning a set. Lace often looks wrong mid-work and right after blocking, so judge size on the blocked piece.
Checkpoints:
- After Row 1 the spine measures 6 in (15.2 cm).
- After Row 2 the widest rib reaches about 1.375 in (3.5 cm) from the spine, measured flat.
- After Row 3 the feather measures 2.75 in (7.0 cm) wide.
- After the border and blocking it measures 3 in (7.6 cm) x 6.5 in (16.5 cm).
If your spine is too long, go down a hook size or tighten your chains. If it is too short, go up to a 1.65 mm (US steel 7) hook. Do not change the chain counts in the ribs. The rib lengths are what set the feather silhouette.
Pattern
Row 1: Spine
Ch 61.
Row 1: Sc in 2nd ch from hook and in each ch across. (60 sc)
The starting chain end with the skipped ch is the bottom tip. The end where you finish is the top.
Hanging Loop
Ch 30, sl st in the last sc of Row 1. (1 loop of 30 ch)
The loop hangs about 1.25 in (3.2 cm) above the spine.
Row 2: Side A Ribs
Now work back down the tops of the Row 1 sc, from top to tip. Rib lengths grow toward the lower middle and then shorten.
Row 2: Ch 1 (does not count as a st), sc in first 3 sc.
Then work the following 9 ribs. Each one uses the pattern “sc in next sc, Rib(n), sc in next 5 sc.” Use these values of n in order:
- Rib(6)
- Rib(9)
- Rib(11)
- Rib(13)
- Rib(15)
- Rib(16)
- Rib(16)
- Rib(14)
- Rib(12)
Sc in last 3 sc.
Count: 3 + (9 x 6) + 3 = 60 sc, plus 9 ribs. The ribs are anchored on sc 4, 10, 16, 22, 28, 34, 40, 46, and 52, counted from the top.
Let each rib hang downward at about a 30 degree angle. That angle is what gives the feather its sweep.
Turning the Tip
Ch 1. This tip ch-1 is used again in the border. Rotate the work so you can see the free loops on the underside of the foundation chain.
Row 3: Side B Ribs
Work into the free loops of the foundation chain, from the tip up to the top. There are 60 free loops, one under each Row 1 sc.
Row 3: Sc in first 8 free loops.
Then work 9 ribs. Each one is “sc in next free loop, Rib(n),” followed by “sc in next 5 free loops” after each of the first 8 ribs. Use these values of n in order:
- Rib(12)
- Rib(14)
- Rib(16)
- Rib(16)
- Rib(15)
- Rib(13)
- Rib(11)
- Rib(9)
- Rib(6)
Sc in last 3 free loops.
Count: 8 + (9 x 1) + (8 x 5) + 3 = 60 sc, plus 9 ribs. The ribs are anchored on free loops 9, 15, 21, 27, 33, 39, 45, 51, and 57, counted from the tip. These are the same positions as the Side A ribs, so the two sides mirror each other exactly.
Sl st in the first ch at the base of the hanging loop. Do not fasten off.
Checkpoint: Lay the feather flat. It measures 2.75 in (7.0 cm) across at the widest ribs and has 18 flowers, 9 per side.
Border
The border is a fine chain outline that links the flower tips, plus a round of sc that firms it up.
Border gauge: 12 ch = 1 in (2.5 cm). Ch 8 measures about 0.67 in (1.7 cm).
Border Round 1: Outline Chains
Work down Side B, around the tip, and up Side A.
- Side B: Ch 6, sl st in petal 3 of the top flower (the Rib(6) flower). Then ch 8, sl st in petal 3 of the next flower 8 times. (70 ch, 9 flower joins)
- Tip: Ch 5, sl st in the tip ch-1, ch 5. (10 ch, 1 join)
- Side A: Sl st in petal 3 of the bottom flower (the Rib(12) flower). Then ch 8, sl st in petal 3 of the next flower 8 times. Ch 6, sl st in the base of the hanging loop. (70 ch, 9 flower joins)
Round 1 total: 70 + 10 + 70 = 150 ch.
Border Round 2: Firming Round
Ch 1, turn.
- Side A: Sc in each of the 70 ch, and sl st in each flower join as you pass it.
- Tip: Sc in each of the 10 ch, and sl st in the tip join.
- Side B: Sc in each of the 70 ch, and sl st in each flower join.
Sl st in the base of the hanging loop and fasten off.
Round 2 total: 70 + 10 + 70 = 150 sc, the same as Round 1, because each ch gets exactly 1 sc.
Why the Math Works
The ribs are anchored every 6 sc on the spine, which is 0.6 in (1.5 cm) apart. As they fan outward and downward, their tips spread to about 0.67 in (1.7 cm) apart. Ch 8 at 12 ch per inch matches that spacing. That way the outline lies flat. It does not pull the ribs together into a cupped shape, and it does not ripple between flowers.
The ch-6 at each top end is shorter because the top ribs are short and sit close to the loop. The ch-5 on either side of the tip covers the 8 bare spine sts at the bottom on each side.
Final Blocking
- Weave in both ends along the spine, splitting the plies so they cannot slip out.
- Mix fabric stiffener as directed, or use 1 part white glue to 1 part water.
- Soak the feather completely, then gently squeeze out the excess. Do not wring it.
- Cover your blocking board with plastic wrap.
- Pin the spine straight, or in a gentle curve, to 6 in (15.2 cm).
- Pin the tip of each rib so the ribs angle down evenly on both sides, with a total width of 3 in (7.6 cm).
- Pin open the petals of each flower, using one pin in petal 3.
- Shape the hanging loop into a round teardrop.
- Let it dry completely, which usually takes 12 to 24 hours.
- Remove the pins and check the measurements.
Final Quality-Control Checklist
- Spine is 60 sc long and lies straight or gently curved.
- 9 ribs on each side, 18 flowers in total.
- Every flower has 5 open petals.
- Rib lengths mirror each other across the spine.
- Border has 150 ch and 150 sc, with 70 per side and 10 around the tip.
- Outline lies flat with no puckers or slack loops.
- Finished size is 3 in (7.6 cm) x 6.5 in (16.5 cm), plus a 1.25 in (3.2 cm) loop.
- Both ends are woven in invisibly.
- Feather is stiff enough to hang without curling.
Troubleshooting
Ribs twist. The chain is twisting as you work. Keep the front of the chain facing you, and give each rib a gentle tug straight before you work the flower.
Flowers look closed or bunched. Your ch-3 petals are too tight. Loosen your tension a little for the petals only, and pin each petal open during blocking.
Outline pulls the edge into a curve. Your chains are tight. Go up a hook size for Border Round 1 only, or add 1 ch to each ch-8 space on both sides. Keep the same change on both sides so the feather stays symmetrical.
Outline ripples. Your chains are loose. Use a smaller hook for the border, or work ch 7 instead of ch 8 on both sides.
Feather leans to one side. One side’s ribs ended up longer. Recount the chains in each rib, especially the two Rib(16) ribs on each side.
Feather is floppy after blocking. Repeat the blocking with a stronger stiffener mix.
Care
Store the feathers flat in a box between sheets of tissue paper. If one gets dusty, rinse it gently in cool water and block it again with fresh stiffener.
Final Notes
The measurement chain is short and easy to check. At 20 sc per 2 in (5.1 cm), the 60 sc spine is 6 in (15.2 cm). Mirrored ribs bring the width to 2.75 in (7.0 cm). A 150-stitch outline adds 0.125 in (0.3 cm) per side for a blocked size of 3 in (7.6 cm) x 6.5 in (16.5 cm), and the 30-ch loop adds 1.25 in (3.2 cm) above the top. Check the spine first and the rest follows.
Happy crocheting!