

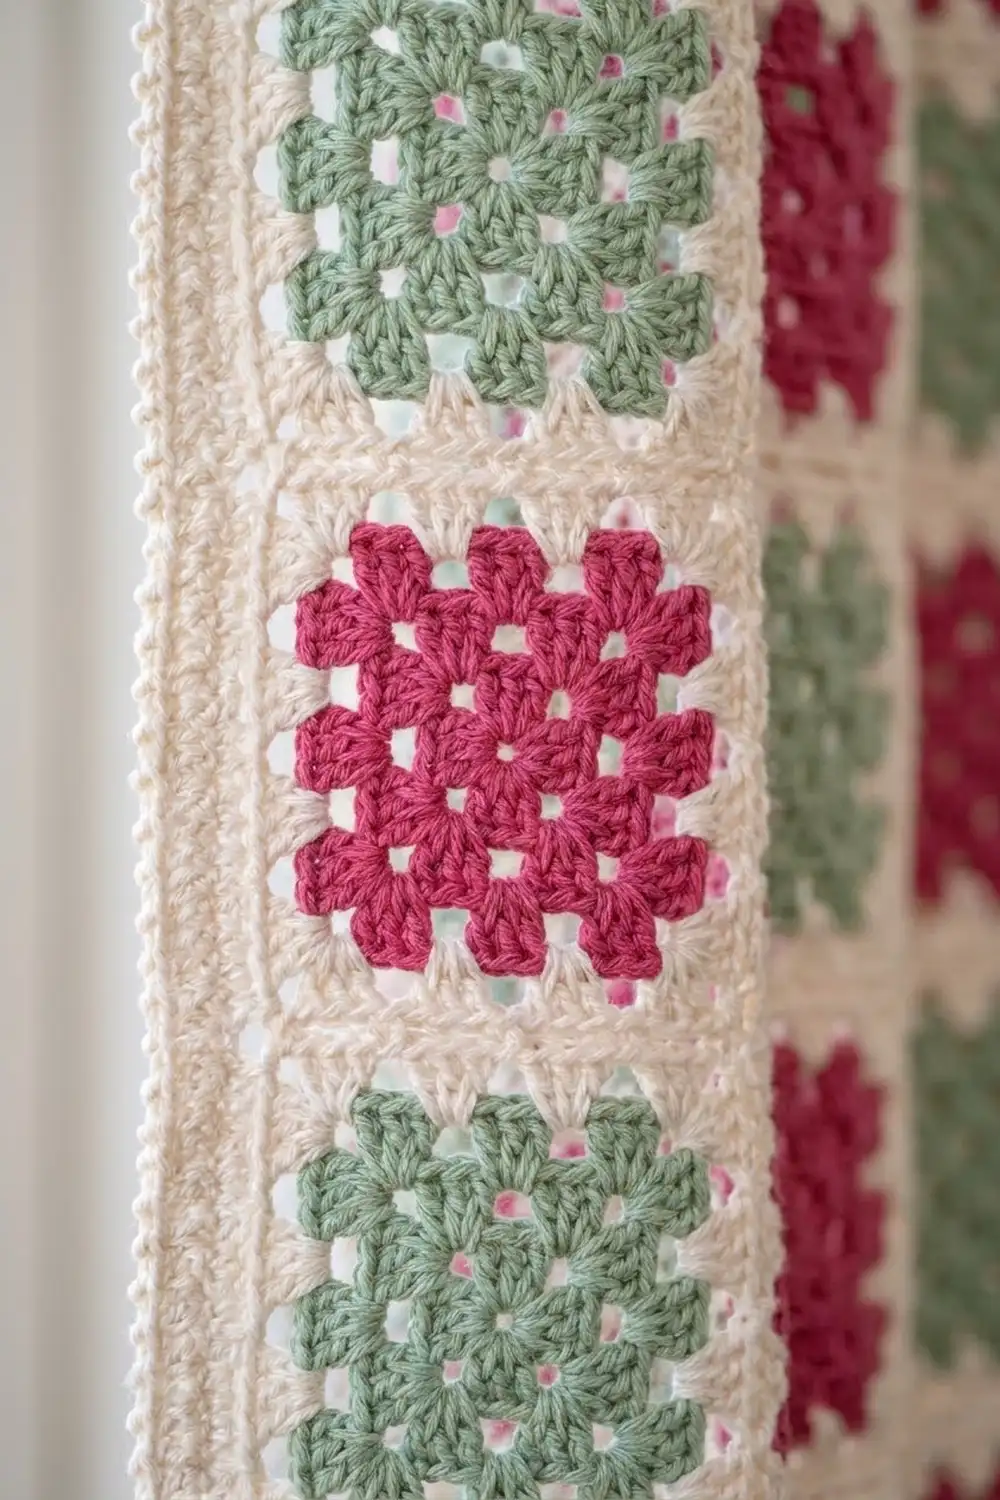
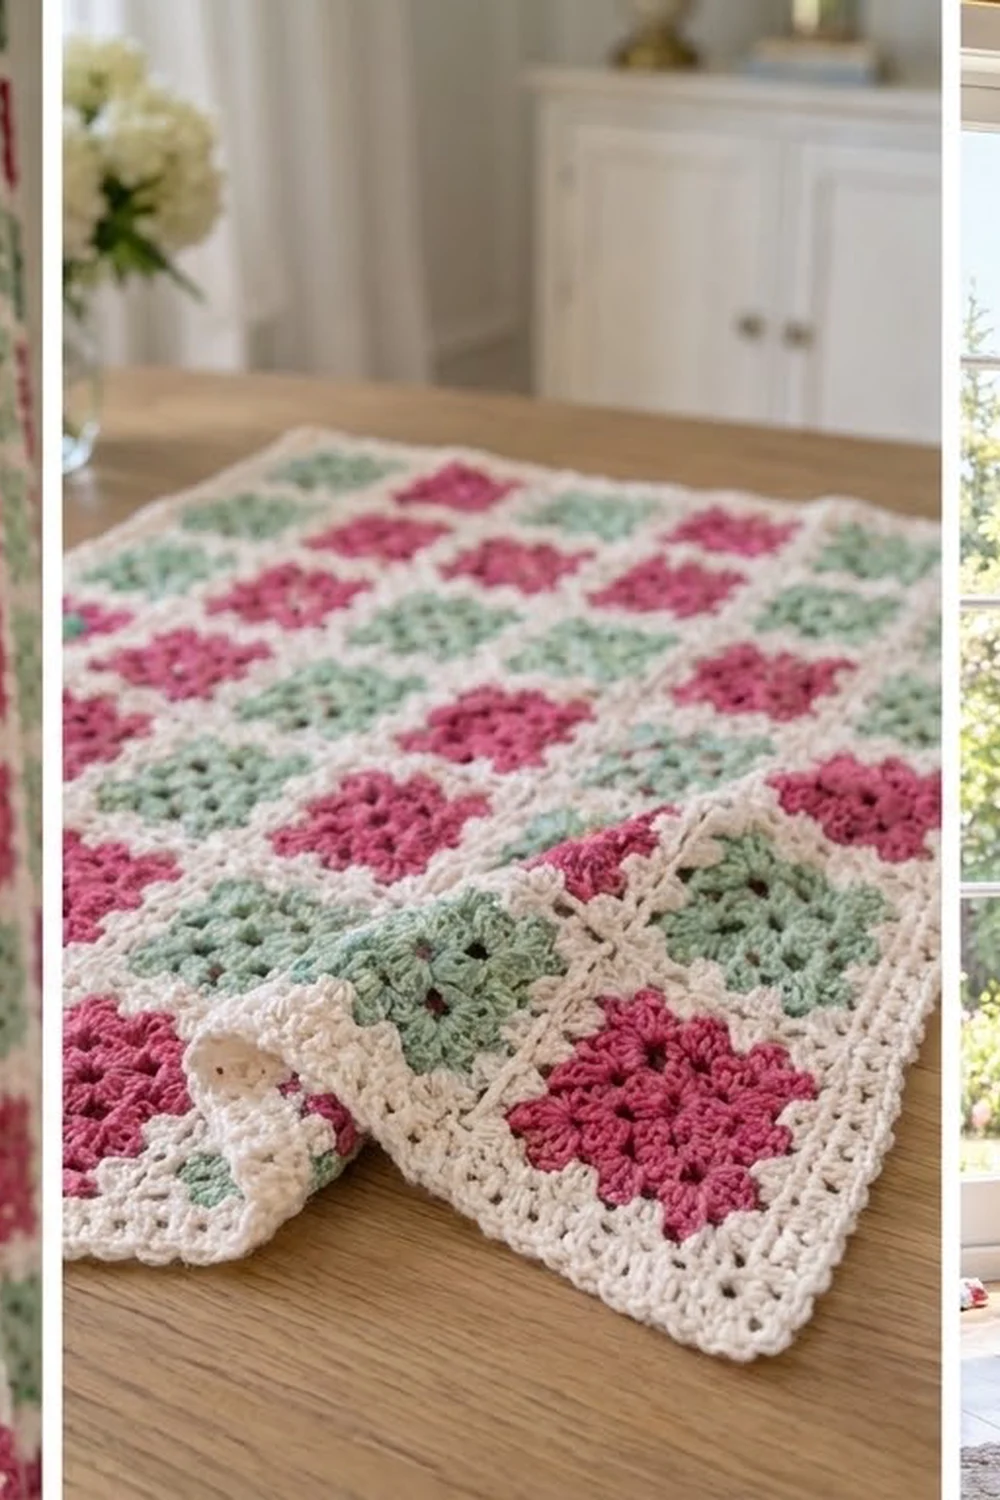
These curtain panels bring a cottage-garden feel to any window. Raspberry-pink and sage-green granny squares alternate in a cheerful checkerboard, and each square sits inside a soft cream frame. Together the cream frames form a light, lacy grid that lets daylight through the small holes in every granny cluster.
The palette is three colors: raspberry pink, sage green, and cream. The style is classic vintage granny. It is simple and repetitive, and very relaxing to work in batches. This pattern uses US crochet terms throughout.
Each finished panel measures 42 in (106.7 cm) wide by 87 in (221.0 cm) long, including the border. The pattern makes two matching panels.
The construction is straightforward. You crochet 5 in (12.7 cm) granny squares, finishing each with two cream rounds. You join them with cream slip stitches into a grid 8 squares wide and 17 squares tall, then add a three-round cream border. The panels hang from clip rings, so no rod pocket is needed.
Finished Size and Construction
- Finished panel size: 42 in × 87 in (106.7 cm × 221.0 cm)
- Skill level: Easy / advanced beginner
- Terminology: US crochet terms
- Yarn weight: Worsted (#4)
- Hook: 5.0 mm (US H-8)
- Number of pieces: 136 squares per panel, 272 squares for two panels
- Layout: 8 squares wide × 17 squares tall per panel, in a checkerboard
- Square size: 5 in × 5 in (12.7 cm × 12.7 cm)
- Panel size before border: 40 in × 85 in (101.6 cm × 215.9 cm)
- Border depth: 1 in (2.5 cm) on all sides
Materials
Yarn advice: Use a smooth worsted-weight cotton or cotton blend. Cotton holds its shape when it hangs and shows the granny stitch definition well. Quantities below assume roughly 170 m per 100 g. If your yarn has a different yardage, convert by meters, not by grams.
- Color A, Raspberry Pink: 750 g / 1,275 m
- Color B, Sage Green: 750 g / 1,275 m
- Color C, Cream: 2,700 g / 4,590 m
All quantities are for two panels and include a margin of about 12–15% for gauge differences and test squares.
Tools:
– 5.0 mm (US H-8) crochet hook
– Tapestry needle
– Stitch markers
– Measuring tape
– Blocking mats and rust-proof pins
– Spray bottle
– 24 curtain clip rings (12 per panel)
– A sturdy curtain rod. Each panel weighs about 2.1 kg (4.6 lb).
Abbreviations (US Terms)
- ch: chain
- sl st: slip stitch
- sc: single crochet
- hdc: half double crochet
- dc: double crochet
- sp: space
- st(s): stitch(es)
- BLO: back loop only
- rev sc: reverse single crochet (crab stitch)
- RS / WS: right side / wrong side
Special stitch: Reverse single crochet (rev sc). Working from left to right (right-handers), insert the hook into the next stitch to the right, yarn over, pull up a loop, yarn over, and pull through both loops. This makes a twisted, beaded cord edge.
Corner group: (3 dc, ch 2, 3 dc) worked into the same corner space.
Gauge and Checkpoints
Make one complete test square (Rounds 1–5) before you start production. With 272 squares, even a small difference adds up. An extra 1/8 in (0.3 cm) per square becomes 1 in (2.5 cm) across the width and over 2 in (5.4 cm) down the length.
Gauge: 19 sc = 5 in (12.7 cm) along the edge of Round 5.
Square checkpoints, measured flat and edge to edge:
– After Round 1: 1.5 in (3.8 cm)
– After Round 2: 2.25 in (5.7 cm)
– After Round 3: 3.5 in (8.9 cm)
– After Round 4: 4.5 in (11.4 cm)
– After Round 5: 5 in (12.7 cm)
If your square is too big, go down to a 4.5 mm (US 7) hook. If it is too small, go up to a 5.5 mm (US I-9) hook. A tolerance of about 1/8 in (0.3 cm) is fine, as long as every square matches the others.
The Granny Square
Make each square in Color A or Color B for Rounds 1–3. Rounds 4–5 are always Color C (cream).
Round 1 (A or B): Ch 4 and sl st to the first ch to form a ring. Ch 3 (counts as dc), 2 dc in the ring, ch 2. 3 dc in the ring, ch 2; repeat from * to * twice more. Sl st to the top of the beginning ch-3.
(12 dc, 4 ch-2 corner sps)
Round 2: Sl st in the next 2 dc and into the ch-2 sp. Ch 3, (2 dc, ch 2, 3 dc) in the same sp, ch 1. Corner group in the next ch-2 sp, ch 1; repeat from * to * twice more. Sl st to the top of the beginning ch-3.
(24 dc: 4 corner groups, 4 ch-1 sps)
Round 3: Sl st in the next 2 dc and into the corner sp. Ch 3, (2 dc, ch 2, 3 dc) in the same sp, ch 1. 3 dc in the next ch-1 sp, ch 1, corner group in the next corner sp, ch 1; repeat from * to * twice more. 3 dc in the last ch-1 sp, ch 1, and sl st to the top of the beginning ch-3. Fasten off.
(36 dc: 4 corner groups plus 4 side clusters, 8 ch-1 sps)
Round 4 (C): Join C in any corner sp. Ch 3, (2 dc, ch 2, 3 dc) in the same sp, ch 1. (3 dc in the next ch-1 sp, ch 1) twice, corner group in the next corner sp, ch 1; repeat from * to * twice more. (3 dc in the next ch-1 sp, ch 1) twice, and sl st to the top of the beginning ch-3.
(48 dc, 12 ch-1 sps, 4 corner sps)
Each side now has 12 dc and 3 ch-1 sps between the corner spaces, for 15 workable sts and sps per side.
Round 5 (C): Sl st in the next 2 dc and into the corner sp. Ch 1. 3 sc in the corner sp. Then 1 sc in each dc and each ch-1 sp along the side (15 sc); repeat from * to * 4 times total. Sl st to the first sc. Fasten off and weave in the ends.
(72 sc total)
Count check: The 60 sts from Round 4 (48 dc + 12 ch-1 sps), worked 1 sc each, plus 12 sc in the corners (4 corners × 3), gives 72 sc.
Per-side count: The middle sc of each 3-sc corner group is the corner stitch. Each side has 1 corner stitch + 17 sc + 1 corner stitch = 19 sts per side, including both corners. As a check, 4 sides × 19 = 76, minus 4 shared corners = 72. ✓
Make All Pieces
Per panel: 68 squares in Color A (pink) and 68 squares in Color B (green), for 136 squares.
For two panels: 136 pink and 136 green, for 272 squares total.
Lay out each panel as a checkerboard. Rows 1, 3, 5 and every odd row start with pink. Even rows start with green.
Row 1:  P G P G P G P G
Row 2:  G P G P G P G P
Row 3:  P G P G P G P G
Row 4:  G P G P G P G P
...continue alternating...
Row 17: P G P G P G P G
Each row has 4 pink and 4 green squares. 17 rows × 4 = 68 of each color per panel. ✓
Weave in all ends as you finish each square. Do not save them for the end.
Joining
Method: Flat slip-stitch join with Color C, worked through the back loops only.
- Place two squares side by side with RS facing up and the edges you are joining touching.
- Join C with a sl st in the corner stitch of the first square, then in the matching corner stitch of the second square.
- Work 1 sl st through the inner back loop of each square in turn, matching stitch to stitch. Each edge has 19 sts, so you match 19 sts to 19 sts, corner to corner.
Order of work:
1. Join the 8 squares of each row into a horizontal strip with 7 short seams.
2. Join the strips together with long seams. Each long seam is 8 × 19 = 152 sts matched to 152 sts.
3. Where four corners meet, work 1 sl st into each corner stitch. Do not skip any, or a hole will open at the crossing.
Tension advice: Keep your sl sts as loose as the sc stitches on the edge. A tight join will pucker and pull the panel narrower. If the seams ripple when you lay the work flat, go up one hook size for joining only.
Size checkpoint:
– After two strips are joined, the piece should measure 40 in × 10 in (101.6 cm × 25.4 cm).
– The finished grid should measure 40 in × 85 in (101.6 cm × 215.9 cm).
Edge counts for the border:
– Top and bottom edges: 8 squares × 19 = 152 sts each, including the panel’s corner stitches.
– Side edges: 17 squares × 19 = 323 sts each.
No stitches are added at the seams. Where two squares meet along the outer edge, both corner stitches are already counted in their own square’s 19.
Panel perimeter: 2 × 152 + 2 × 323 − 4 shared panel corners = 946 sts.
Border
Border gauge: 19 sc = 5 in (12.7 cm), the same as the square edges. Each edge stitch gets exactly one border stitch, so the border lies flat without stretching or rippling.
Round 1 (C), conversion round: Join C in the stitch after any panel corner. Ch 1. Work 1 sc in each st around and 3 sc in each of the 4 panel corner stitches. Sl st to the first sc.
– Count: 946 sts (1 per existing st) + 8 extra (2 per corner) = 954 sc
– Per side, including both new corner stitches: top and bottom 154; long sides 325
Round 2, growth round: Ch 2 (does not count as a st). Work 1 hdc in each sc and 3 hdc in each corner sc (the middle sc of the corner group). Sl st to the first hdc.
– Count: 954 sts + 8 extra = 962 hdc
– Per side, including corners: top and bottom 156; long sides 327
Round 3, trim round: Ch 1. Work 1 rev sc in each hdc around, with no increases. Sl st to the first rev sc and fasten off.
– Count: 962 rev sc (1 per existing st + 0 extra)
Why the math works: Round 1 places exactly one stitch on every edge stitch, so the border keeps the panel’s measured length. The 3-stitch corners in Rounds 1 and 2 add just enough stitches to turn each corner flat. Round 3 has no increases because the rev sc cord is meant to sit as a firm edge.
Border depth is about 1 in (2.5 cm). Final panel size: 40 + 2 = 42 in (106.7 cm) wide and 85 + 2 = 87 in (221.0 cm) long.
Final Blocking
- Lay the panel flat on blocking mats or a clean sheet on the floor. If space is short, block it in sections.
- Gently ease the grid square so the seams run in straight lines.
- Pin the outer border to 42 in × 87 in (106.7 cm × 221.0 cm), placing a pin every 4–6 in (10.2–15.2 cm).
- Mist the panel evenly with water until it is damp but not soaked.
- Use your fingers to open the ch-1 gaps in the granny clusters and press the seams flat.
- Leave it to dry completely, which usually takes 24 hours.
- Unpin it, then attach 12 clip rings evenly along the top edge, spacing them about 3.6 in (9.1 cm) apart.
- Hang the panel and let it settle for a day. Cotton drops slightly with its own weight.
Final Quality-Control Checklist
- [ ] All 272 squares measure 5 in (12.7 cm) ± 1/8 in (0.3 cm)
- [ ] Every square has 72 sc in Round 5 and 19 sts per side
- [ ] The checkerboard alternates correctly in every row
- [ ] All joins are matched stitch to stitch, with no gaps at the four-corner crossings
- [ ] The border has 954 / 962 / 962 sts in Rounds 1–3
- [ ] Each panel measures 42 in × 87 in (106.7 cm × 221.0 cm) after blocking
- [ ] All ends are woven in securely, with no tails showing on the RS
- [ ] Both panels match in length to within 0.5 in (1.3 cm)
Troubleshooting
Squares cup or ruffle: Check the ch-1 between clusters. Too many chains cause ruffling and missing chains cause cupping.
Squares differ in size: Tension often changes from one session to the next. Measure each square after Round 3 and set aside any that are outside tolerance.
Seams look tight: Rework the seam with a larger hook, keeping the stitches matched 19 to 19.
Holes where corners meet: Make sure you worked a sl st in each of the four corner stitches.
Border waves: You have added extra stitches along the sides. Recount Round 1.
Border pulls in: Your border tension is tighter than your square tension. Use a hook one size larger for the border.
Panels hang at different lengths: Re-block the longer panel while pinning it slightly wider, which takes up some of the length.
Care
Hand wash or machine wash cold on a gentle cycle inside a large laundry bag. Dry flat and never hang the panels wet, because the weight of the water will stretch them.
Final Notes
Everything in this pattern follows one measurement chain. A 3.5 in (8.9 cm) colored center grows to a 5 in (12.7 cm) cream-framed square with 19 sts per side. Eight squares make 40 in (101.6 cm) across, and seventeen make 85 in (215.9 cm) down. A 1 in (2.5 cm) border then brings each panel to 42 in × 87 in (106.7 cm × 221.0 cm). Check your gauge early and measure every few squares, and your two panels will hang straight and match.
Happy crocheting!