

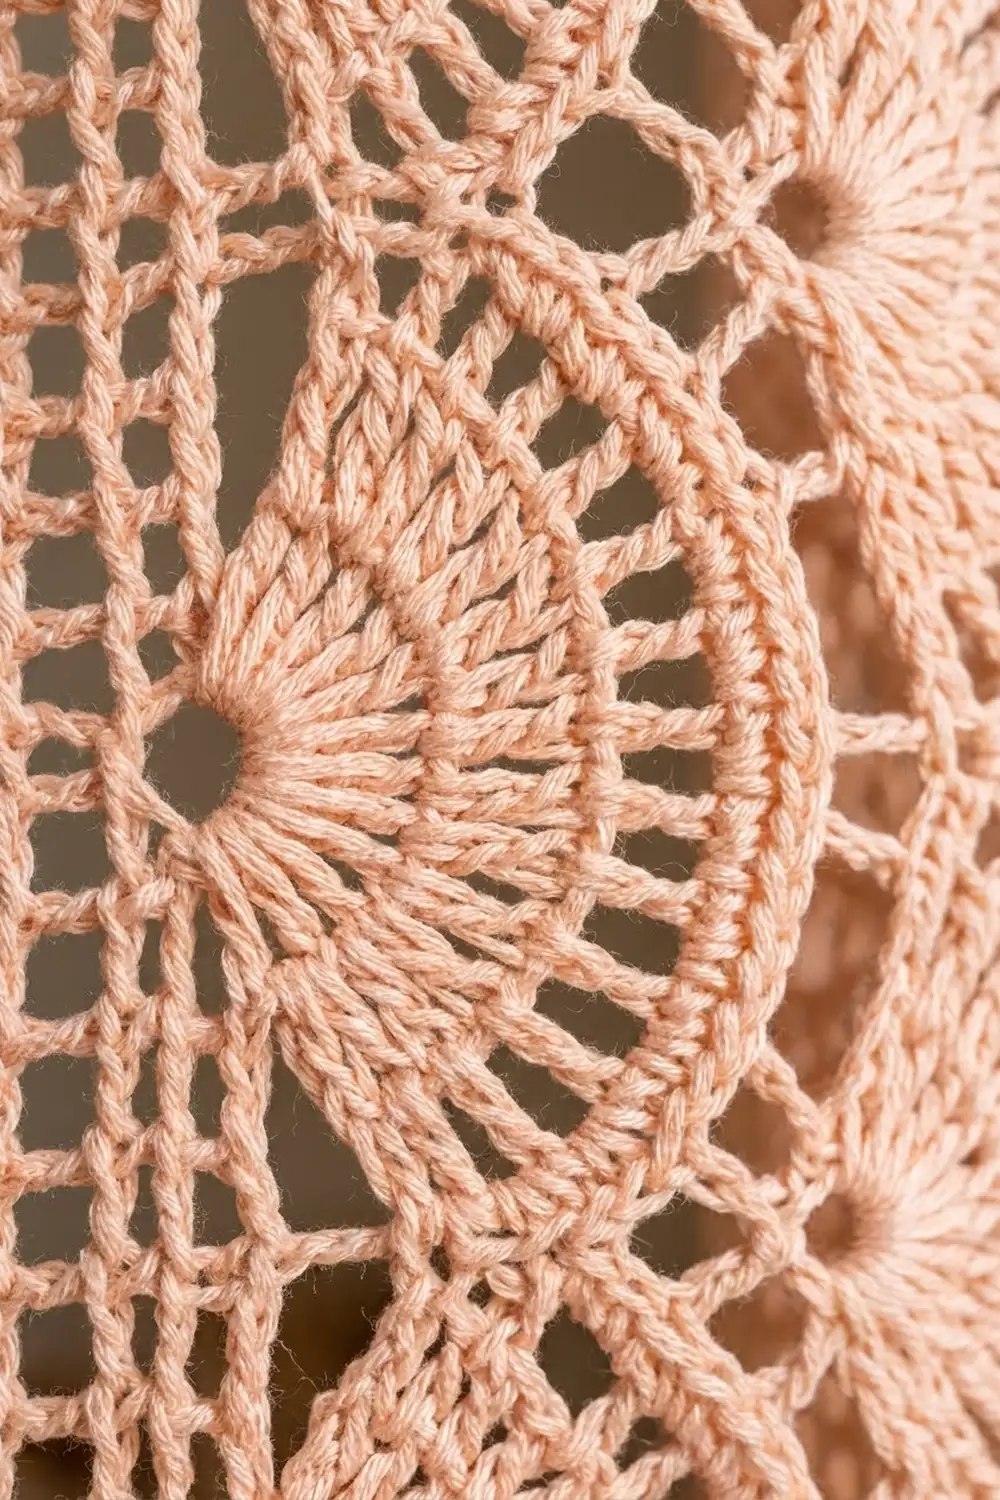
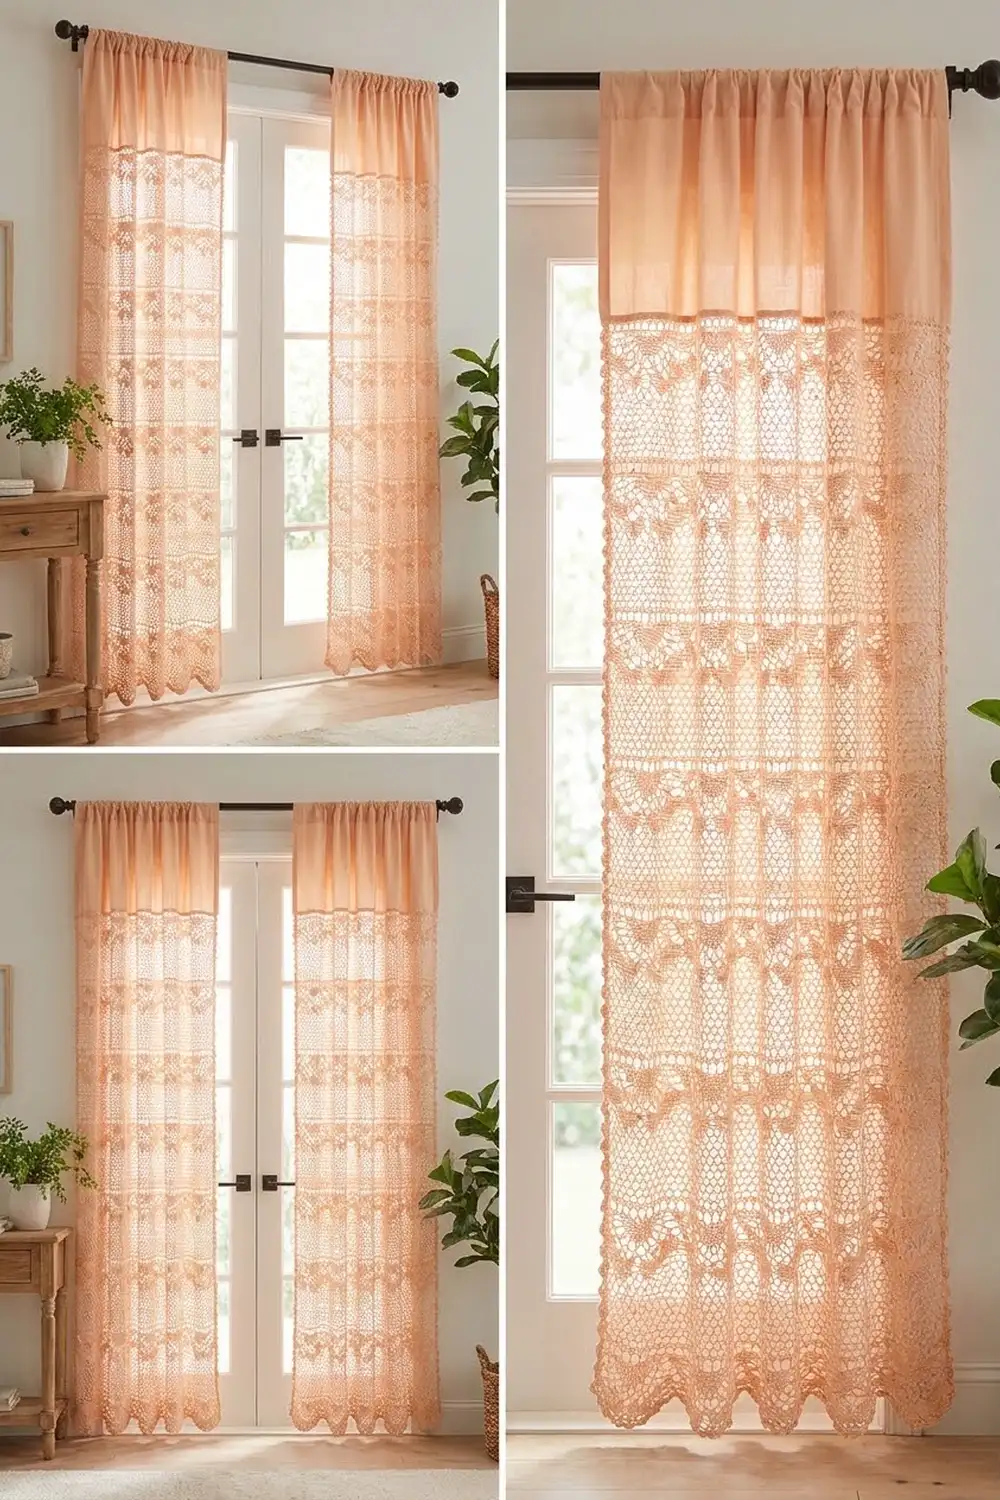
These lace curtain panels catch the light the way a fanlight window does. Rows of open, staggered fans spread downward and alternate with airy filet mesh bands. Each panel ends in a soft scalloped hem, so the bottom edge has a gentle wave when it hangs.
The design uses one warm peach-apricot cotton for a calm cottage look. Sunlight comes through every chain space, and the cotton keeps the fans crisp. The pattern gives instructions for a matching pair of separate panels. They hang side by side on one rod and are not joined to each other.
All instructions use US crochet terms. Each finished panel measures 40.25 in (102.2 cm) wide and 81.5 in (207.0 cm) long as it hangs. Laid flat before the rod pocket is folded, it measures 84.5 in (214.6 cm) long.
Each panel is worked from the top down in a single piece. First you make a solid double crochet header. Next you repeat 8-row bands of fans and mesh, then work a final fan band and a scallop row. Two rows of single crochet finish each long side, and the header folds over to make a rod pocket.
Finished Size and Construction
- Finished size (each panel, hanging): 40.25 in x 81.5 in (102.2 cm x 207.0 cm)
- Skill level: Intermediate
- Terminology: US crochet terms
- Yarn weight: DK (3), cotton
- Hook: 4.5 mm (US 7)
- Number of pieces: 2 identical panels, made separately, not joined
- Layout: panels hang side by side on one rod
- Piece size before border (flat): 39.25 in x 84.5 in (99.7 cm x 214.6 cm)
- Border depth: 0.5 in (1.3 cm) on each long side only
- Rod pocket: 3 in (7.6 cm) deep, fits a rod up to 1.5 in (3.8 cm) across
Materials
Choose a smooth, mercerized or combed cotton in DK weight. Cotton makes the fans look crisp, holds blocking well, and doesn’t stretch much on the rod. Buy all your yarn from one dye lot, because a lot change will show clearly against the window light.
- Peach/apricot (only color): 1,900 g (about 3,990 m) per panel. For the pair: 3,800 g (about 7,980 m), based on 100 g = 210 m balls.
These quantities include a margin of about 8% for your swatch and for small differences in tension.
Tools:
- 4.5 mm (US 7) crochet hook
- Tapestry needle
- Stitch markers (at least 4)
- Measuring tape
- Rust-proof pins and blocking mats, or a clean carpet covered with a sheet
- Spray bottle
Abbreviations (US Terms)
- ch – chain
- sl st – slip stitch
- sc – single crochet
- dc – double crochet
- sp – space
- st(s) – stitch(es)
- RS – right side
- tch – turning chain
Special stitches:
- Fan: (dc, ch 1) 6 times, dc, all in the same st or sp. That makes 7 dc and 6 ch-1 sps.
- Half fan: 4 dc separated by ch-1 sps, all in one st. That makes 4 dc and 3 ch-1 sps.
- V-st: (dc, ch 2, dc) in the same st.
Gauge and Checkpoints
Gauge (blocked): 12 sts = 3 in (7.6 cm), so 4 sts = 1 in (2.5 cm). 8 rows = 4 in (10.2 cm). Every body row is dc height, so 2 rows = 1 in.
Test one piece first. Ch 39 and work Row 1 of the header (37 sts). Then work one full band (Rows A, B, A, B, C, Mesh, Mesh, D) as written below. The fan rows place 2 full fans and 3 V-sts on 37 sts, so the swatch tests the real repeat. Block it like the finished panel.
- Swatch target: 9.25 in (23.5 cm) wide x 4.5 in (11.4 cm) tall.
- Too big: go down to a 4.0 mm hook.
- Too small: go up to a 5.0 mm hook.
Row height matters as much as width, because the side border and the panel length both depend on 2 rows = 1 in.
Panel checkpoints (flat, lightly stretched):
- After the header (12 rows): 39.25 in x 6 in (99.7 cm x 15.2 cm)
- After Band 1: 10 in (25.4 cm) long
- After Band 10: 46 in (116.8 cm) long
- After Band 19: 82 in (208.3 cm) long
- After the final fan band: 84 in (213.4 cm) long
- After the scallop row: 84.5 in (214.6 cm) long
Panel Pattern
Header
Foundation: Ch 159.
Row 1 (RS): Dc in 4th ch from hook and in each ch across. Turn. The skipped ch count as a dc. (157 sts)
Rows 2–12: Ch 3 (counts as dc), dc in each st across, working the last dc in the top of the tch. Turn. (157 sts)
The 157 sts are 13 repeats of 12 sts, plus 1 st to balance the edges.
Body Band (8 rows; repeat 19 times)
Row A (fan row): Ch 4 (counts as dc + ch 1). Work (dc, ch 1, dc, ch 1, dc) in the first st to make a half fan. Skip 5 sts, V-st in the next st, skip 5 sts, Fan in the next st. Repeat from * to * 11 more times. Skip 5 sts, V-st in the next st, skip 5 sts, then work a half fan of (dc, ch 1) 3 times and dc in the last st. Turn.
(12 fans, 13 V-sts, 2 half fans)
Row B (fan row): Ch 3 (counts as edge dc). Fan in the ch-2 sp of the next V-st, V-st in the center (4th) dc of the next fan. Repeat from * to * 11 more times. Fan in the ch-2 sp of the last V-st, then dc in the 3rd ch of the tch. Turn.
(13 fans, 12 V-sts, 2 edge dc)
Each fan in Row B sits on a V-st from Row A, and each new V-st sits on the center of a fan. This is why the fans are staggered like brickwork.
Row A (repeat): Ch 4. Work (dc, ch 1, dc, ch 1, dc) in the first dc. V-st in the center dc of the next fan, Fan in the ch-2 sp of the next V-st. Repeat from * to * 11 more times. V-st in the center dc of the last fan, then half fan in the top of the tch. Turn.
(12 fans, 13 V-sts, 2 half fans)
Row B (repeat): Work as the first Row B. (13 fans, 12 V-sts, 2 edge dc)
Row C (conversion row): Ch 3 (counts as dc), 2 dc in the first st. Dc in each of the 7 dc of the next fan, skipping the ch-1 sps. Dc in the next dc, 3 dc in the ch-2 sp, dc in the next dc of the V-st. Repeat from * to * 11 more times. Dc in each of the 7 dc of the last fan, then 3 dc in the top of the tch. Turn.
Count: 117 sts worked 1 per existing dc + 36 sts added in the ch-2 sps + 4 extra edge sts = 157 sts.
Mesh Row 1: Ch 4 (counts as dc + ch 1), skip the next st, dc in the next st. Ch 1, skip the next st, dc in the next st. Repeat across, working the last dc in the top of the tch. Turn.
(79 dc + 78 ch-1 sps = 157 sts)
Mesh Row 2: Ch 4, skip the ch-1 sp, dc in the next dc. Ch 1, skip the ch-1 sp, dc in the next dc. Repeat across, working the last dc in the 3rd ch of the tch. Turn. (157 sts)
Row D: Ch 3 (counts as dc). Dc in the next ch-1 sp, dc in the next dc. Repeat across, working the last dc in the 3rd ch of the tch. Turn.
(1 + 78 x 2 = 157 sts)
Each band is 8 rows and 4 in (10.2 cm) long. After 19 bands, the body adds 152 rows and 76 in (193.0 cm).
Final Fan Band and Scalloped Hem
Work Row A, Row B, Row A and Row B once more. That adds 4 rows and 2 in (5.1 cm). Do not work Row C.
Scallop Row: Ch 1, sc in the first dc. Over the next fan: sc in the dc, then (2 sc in the ch-1 sp, sc in the next dc) 6 times, for 19 sc. Skip the next dc of the V-st, sl st in the ch-2 sp, skip the next dc. Repeat from * to * 11 more times. Over the last fan, make 19 sc as before, then sc in the 3rd ch of the tch. Fasten off.
(13 scallops of 19 sc + 2 edge sc = 249 sc, plus 12 sl sts)
The 13 fans of the last Row B become the 13 scallops, and the sl sts make the dips between them.
Panel total: 12 header rows + 152 band rows + 4 final fan rows = 168 dc rows, plus 1 scallop row.
Make Both Panels
| Panel | Color | Yarn |
|---|---|---|
| Left | Peach/apricot | 1,900 g (3,990 m) |
| Right | Peach/apricot | 1,900 g (3,990 m) |
Layout on the rod (front view):
=========== ROD ===========
[ Panel 1 ]     [ Panel 2 ]
The two panels are identical and can be swapped. They are not joined, so skip joining entirely. Make sure both panels match the checkpoints within 0.5 in (1.3 cm) before you add the borders.
Border (Long Sides Only)
The top of each panel becomes the rod pocket and the bottom is the scalloped hem, so the border goes only on the two long sides.
Border gauge: 4 sc = 1 in (2.5 cm) along the side edge.
Right side, Row 1: With RS facing, join the yarn at the top corner of the foundation row. Work 2 sc in each dc row-end down the side (168 rows x 2 = 336 sc), then 1 sc in the end of the scallop row. Turn. (337 sc)
Row 2: Ch 1, sc in each sc across. Fasten off. (337 sc)
Left side: With RS facing, join at the bottom corner (the end of the scallop row). Work Rows 1–2 the same way. (337 sc per row)
Why the math works: Each dc row is 0.5 in tall. Two sc per row-end gives 4 sc per inch, which matches the 4 sc per inch of the border gauge. So 336 sc cover the 84 in (213.4 cm) of dc rows exactly, and the single sc covers the scallop row. The edge lies flat and doesn’t ruffle or pull. Two sc rows add 0.5 in (1.3 cm) per side, so the width grows from 39.25 in to 40.25 in (99.7 cm to 102.2 cm).
Final Blocking
- Weave in all ends along solid dc stitches, not through the mesh.
- Soak each panel in cool water with a little wool wash for 15 minutes. Press the water out gently; do not wring.
- Roll the panel in towels to remove extra water.
- Lay it flat and pin it to 40.25 in x 84.5 in (102.2 cm x 214.6 cm).
- Pin each scallop tip so the hem forms an even wave. Open each fan so its ch-1 sps are evenly spread.
- Check that the mesh bands are straight across, using a measuring tape or long ruler.
- Let the panel dry completely.
- Rod pocket: Fold the header to the wrong side along the line between Rows 6 and 7. Whipstitch the 157 foundation chains to the 157 sts at the top of Row 12, working one stitch to one stitch. Leave both short ends open. The pocket is 3 in (7.6 cm) deep, and the hanging length becomes 81.5 in (207.0 cm).
Final Quality-Control Checklist
- Every fan row has the right count: 12 fans + 2 half fans (Row A) or 13 fans (Row B).
- Every conversion, mesh and Row D row has 157 sts.
- There are 19 full bands, with no Row C after the final fan band.
- The hem has 13 even scallops.
- Each border row has 337 sc on each side.
- Each panel measures 40.25 in x 81.5 in (102.2 cm x 207.0 cm) when hanging.
- Both panels match in length within 0.5 in (1.3 cm).
- Both ends of each rod pocket are open, and the seam is straight.
Troubleshooting
- Fans lean to one side: you worked a V-st off center. Always put it in the 4th dc of the fan.
- Panel narrows after the fan rows: check that you worked 3 dc in each ch-2 sp in Row C.
- Mesh band is wider than the fan bands: use a slightly firmer tension on the ch-1 sps.
- Side border ruffles: your rows are shorter than 0.5 in. Work 2 sc in one row-end and 1 sc in the next, then match the opposite side.
- Side border cups: your rows are taller than 0.5 in. Go down a hook size for the border only.
- Panels differ in length: block the shorter panel again, or add or remove a Mesh Row pair in one band.
- Scallops curl: steam them lightly and pin them flat while they dry.
Care
Hand wash in cool water, or machine wash on a gentle cycle in a mesh laundry bag. Reshape and dry flat. Never hang a wet panel, because the weight of the water will stretch it.
Final Notes
Here is the full measurement chain. 12 sts = 3 in (7.6 cm), so 157 sts = 39.25 in (99.7 cm). Each 8-row band is 4 in (10.2 cm). The 6 in (15.2 cm) header, 19 bands, a 2 in (5.1 cm) final fan band and the scallop row add up to 84.5 in (214.6 cm) flat. A 0.5 in (1.3 cm) border on each side brings the width to 40.25 in (102.2 cm). Folding the rod pocket gives a hanging length of 81.5 in (207.0 cm). Check each stage as you go and both panels will hang evenly side by side.
Happy crocheting!