

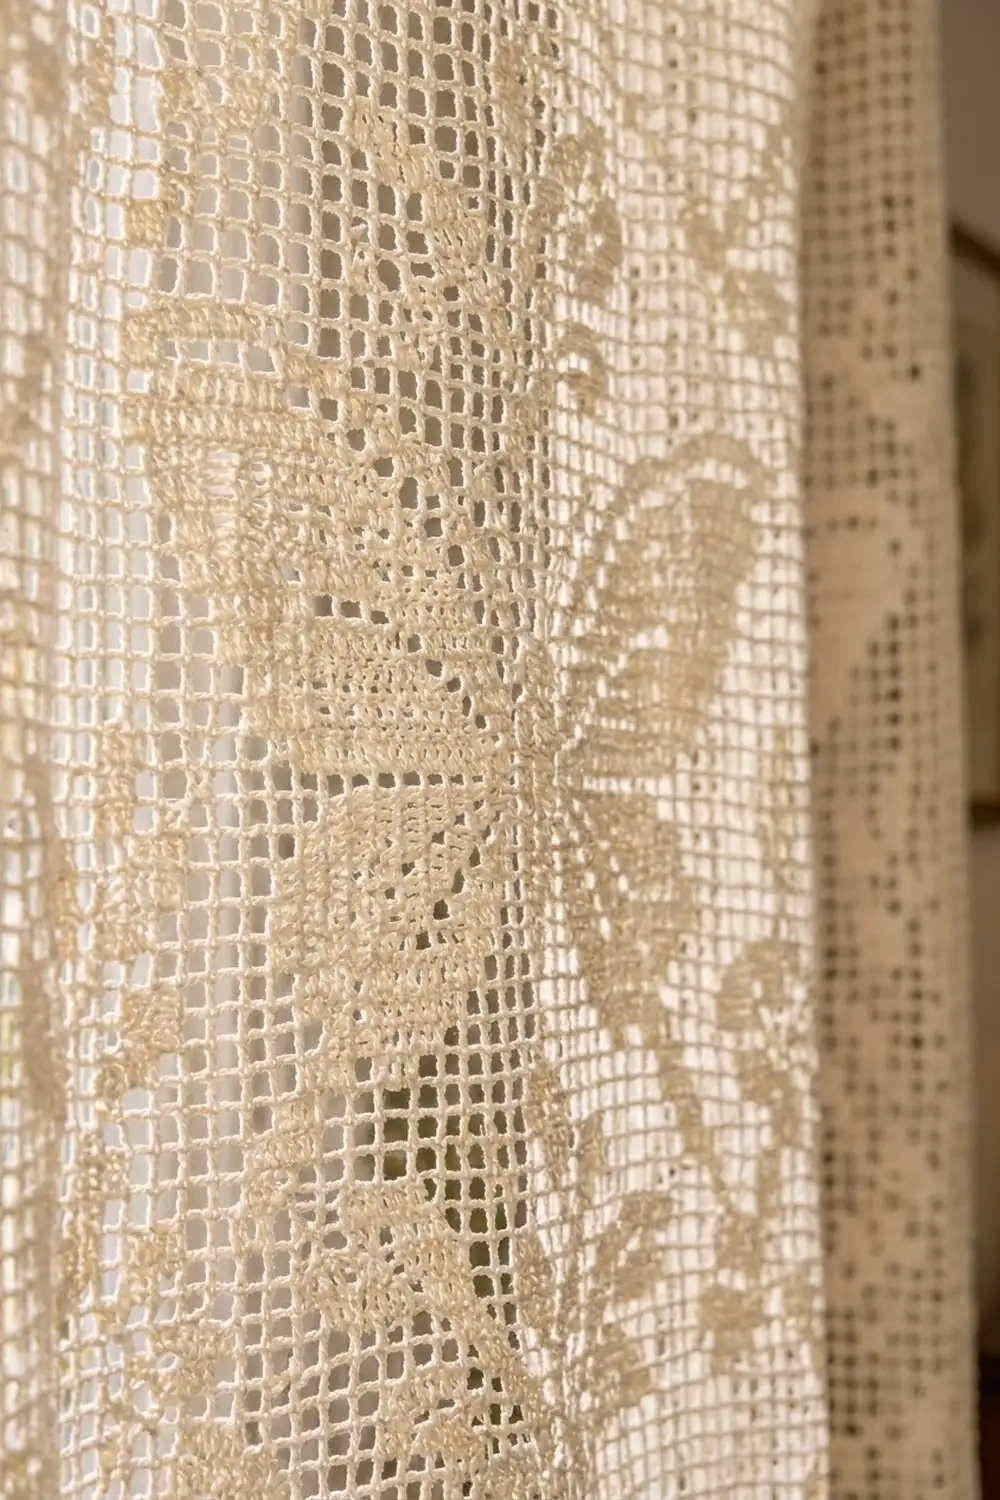
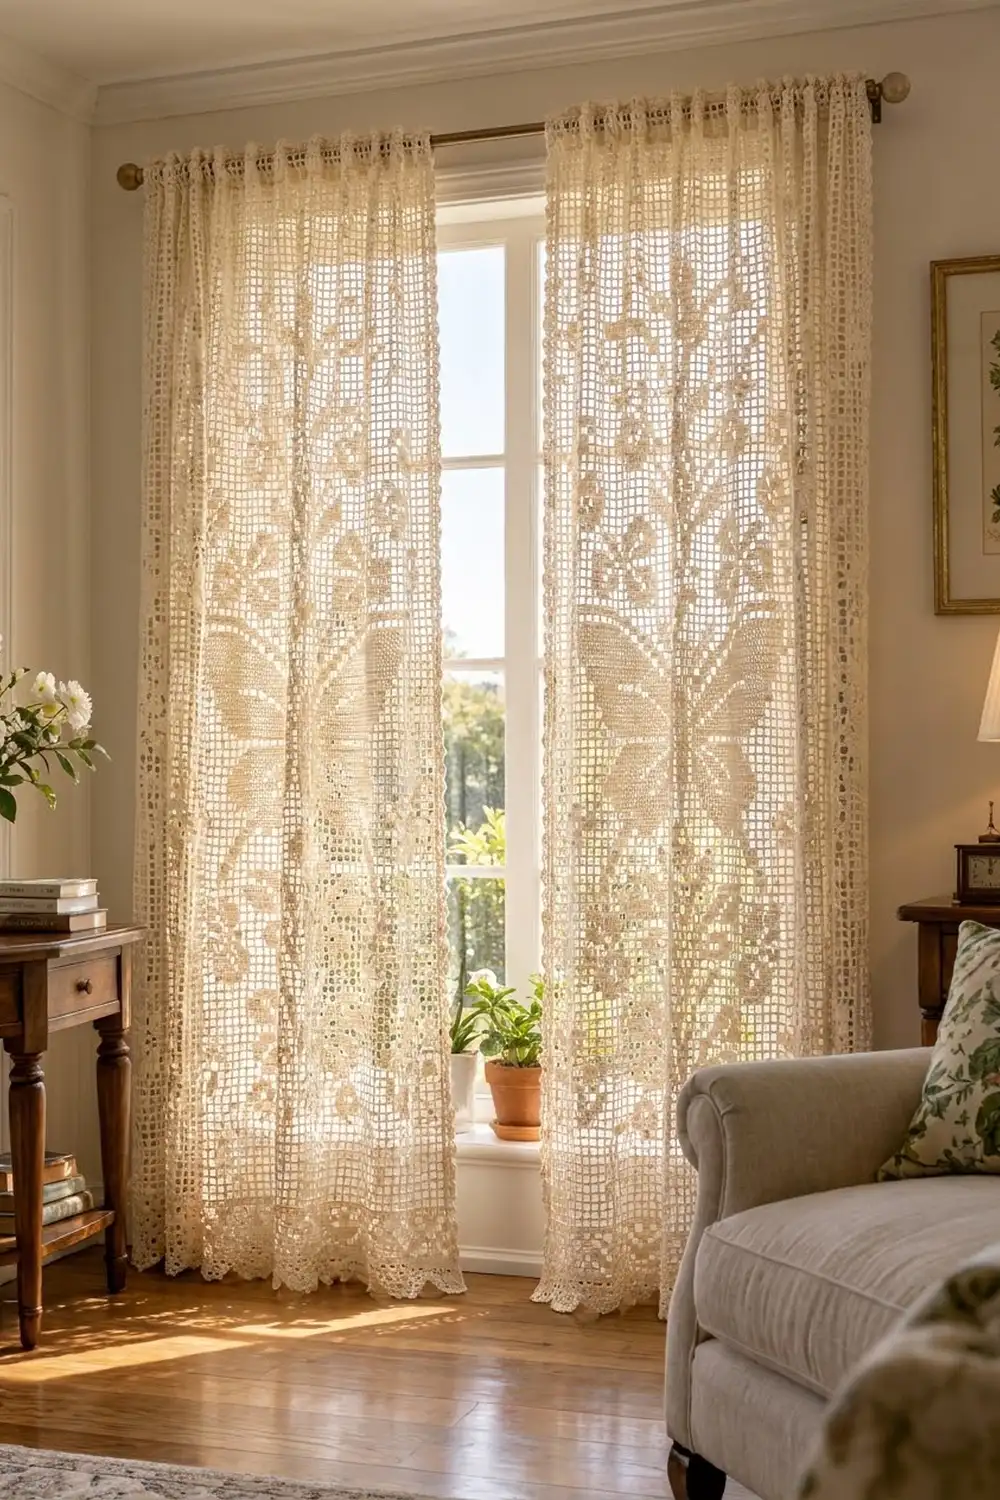
This floor-length filet lace curtain panel has a soft vintage-garden look. Open square mesh lets the light through, a large solid-block butterfly sits high in the center, small ring flowers are scattered in staggered rows above and below it, and a scalloped picot edge runs across the bottom.
The whole panel is worked in one color, a warm cream or ivory cotton thread. The single color makes the butterfly and flowers stand out against the light without looking busy. Two identical panels make a pair like the ones in the photo.
This pattern uses US crochet terms. The finished panel measures 40 in (101.6 cm) wide by 79.6 in (202.2 cm) long, measured from the top of the folded rod pocket to the tips of the scallops.
You work the panel in one piece from the bottom up in rows of filet mesh, finishing with a solid band that folds into a rod pocket. The scalloped border is then worked into the foundation chain, and a simple sc edging finishes both sides.
Finished Size and Construction
- Finished size: 40 in (101.6 cm) wide x 79.6 in (202.2 cm) long
- Skill level: Intermediate (simple stitches, careful counting)
- Terminology: US
- Yarn weight: Size 3 crochet thread (light fingering)
- Hook: 2.5 mm (B/1 or C/2)
- Number of pieces: 1 panel. The photo shows a matching pair; make a second panel exactly the same way. The panels are never joined.
- Layout: 100 blocks wide x 200 rows tall
- Size before border: 40 in (101.6 cm) x 80 in (203.2 cm) flat; 40 in (101.6 cm) x 78.4 in (199.1 cm) after folding the rod pocket
- Border depth: 1.2 in (3.0 cm)
Materials
Yarn: Use mercerized cotton crochet thread in size 3, about 274 m per 100 g. Mercerized cotton holds crisp blocks, drapes well and stands up to sunlight and washing. Buy all the thread from one dye lot, because large ivory panels show color shifts clearly.
- Cream/ivory: 750 g (2,055 m) per panel; 1,500 g (4,110 m) for a pair
Tools:
– 2.5 mm hook
– Tapestry needle
– Stitch markers (at least 10)
– Rust-proof pins and a large blocking surface (a clean bed with towels works)
– Measuring tape
– Spray bottle
The yarn amounts already include about a 15% margin for the swatch and blocking adjustments.
Abbreviations (US Terms)
- ch: chain
- sl st: slip stitch
- sc: single crochet
- dc: double crochet
- sp: space
- RS: right side
- st(s): stitch(es)
Special stitches:
– Open block (O): ch 2, skip 2 sts (or the ch-2 sp), dc in next dc.
– Solid block (X): 2 dc in the next 2 sts (or 2 dc in the ch-2 sp), dc in next dc.
– Picot: ch 3, sl st into the sc just made.
Each block uses 3 st positions. A row of 100 blocks always has 301 positions: 100 blocks x 3, plus 1 for the starting turning chain.
Gauge and Checkpoints
Gauge: 10 blocks and 10 rows = 4 in (10.2 cm) square after blocking. One block measures 0.4 in (1.0 cm) each way.
Test swatch: Ch 48. Row 1: dc in 4th ch from hook and in each ch across (46 sts, 15 solid blocks). Work 14 rows of open mesh, then wash and pin the swatch. It should measure 6 in (15.2 cm) square. Measure the center 10 blocks against the 4 in (10.2 cm) target.
If the blocks are too big (10 blocks over 4.2 in / 10.7 cm), go down 0.25 mm. If they are too small (10 blocks under 3.8 in / 9.7 cm), go up 0.25 mm. A difference of only 0.1 in (0.3 cm) per 10 blocks adds up to 1 in (2.5 cm) across the width, so it’s worth getting the gauge right.
Checkpoints, measured relaxed on a flat surface:
– After Row 2: 40 in (101.6 cm) wide
– After Row 25: 10 in (25.4 cm) tall
– After Row 100: 40 in (101.6 cm) tall
– After Row 192: 76.8 in (195.1 cm) tall
– After Row 200: 80 in (203.2 cm) tall
Unblocked filet often measures 3–5% shorter than these figures. Blocking fixes small differences.
Panel Body
Reading the placements: Columns are numbered 1–100 across the panel. Every motif is mirror-symmetric around the center line between columns 50 and 51, so you can count from either edge on any row. Any block not listed is open.
Row 1 (solid): Ch 303. Dc in 4th ch from hook (the skipped ch count as the first dc) and in each ch across. Turn. (301 sts = 100 solid blocks)
Row 2 (open): Ch 5 (counts as dc + ch 2), skip 2 dc, dc in next dc. Ch 2, skip 2 dc, dc in next dc; repeat from * across, working the last dc in the top of the turning ch. Turn. (101 dc and 100 ch-2 sps = 301 positions)
Starting each row:
– If block 1 is open, ch 5 (counts as dc + ch 2), then dc in the next dc.
– If block 1 is solid, ch 3 (counts as dc), then work 2 dc and dc in the next dc.
Always end the row with the last dc in the top of the turning chain.
Rows 3–192: Work in filet mesh, placing the motifs below. Check that each row has 301 positions.
Flower Motif (6 blocks x 6 rows)
Columns are numbered 1–6 from the left of the motif:
– Flower row 1: X in columns 3–4
– Flower row 2: X in columns 2–5
– Flower rows 3–4: X in columns 1–2 and 5–6 (open center)
– Flower row 5: X in columns 2–5
– Flower row 6: X in columns 3–4
Each flower measures 2.4 in (6.1 cm) square.
Flower Placements
- Set A (columns 13–18, 48–53, 83–88): Rows 20–25, 50–55, 80–85, 155–160
- Set B (columns 30–35, 66–71): Rows 35–40, 65–70, 175–180
The two sets alternate up the panel, giving the staggered sprig look from the photo.
Butterfly Motif (Rows 105–134)
The butterfly is 40 blocks wide (columns 31–70) and 30 rows tall, which is 16 in (40.6 cm) x 12 in (30.5 cm). The positions below are half-columns counted outward from the center line. Half-column 1 is panel column 51 on the right and its mirror, column 50, on the left. Half-column 20 is column 70 on the right and column 31 on the left. Work every listed half-column on both sides.
- B1: 6–8
- B2: 5–9
- B3: 4–10
- B4: 1, 4–11
- B5: 1, 3–12
- B6: 1, 3–7, 9–12
- B7: 1, 3–6, 8–13
- B8: 1, 3–5, 7–13
- B9: 1, 3–13
- B10: 1, 4–14
- B11: 1, 5–14
- B12: 1, 7–13
- B13: 1
- B14: 1, 3–12
- B15: 1, 3–15
- B16: 1, 3–17
- B17: 1, 3–8, 10–18
- B18: 1, 3–9, 11–19
- B19: 1, 3–10, 12–19
- B20: 1, 3–19
- B21: 1, 3–11, 13–20
- B22: 1, 3–12, 14–20
- B23: 1, 3–20
- B24: 1, 4–20
- B25: 1, 5–19
- B26: 1, 7–18
- B27: 1, 10–16
- B28: 1
- B29: 2
- B30: 3
Butterfly row B1 is panel Row 105, and B30 is Row 134.
- Body: Half-column 1 on both sides makes a body 2 blocks wide.
- Outline: Open half-column 2 separates the wings from the body.
- Wing gap: The open B13 row separates the lower wings from the upper wings.
- Veins: The open blocks that step diagonally through the wings form the veins.
- Head and antennae: B28 is the head, and B29–B30 form antennae that angle outward.
Place a marker at column 31 and another at column 70 on Row 105, and move them up as you go.
Rod Pocket
Rows 193–200 (solid): Ch 3 (counts as dc), dc in each st across. Turn. (301 sts per row) Fasten off after Row 200.
This band measures 3.2 in (8.1 cm). Fold Rows 197–200 to the wrong side so the top of Row 200 lies along the base of Row 193. Whipstitch it down through matching stitches, 301 stitches to 301 stitches.
Leave the side ends open. The finished pocket is 1.6 in (4.1 cm) deep and fits a rod up to 3/4 in (1.9 cm) in diameter.
Border
Border gauge: One scallop uses 6 sts, which equals 2 blocks or 0.8 in (2.0 cm). 50 scallops x 0.8 in = 40 in (101.6 cm), exactly the panel width.
Bottom Edge
Turn the panel upside down with the RS facing you, so you are working into the foundation chain.
Border Row 1: Join thread in the first ch. Ch 1, then sc in the same ch and in each foundation ch across. Turn. (301 sc)
Border Row 2: Ch 1, sc in the first sc. Skip 2 sc, 7 dc in next sc, skip 2 sc, sc in next sc; repeat from * 49 more times. Turn. (50 shells, 51 sc)
Check: 1 + (50 x 6) = 301. Each repeat uses exactly 6 sc, so the shells line up with every second block.
Border Row 3 (trim): Ch 1, sc in the first sc. Sc in next 3 dc, (sc, picot) in the 4th dc, sc in next 3 dc, sc in next sc; repeat from * 49 more times. Fasten off.
Count: 401 sc (51 sc + 350 dc, worked 1 sc per stitch) + 50 picots added.
Side Edges
With the RS facing, join thread at the lower corner of Row 1. Work 2 sc into the side of each row end up through Row 192 only, so the pocket ends stay open.
(384 sc per side: 192 rows x 2)
The sc edging lies over the outer dc posts and doesn’t add any measurable width.
Why the math works: The 301-stitch width divides into 50 scallops of 6 sts plus 1 closing sc. The sides use a fixed 2 sc per dc row-end, which matches the dc row height. Neither edge gathers or flares.
Final Blocking
- Soak the panel in cool water with a little wool wash for 15 minutes.
- Press the water out gently without wringing, then roll the panel in towels.
- Lay it flat and pin the width to 40 in (101.6 cm) at the bottom, at Row 100, and just below the pocket.
- Pin the length to 78.4 in (199.1 cm) from the pocket fold to the base of Border Row 1.
- Pin each scallop at its center dc and each picot so the scallops are 1.2 in (3.0 cm) deep.
- Run a ruler along the mesh lines to straighten the columns. Butterfly columns 31 and 70 should sit parallel to the edges.
- Mist the panel lightly and let it dry completely, which takes 24–48 hours. Unpin it only when it is fully dry.
Final Quality-Control Checklist
- Every row has 301 positions; no block drifted by 1 st.
- The flowers in Sets A and B are mirror-matched from the left and right edges.
- The butterfly is centered on columns 31–70, and both wings match.
- The rod pocket opens at both ends and the whipstitching doesn’t show on the RS.
- There are 50 scallops, all the same size, and each picot points straight down.
- There are 384 sc on each side, with flat edges.
- The panel measures 40 in (101.6 cm) x 79.6 in (202.2 cm).
- If you made a pair, both panels match within 0.4 in (1.0 cm).
Troubleshooting
- The mesh leans diagonally: Your dc are tighter on one row direction than the other. Block with more pins, and keep your ch-2s the same height as your dc.
- Open blocks look tall and narrow: The ch-2 is too tight. Work the chains slightly looser or go up a hook size for the chains only.
- A motif sits off-center: You miscounted a starting block. Put a marker every 10 blocks on the row before a motif begins.
- The bottom edge ruffles: You worked more than 301 sc in Border Row 1. Recount and redo it.
- The bottom edge pulls in: Your Border Row 1 tension is too tight. Go up 0.25 mm for the border only.
- The pocket is too tight for the rod: Add 2 more solid rows (Rows 201–202) before folding. Each extra row adds 0.2 in (0.5 cm) to the pocket depth.
Care
Hand wash in cool water, roll in towels, and dry flat, pinning the panel back to size if needed. Hang it while it is still slightly damp, if you like, so the weight straightens the mesh.
Final Notes
Everything in this pattern follows from the 0.4 in (1.0 cm) block:
- 100 blocks make a width of 40 in (101.6 cm).
- 192 body rows measure 76.8 in (195.1 cm).
- The folded pocket adds 1.6 in (4.1 cm), bringing the length to 78.4 in (199.1 cm).
- The 1.2 in (3.0 cm) scallop border completes the 79.6 in (202.2 cm) panel.
If your swatch matches the gauge, every motif, scallop and edge will land where it should.
Happy crocheting!