

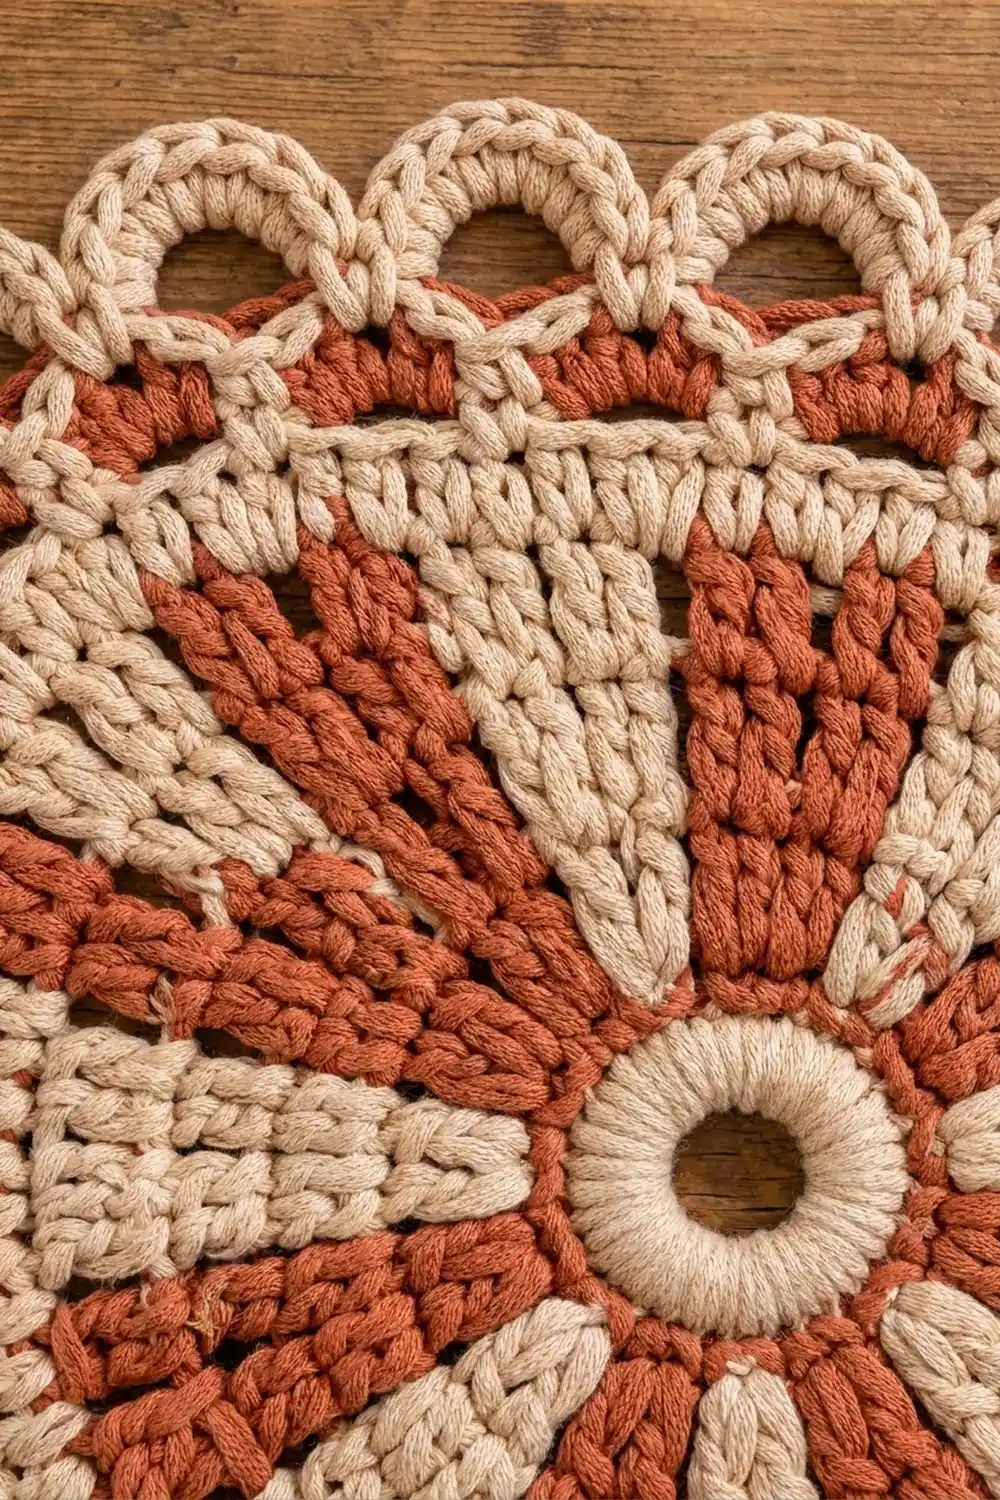
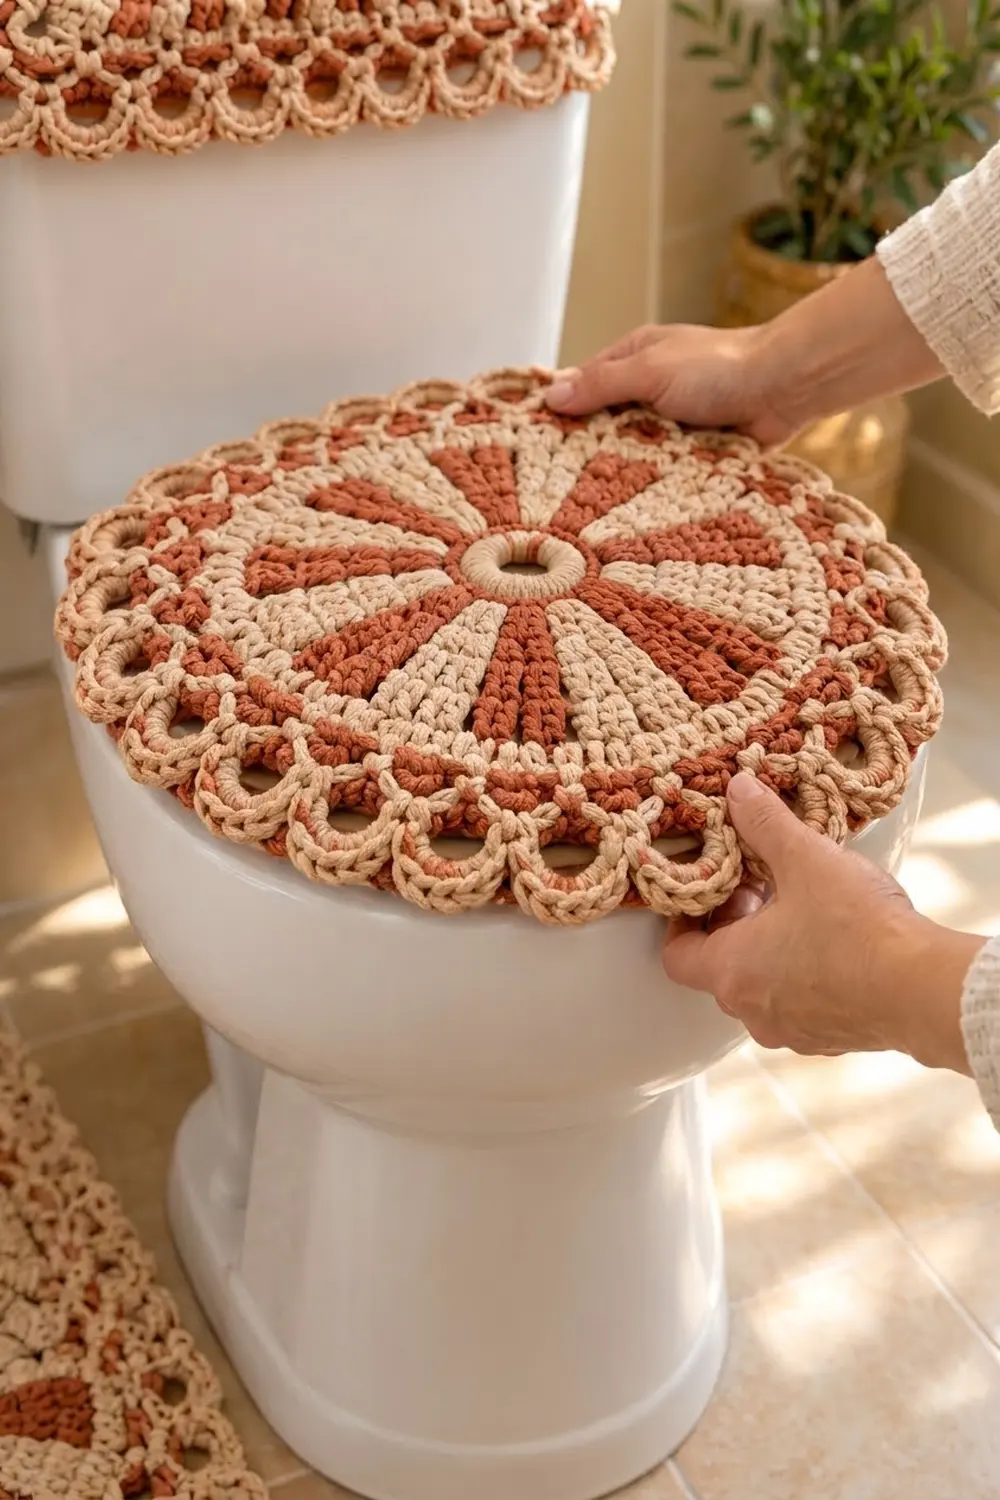
This lid cover is one flat, round motif in two colors. A raised cream ring sits in the center like a hub. Twelve terracotta spokes radiate out from it, with twelve cream wedges between them, so the piece looks like a sunburst or a wagon wheel.
Outside the spokes there is a solid cream round, then a solid terracotta round, and then a border of 22 rounded cream arches. Each arch is a chain loop packed tightly with single crochet, so the edge looks like a ring of chunky little hoops. The warm rust and oatmeal colors suit a boho or farmhouse bathroom.
The pattern uses US crochet terms. The finished cover measures 16 in (40.6 cm) across after blocking. Before the border it measures 14 in (35.6 cm).
You work the whole piece in joined rounds from the center out. First comes a padded ring, then seven rounds of two-color tapestry double crochet for the spokes, then two solid rounds and a two-round border. There’s no seaming. You only need to weave in ends.
Finished Size and Construction
- Finished size: 16 in (40.6 cm) diameter
- Skill level: Intermediate (tapestry color changes)
- Terminology: US crochet terms
- Yarn weight: Bulky (#5) cotton or cotton blend
- Hook: 5.5 mm (I-9)
- Number of pieces: 1
- Layout: one round motif, worked from the center out
- Piece size before border: 14 in (35.6 cm) diameter
- Border depth: 1 in (2.5 cm)
Materials
Use a smooth, firm, bulky cotton or cotton-blend yarn. A rounded, cord-like ply gives the crisp stitches you see on the spokes. Avoid fuzzy or very soft acrylic. The cover gets handled often and needs to keep its shape.
- Color A, cream/beige: 150 g, approx. 165 m (180 yd)
- Color B, terracotta/rust: 100 g, approx. 110 m (120 yd)
These amounts include extra yarn for your gauge test and for carrying the unused color through the spoke rounds.
Tools:
- 5.5 mm (I-9) crochet hook
- Tapestry needle
- Stitch marker
- Scissors
- Measuring tape
- Blocking mat, rust-proof pins, and a spray bottle
Abbreviations (US Terms)
- ch: chain
- sl st: slip stitch
- sc: single crochet
- dc: double crochet
- sk: skip
- st(s): stitch(es)
- sp: space
- rnd: round
- A: Color A (cream)
- B: Color B (terracotta)
Tapestry dc (color change): Work the last dc before a color change until 2 loops remain on the hook. Drop the old color, yarn over with the new color, and pull it through both loops. Lay the unused color along the tops of the stitches below and work over it, so it is hidden inside the new stitches.
Padded ring: Wrap the yarn around two fingers 8 times. Slide the bundle off and hold it as a ring. Work all Rnd 1 stitches into the center of this bundle. This makes the raised hub.
Note: In every dc round, the beginning ch 3 counts as the first dc. Join every round with a sl st to the top of the beginning ch 3.
Gauge and Checkpoints
Gauge: 12 dc and 6 dc rnds = 4 in (10.2 cm) in a flat circle.
Test the pattern before you make the whole cover. Work Rnds 1–4 and measure. The test circle should be 6 in (15.2 cm) across. If it is, just keep going on the same piece.
Checkpoints:
- After Rnd 1: 2 in (5.1 cm) across, with a center hole of about 0.75 in (1.9 cm)
- After Rnd 4: 6 in (15.2 cm)
- After Rnd 8: 11.3 in (28.7 cm)
- After Rnd 9: 12.7 in (32.3 cm)
- After Rnd 10: 14 in (35.6 cm)
- After Rnd 12, blocked: 16 in (40.6 cm)
If your circle is too big, try a 5 mm (H-8) hook. If it is too small, try a 6 mm (J-10) hook. If the center cups up like a bowl, your stitches are too short for the increases, so go up a hook size. If it ruffles, go down a hook size.
Main Pattern: The Sunburst
Center Hub
Rnd 1 (A): Make a padded ring. Join A with a sl st into the ring and ch 1. Work 24 sc into the ring, pushing the stitches together so they cover the bundle completely. Join with a sl st to the first sc. (24 sc)
Pull the tail gently so the hole shrinks to about 0.75 in (1.9 cm). The ring should look thick and round, and sit a little higher than the rounds that come next.
Spoke Rounds
From here on, carry the unused color inside every stitch. Each round has 12 repeats. Each repeat is one terracotta spoke (B) followed by one cream wedge (A).
Every round adds exactly 12 stitches, one per repeat. The spoke gets the increase on even-numbered rounds and the wedge gets it on odd-numbered rounds. This keeps the circle flat and makes both shapes widen as they go out.
Rnd 2: Join B in any sc. Ch 3 (counts as dc), dc in the same st. Change to A and dc in the next st. With B, 2 dc in the next st. With A, dc in the next st. Repeat from * 10 more times. Join. (36 dc: 12 B spokes of 2 sts, 12 A wedges of 1 st)
Rnd 3: With B, dc in each of the next 2 B sts. With A, 2 dc in the next A st. Repeat around. (48 dc: B2, A2 per repeat)
Rnd 4: With B, dc in the next B st, 2 dc in the next B st. With A, dc in each of the next 2 A sts. Repeat around. (60 dc: B3, A2 per repeat)
Rnd 5: With B, dc in each of the next 3 B sts. With A, dc in the next A st, 2 dc in the next A st. Repeat around. (72 dc: B3, A3 per repeat)
Rnd 6: With B, dc in the next st, 2 dc in the next st, dc in the next st. With A, dc in each of the next 3 A sts. Repeat around. (84 dc: B4, A3 per repeat)
Rnd 7: With B, dc in each of the next 4 B sts. With A, dc in the next st, 2 dc in the next st, dc in the next st. Repeat around. (96 dc: B4, A4 per repeat)
Rnd 8: With B, dc in the next 2 sts, 2 dc in the next st, dc in the next st. With A, dc in each of the next 4 A sts. Repeat around. Fasten off B. (108 dc: B5, A4 per repeat)
Check: 12 × (5 + 4) = 108. The piece should now measure 11.3 in (28.7 cm).
Solid Rounds
Rnd 9 (A only): Ch 3, dc in the next 3 sts, 2 dc in the next st, dc in the next 4 sts. Dc in the next 4 sts, 2 dc in the next st, dc in the next 4 sts. Repeat from * 10 more times. Join. (120 dc)
Each repeat works into 9 stitches and makes 10, so 12 × 10 = 120. Fasten off A. The piece should measure 12.7 in (32.3 cm).
Rnd 10 (B only): Join B in any st. Ch 3, dc in the next 3 sts, 2 dc in the next st, dc in the next 5 sts. Dc in the next 4 sts, 2 dc in the next st, dc in the next 5 sts. Repeat from * 10 more times. Join. (132 dc)
Each repeat works into 10 stitches and makes 11, so 12 × 11 = 132. The increases fall in a different place than in Rnd 9, so they don’t stack up into a visible corner. Fasten off B. The piece should measure 14 in (35.6 cm).
Border
Border gauge: One finished arch (13 sc over a ch-9 loop) is 2 in (5.1 cm) wide at its base and 1 in (2.5 cm) tall.
Rnd 11 (A), loop round: Join A in any st of Rnd 10. Ch 1, sc in the same st. Ch 9, sk the next 5 sts, sc in the next st. Repeat from * 20 more times. Ch 9, sk the last 5 sts, and join with a sl st to the first sc. (22 sc and 22 ch-9 loops)
Count: each repeat uses 6 stitches of Rnd 10 (1 sc + 5 skipped), and 22 × 6 = 132. Every stitch of Rnd 10 is used exactly once.
Rnd 12 (A), filling round: Sl st into the first ch-9 loop. Work 13 sc into the ch-9 loop, then sl st in the next sc of Rnd 11. Repeat from * around. The last sl st goes into the first sc of Rnd 11. (286 sc and 22 sl sts: 13 sc per arch × 22 arches)
Push the 13 sc close together along each loop as you work. Packing them tightly turns the loose chain into a firm, round hoop. Fasten off and weave in all ends.
Why the math works: At 12 sts per 4 in (10.2 cm), Rnd 10’s 132 stitches measure 44 in (111.8 cm) around. Each arch takes 6 stitches, or 2 in (5.1 cm) of edge, so 22 arches fill exactly 44 in (111.8 cm). The ch-9 loop is longer than the 2 in (5.1 cm) it spans, so it curves outward into a half-ring. Thirteen sc cover the chain snugly without ruffling. The border adds 1 in (2.5 cm) on each side, taking the 14 in (35.6 cm) circle to 16 in (40.6 cm).
Final Blocking
- Weave in all ends, keeping each tail inside an area of the same color.
- Lay the cover right side up on a blocking mat.
- Spray it evenly until it’s damp but not dripping.
- Smooth the spokes outward from the center so each one runs straight.
- Measure across in two directions and ease the circle to 14 in (35.6 cm) at the edge of Rnd 10.
- Pin each arch at its top point so the full width is 16 in (40.6 cm).
- Gently press the center ring with your fingers so it stays raised and round.
- Let it dry completely before you remove the pins.
Final Quality-Control Checklist
- The center ring is raised, round, and fully covered by 24 sc.
- There are 12 terracotta spokes and 12 cream wedges, all the same width.
- No carried strands show on the right side.
- Rnd 8 has 108 sts, Rnd 9 has 120 sts, and Rnd 10 has 132 sts.
- There are 22 arches, each with 13 sc.
- The cover lies flat, with no cupping or ruffling.
- It measures 14 in (35.6 cm) before the border and 16 in (40.6 cm) finished.
- All ends are woven in securely.
Troubleshooting
The center cups like a bowl. Your dc are too short for 12 increases per round. Loosen your tension or go up one hook size.
The circle ruffles. Your stitches are too tall or too loose. Go down one hook size or tighten your yarn-overs.
The spokes drift sideways. Count each color section at the end of every round. One extra stitch in a section shifts every spoke after it.
Carried yarn shows through. Keep the carried strand flat against the stitch tops and don’t pull it tight. Bulky cotton hides it well when your tension is even.
The arches look flat or floppy. Make sure you work 13 sc in each loop and push them close together. If they still look limp, work 14 sc per loop.
The border is wavy after blocking. Rnd 10 is probably too large. Check that it has 132 sts. If the count is right, redo Rnds 11–12 with a smaller hook.
Care
Hand wash in cool water with mild soap, then roll it in a towel to press out the water. Reshape it, dry it flat, and don’t tumble dry.
Final Notes
Here is how the measurements build up. The padded ring is 2 in (5.1 cm) across. The spoke rounds bring it to 11.3 in (28.7 cm), and the two solid rounds bring it to 14 in (35.6 cm). The 1 in (2.5 cm) arch border finishes it at 16 in (40.6 cm). If you hit the 6 in (15.2 cm) checkpoint after Rnd 4, the rest of the numbers should follow.
Count each color section as you go, and your twelve spokes will stay straight and even all the way out to the hoops.
Happy crocheting!