

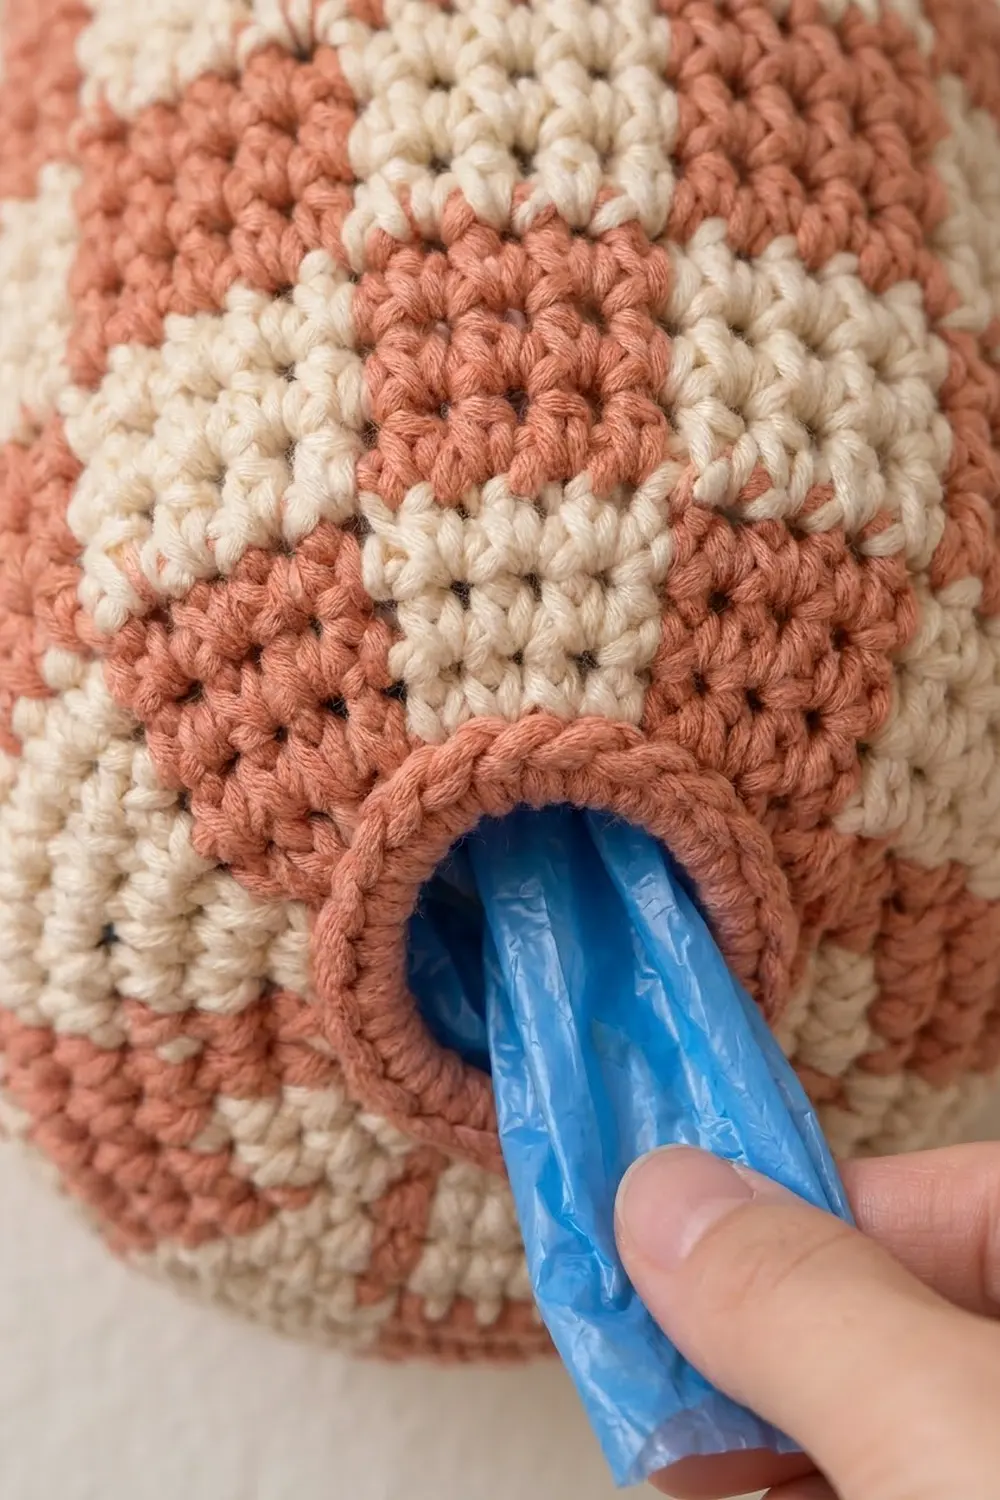
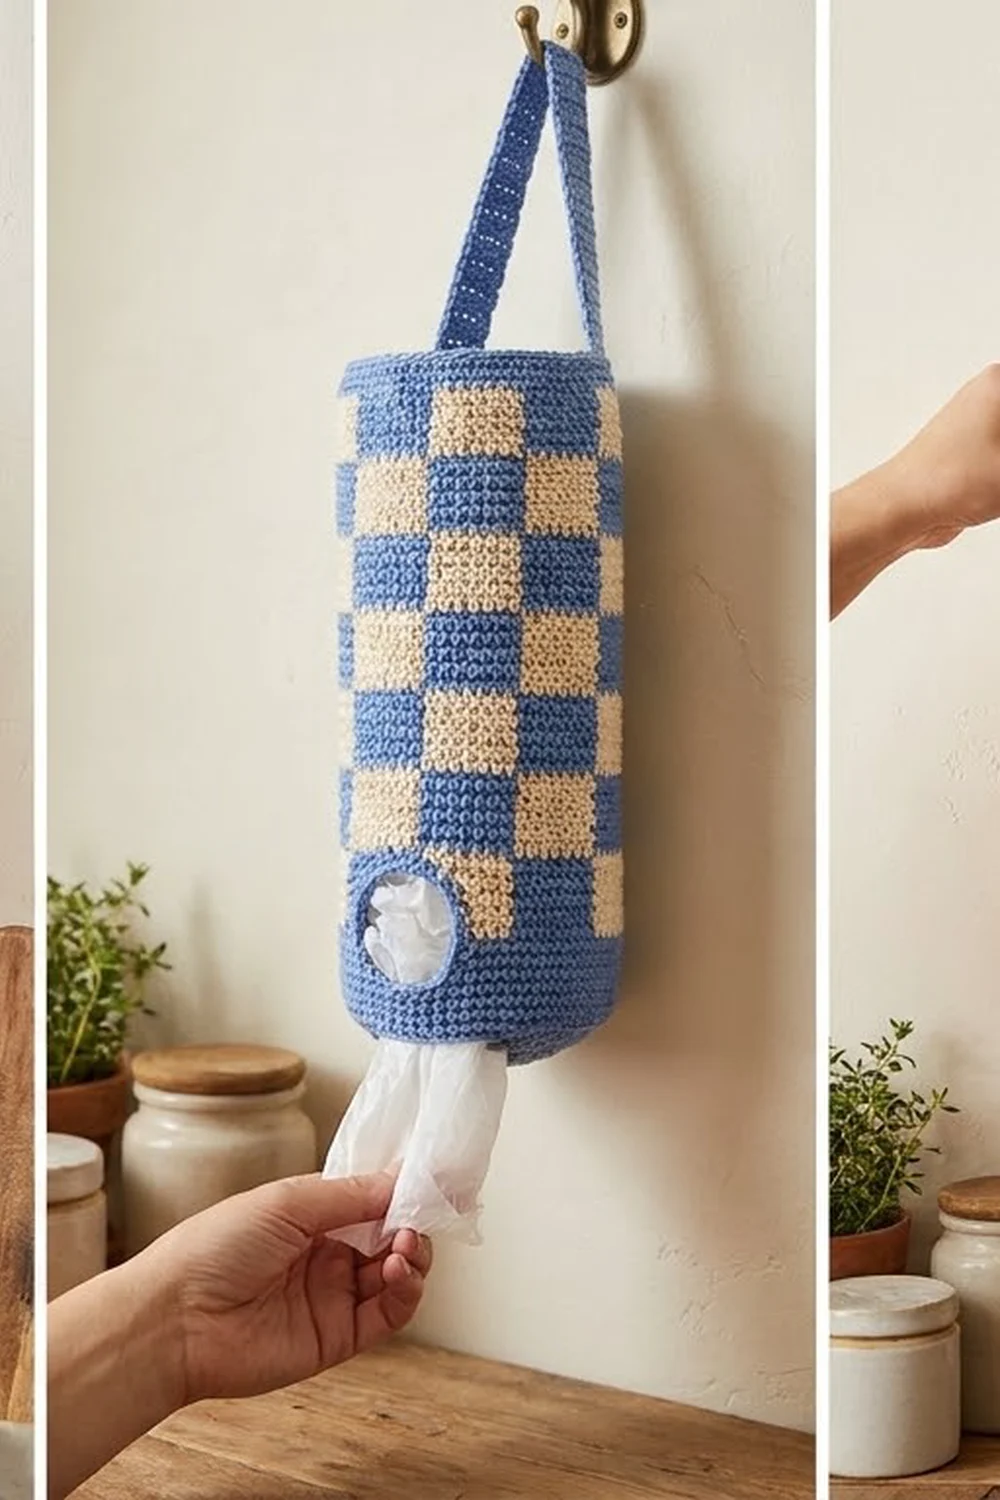
This checkerboard bag holder is a tidy way to deal with the plastic bags that collect under the sink. It’s a soft cylinder covered in a two-color check. You stuff bags in at the top and pull them out one at a time through a small round opening in the base. A narrow strap at the back lets it hang from a door hook or a wall knob.
The sample uses warm coral (terracotta pink) checked against cream. It works just as well in cornflower blue and cream, which gives it a classic gingham-kitchen look. Every square is the same size and the colors alternate cleanly, so it reads as a crisp checkerboard from across the room.
The pattern uses US crochet terms. The finished holder is 16 in (40.6 cm) around, about 5.1 in (13.0 cm) across, and 10.25 in (26.0 cm) tall including the rim border, with a 6 in (15.2 cm) hanging strap.
You make the holder in one piece from the bottom up. First you work a flat ring-shaped base around the dispenser opening. Then you work the straight sides in joined rounds of tapestry single crochet, followed by a solid rim. You crochet the strap directly onto the back of the rim, and a reverse single crochet border finishes both edges. You won’t need any sewing beyond weaving in tails.
Finished Size and Construction
- Finished size: 16 in (40.6 cm) circumference, 5.1 in (13.0 cm) diameter, 10.25 in (26.0 cm) tall
- Skill level: Intermediate (tapestry color changes in the round)
- Terminology: US crochet terms
- Yarn weight: #4 worsted, cotton or cotton blend
- Hook: 4.0 mm (G-6)
- Number of pieces: 1 (strap is worked directly onto the body)
- Layout: Single cylinder: 12 squares around, 7 bands of squares tall
- Piece size: each check square is 6 sts x 6 rounds = 1.33 in (3.4 cm) square
- Size before border: 16 in (40.6 cm) around x 10.0 in (25.4 cm) tall at the sides
- Border depth: 0.25 in (0.6 cm) at the rim; the opening also gets a reverse sc edge
Materials
Choose a smooth, firm worsted cotton or cotton blend. Cotton holds its cylinder shape better than acrylic and doesn’t stretch out when the holder is full. Stay away from fuzzy or very splitty yarn, because the checks will lose their crisp edges.
- Main color (MC), coral: 140 g / 250 m (273 yd)
- Contrast color (CC), cream: 90 g / 160 m (175 yd)
- Alternate colorway: use cornflower blue as MC in the same amount
These quantities include a margin of about 15%. That covers your gauge swatch and the extra yarn used by the strand you carry through the tapestry rounds.
Tools:
- 4.0 mm (G-6) crochet hook
- Stitch marker
- Tapestry needle
- Scissors
- Measuring tape
- Rust-proof pins and a spray bottle for blocking
Abbreviations (US Terms)
- ch – chain
- sc – single crochet
- sl st – slip stitch
- inc – 2 sc in the same stitch
- BLO – back loop only
- rev sc – reverse single crochet (crab stitch)
- MC / CC – main color / contrast color
- st(s) – stitch(es)
Tapestry sc (special technique): carry the color you aren’t using along the top of the previous round and work over it, so it’s hidden inside your stitches. To change color, work the last sc before the change until 2 loops are left on the hook. Yarn over with the new color and pull it through. Keep the carried strand relaxed. If you pull it tight, the fabric will pucker.
Rev sc: work single crochet from left to right (right to left if you’re left-handed). This makes a corded edge.
Gauge and Checkpoints
Gauge: 18 sts and 18 rounds = 4 in (10.2 cm) in tapestry sc worked in the round.
Before you start the holder, test one check square. Work a small tube or a flat swatch of tapestry sc with 6-st color blocks. One 6-st x 6-round square should measure 1.33 in (3.4 cm) each way. Measure after a light steam or spritz, because cotton relaxes slightly.
Checkpoints:
- After base Rnd 8 (72 sts): the base lies flat and measures 5.1 in (13.0 cm) across.
- After Rnd 33 (band 4 complete): the sides measure 5.56 in (14.1 cm) from the base fold.
- After Rnd 53: the sides measure 10.0 in (25.4 cm) and the circumference is 16 in (40.6 cm).
If your fabric is too big (squares wider than 1.33 in / 3.4 cm), go down a hook size. If it’s too small, go up a hook size. Don’t change the stitch counts: the checkerboard depends on 72 sts divided into 6-st blocks.
Pattern
Join each round with a sl st to the first sc, then ch 1. The ch 1 doesn’t count as a stitch. Rounds start at the center back, which hides the color jog under the strap. Place a marker in the first stitch of each round.
Base (MC)
Leave a 6 in (15.2 cm) tail.
Foundation: With MC, ch 30. Join with a sl st to the first ch to form a ring, taking care not to twist.
Rnd 1: Ch 1, sc in each ch around, join. (30 sts)
Rnd 2: Ch 1, [sc 4, inc] 6 times, join. (36 sts)
Rnd 3: Ch 1, [sc 5, inc] 6 times, join. (42 sts)
Rnd 4: Ch 1, [sc 6, inc] 6 times, join. (48 sts)
Rnd 5: Ch 1, [sc 7, inc] 6 times, join. (54 sts)
Rnd 6: Ch 1, [sc 8, inc] 6 times, join. (60 sts)
Rnd 7: Ch 1, [sc 9, inc] 6 times, join. (66 sts)
Rnd 8: Ch 1, [sc 10, inc] 6 times, join. (72 sts)
The open center of the ring becomes the dispenser opening, about 2 in (5.1 cm) across. Each round adds 6 sts, which matches the growth a flat sc circle needs at this gauge, so the base stays flat. Check this against Checkpoint 1.
Sides
Rnd 9 (turning round): Ch 1, sc in BLO of each st around, join. (72 sts) The unused front loops form a neat fold line where the base meets the sides.
Now join CC and start carrying it. From here on, the round count stays at 72 on every round. There are no increases or decreases on the sides.
Band A rounds: Ch 1, [6 sc MC, 6 sc CC] 6 times, join. (72 sts: 36 MC + 36 CC)
Band B rounds: Ch 1, [6 sc CC, 6 sc MC] 6 times, join. (72 sts: 36 CC + 36 MC)
At the end of each round, make the color change for the next round’s first stitch during the joining sl st.
- Rnds 10–15: Band A (band 1).
- Rnds 16–21: Band B (band 2).
- Rnds 22–27: Band A (band 3).
- Rnds 28–33: Band B (band 4). Check against Checkpoint 2.
- Rnds 34–39: Band A (band 5).
- Rnds 40–45: Band B (band 6).
- Rnds 46–51: Band A (band 7).
Cut CC, leaving a 6 in (15.2 cm) tail.
That makes 7 bands of 6 rounds each, or 42 check rounds in total. Bands 1 and 7 both start with MC, so the pattern looks the same at the top and the bottom. Stacked squares of the same color should line up vertically. If a column drifts, recount that round before going on.
Rim (MC)
Rnds 52–53: Ch 1, sc in each st around, join. (72 sts)
Sl st into the next st to secure, then fasten off MC.
The sides are now 1 + 42 + 2 = 45 rounds tall. At 4.5 rounds per inch, that’s 10.0 in (25.4 cm) (Checkpoint 3).
Hanging Strap (MC)
Hold the holder with the round joins at center back facing you. Count Rnd 53’s stitches from the join: the first st after the join is st 1 and the last is st 72.
Row 1: Join MC with a sl st in the BLO of st 64. Ch 1, then sc in the BLO of sts 64–67. (4 sts)
Rows 2–27: Ch 1, turn, sc in each st across. (4 sts)
That gives 27 rows, or 6.0 in (15.2 cm). Lay the strap over in an arch, without twisting it, so the end of Row 27 sits along sts 6–9. There are 10 sts between the two strap ends (sts 68–72 and 1–5), so the ends are 2.2 in (5.6 cm) apart.
Attach: Working from inside the holder, sl st through each Row 27 stitch and the BLO of sts 6–9 together. (4 sl sts) Fasten off.
Working the strap only through back loops leaves the front loops of all 72 rim stitches free for the border.
Border
Border gauge: rev sc is worked 1 per stitch, so it matches the body gauge of 4.5 sts per inch. Slip stitches along the strap edges are worked 1 per row end.
Rim border: Join MC at center back in the front loop of st 1 of Rnd 53. Ch 1, then rev sc in each st around, working into the front loops wherever the strap sits. Join. (72 rev sc) Fasten off. This adds 0.25 in (0.6 cm), bringing the total height to 10.25 in (26.0 cm).
Opening border: Turn the holder upside down. Join MC in any free loop of the foundation chain. Ch 1, then rev sc in each of the 30 loops around, join. (30 rev sc) Fasten off. This firms up the opening so bags slide out smoothly and the edge doesn’t stretch.
Strap edges: Join MC at the base of one long edge of the strap. Sl st in each row end up to the end. (27 sl sts) Fasten off and repeat on the other long edge. (27 sl sts)
Why the math works: The rim has 72 sts, which is 12 squares of 6 sts each. The opening has 30 chain loops. Both edges are worked strictly 1 rev sc per existing stitch, so neither edge ruffles or pulls in. The strap has 27 rows, so each edge gets exactly 27 sl sts.
Final Blocking
- Weave in all tails along same-color stitches, inside the holder.
- Spritz the whole holder until it’s evenly damp. Don’t soak it.
- Stuff it firmly with a rolled towel to a 16 in (40.6 cm) circumference.
- Shape the base flat, and smooth the opening into a round about 2 in (5.1 cm) across.
- Pull the sides upright to 10.0 in (25.4 cm), plus the 0.25 in (0.6 cm) rim border.
- Pin the strap straight at 6 in (15.2 cm).
- Let it dry completely before removing the towel.
Final Quality-Control Checklist
- The base lies flat with 72 sts on the outer round and 30 at the opening.
- Every side round has exactly 72 sts, and there are 12 squares around.
- There are 7 bands of squares, and the colors alternate correctly from band to band.
- No carried strand shows through on the outside.
- The rim border has 72 rev sc and doesn’t flare.
- The strap is 4 sts wide, 27 rows long, untwisted, and attached securely at both ends.
- The holder measures 16 in (40.6 cm) around and 10.25 in (26.0 cm) tall.
Troubleshooting
Squares look slanted: This is normal with sc worked in the round. Blocking reduces it. You can also try the yarn-under sc to stack the stitches more directly.
The other color peeks through: Use the yarn-under sc, or tension the carried strand more snugly. Choosing yarn colors with more contrast also helps.
The sides pucker: The carried strand is too tight. Spread your stitches out on the hook before every color change.
The base cups or ruffles: Recount the base rounds. Each one has to add exactly 6 sts. If the count is right, change your hook size for the base only.
The opening is too loose: Work the rev sc border one hook size smaller.
The jog is visible: Rotate the holder so the jog sits under the strap.
Care
Hand wash in cool water, press out the water in a towel, and lay the holder flat to dry. Reshape it around a rolled towel while it’s damp.
Final Notes
All the measurements in this pattern follow from the gauge. At 18 sts and 18 rounds per 4 in (10.2 cm), each 6 x 6 square is 1.33 in (3.4 cm). Twelve squares around gives 72 sts, or 16 in (40.6 cm). The base reaches that count in 8 rounds of steady 6-st growth. Forty-five side rounds give 10.0 in (25.4 cm), and the border adds 0.25 in (0.6 cm). If you check your measurements at each checkpoint, the finished holder will come out at the right size.
Happy crocheting!